 I've been itching to blog this and I just got my go ahead when Anne emailed me that she finally received my package as part of this month's EBBP event. Woohoo! I genuinely thought it got lost since the postman told me it will be in Sweden in 3 days, well she got it in 1 week! Serious slip in delivery time that is. I'm just glad it finally reached Anne and hope she liked it.
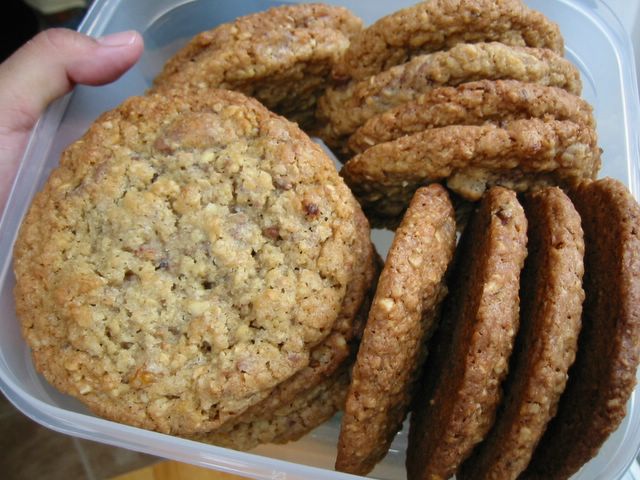
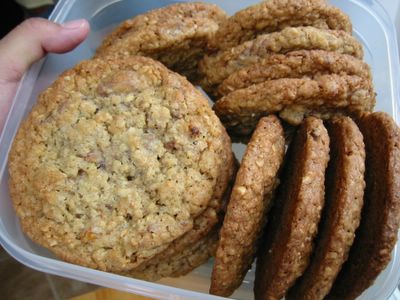
The mother and daughter team of Alisha delos Reyes and Susan Middleton made these oatmeal cookies at a US state fair and won the top prize. Problem is, I don't know which state or what year or what magazine I clipped the recipe from. A big thanks to them in coming up with these lovely cookies filled with morsels of apricot and chocolate chunks. And since I'm a nut lover the hazelnuts further endeared it to me.
I adjusted the recipe according to the preference of the main cookie customers in my family (meaning my kids). Originally they had white chocolates (Mec would love that!) but I subtituted milk chocs and reduced the salt plus altered the method a little bit. The dough was too soft to my liking after the final stir. Problem is, when it's too soft it melts easily once inside the oven resulting in flatter cookies. So I did what I usually do with my cookie dough - stuck it in the fridge (in the freezer actually since I'm in a hurry) for about 20-30 minutes until it's firm enough to handle. Sometimes I even put it back to the fridge after I formed them into balls - which I think results in even better cookie heights. With this extra step I sometimes use melted butter in the batter since I'll be chilling it anyway. If you forgot to take the butter out of the fridge way ahead of time it can be patience-trying waiting for it to soften. But thankfully I've solved that and I don't think the melting and chilling part is not detrimental to the taste of the cookie.
OT: All these talk of butter and batter reminded me of a tongue twister I learned in Grade 5. Yeah that long ago and I still remember it something along these lines:
Betty Botter bought a bit of butter.
But she said, "This butter is bitter."
"If I put it in my batter it will make my batter bitter."
"But a bit of better butter will make my batter better."
So she bought a bit of butter
Better than her bitter butter
To make her batter better
Oatmeal Cookies
250 g [1 cup] unsalted butter - softened at room temperature
1 cup sugar
1 cup firmly packed light brown sugar
2 large eggs
1 tsp vanilla
1 1/2 cups all-purpose flour - sifted
1 Tbsp all-purpose flour (for dredging)
1 tsp bicarbonate of soda (baking soda)
1/2 tsp salt
2 1/2 cups porridge oats
1 cup finely chopped hazelnuts
1 cup finely chopped apricots
1 cup coarsely chopped white or milk chocolates
- Preheat oven to 180°C/fan 160°C/350°F.
- In a bowl combine 1 1/2 cup flour, salt and bicarbonate of soda until well mixed. Set aside.
- Toss the apricots with the 1 Tbsp flour in another container. Set aside.
- Beat together in a big bowl the butter, sugar, brown sugar, eggs, and vanilla at medium speed until well combined.
- Add in the flour mixture to the beaten butter mixture with a wooden spoon.
- Stir in oats and hazelnuts.
- Add in apricots and chopped chocolates. Mix well.
- Shape dough into 1 1/2-inch balls and flatten slightly. Place them about 2 inches apart on ungreased baking sheets.
- Bake for 11 - 13 minutes or until slightly moist in the centre and browned at the edges.
- Remove from oven and let cool for a couple of minutes before carefully removing from the baking sheets onto a cooling rack. Cool completely.
Note: If the dough is too soft, the baked result tends to be too spread out or flat. You can put the dough in the fridge for about 30 minutes before shaping them into balls. Or you can shape them into balls first then put in the fridge for the same amount of time or you can do both (chill before and after shaping into balls).
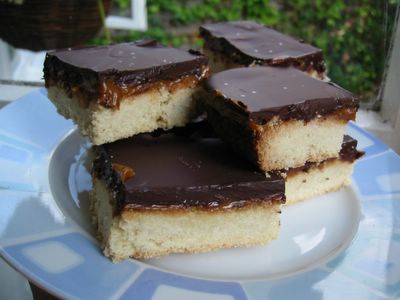 This is one homemade cookie that I was supposed to send to somewhere in the European continent as part of the EBBP#1 event. I baked it, sliced, packed and almost sent by post. Just so happened I forgot to include something in the box so I opened it again and saw that these delicate babies' topping and filling melted and smeared all over its plastic container. Not a very appetising sight. So I reluctantly removed it from my package. :sigh: Don't get me wrong this is a very nice cookie with your afternoon tea. I love it! If you use dark chocolate the more it will contrast with the sweetness of the dulce de leche and the relative blandness of the shortbread. Though if the temperature is too warm, it's best to put these in the fridge a few minutes before serving to avoid the choc and dulce from getting too runny. The only problem I can think of with chilling is that the 'bloom' of the chocolate might rise. These are light coloured spots on the chocolate which is actually the chocolate butter that separates when it's stored in a too warm place or if there is an extreme change in temperature. If yours has got this don't worry 'coz it's still edible and does not detract that much in the taste although it can feel grainy if there's too much.
As for the dulce de leche, you can substitute any caramel or toffee thick enough but spreadable. You can also make your own by cooking a whole can of condensed milk (not opened) in a simmering pot of water for about 2 hours. I don't know about you but I'm scared of trying (maybe if I'm desperate) for fear of explosions. I adapted this from Sue Lawrence's excellent Book of Baking - my favourite at the moment. Not sure why this is called "millionaire's". Maybe it makes you feel like a million bucks with the indulgent bites of the rich ingredients. ;)
Millionaire's Shortbread
450 g [3 1/2 cups] plain flour - sifted
115 g [2/3 cups] golden caster sugar (superfine sugar)
250 g [1 cup] butter - softened
*For the filling and topping:
1 x 450 g jar of dulce de leche
250 g good quality milk or dark chocolate
- Butter a 13 x 9 inch baking pan. Preheat oven to 180°C/fan 160°C/350°F.
- Mix the flour and sugar in a bowl.
- Add in butter, kneading it in the flour mixture to form a dough. (This can be also done in a food processor.)
- Press the dough into the baking pan making sure to level it. Prick all over with fork.
- Bake in oven for 30 - 35 minutes or until pale golden brown.
- Remove pan from oven and cool for about 30 minutes.
- While it's cooling off, warm the dulce de leche either by: microwaving/steaming in the jar with the lid off *or* spoon into a saucepan and heat very gently.
- Once the pan (with shortbread) has cooled off, spread the warm dulce de leche evenly on top. Cool for about 30 minutes.
- Put a heatproof bowl on a saucepan of simmering water and let the chocolate melt in it.
- Spread it on top of the dulce de leche, gently spreading it to cover completely.
- Leave to cool completely before cutting into squares and removing from the pan.
*Note: You may substitute any thick caramel or toffee for the dulce de leche or make one yourself by cooking an unopened can of condensed milk in simmering water for about 2 hours.
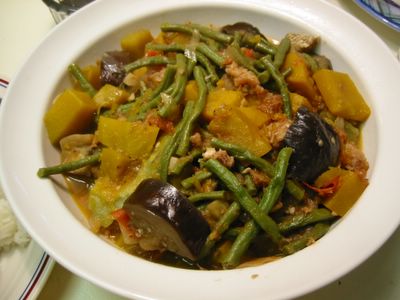
After what seems like a hundred years, I finally was able to cook and document a recipe of pinakbet as I promised Roh Mih. :) Pinakbet or pakbet is a melange of vegetables braised under cover traditionally in a clay pot. The northern region of Ilocos is acknowledged as its origin which is quite appropriate since a large part of the diet there is made up of veggies. As with any popular dish, there are numerous variations. One of which is that in our family we use fresh salted alamang (tiny shrimps) instead of the usual bagoong. Due to the fact that our hometown is by the seaside so there is usually an abundance of fresh seafood. Only when alamang is nowhere to be found do we use the cooked bagoong. I do have a jar of homemade bagoong sitting in my kitchen but since I found this Cincalok (fermented alamang) in our local Chinese supermarket it's but natural that I use it. I believe the Baby Rambutan has blogged about this ingredient before. Cincalok has this pungent aroma that really complemented the vegetables. Although like the bagoong it's not for everybody.
As for the veggies, any number of combination can be tipped in the pot. I banned okra since I'm not too fond of the slimy sticky texture of it. Also I did not bother to rid the amplaya with its bitterness since my husband likes them as they are. In case you want to, marinate the ampalaya in salt for 30 minutes, squeeze out juice, then rinse well with water. I almost did not include ampalaya and sitaw because of the atrocious prices. But I can't call it pinakbet with just squash and aubergine so I have to buy them with my eyes closed. :)
 Pinakbet
1 cup diced pork belly (or any fatty piece of pork) [optional]
1 Tbsp oil
2 tsp minced garlic
1 medium onion - sliced
3 medium tomatoes - sliced
2-3 Tbsp salted alamang (tiny shrimps) or bagoong
250 g squash/pumpkin - sliced roughly into 1-inch pieces
1 medium aubergine - sliced and quarted
125 g sitaw (yard long beans, snake beans) - cut into 2-inch pieces
250 g ampalaya (bitter gourd/melon)
1 cup water
salt and pepper
- Slice ampalaya lengthwise, remove inner white membrane with a spoon and discard. Slice each half diagonally into 1/4-inch thick pieces. Set aside.
- Put pork in a clay pot or medium size pot. Pour about 1/2 cup of water on it. Bring to boil then simmer until tender adding more hot water a little at a time if needed.
- Once almost all the water has evaporated, drizzle the oil on it. Bring up heat to medium - by this time the pork will be rendering fat. Fry the pork until crispy and golden brown.
- Put to one side of the pot and spoon off excess oil. You should only have about 1-2 Tbsp oil left in the pot.
- Saute garlic and onion for a few minutes. Add in tomatoes, salt and pepper to taste. Mix in the pork and cook until tomatoes are a bit soft.
- Stir in the alamang or bagoong. Cook for a few minutes.
- Add 1/2 cup water, bring to boil.
- Add the squash, aubergine, and sitaw. Simmer under cover for 3 minutes.
- Tip in the ampalaya and cook for a further 3 minutes or until all the vegetables are cooked.
- Remove from heat and serve.
Note: If you're not going to serve immediately after cooking, leave the cover slightly ajar to let the steam out and prevent the vegs from getting overcooked or else it will lose its bite and vivid colour.
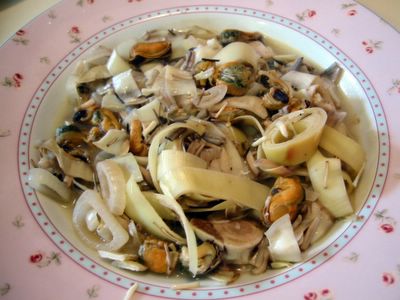 As a direct aftermath of our trip to the London Thai Food Festival, I cooked the puso ng saging or banana heart (blossom) that we bought into a kilawin. Kilawin is what we call, in the Tagalog region of the Philippines, a method of cooking with vinegar - lots of it actually.
When I was still living in the Phils. I noticed that this dish is not common in the Metro Manila area unlike in our place in Cavite where you can find it in most carinderia (eateries). Anyhow, I have to call my aunt and my Nanay because it's been more than a decade since I cooked one of these and I badly need directions. My main pet peeve was the amount of dagta (plant sap) that you have to deal with and the banana plant have a lot of it which I think it got concentrated in the heart. The soaking in water and squeezing out before putting it in the pan can only help so much. It can get really sticky. Much of it thankfully sticks on the side of the pan as you cook so you just have to spoon it off. I have to admit this recipe is still on update mode since I'm not perfectly satisfied with the result (probably because I didn't use shrimp juice) but good enough for your everyday meals.


Kilawing Puso Ng Saging
1 Tbsp oil
2 tsp minced garlic
1 small onion - sliced
1 puso ng saging (banana heart) - about 500 gm
125 g cooked shelled clams/mussels - roughly chopped or flaked canned tuna
3/4 cup vinegar
1 1/2 cup water or shrimp juice*
salt and pepper to taste
- Unwrap the banana heart (see above left) until you get to the mainly white part (see above right). Cut off the stem part and discard together with the skin that you unwrapped.
- Put 8 cups of water in a large bowl and add around 3 Tbsp salt. Make sure salt is dissolved in the water.
- Slice the banana heart into 1/2 inch thick pieces. As you slice, immediately put them in the bowl of salted water. This is to prevent them from turning black. Set aside.
- Heat oil in a saucepan. Saute garlic and onion.
- Add in the clams or mussels meat. Season with salt and pepper according to taste. Cook for about 2-3 minutes on medium heat.
- Add in vinegar and water, bring to boil.
- Drain the banana heart and squeeze out excess water.
- Stir in the the banana heart into the saucepan. Simmer until fully cooked - about 5-10 minutes.
- Remove from heat and serve.
Note: For the shrimp juice - mash heads and shells of fresh shrimps with mortar and pestle; mix well in water then strain. Discard shrimp shells.
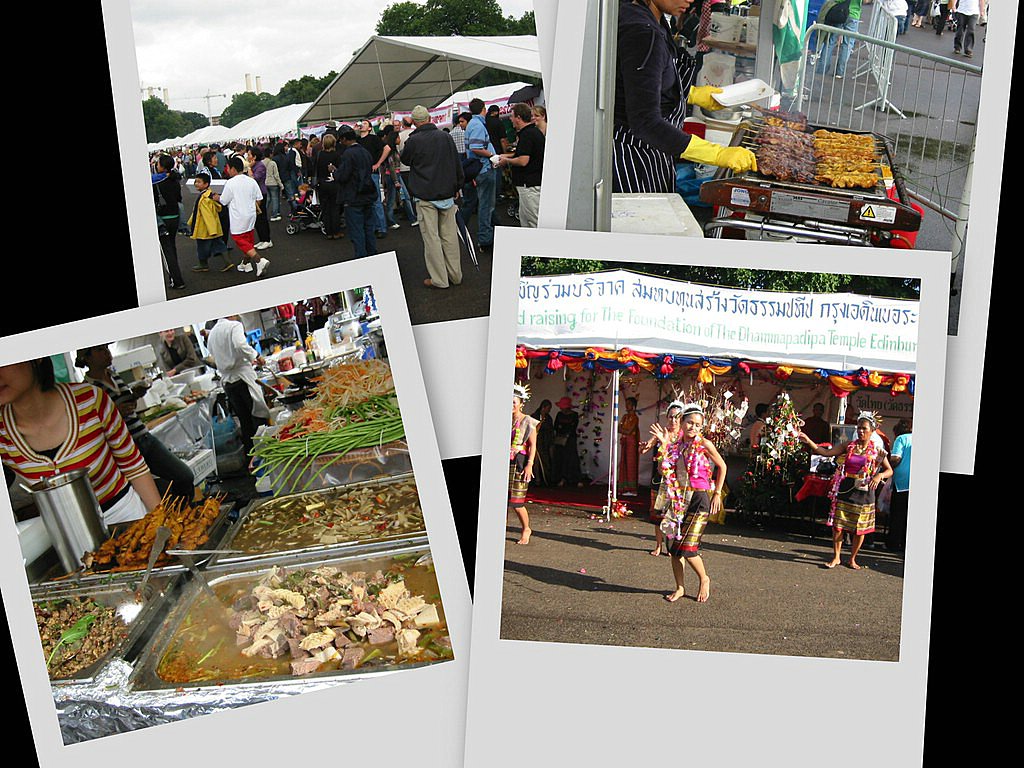
The threat of terrorist bombings did not deter my husband and I in going to this year's London Thai Food Festival last 24th of July. I was determined to explore more of Thai food and no bomb threat can discourage me from it. Battersea park was the venue where I've always loved coming to, admiring its attractive gardens, well maintained lawns, to its towering old trees. Though we only get to see it when we pass by on the way to central London, this time (which is probably only our third) we purposely set off to imbibe its refreshing atmosphere. I think the organisers picked an excellent venue.
By the way, prior to this I called on a fellow blogger's Thai food knowledge to point me in the right direction on sampling the food. A big thanks is in order to ever helpful Thess of Eet Smakelijk. Cheers mah dear!
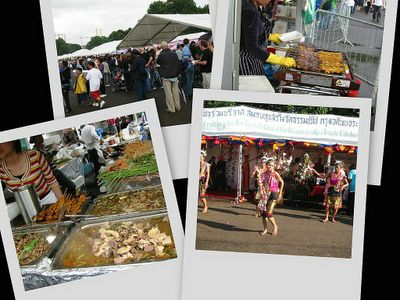
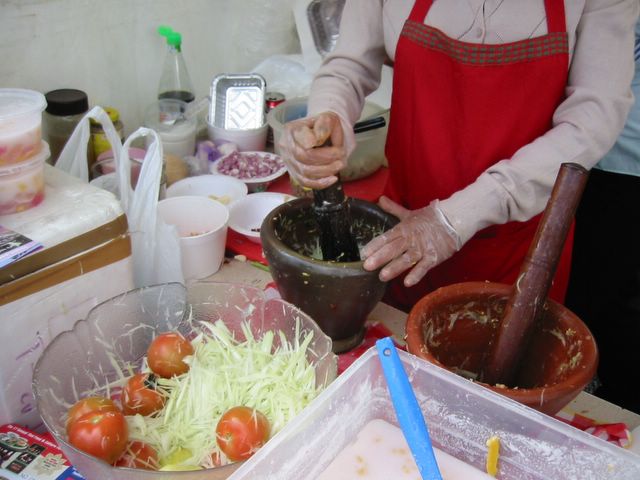
Unfortunately, our food orgy was rudely interrupted by a bomb scare and we only managed ogling around and sampling food for about 1 hour before police came to escort everybody out of the park. As you can see from the above picture (click on it for a bigger view) there were quite a number of things and stalls to nose around. They have lovely smelling barbecues, lots of spicy looking dishes with offal and seafood - two things that my husband is very interested in. Also stalls with handicrafts, mobile phones, freight companies, even ones doing Thai massage, plus Thai dancers in native costumes. 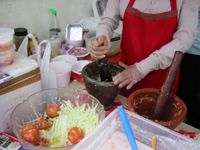 Almost all of the food stalls were serving the popular fresh papaya salad where ladies prepare it right on the spot only when somebody ordered it which makes it ultra fresh. The lady who did it for us asked me if I want it spicy and I made the mistake of nodding my head. All I can say is I only managed one spoonful before throwing my hands up in spicy defeat. It was really really spicy hot - phwoarr! While my husband happily finished it noting that it would be good with barbecued or fried meats or fish. Next time I'll make sure not to overestimate my wimpy self and order it mild only. But I did notice its lovely crunchy texture and from watching the lady do it I think I can make it at home I just have to find green papayas around here which is like trying to find fresh peaches in a tropical country - nearly impossible.


We also tried their longganisa or sausage which has noodles in it! Quite yummy. And of course my day wouldn't be complete without my favourite Pad Thai. I need to gripe with what I got - though the prawns were excellent, the flavouring itself was so-so. It seriously need more patis/nam pla and lots of lime juice.
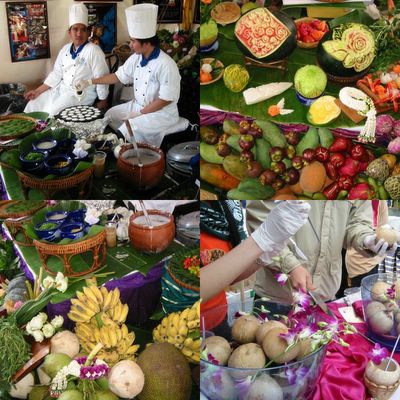
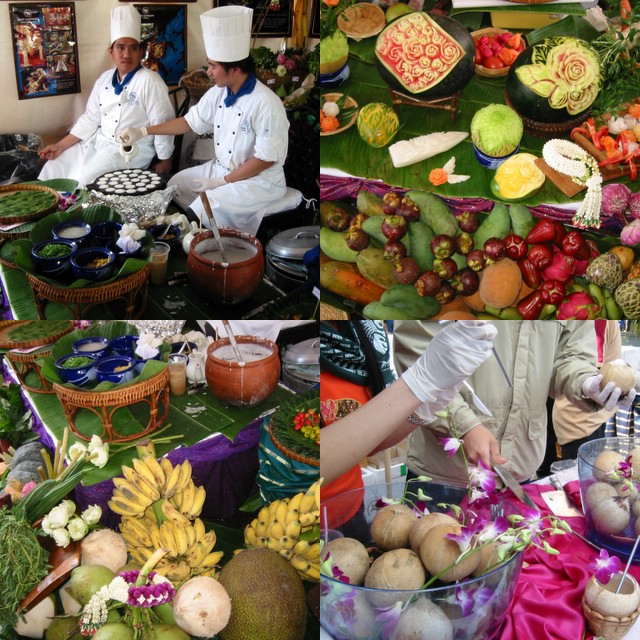
One of the more attractive stalls there was the Blue Elephant restaurant's. They even have chefs who demonstrated the making of desserts cooked in a cast iron pan with lots of 2-inch holes where they first poured some kind of galapong or rice flour batter. They let this cook for about 15 minutes then topped with sweet coconut cream - cooked again for about 5 minutes. Then finally topped alternately with sliced green onions and sweet corn. Delicious!
They also had lots of Thai veggies and fruits on display which are familiar to us Pinoys, too. Since it was closing time they were selling these off. The only thing that prevented me from buying them all is the steep London style price. It was like £2 for 1 piece of atis (apple custard)! So we just contented ourselves with 1 atis, 1 slice of pumpkin, and 1 banana heart. We cooled ourselves from the heat of the haggling with fresh buko (young coconut) - you sip the coconut water then spoon the meat from the shell. Nice ...
Despite having limited time there, we did enjoy getting a food adventure that day. In the words of the Terminator - I'll be back!


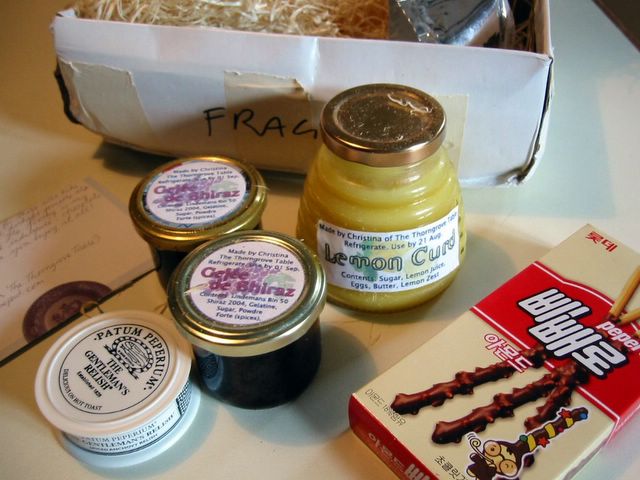
What a lovely surprise first thing in the morning! I just received my package for the first Euro Blogging By Post (incited by Andrew of Spitoon) last Tuesday. The lovely Christina of Thorngrove Table gifted me with such delectables as - homemade Lemon Curd and Gelee de Shiraz plus Gentlemen's Relish and our family's old favourite almond and chocolate covered pretzels (brand name: Peppero). Yum!
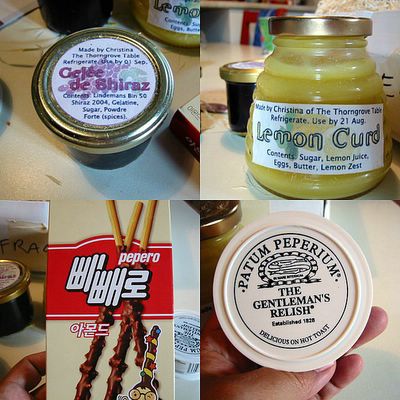
As for the lemon curd and gentlemen's relish, I've seen these countless of times in supermarkets and delis but I've never tried them. First off the relish, I must admit I was overwhelmed by the strength of flavour on my first bite. It was only then that I saw the sign on the lid that says - "spread sparingly" - or something like that. 'Well,' my husband said, 'that's not the first time you've tried out something before reading the manual !' Okay okay, stop the lecture I get it now - the procedure is similar to eating Marmite. Spread verrrry thinly over toast then munch. Hmmm ... very nice I quite like it. Me and the husband was having it over breakfast and tried out having both the relish *and* the lemon curd in one toast. The strange combination was actually good! I certainly am gonna have more of these. We now are in a running debate on what to do with the lemon curd. Husband insists on having it in his toast every morning while I want to make a pastry or dessert with it. Let's see who can use it up the fastest. ;)
The gelee de shiraz is still jelling in my fridge - Christina said this is good as a condiment to meats. I'll keep that in mind next time we have roasts. I love trying these food for the first time they're such an adventure and revelation. And don't ask about the choc pretzels, the kids found it so they were long gone before I came home from work. :(
A big big thank you to Christina for these delectables. I really appreciate it. I wouldn't have tried these if she hadn't sent them. It was so nice to answer the door first thing in the morning and be handed a package of goodies. Now I just have to pack up *my* box and send it off somewhere in the continent. This is such fun!
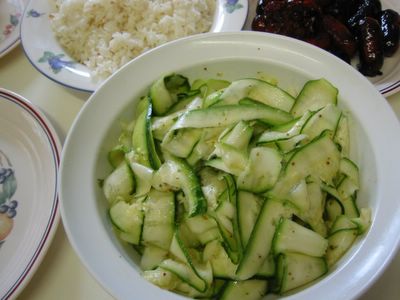 We were having longganisa with rice for lunch that day. Husband checked in the cupboard for atchara (pickled papaya) and realised we just ran out. I had to think fast on what to serve with these sausages - I need veggies that is a bit tart, refreshing and would be a foil to the sticky salty-sweet flavour of the longganisa. Immediately I remembered the carpaccio that Jeanne of Cook Sister brought to our first London blogger's EB (her original recipe is here). Fortunately, I had a couple of courgettes (zucchinis) in the fridge. It was perfect! I think this is good to serve with any grilled or barbecued meat just like what Jeanne did. Anyhow, I took the liberty of renaming the latter part of the recipe name to 'courgette' instead of the original 'zucchini' since that is how it is known around here. A very big thanks to Jeanne for sharing the recipe and I hope she doesn't mind the change in name.
Carpaccio of Courgette
We were having longganisa with rice for lunch that day. Husband checked in the cupboard for atchara (pickled papaya) and realised we just ran out. I had to think fast on what to serve with these sausages - I need veggies that is a bit tart, refreshing and would be a foil to the sticky salty-sweet flavour of the longganisa. Immediately I remembered the carpaccio that Jeanne of Cook Sister brought to our first London blogger's EB (her original recipe is here). Fortunately, I had a couple of courgettes (zucchinis) in the fridge. It was perfect! I think this is good to serve with any grilled or barbecued meat just like what Jeanne did. Anyhow, I took the liberty of renaming the latter part of the recipe name to 'courgette' instead of the original 'zucchini' since that is how it is known around here. A very big thanks to Jeanne for sharing the recipe and I hope she doesn't mind the change in name.
Carpaccio of Courgette
500 g courgettes (zucchini)
parmesan or pecorino shavings
parsley - finely chopped
*For the dressing:
1/3 cup of olive oil
3 Tbsp fresh lemon juice
1 clove garlic - crushed or finely minced
1 Tbsp capers (optional)
1 tsp wholegrain mustard
1 tsp honey
salt & milled black pepper to taste
- Wash and dry the courgettes. Using a sharp vegetable peeler, slice/shave the courgette lengthwise into ribbons.
- Mix all ingredients for the dressing together by whisking in a bowl or shaking in a jar. Pour over the courgette ribbons. Stir and mix carefully. Arrange on a platter.
- Refrigerate for an hour or two to allow the flavours to develop.
- When ready to serve, top with shavings of parmesan and sprinkle with the chopped parsley.
- Serve with good bread to mop up the dressing.
Calling all Europe based food bloggers!! Wouldn't it be nice to exchange food goodies with your fellow bloggers all over Europe? If you would like to join the Blogging By Mail event European edition please point your internet compasses to Andrew's blog at Spitoon for the lowdown on the rules and details. Nic of Bakingsheet originated this idea (I think it was mostly bloggers from US and Canada who joined) and Andrew decided to have our very own food swapping circle here. Please do join us as you know the more people we have the better.
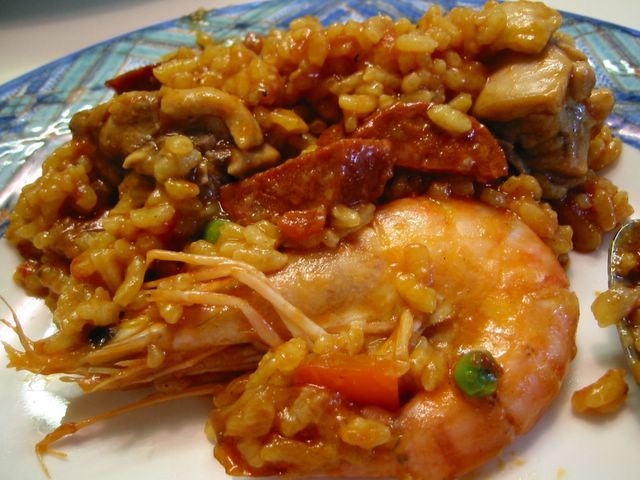
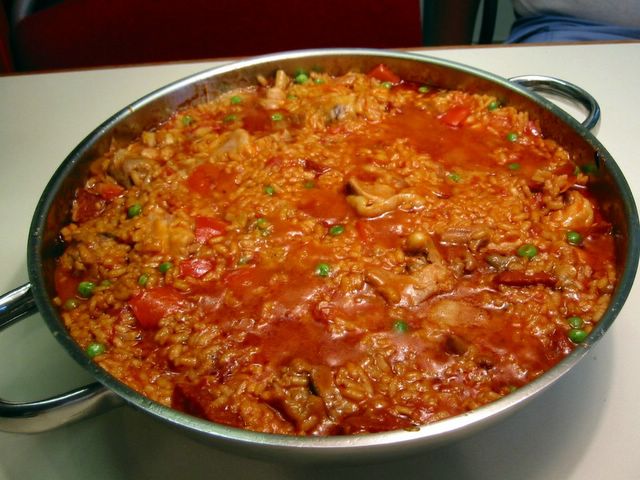
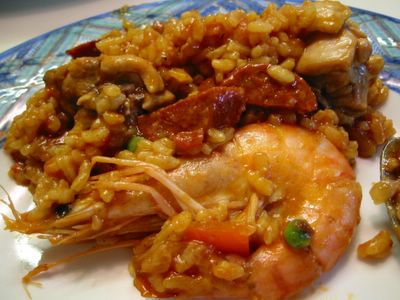 I've been wanting to post this for the longest time but I had to wait until I get a chance to cook it (not very often) and take a picture. Admittedly, even if in the Phils. this is a 'fiesta' quality dish, I've never really eaten this back home or maybe I did but did not like our first meeting. However, once I set foot here in Europe and had access to the ingredients needed for it, I set about hunting for a good recipe to religiously follow the directions. I got more fuel for it when I visited Valencia, the traditional home of paella, where I got to taste the authentic the real thing. As in my previous Valencia post, the original Paella Valenciana DO NOT have any seafood in it. Traditional ingredients for it include rabbit meat, chicken, broad beans, snails, other vegetables besides of course the rice. If the paella has seafood exclusively then it's called Paella Mariscos. While the one with mixed meats - red, white, seafood, et al - is called Paella Mixta, hence the name of this recipe.
This time around my paella was a bit on the 'wet' side since I put in a whole tin of chopped tomatoes (400gm). I didn't want to put in half and waste the other half however I forgot to reduce the amount of stock accordingly. Also, I think I have to be braver and not be constantly scared that the rice is undercooked. It's cooked alright but it's got more sauce than desired. Like any popular dish, there are hundreds of variations. You can put almost any combination of meat, seafood and/or veggies. Some even grill the top a little, some involves cooking the meat entirely separate from the rice and only combining them together at the end. I rather prefer Delia Smith's technique of cooking the chicken with the rice so that the flavour from the chicken is well infused in the rice. I have loosely adapted this from her How To Cook Book 2. Her instructions and most other recipes says not to stir it much after the rice has boiled. But I can't help it because the pan is so much bigger than the hob consequently the heat is not evenly distributed. Besides the meat will not be cooked well if I don't stir it. Another note, if you're going to cook this please use only paella rice such as Calasparra, Bomba, and Granza. The rice in it is supposed to be creamy and clinging a bit to each other but not exactly sticky - very similar to risotto. You wouldn't want to use long grain or Jasmine rice in your risotto, would you?
 Paella Mixta
350 g paella rice (calasparra, bomba, granza, etc.)
1 1/2 Tbsp olive oil
750 g chicken - cut into serving pieces
1 large onion - chopped roughly
1 red bell pepper - diced into 1/2-inch pieces
110 g chorizo - skinned and sliced into 1/2-inch pieces
2 tsp minced garlic
1 tsp paprika
1/4 tsp cayenne pepper (optional)
1/4 tsp saffron strands
225 g tomatoes - skinned and chopped
5 cups stock or water
10-12 raw tiger prawns, shell-on
1/2 cup frozen or fresh peas
salt and pepper
- In a 13-inch paella pan, heat oil then lightly brown chicken in batches. Set aside.
- Saute onion, bell pepper and chorizo for about 5 minutes in medium heat.
- Stir in garlic, paprika, cayenne (if using), saffron and cook for about 1 minute.
- Bring back the chicken to the pan, stir a little; then tomatoes.
- Add plenty of seasonings (salt and pepper) and pour in the stock.
- Bring to boil then simmer for 10 minutes uncovered.
- With a slotted spoon, remove chicken and set aside.
- Pour rice in the pan and stir.
- Bring back to boil, stir once or twice making sure rice is not sticking at the bottom. Lower down heat and simmer uncovered for 10 minutes. As you simmer, move pan occasionally to distribute heat evenly since your pan is more likely to be a lot bigger than your cooking hob.
- Return chicken to the pan, cook for another 10 minutes while stirring occasionally (and *carefully* so as not to turn the rice into mush) and adding more liquid if necessary.
- Add prawns and peas and cook for another 5-10 minutes turning prawns half way through.
- Check rice if cooked especially ones at the outer edges. If not yet fully cooked, simmer for a few minutes more while keeping a close eye to make sure the bottom is not browning too much. Add more liquid if necessary.
- Remove from heat. Cover with a tea towel for about 5 minutes to absorb moisture. Serve with wedges of lemon.
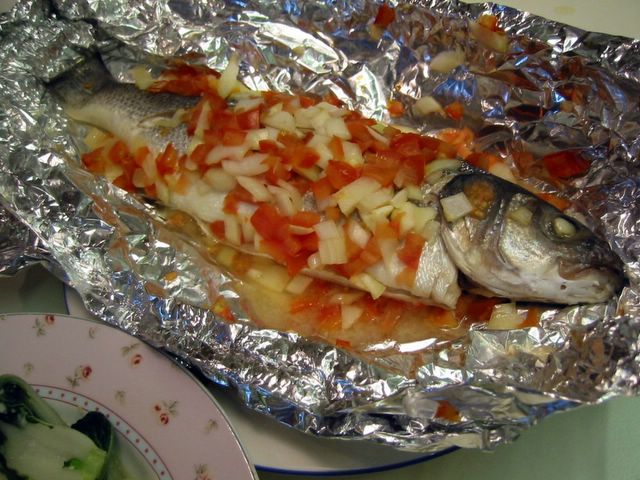
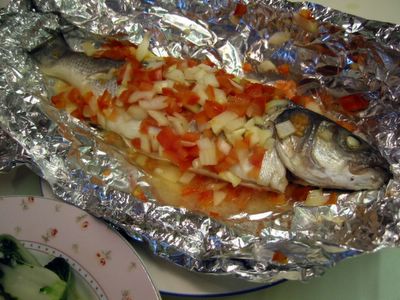 The husband wanted something 'simple' and uncomplicated for dinner. No rich sauces or dozens of ingredients to purchase. So we thought of this, never mind that the name is quite appropriate in the current climate here in London. Pinaputok in English means fired, popped, or exploded (thank goodness all we're 'exploding' is a fish). I'm not quite sure why this is called as such since it does not really 'pop' though I have an inkling it might have originated in another region where the name means something else. Traditionally, this is wrapped in banana leaves and fried. But I don't have any banana leaves so I used a foil plus we wanted something not oily so we baked it. I imagine this would even be better in a barbecue.
Pinaputok na Isda
The husband wanted something 'simple' and uncomplicated for dinner. No rich sauces or dozens of ingredients to purchase. So we thought of this, never mind that the name is quite appropriate in the current climate here in London. Pinaputok in English means fired, popped, or exploded (thank goodness all we're 'exploding' is a fish). I'm not quite sure why this is called as such since it does not really 'pop' though I have an inkling it might have originated in another region where the name means something else. Traditionally, this is wrapped in banana leaves and fried. But I don't have any banana leaves so I used a foil plus we wanted something not oily so we baked it. I imagine this would even be better in a barbecue.
Pinaputok na Isda
(Baked Fish)
1 piece fresh fleshy fish (sea bass, pomfret, grouper, tilapia, sea bream, etc.)
1 cup chopped tomatoes
1 medium onion - chopped
green onion or coriander - chopped (optional)
salt to taste
- Scale, gut, clean, and wipe dry the fish. Score with several slits (tari-an) on each side.
- Sprinkle salt on both sides of the fish and in the stomach cavity, making sure the salt gets in the slits that you made. Set aside for about 10 minutes.
- Mix the chopped tomatoes, onions and coriander (if using) in a bowl.
- Lay the fish on a piece of aluminum foil big enough to wrap it. Put the tomatoes and onions in the stomach cavity, under and on top of the fish.
- Wrap the fish tightly crimping the ends of the foil.
- Bake in a preheated oven at 200C/fan 180C/400F for 40 minutes or on a barbecue.
 Charlie of What's Cooking? and Stel of Baby Rambutan both tagged me in another meme. Just in time to have some break from all the baking and cooking. This gotta be my favourite of all the memes passed to me. I'm the type who has cookbooks for bedtime reading ...
1. Total number of cookbooks I own.
54 (not including the food magazines and hundreds of clippings)
2. Last cookbook I bought.
Brian Turner's Favourite British Recipes
3. Last food/cook book I read.
Book of Baking by Sue Lawrence
4. Five (cook)books that mean a lot to me.
Why only five? Most of the cookbooks I list here are ones that taught me the basics of cooking mostly from the time I went away and got married. You can easily tell due to the state they're in that they're favourites - dog eared, worn out, food splattered, no cover, etc. I wanted to put in my old beloved Betty Crocker's as well but I lost it when my sister's friend borrowed it then said it 'burned' in an office fire. Yeah right. Hmmmp!
Let's Cook with Nora Daza - when I first set up house with my husband, I only know how to cook the standard Filipino fare of adobo, nilaga, sinigang, and the odd fried fish (or fried anything for that matter). So this was indispensable to me in jogging my memory on how to cook other Filipino dishes.
Maya Cookfest series - my friend Nanette gifted me with the first 2 of this and I bought the last 2. It gives me joy just reading the recipes, always imagining and salivating on cooking the great dishes there.
Chinese Cuisine & Chinese Cooking for Beginners by Huang Su-Huei - this pair guided me a lot in creating and imitating tasty Chinese dishes we had while living in Hong Kong. They are one of my most cherished cookbooks.
How to Cook series by Delia Smith - again another one of my reference books (this time for Western cuisine) whom I consult whenever I want to find out how to cook certain basic ingredients or dishes. Her recipes always work.
The Food of the Philippines by Reynaldo Alejandro - a very good source of information about Filipino food and the recipes work, too.
5. Which five people would you like to see fill this out in their blog?
Most of the people I know has been tagged already so I hope these five haven't been yet:
Thess of Eets Makelijk
Annalyn of Ajay's Writings On The Wall
Ling of Little Gingko Nut
Dilek of Dilek'ce
Riana of For The Love of Baking
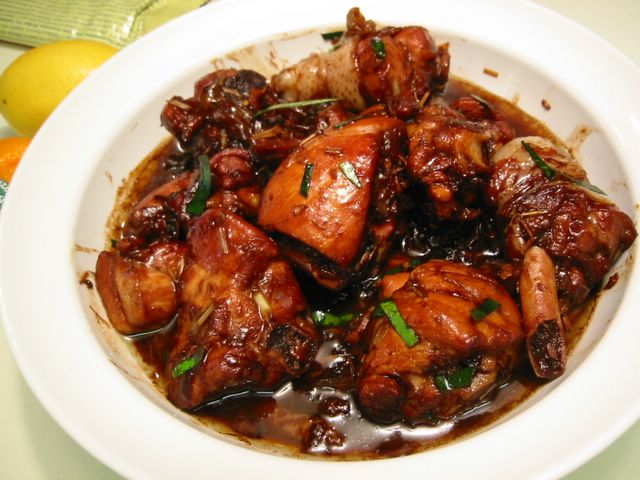
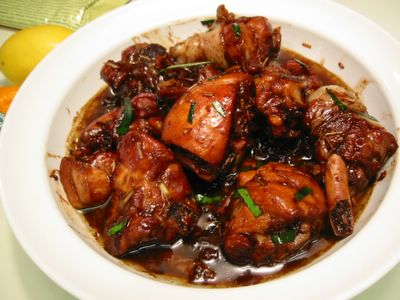 The moment I saw this dish in Stel's blog, adapted from the cookbook Shiok! by Terry Tan and Christopher Tan, I was enamored. I felt I had to try it since we often have chicken at home, much more than any other meat and had to find other ways of serving it from the usual. Both me and my husband love the salty-sweet taste plus the subtle flavour of the blachan which is very similar to the Pinoy's bagoong. Stel was right, hot steaming rice is the perfect accompaniment with this dish plus any salad or stir fried vegetables.
The blachan or shrimp paste that I got from our local Chinese grocery is from Thailand branded as 'Tranchang'. Malaysia and Indonesia also have this pungent ingredient. It's drier, finer and more concentrated than our bagoong but imparts similar taste and aroma. If you can't find it, I think you can substitute bagoong. The only complain my husband had was he got pricked with the lemon grass while eating because what I did was to chop it into small pieces and mash with mortar and pestle. After conferring with the chef Stel, next time I'll cut them into bigger pieces, just slightly bruise them so it can be easily fished out before serving. So here's my take on this tasty dish and thanks to Stel for sharing it.
Ayam Tempra
(Spicy-Sour Stir-fried Chicken)
750 g chicken - cut into serving pieces
2 Tbsp oil
1 tsp minced garlic
1 medium onion - quartered
1 stalk lemongrass - cut diagonally into 1 inch pieces, pounded slightly
1 long green chilli pepper - sliced (optional)
1 bird chilli - sliced (optional)
1/2 cup chicken stock/broth
3 Tbsp lime juice
3-4 Kaffir lime leaves - midrib removed and leaves finely sliced
*Marinade:
1/2 Tbsp minced garlic
1 stalk lemongrass - cut diagonally into 1 inch pieces, pounded slightly
1 tsp shrimp paste (blachan)
3 Tbsp ketjap manis (thick sweet soy sauce), or dark soy sauce
1 1/2 Tbsp water
1 1/2 Tbsp crushed palm sugar
- In a mortar and pestle mix and mash all marinade ingredients and pour over chicken. Set aside and let sit for at least an hour. Drain and reserve marinade.
- In a wok, heat the oil over medium high heat. Saute the garlic, onion, lemongrass, and chili, until fragrant.
- Add chicken pieces and stir fry until chicken is well browned.
- Pour in the marinade and chicken broth. Bring to boil then lower heat to a simmer.
- Stir from time to time, adding more broth or water a little at a time if it gets too dry. Cook until chicken is tender, about 25-30 minutes.
- [optional] Remove lemongrass.
- Add in lime juice, Kaffir lime leaves, and salt to taste. Stir well and remove from heat. Serve.
Note: If using boneless chicken meat, cooking time is cut drastically and you may not need to add more broth or water.
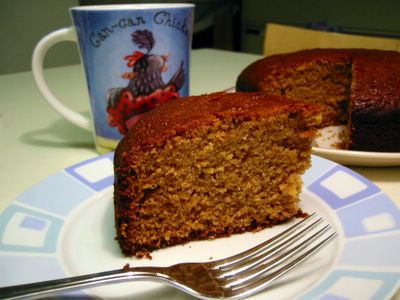 As you may have noticed by now, I'm partial to recipes that has few ingredients and/or easy and simple to make. The recent announcement of the current Sugar High Friday theme of honey, which by the way is hosted by Nic of Bakingsheet, got me scouring my cookbooks. Luckily the BBC GoodFood Magazine's 101 Cakes and Bakes yielded this one-saucepan simple and easy cake. But don't let its simplicity fool you for it resulted in a very moist and moreish cake perfect for afternoon tea. The nice thing about it is you can change the taste by using different flavoured honey instead of the usual clear one. You can have flavour as mild or as strong as you like depending on the honey you use. My work colleagues whom I gave a generous part of this cake gave it a resounding thumbs up. This is a definite keeper of a recipe.
Devonshire Honey Cake
As you may have noticed by now, I'm partial to recipes that has few ingredients and/or easy and simple to make. The recent announcement of the current Sugar High Friday theme of honey, which by the way is hosted by Nic of Bakingsheet, got me scouring my cookbooks. Luckily the BBC GoodFood Magazine's 101 Cakes and Bakes yielded this one-saucepan simple and easy cake. But don't let its simplicity fool you for it resulted in a very moist and moreish cake perfect for afternoon tea. The nice thing about it is you can change the taste by using different flavoured honey instead of the usual clear one. You can have flavour as mild or as strong as you like depending on the honey you use. My work colleagues whom I gave a generous part of this cake gave it a resounding thumbs up. This is a definite keeper of a recipe.
Devonshire Honey Cake
225 g unsalted butter
250 g honey
100 g dark muscovado sugar
3 large eggs - beaten
300 g [2 1/4 cups] self-raising flour
2 Tbsp honey for glazing
- Preheat oven to 160°C/fan 140°C/300°F/gas mark 4. Grease and line a 20 cm/8-in round loose-bottomed baking pan.
- Melt butter, honey, and sugar slowly in a saucepan. Boil for one minute. Leave to cool.
- Beat in eggs one at a time in the saucepan.
- Add in the flour; mix well.
- Pour into the pan and bake for 50 minutes or until cake is golden brown and spring back when pressed.
- Turn out the cake onto a wire rack. Warm 2 Tbsp honey in a small saucepan and brush over the top of the cake to glaze. Leave to cool.
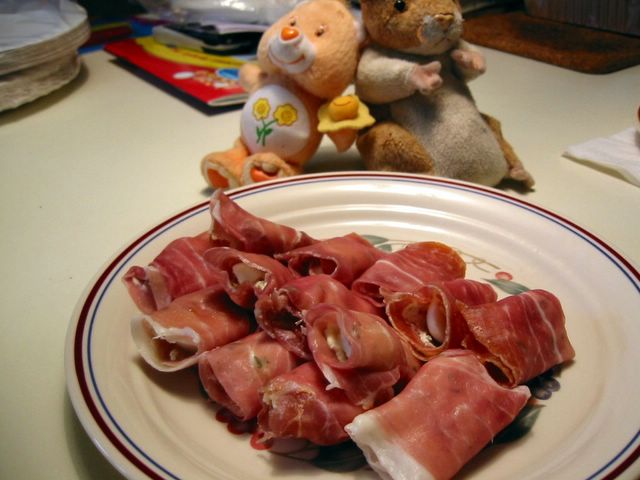
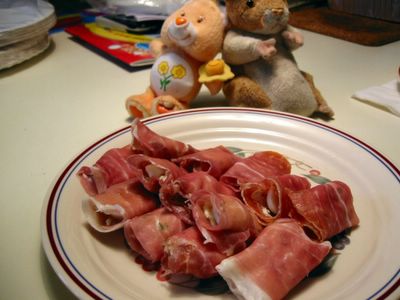 One of the finger foods that I prepared for my aborted participation in the last London Food Blogger's picnic at the Henley Regatta is this scrumptious quail eggs wrapped in prosciutto. Lovely melding of flavours with the spiky tang of the lime zest contrasting with the creamy and a bit salty cream/smoked cheese mixture serving a nice foil to the blandness of the quail eggs while the chewy-citrusy prosciutto completes the melange of flavour. This was a lovely surprise and one that I will definitely make again. Next time I will try it without the smoked cheese or probably choose one that's not too salty.
I love air dried hams such as the Prociutto di Parma or the Spanish Jamon Iberico or Jamon Serrano. They are just so yummy to have very thinly sliced on sandwiches, cheese or just eaten on their own. Steep prices of these is the only thing stopping me from having them all the time.
Prosciutto Quail Egg Rolls
12 quail eggs
40 g cream cheese
2 Tbsp finely grated smoked cheese
1/4 tsp grated lime zest
1 tsp chopped fresh basil
6 slices prosciutto di parma (parma ham)
- Hard boil quail eggs by lowering in a gently simmering pan of water. Cook for 4 minutes. Drain and cool immediately by plunging into cold tap water. Peel and cut in half lengthwise.
- Combine cream cheese, smoked cheese, lime zest, chopped basil in a bowl. Mix well.
- Cut prosciutto in half lengthwise then cut in half again crosswise making 24 pieces.
- Spread cream cheese mixture in each strip then wrap each of the quail egg halves in it. This can be made about 6 hours in advance.
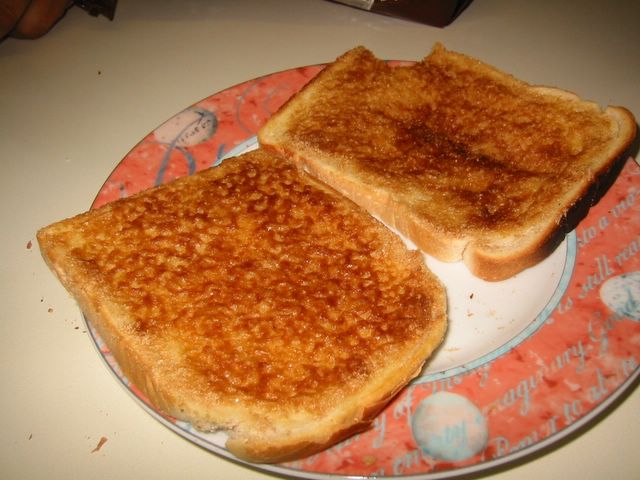
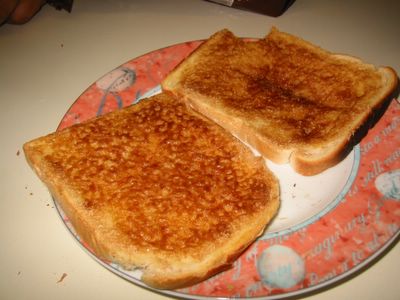 A favourite childhood snack of mine is 'biscocho' - toasted left-over bread smeared with butter (or Star margarine) and sprinkled with sugar. Biscocho in Spanish means sponge cake while the Filipino version is a crunchy piece of bread toasted with butter and sugar all around. This is certainly one of my most treasured comfort food from my growing up period in the Phils. The crunchy bite on the bread (usually pandesal) with the salty-sweet taste of the caramelised butter-sugar mixture is simply a great way to fill you up. You could just imagine how this came about - mothers who wanted to use up their supply of stale pandesals and serve as snacks to their brood. What a nice invention.
Biscocho
A favourite childhood snack of mine is 'biscocho' - toasted left-over bread smeared with butter (or Star margarine) and sprinkled with sugar. Biscocho in Spanish means sponge cake while the Filipino version is a crunchy piece of bread toasted with butter and sugar all around. This is certainly one of my most treasured comfort food from my growing up period in the Phils. The crunchy bite on the bread (usually pandesal) with the salty-sweet taste of the caramelised butter-sugar mixture is simply a great way to fill you up. You could just imagine how this came about - mothers who wanted to use up their supply of stale pandesals and serve as snacks to their brood. What a nice invention.
Biscocho
slices of bread
butter or margarine
sugar
- Spread butter or margarine on the bread and sprinkle sugar on top. Spread the butter a bit on the thick side to have enough for caramelising with the sugar also to make the sugar stick on the bread. If you prefer you can do this on both sides of the bread.
- Grill in a hot oven (about 400F/200C) until butter and sugar bubbles up and turn golden. Serve warm or cold.
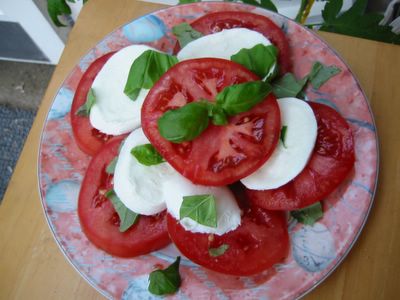
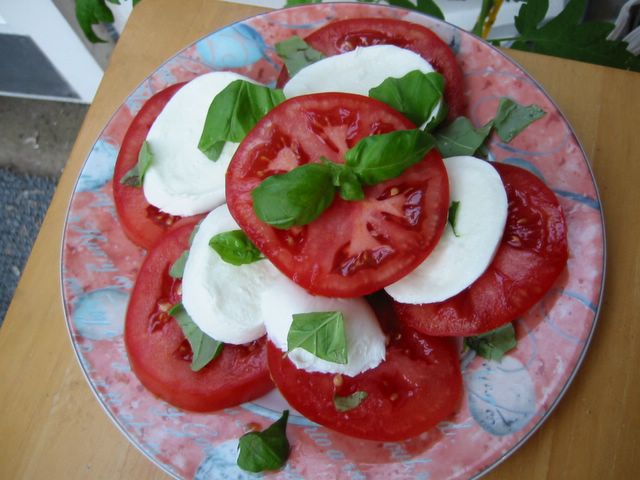
Whenever my husband wanted to have a simple uncomplicated healthy light food, the first thing that comes to his mind is this Italian salad. It is quite simply his favourite. And why not? It's one of the very few that he can make without anybody's assistance ;-). Named 'caprese' in honor of the Italian island of Capri where this supposedly originated.
There are only two main ingredients in this one - tomatoes and mozzarella cheese. As for the dressing, some people (like him) like to drizzle just olive oil and balsamic vinegar on it. Others (like me) want something with more flavour like a vinaigrette - any type will do for me. I included a vinaigrette recipe below which I adapted from Delia Smith's The Delia Collection Italian. Make sure to drizzle the olive oil or dressing right before serving because soaking in oil/dressing will just make the tomatoes soggy.We're having a lot of this lately because of the hot weather and the abundance of tomatoes in season. Beef tomatoes or large vine-ripened tomatoes can be used (though the latter has more flavour, IMO). With the cheese, get the mozzarella that's shaped like a ball and packed with some water. I heartily recommend the mozzarella made from buffalo milk (mozzarella di bufala) due it being more creamy (according to the husband) than the ones made from cow's milk.Insalata Caprese
fresh ripe tomatoes - sliced 1/4-inch thick
mozzarella cheese - sliced 1/4-inch thick
fresh basil leaves - torn into pieces
salt and pepper (optional)
olive oil and/or balsamic vinegar (optional)
*Vinaigrette Dressing
1 garlic
1 tsp sea salt
1 tsp whole grain mustard
1 Tbsp white wine vinegar
3 Tbsp extra virgin olive oil
1 Tbsp chopped herbs (basil, tarragon, thyme, etc.)
freshly ground pepper
- Arrange overlapping layers of tomatoes and mozzarella in a plate.
- Scatter the basil leaves on top and crush some salt and pepper on it, if using.
- Drizzle olive oil and balsamic vinegar or vinaigrette dressing. Serve immediately.
*For the Vinaigrette Dressing
- Mash the garlic and salt with a mortar and pestle. Add the mustard and mash until creamy.
- Transfer to a small bowl and add the vinegar, olive oil, and pepper. Whisk until thoroughly combined.
- Add the chopped herbs.
- Drizzle on salads just before serving.
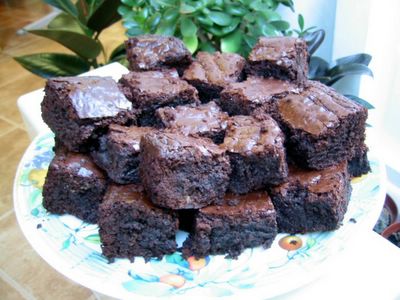 For industrial strength brownie lovers, I dedicate this one. (Am I not sounding like Master Yoda?) I found Sue Lawrence's Book of Baking at our local library and just wanted to try *everything* in that cookbook, forgetting that my ancient oven is not really up to scratch. But since the peculiar characteristic of burnt edges and undercooked middle is perfect for brownies so I gladly made this one. It is indeed intensely chocolately and if that's what you fancy then welcome to this post. Maybe next time I'll try to play around with the chocolate and sugar proportions to tame the chocolate a little bit. My previous brownie recipe of Banana Nut Brownies is not far off from this. I imagine this would be great with milk, ice cream, strong tea or even stronger coffee.
Muscovado Brownies
For industrial strength brownie lovers, I dedicate this one. (Am I not sounding like Master Yoda?) I found Sue Lawrence's Book of Baking at our local library and just wanted to try *everything* in that cookbook, forgetting that my ancient oven is not really up to scratch. But since the peculiar characteristic of burnt edges and undercooked middle is perfect for brownies so I gladly made this one. It is indeed intensely chocolately and if that's what you fancy then welcome to this post. Maybe next time I'll try to play around with the chocolate and sugar proportions to tame the chocolate a little bit. My previous brownie recipe of Banana Nut Brownies is not far off from this. I imagine this would be great with milk, ice cream, strong tea or even stronger coffee.
Muscovado Brownies
350 g dark chocolate (60-70 per cent cocoa solids)
200 g unsalted butter
250 g [1 1/4 cups] dark muscovado sugar
3 large eggs
70 g [2/3 cup] plain flour - sifted
1 tsp baking powder
1/4 tsp salt
- Preheat oven to 170°C/fan 150°C/325°F. Butter bottom and sides of a deep 9-inch square baking pan.
- Melt chocolate and butter in a heatproof bowl over simmering water in a saucepan. Stir and mix until smooth.
- In a container or bowl, combine well the sifted flour, baking powder, and salt. Set aside.
- In another bowl, put in the sugar, making sure to break up lumps if there are any.
- Add eggs one at a time, beating after each addition. Add this to the melted chocolate; combine well.
- Add in the flour mixture, gently folding together.
- Pour into the prepared baking pan and bake for 35 minutes or until a toothpick inserted in the middle comes out with moist crumbs. DO NOT OVERBAKE.
- Remove from oven and let cool for about 30 minutes. Cut into squares or desired serving sizes in the pan before allowing to cool completely. Remove from pan.
What a hectic weekend that was. And it seems everyone else including here in blogosphere is making the most out of the good summer weather and the holidays. Everybody's busy ... partying and relaxing. It's only now that I got to blog. First things first, just want everyone to know that I was included by Ajay in her Blog-o-Rama column in the Manila Bulletin. I was one of four food bloggers in a roundtable discussion about what else - food. Thanks Ajay for featuring us!
Now let's have some fun. I was tagged by the cooking queen of Boston, Stel of Baby Rambutan for this cooking meme, here it goes ...
What is your first memory of baking/cooking on your own?
I clearly remembered being left for about an hour with my 2 younger sisters at home. I was probably 7 or 8 years old at the time. To amuse them, I decided to treat my sisters to popcorns. My mother used to cook popcorns in our a banged up old aluminum pot and I distinctly remembered how she did it. I thought, 'I can do that with no problem at all.' So I turned on the electric stove, put the pot on, poured ridiculous amount of oil then added a fistful of popcorns, covered the pot and waited until it popped. Once we heard the tell-tale popping sounds I dutifully shook the pot just like my nanay did. It was fine until I opened the lid and out came this big black puff of smoke! We thought we had to call the bumberos (firemen). My sisters have to make do with the popcorns on top because all of the ones at the bottom where burned black. Nevertheless, from then on one of the strict instructions from my mother was - no more cooking. Hehehe!
Who had the most influence on your cooking?
That would be my nanay (mother) and my Lolo Apeng (maternal grandfather). Nanay was the one who first taught me how to cook - all the Pinoy basics from anything fried, sinigang, adobo, nilaga, etc. although it was my Lola Ebia (maternal grandmother) who taught me the nuances of cooking rice in a pot. I'd like to think I inherited my cooking genes from Lolo Apeng. He's a great cook and a stickler for details. He's the type who won't cook at all if he can't do it the right way with the right ingredients prepared in the way that he deemed correct.
Do you have an old photo as "evidence" of an early exposure to the culinary world and would you like to share it?
Since my childhood photos are few and far in-between, I don't think I have this. Though my family will surely attest that I'm a very enthusiastic eater. :)
Mageiricophobia - do you suffer from any cooking phobia, a dish that makes your palms sweat?
I didn't have any before but just recently I get nervous when blind baking tarts or pie bases because of repeated disasters I was in. :(
What would be your most valued or used kitchen gadgets and/or what was the biggest letdown?
Well, I don't know if you consider it a 'gadget' but my cleaver is indispensable to me. I use it for most kitchen jobs from slicing, mincing, tenderising, whacking garlics open, etc. Letdown? Hmmm … I think it would be the mini chopper. After only 1 month, the blades were already blunt.
Name some funny or weird food combinations/dishes you really like and probably no one else.
I'm pretty boring in this regard, most of the combinations I like are 'orthodox' such as crispy fried anything with rice and sinigang or singkamas (jicama) sliced thinly and marinated in vinegar and salt and chilled well then I eat it and slurp up the vinegar as well. Yum!
What are the three eatables or dishes you simply don't want to live without?
Rice, dimsums, patis (fish sauce), adobo.
3 quickies:
favorite ice cream ... Rocky Road, Coffee Mangosteen
you will probably never eat ... Like Stel - 'pet food', horse meat, escargot
signature dish ... I really don't have any signature dish to speak of but my cassava cake always get requested.
Tag 3 people ... I think most people has been tagged already but hopefully these three haven't been yet - April Lassy, Ting Aling, and Jmom.
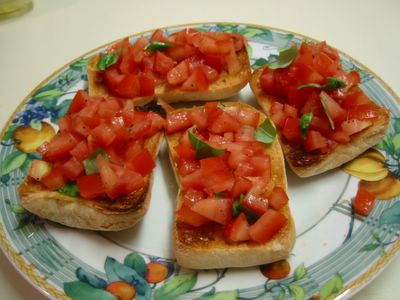
Everytime we have a dimsum lunch we tend to order too much - not that I'm complaining. So we usually have a very light dinner afterwards or none at all. Last Saturday was one like this, me and my husband were still partially full and we couldn't possibly have our usual dinner. I decided to fix something light with the ciabatta I picked up from the supermarket earlier.
Bruschetta is a favourite starter in Italian restaurants. In essence, it's garlic bread with toppings like tomatoes or anchovies or aubergines, etc. Although this garlic bread uses olive oil instead of butter. The one I made that night is the standard bruschetta you find in restos with tomatoes and basil leaves on top. Very easy to make though quite refreshing to have. Biting on the combination of crusty garlicky bread soaked in olive oil with fresh tomatoes and basil on top is simply divine. Bruschetta
slices of crusty bread (ciabatta, baguette, etc.)
olive oil
ripe tomatoes
fresh basil leaves
garlic clove - peeled and sliced in the middle
salt and pepper
- Halve tomatoes crosswise. Scoop out the seeds, discard. Chop roughly.
- In a bowl, put the tomatoes and season well with salt and pepper.
- Tear basil leaves and mix with the tomatoes.
- Toast, grill, or broil the bread until well browned on both sides.
- While still hot, rub the cut side of the garlic on the toasted bread.
- Drizzle or brush olive oil on top.
- Spoon mounds of tomatoes on top of the toasted bread. Serve immediately.
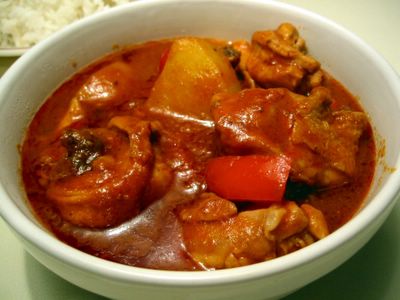
I've done several recipes for caldereta with different takes on this spicy dish. But I always comeback to this version which is the simplified amalgamation of most of the calderetas I have tasted. Goat's meat is traditionally used in the Filipino caldereta. The spiciness lends well and sort of masks the 'gamey' taste of the goat's meat and since it's quite tough the dish benefits from the long simmering making the sauce quite rich. Like any popular dish, it's got lots of variations and mine here uses chicken instead of red meat. I tone down the spiciness if I know my children are having it otherwise I add the full gamut of fresh chillies and Tabasco sauce. Also for everyday use I often skip the chorizo and olives. This recipe can be adapted for red meats as well such as goat's meat, mutton, beef, lamb, etc. The only difference that I could think of is that you have to marinate the red meat longer and obviously simmer/cook it for a longer time.
Chicken Caldereta
1 kg chicken - cut into serving sizes
1/3 cup vinegar
2 tsp salt
1/2 tsp black peppercorns - lightly cracked with mortar and pestle
1/2 Tbsp minced garlic
1 medium onion - chopped
oil for frying
500 g passata (tomato sauce)
1/4 cup coarse grained liver pate (or mashed cooked liver or 85gm can of liver spread)
125 g chorizo - chopped into 1/2-inch slices [optional]
1/2 bell pepper - seeded and sliced
1 green or red fresh chilli [optional]
hot chilli sauce (or Tabasco)
1/3 cup bottled olives - drained [optional]
1/3 cup peas (fresh or frozen)
250 g potatoes - peeled and quartered
1/2 cup grated cheddar cheese
- Mix vinegar, salt, garlic, and peppercorns in a bowl. Add chicken pieces, mix well. Marinate chicken for at least 2 hours.
- In a big pot, heat oil for frying. Drain chicken from marinade and brown briefly in the oil in batches. Set aside.
- Remove oil from the pot but leave about 2 Tbsp. Heat up again and saute the onion on medium heat until soft and translucent (about 4-5 minutes).
- Scoop out the garlic and peppercorns from the marinade and add to the onion. Saute for a few minutes.
- Add in the browned chicken, stir for a minute.
- Add the rest of the marinade, stir and cook for about 30 seconds.
- Stir in the passata and bell pepper. Bring to boil then turn down the heat.
- Add the chorizo and fresh chilli (if using). Simmer until meat is almost done.
- Stir in the liver pate and mix well to combine.
- Add potatoes and peas. Simmer until potatoes are cooked.
- Add grated cheese, mix well until cheese has melted.
- Taste sauce and correct seasonings adding hot chilli sauce if preferred.
- Add olives just before removing from heat. Serve warm.