I never knew that making pilau rice is so easy. Probably the only thing hard about it is assembling the myriad spices you need. Pilau rice, if you must know, is the spiced fragrant rice accompanying Indian dishes. There so many variations of it much depending on how colourful or how much spices you want in it.
I love how easy it is to cook this resulting in fluffy and soft fragrant rice. Highly recommended!
Pilau Rice
250 g [1-1/3 cups] basmati rice
2 2/3 cups water
1 Tbsp ghee or cooking oil
1 small onion - finely chopped
1/2 tsp fennel seeds
1 cinnamon stick - halved lengthwise
2 cardamon seeds - squashed open
3 cloves
2 tsp ground turmeric
2 bay leaves
- Wash and drain the rice several times with cold water then soak for 30 minutes.
- In a saucepan with a tight fitting lid, heat the oil and saute the onion in medium heat until soft (about 5 minutes).
- Add the rest of the spices until fragrant.
- Drain the water from the soaked rice and add the rice to the saucepan and stir to coat with the sauteed spices and oil.
- Add the water, stir, cover saucepan and bring to boil. Lower heat to simmer for 10 minutes.
- Turn off heat and keep covered and leave to steam for 15 minutes.
- Fluff up the rice with fork and serve while hot.
*Note: You can use rice cooker cup to measure the rice and water (1 rice cooker cup = 2/3 cup). The ratio is 1 cup rice to 2 cups water.

This is the longest recipe I've ever typed in this blog. I never knew something so homely can involve a lot of work! But I thoroughly enjoyed the experience and the eating so much more. I've heared about this intriguing dish from American friends and family and in a lot of food magazines. So it was a delight to find out that this was our next task in the Daring Kitchen.
The July Daring Cooks' Challenge took us to Korea, where Renata of Testado, Provado & Aprovado taught us to make bibimbap. This colorful rice dish can be customized to meet any taste, and is as much fun to eat as it is to say!
The traditional Dolsot Bibimbap involves a heated stone bowl which my kitchen definitely do not have. So the alternative is use warmed bowls which was quite sufficient as evident in the recipe that I adapted from Bon Apetit. I did not do the crunchy rice step because we're definitely not fans of tutong. My husband and I really enjoyed eating this sort of Korean hot salad and I was pleasantly surprised with the gochujang (Korean chili paste). It's not as scorchingly spicy hot as I imagined it would be. For me, the best part of this is the bulgogi. It's the one thing that I would definitely keep making over and over again. But with everything else considered I think it will take quite sometime before I make all of these again. There's just a lot of little things to do including a lot of washing up!

Marinate the bulgogi and prepare all the rest of the listed ingredients listed here.
Then proceed to the assembly section.
Bulgogi:
1/4 cup light soy sauce
1/3 cup finely grated Asian pear with juices (about 1 pear)
2 green onions - thinly sliced
2 garlic cloves - minced
1 Tbsp demerara or brown sugar
2 tsp grated ginger
500 g very thinly sliced boneless beef (rib-eye steak or short ribs)
- Mix all ingredients, except the beef, in a bowl until combined.
- Marinate beef in the mixture for at least 3 hours or overnight.
Sesame Oil Mix:
6 Tbsp toasted sesame oil
1 1/2 tsp fine sea salt
3/4 tsp freshly ground black pepper
- Combine all to mix and set aside.
Sesame Bean Sprouts:
6 cups of bean spouts
gochugaru or ground chili
1 Tbsp sesame oil mix
- Bring a pot of water to boil.
- Add the bean sprouts and bring it back to boil.
- Once it boils again, remove and drain. Plunge in cold water to stop cooking.
- Drain well and let drip for at least 30 minutes.
- Transfer to a bowl or contained and sprinkle the sesame oil mix and gochugaru; toss to coat.
Sesame Carrots:
4 medium carrots - juliened into matchstick size
1 Tbsp sesame oil mix
- Heat a skillet over medium heat.
- Add in the sesame oil mix and carrots.
- Cook while stirring occasionally until just tender (about 3-4 minutes).
Soy-Glazed Shiitake Mushrooms:
3 cups of dried shiitake mushrooms
3 Tbsp light soy sauce
1 Tbsp demerara or brown sugar
1 cup water
1/2 tsp toasted sesame seed
freshly ground black pepper
- Put the first 4 ingredients in a saucepan and bring to a boil.
- Reduce heat medium-low and simmer until mushrooms are softened and all liquid is absorbed (about 15 minutes).
If the liquid is drying out but the mushrooms are not yet done, add a few tablespoons of water and continue cooking.
- Cool the mushrooms a little. Remove stems then slice thinly.
- Transfer to a bowl then add in the sesame seed and black pepper. Toss to mix.
Garlicky Spinach:
500 g fresh spinach
2 Tbsp sesame oil mix
2 garlic cloves - minced
2 tsp light soy sauce
1 tsp distilled white or rice vinegar
- Cook the spinach in a pot of boiling water.
- Once it boils again, remove and drain.
- Plunge into cold water to stop the cooking.
- Drain well and squeeze out excess water.
- Heat a skillet over medium heat.
- Add sesame oil mix and saute the garlic until fragrant.
- Add the soy sauce and vinegar. Stir to mix.
- Add the cooked spinach and stir to mix. Separate the spinach as much as you can while mixing. Cook just enough to combine it well (about 1-2 minutes).
Sauteed Courgette:
1 medium courgette - julienned into matchstick size
1 Tbsp sesame oil mix
gochugaru or ground chili
- Heat a skillet over medium heat.
- Add sesame oil mix and courgette.
- Cook, while stirring occasionally, until just tender (about 3-4 minutes). Season with gochugaru.
Green Onion Slaw:
2 bunches green onions - julienned into 3-inch lengths
1 Tbsp sesame oil mix
1 Tbsp distilled white or rice vinegar
gochugaru or ground chili
- Place green onions in a bowl of ice-cold water (to crisp).
- Just before serving, combined sesame oil mix and vinegar in a bowl.
- Drain and pat dry the green onions then add in the vinegar mix. Toss to coat.
Wakame:
30 g wakame (dried seaweed)
- Cover wakame with boiling water and let sit until softened (about 10 minutes).
- Drain, squeeze out excess water, and coarsely chop.
Gochujang-Date Sauce:
5 Medjool dates - pitted
1 cup gojuchang (hot pepper paste)
2 Tbsp toasted sesame oil
- Put the dates in a heatproof bowl, cover with boiling water, and soak until softened (about 15 minutes).
- Drain and transfer dates in a food processor with the gochujang and sesame oil.
- Puree until smooth. Set aside.
Rice:
500 g [2 1/2 cups] sushi rice
3 cups water
- Wash and rinse rice until the water runs clear.
- Add in 3 cups of water and bring to boil on high heat.
- Once it boils, reduce heat to lowest and simmer until all the water has evaporated (about 15-20 minutes).
- Turn off heat and let sit for 10-15 minutes.
Assembly:
4 big ceramic bowls - warmed
Cooked rice
Bulgogi
cooking oil
4 fried eggs - sunny side up
kimchi (optional)
vegetable mix-ins prepared in advance - Sesame Bean Sprouts, Sesame Carrots, Garlicky Spinach, Soy-Glazed Mushrooms, Sauteed Courgette, Green Onion Slaw, Wakame, Gochujang-Date Sauce
- Heat 1/2 Tbsp cooking oil in a heavy-bottomed frying pan (preferably non-stick).
- Cook the bulgogi in batches, turning once until cooked through and browned, about 3-4 minutes.
- Divide rice among the bowls.
- Put one fried egg in the middle on top of the rice.
- Arrange the bulgogi and the prepared vegetables and sauce around it.
- Serve with kimchi (optional).
This was supposed to be my submission for the Daring Cooks in October. But for some reason I wasn't able to blog. So here it is and what a very good recipe to keep. Actually, I made a lamb biryani earlier using a recipe from another book. You could probably hear the crash it made when I tossed it in the rubbish bin. The dish that came out of that was vile! And the meat was so tough I wasn't able to eat it. Well I say good riddance. One less cookbook on my bookshelf.
My ever reliable cookbook by Angela Nielsen, The Ultimate Recipe Book, was the source that I adapted for this keeper of a recipe. The accompanying tomato raita paired very well with it. My only gripe was that it took quite sometime to make and involved a lot of steps and ingredients. But it is perfect for those infrequent special occasions where your effort will be well rewarded with one delicious complete meal.

600 g lean boneless leg of lamb - cut into 1-inch pieces
*Marinade:
1 Tbsp minced or grated garlic
1/2 Tbsp grated ginger
1/2 tsp ground cinnamon
3/4 tsp turmeric
1 tsp sea salt
150 g natural yoghurt
*For the rice:
300 g basmati rice
1 cinnamon stick - halved
5 green cardamom pods - lightly bashed
4 cloves
1 tsp cumin seeds
700 ml chicken stock
*For the drizzle:
5 Tbsp lukewarm milk
generous pinch of saffron strands
1 tsp garam masala
25 g butter - melted
4 medium onions - cut into half lengthwise then very thinly sliced
5 Tbsp vegetable oil
1/2 tsp hot chilli powder
1 - 2 fresh chillies - chopped (optional)
60 ml [1/4 cup] hot water
*To serve:
1/2 cup toasted almonds or cashews
1 Tbsp finely chopped fresh mint leaves (optional)
1 Tbsp finely chopped fresh coriander leaves
Coriander and Tomato Raita
- Marinate the meat - combine the yoghurt, garlic, ginger, cinnamon, turmeric, and salt in a bowl. Mix in the lamb and marinate for 2-3 hours or more.
- Dissolve the saffron in the lukewarm milk. Set aside.
- Combine the melted butter and garam masala. Set aside.
- Once the lamb has marinated, saute one of the sliced onions in 1 1/2 Tbsp oil in a saute pan. Fry over medium-low heat until it has softened (about 5 minutes).
- Add the marinated lamb (including the marinade) a tablespoon at a time, cooking and frying briefly before adding the next one. This helps stop the yoghurt from curdling.
- When all the lamb has been added, cook for about 10 minutes.
- Add the chilli powder and/or fresh chillies (if using) and fry for a few seconds.
- Mix in the hot water. Bring to boil and then turn the heat to low and simmer covered for about 1 hour or until meat is very tender. Stir from time to time.
- Put the rice in a bowl cover with cold water and soak for about 20 minutes. Drain. Set aside.
- While the rice is soaking and the meat is cooking, cook the rest of the onions in a large saute pan with about 2 Tbsp oil on medium heat. Sprinkle salt on it to stop it from burning.
- Fry for about 25 minutes or until golden brown all over. Tip the onions onto kitchen paper towels, spread them out in thin layer and set aside to cool.
- To cook the rice - heat the remaining 1 1/2 Tbsp oil in the pan used for the onion. Fry the cinnamon sticks, cardamom, cloves and cumin seeds for about a minute or until you could smell the aroma.
- Add the drained rice and fry for a minute, stirring all the time. Add in the stock and bring to boil. Cover and cook over medium heat for about 6-7 minutes or until the all the stock has been absorbed. Take off the heat, let stand but keep the cover on.
- Heat the oven to 180°C/fan 160°C/350°F. Butter a 2.5 litre casserole dish or pot.
- Fluff the rice with a fork while picking out the spices from it.
- Spread in half of the lamb at the bottom of the casserole.
- Scatter a third of the fried onions on top.
- Spoon half of the rice on top of the lamb and onions, then pour the spiced butter all over.
- Repeat the layers and finish with a sprinkling of the spiced milk on the rice, then the rest of the fried onions and toasted nuts.
- Cover tightly with foil then put the casserole cover on and bake in oven for about 20 minutes.
- Sprinkle with mint (if using) and coriander. Serve with coriander and tomato raita (see below).


1/2 tsp cumin seeds or powder
300 g natural yoghurt
1 medium tomato - deseeded and chopped finely
about 1/2 cup chopped fresh coriander
salt to taste
- If using cumin seeds, briefly dry-fry the seeds in a small pan until toasty and aromatic. Grind to a powder.
- Combine cumin powder and all the other ingredients in a bowl.
- Add salt to taste. Mix well.
This is my homage to Hong Kong-style fastfood restaurants that ushered me gently into the wonderful world of Hong Kong food. At the start my stint in the former British colony in the early 1990s, I was quite intimidated of walking into any restaurant for fear of being reprimanded or ignored due to my lack of Cantonese language skills. So the fast food restaurants of Maxim's and Cafe de Coral were heaven sent for me. If the staff does not speak English I simply point to the brightly coloured pictures of mouth-watering food on the wall and I get served pronto!
Thank god the fast food there were so much healthier than the usual Western ones. The mains were almost always a rice-based meal or noodles with meat. Although there are some pretty weird ones like Hot Lemon Coke. Once I plucked the courage to order it to satisfy my growing curiosity. How did they do it? They filled up a tall glass with Coke, stuck in a microwave and nuked it then, just before handing it to me, dropped a slice of lemon in it. Et voila - hot lemon coke! I was laughing pretty much of the time I walked to my table. The concoction had a strange chemical potion taste to it. Similar to a medicine you're forced to swallow when you were little except it's hot. It was okay though I'm not hurrying to order another one any time soon. LOL.
Baked Pork Chop Rice is one of my favourites among Cafe de Coral's menu. It is simply fried pork chops (marinated and floured), put on a bed of egg fried rice, topped with a tomato-based sauce and grated cheese then baked. Just remembering the smell when it comes out of the oven onto my plastic tray and the wonderful taste of the succulent chops starts me drooling.
My well-thumbed Chopsticks Recipes Introduction cookbook by Cecilia J. Au Yeung is where I got the recipe that I adapted.


500 g pork chops or pork rib steaks or pork shoulder steaks
flour
grated cheddar cheese
*Marinade:
2 tsp Worcestershire sauce
1/2 tsp garlic salt
1/2 tsp celery salt (optional)
1 tsp light soy sauce
2 tsp rice wine
2 tsp sugar
1 Tbsp water
1 Tbsp cooking oil
*Sauce:
1 medium onion - chopped
2 medium tomatoes - chopped
1/2 cup of chopped vegetables - carrots, peas, sweetcorn, celery, etc.
1 Tbsp tomato paste or ketchup
1 cup stock
1 Tbsp light soy sauce
1 tsp sugar
freshly ground black pepper
1 Tbsp cornflour
3 Tbsp water
1 cooking oil
*Egg Fried Rice:
4-5 cups cooked rice (preferably chilled)
2 beaten eggs
3 Tbsp cooking oil
salt to taste
- Pound the meat with a meat mallet or the back of a cleaver knife to tenderise.
- Combine all ingredients for the marinade and mix with the meat. Marinate for 30 minutes.
- Add the oil and marinate for another 10 minutes.
- While it is marinating, make your egg fried rice. Heat the oil in a wok over medium heat.
- Add the cooked rice plus salt according to taste. If you're using chilled cooked rice, crumble the rice first before adding to the wok to separate the grains.
- Stir fry for a few minutes.
- When it is almost done, push the rice to the sides of the wok and drizzle a little oil in the middle. Pour in the beaten eggs and cook in the middle for a few seconds until almost completely set. Then combine it with the rest of the rice breaking it up as you stir it in.
- Remove from heat and set aside.
- For the sauce, heat the cooking oil over medium heat in a sauce pan.
- Saute the onion in medium heat until translucent.
- Add the tomatoes and cook until soft. Mash the tomatoes with a spatula.
- Tip in the soy sauce, sugar, tomato paste, pepper, stock, and vegetables.
- Bring to boil and then simmer until the vegetables are cooked (about 5 minutes).
- Dissolve the cornflour in the water and then add to the sauce.
- Bring to boil on medium heat and stir until thickened.
- Remove from heat and set aside.
- Dredge the marinated pork chops in flour.
- Deep fry or pan fry until golden brown - about 3-4 minutes each side.
*To assemble:
- Pre-heat oven to 220°C/fan 200°C/430°F.
- Divide the egg fried rice into oven-proof bowls.
- Top each one with one fried pork chop.
- Spoon sauce on top.
- Sprinkle grated cheese.
- Bake in oven for about 15 minutes.
- Serve while hot.


I've always been intrigued by risotto and as more cookbooks and magazine articles I read lauding its virtues I was actually intimidated. I had to get a very precise recipe to guide risotto newbies like me. Luckily, I just got Angela Nielsen's The Ultimate Recipe Book from where I adapted this recipe.
Lesson learned: use a heavy, wide pan. Mine was heavy but it was a pot not a wide pan. Therein lay my main problems, I found it hard to stir towards the end. Actually I used a cast iron pot so when I finished and turned off the heat it still had lots of residual heat that dried out my risotto. So probably next time I'll just settle for a thick bottomed wide pan.
My primary objective here besides having a go at cooking risotto is to use seasonal ingredients. Asparagus season here in UK is quite short. It starts from late April up to June-early July only. Many regard British asparagus as one of the best in the world. They even have an asparagus festival at the Vale of Evesham late this month which I hope I can attend just to satisfy my curiosity. Peas, one of my fav vegs, are also in season so that gets my nod in here. But not broad beans, I've not been fond of them types, so I omitted that in my risotto.
Well, what do I think of it? I love it! Especially when eaten with the crunchy asparagus and wholesome peas. It's already a complete meal so you can perfectly eat it on its own though I'm thinking of what meats I can serve it with if ever. That said I don't think I can eat more than a big bowlful of it because I find it quite rich. Maybe I should reduce the cheese or mix the stock with some water?
I can't help comparing this with lugaw, that rice comfort food loved by Filipino. It's not far off to be honest I'd like to think risotto is the posh, more upscale sister of lugaw. :) For me, the main difference is in the cooked grains. The risotto's grains retains its shape thereby avoiding it being mushy while lugaw is meant to be mushy and more porridge like. I wonder if I can cook the malagkit rice variety like a risotto and retain its shape. Abangan ang susnod na kabanata! Wait for the next installment.
Risotto Primavera
1 Tbsp olive oil
65 g [1/4 cup] butter
1 garlic clove - minced
3 spring onions - finely chopped
4 shallots - finely chopped
350 g risotto rice (Carnaroli, Arborio, Vialone)
1/2 cup white wine
200 g shelled fresh peas (or frozen ones - thawed)
250 g asparagus
100 g parmesan cheese - finely grated
5 1/2 cups of chicken or vegetable stock
- Snap the woody bases from the asparagus and slice each into 4 diagonal pieces.
- Put the stock in a pot and bring to a simmer. Keep this simmering while cooking the risotto.
- In a thick bottomed wide pan (beside or close to the simmering stock), heat olive oil and 2 Tbsp of the butter until bubbly.
Saute the onions and garlic on medium heat for about 3 minutes until soft.
- Stir in the rice and cook while stirring often for about 2-3 minutes.
- Add the wine and keep stirring until almost all the wine has evaporated.
- Put the timer on for 20 minutes.
- Add 1 big ladleful of stock to the rice and bring to simmer (do not boil; you may have to lower the heat) while stirring constantly until all the liquid has been absorbed.
- Repeat adding ladleful of stock and stirring when the previous amount has been absorbed.
- After 14 minutes (meaning 6 minutes left in your timer), add the peas to the rice.
- At the same time drop the asparagus in the stock. Let the asparagus simmer for 4 minutes while you're stirring and adding stock to the rice. After 4 minutes, remove with a slotted spoon add it to the rice mixture.
- At this point you should taste the rice, it should be soft but still with a bite in the centre. Also add seasonings if you think it needs some.
- The timer should have gone off by now and you should have the desired texture. If not, continue adding stock and stirring until done.
- Take the pan off the heat then add half the parmesan and the rest of the butter plus a little of the stock to keep it moist.
- Cover the pan and let it rest for about 3 minutes.
- Serve with a sprinkling of parmesan on top.
Here's what you can do when you've got that odd small quantity of beef left. Too little to freeze, too fiddly to stir-fry with vegetables, and especially too much of a waste to throw away. I adapted this from my old reliable Chinese Cooking For Beginners by Huang Su-huei. It originally had 1 tsp sugar in it but I completely omitted it since I really don't want a sweet fried rice. This is very adaptable such that you can add in other veggies or left over meat in it.
Beef Fried Rice
150 g [about 1/2 cup] minced beef
1 cup chopped onions
2 1/2 cup steamed rice (chilled left-over rice is best)
3 Tbsp ketchup
1/2 tsp fine salt
1 tsp Worcestershire sauce
2-3 Tbsp oil
- Mix ketchup and salt in a small bowl. Set aside.
- Heat a wok and add the oil. Fry the onion until translucent (about 3-5 minutes).
- Add the ground beef and cook in medium heat until cooked (about 5-6 minutes). Make sure to separate the tiny beef pieces with your spatula or cooking spoon.
*OR*
To make it more tender, add about 1/4 cup hot water and simmer for 30 minutes or until beef is tender and all the water has evaporated.
- Sprinkle the Worcestershire sauce on the beef and cook for a few minutes more.
- Add the ketchup mixture, mix well. Then add in the rice and stir fry until rice is heated through and mixed well.
 I've been wanting to post this for the longest time but I had to wait until I get a chance to cook it (not very often) and take a picture. Admittedly, even if in the Phils. this is a 'fiesta' quality dish, I've never really eaten this back home or maybe I did but did not like our first meeting. However, once I set foot here in Europe and had access to the ingredients needed for it, I set about hunting for a good recipe to religiously follow the directions. I got more fuel for it when I visited Valencia, the traditional home of paella, where I got to taste the authentic the real thing. As in my previous Valencia post, the original Paella Valenciana DO NOT have any seafood in it. Traditional ingredients for it include rabbit meat, chicken, broad beans, snails, other vegetables besides of course the rice. If the paella has seafood exclusively then it's called Paella Mariscos. While the one with mixed meats - red, white, seafood, et al - is called Paella Mixta, hence the name of this recipe.
This time around my paella was a bit on the 'wet' side since I put in a whole tin of chopped tomatoes (400gm). I didn't want to put in half and waste the other half however I forgot to reduce the amount of stock accordingly. Also, I think I have to be braver and not be constantly scared that the rice is undercooked. It's cooked alright but it's got more sauce than desired. Like any popular dish, there are hundreds of variations. You can put almost any combination of meat, seafood and/or veggies. Some even grill the top a little, some involves cooking the meat entirely separate from the rice and only combining them together at the end. I rather prefer Delia Smith's technique of cooking the chicken with the rice so that the flavour from the chicken is well infused in the rice. I have loosely adapted this from her How To Cook Book 2. Her instructions and most other recipes says not to stir it much after the rice has boiled. But I can't help it because the pan is so much bigger than the hob consequently the heat is not evenly distributed. Besides the meat will not be cooked well if I don't stir it. Another note, if you're going to cook this please use only paella rice such as Calasparra, Bomba, and Granza. The rice in it is supposed to be creamy and clinging a bit to each other but not exactly sticky - very similar to risotto. You wouldn't want to use long grain or Jasmine rice in your risotto, would you?
 Paella Mixta
350 g paella rice (calasparra, bomba, granza, etc.)
1 1/2 Tbsp olive oil
750 g chicken - cut into serving pieces
1 large onion - chopped roughly
1 red bell pepper - diced into 1/2-inch pieces
110 g chorizo - skinned and sliced into 1/2-inch pieces
2 tsp minced garlic
1 tsp paprika
1/4 tsp cayenne pepper (optional)
1/4 tsp saffron strands
225 g tomatoes - skinned and chopped
5 cups stock or water
10-12 raw tiger prawns, shell-on
1/2 cup frozen or fresh peas
salt and pepper
- In a 13-inch paella pan, heat oil then lightly brown chicken in batches. Set aside.
- Saute onion, bell pepper and chorizo for about 5 minutes in medium heat.
- Stir in garlic, paprika, cayenne (if using), saffron and cook for about 1 minute.
- Bring back the chicken to the pan, stir a little; then tomatoes.
- Add plenty of seasonings (salt and pepper) and pour in the stock.
- Bring to boil then simmer for 10 minutes uncovered.
- With a slotted spoon, remove chicken and set aside.
- Pour rice in the pan and stir.
- Bring back to boil, stir once or twice making sure rice is not sticking at the bottom. Lower down heat and simmer uncovered for 10 minutes. As you simmer, move pan occasionally to distribute heat evenly since your pan is more likely to be a lot bigger than your cooking hob.
- Return chicken to the pan, cook for another 10 minutes while stirring occasionally (and *carefully* so as not to turn the rice into mush) and adding more liquid if necessary.
- Add prawns and peas and cook for another 5-10 minutes turning prawns half way through.
- Check rice if cooked especially ones at the outer edges. If not yet fully cooked, simmer for a few minutes more while keeping a close eye to make sure the bottom is not browning too much. Add more liquid if necessary.
- Remove from heat. Cover with a tea towel for about 5 minutes to absorb moisture. Serve with wedges of lemon.

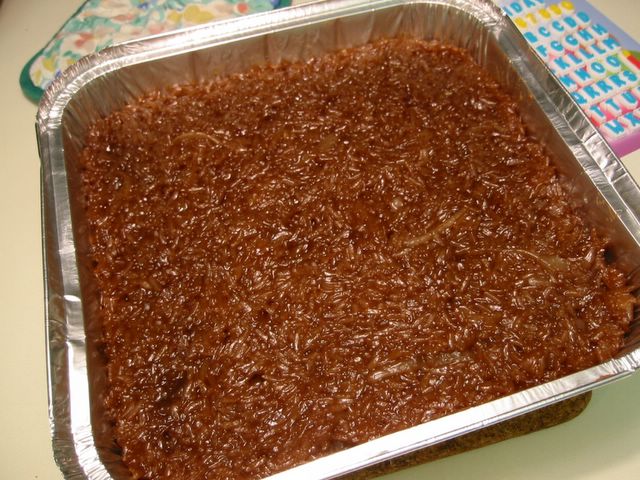
Traditional biko in the Philippines consists of malagkit (glutinous) rice, coconut milk, sugar, and usually mashed cooked ube (purple yam). Whenever cooking the biko is suggested you could always hear the collective sighs of cooks nearby. For it is quite hard to do with the constant mixing and stirring involved to prevent the bottom from scorching until the malagkit is thoroughly cooked. It was a major undertaking each time biko is cooked. However, I heard that my aunt - Ate Letty - pre-cooks the malagkit to cut down the cooking time drastically and to have a more even consistency of the malagkit. Great idea, I thought and promptly forgot about it for years until I started making this.
In our gatherings among friends in North London, we would always watch out for Gemma G's biko. It is almost always sold out at the end of the party and people would include it in their take home bags everytime. I love the treacly-molasses like taste with just enough sweetness blended in. Gemma was gracious enough to give me the recipe though my first attempts were utter disasters. This is one of those things with very few ingredients but is quite tricky to make. If you're like me and your timing is off you either have a mushy, soft, overcooked biko or a hard, gritty one. Both not nice to have. The grains has to be whole and firm but cooked through something like an al dente pasta or a properly made Italian risotto or Spanish Paella. That is the goal of the whole exercise. So it is important that the malagkit is cooked or rather half-cooked, if not it will become mushy once you are done mixing it up with the sauce. Like most dishes I have in this blog, the ingredients here are borne out of what is available in the UK supermarkets. Therefore mashed ube is out and muscovado sugar is in. I must stress that you should use the latter to achieve that scrumptious taste. If not available, use grated panucha or if absolutely desperate use dark brown sugar. Good luck!
Biko Macapuno
6 rice cooker cups malagkit (glutinous rice)
5 rice cooker cups water
3 x 400 g cans coconut milk
500 g muscovado sugar
1 x 340 g [12oz] bottle of sweetened macapuno (mutant coconut)
- Half-cook 6 cups of malagkit in a rice cooker using only 5 cups of water. As soon as the rice cooker switches from 'Cook' to 'Keep Warm' unplug it to prevent the malagkit from further cooking.
- Pre-heat oven to 190C/fan 170C/375F/Gas Mark 5.
- In a wok or big frying pan, boil the coconut milk. Add the muscovado sugar, stir to dissolve and bring to boil. Add in the sweetened macapuno (including the syrup). Bring to boil again and lower heat. Simmer until thick - about 5-10 minutes.
- Add all the half-cooked malagkit to the wok and stir to mix well.
- Cook on medium-low heat while stirring from time to time until the malagkit is fully cooked (but not mushy and too soft) and the sauce has thickened and covers/clings to the malagkit grains well - about 10-15 minutes.
- Transfer to a baking dish; pat level. Put in the oven for about 5 minutes or just enough to dry out the top a little. Cut into squares and serve warm or cold.
[Optional] Although in my opinion this does not need any more garnishings, you may add the traditional topping for biko - the latik.
*To make latik: Boil a can or two of coconut milk in a heavy-bottomed pan. Add a pinch of salt and (optional) a tablespoon of sugar. Lower heat and simmer until the coconut renders fat and sediment sticks to the bottom of the pan. Once the oil renders and separates from the sediment, stir it frequently to keep it from burning. When the sediment becomes dark brown, remove from heat, drain the oil and scrape off the sediment. This sediment is now your "latik". Put about a 1/2 tsp mound of the latik on top of each of the biko squares. The coconut oil can be used for other dishes or as a natural body and hair moisturiser - but that's a whole different topic.
Variation: Add slices of sweetened langka (jackfruit) to the sauce together with the macapuno. This will make the biko more aromatic.
Note: A rice cooker cup is equivalent to about 2/3 cups.
Ginataang Totong - that's what it should say in Tagalog. This is my entry to the food blogging world's 11th edition of 'Is My Blog Burning?'. Currently hosted by Cathy in My Little Kitchen. Theme for this one is beans - the musical food or should I say 'gassy' food.
I don't know why this is called 'Totong' in our area in Cavite, Phils. All I know is that it's a sweet comfort food heartily taken especially during the cold season. Eaten in between meals (usually sandwiched between lunch and dinner), I can't call it snack because it is obviously heavy. Let's just say it's in-between meals meal. ;)
Toasted mung beans in it is the one referred to as 'totong'. The nuttiness of the beans brought about by the toasting and the gentle breaking up of it is the main event here. It lends a crunch that contrasts with the softness of the rice and creaminess of the coconut milk. The closest I can compare this to is the rice pudding. Best served warm with a few tablespoons of coconut cream on top although some people prefer to eat it cold.
Ginataang Totong
(Glutinous Rice Coconut Soup with Toasted Mung Beans)
1/4 cup mongo (mung beans)
1 cup malagkit (glutinous rice)
1 x 400 g can of coconut milk (less 1/4 cup)
1/2 cup sugar
water
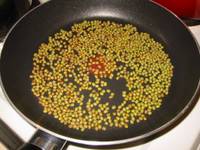 Put the mung beans in a frying pan and toast over medium heat until it turns brown. Shake the pan from time to time. Make sure to keep your eye on it because it burns easily.
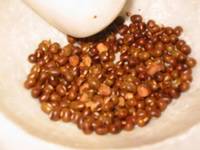 Cool the toasted beans a little. Pour into a mortar and press on the beans with the pestle with just enough pressure to break the grains and detach the skin. Transfer to a shallow plate and separate the skin from the beans by blowing very gently on it with a blow drier or electric fan. Traditionally we would have this on a bilao (woven container for winnowing) and do a tahip (ano bang english sa tahip?) - throwing the grains gently up the air with the bilao and letting a gentle breeze to take away the skin from the bean grains. We do this a lot with rice. Anyways, I didn't have any fan or blow-drier in the kitchen so I just blew on it. Don't worry it was only me and my husband who ate it.
Reserve 1/4 cup of the coconut milk and set aside. Pour the coconut milk into a pot and add enough water to make 5 cups all in all. Add the glutinous rice and toasted mung beans. Bring to a boil and simmer for about 30 minutes or until rice is throughly cooked. Stir from time to time to keep scorching at the bottom.
Add sugar and mix. Cook for a couple more minutes. Taste and add more sugar if preferred. Serve hot or cold topped with about a tablespoon of the reserved coconut milk.
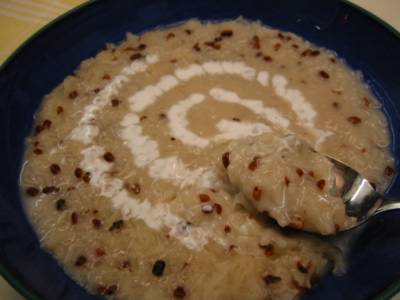
ginataang totong
This is another one of my cooking basics for my kids. They often confuse sinangag with sinigang. Sinangag is Filipino for fried rice while sinigang is meat sour soup.
When you say sinangag it implies the traditional Filipino fried rice which is comprised of left over cooked rice fried in oil and garlic. Quite an enjoyable comfort food whether eaten for breakfast, lunch, or dinner. The usual application (sounds like a software) of this is in the ubiquitous meals suffixed with 'silog' in fast foods and eateries in the Philippines. These are meals with a variety of fried meat and always paired with sinangag and itlog (egg) - all fried. I likened it to the all-day English breakfast. Usually eaten in the morning but taken as well any time of the day. Varieties of the 'silog' are numerous: Tapsilog - tapa (thinly sliced cured beef); Tocilog - tocino (cured pork); Lonsilog - sausage; and others. Your nearest Filipino or oriental store will surely have these. Another similar brekkie meal that brings me a smile whenever I hear it is the 'pakaplog' - pandesal (breakfast roll), kape (coffee), itlog (fried egg).
I cooked a tocilog one night (see below), guess what is missing. That's right I forgot the egg!
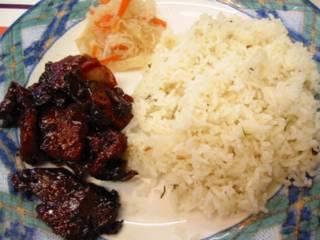 Oh well, use your imagination and picture a nice fried sunny side up egg in there. ;-) On the top left hand side of the plate is a little mound of achara (pickled green papaya). It's a regular accompaniment for all the 'silog' meals. I also like to have suka at patis (vinegar and fish sauce) dip to balance things up.
How To Prepare For Fried Rice:
Oh well, use your imagination and picture a nice fried sunny side up egg in there. ;-) On the top left hand side of the plate is a little mound of achara (pickled green papaya). It's a regular accompaniment for all the 'silog' meals. I also like to have suka at patis (vinegar and fish sauce) dip to balance things up.
How To Prepare For Fried Rice:
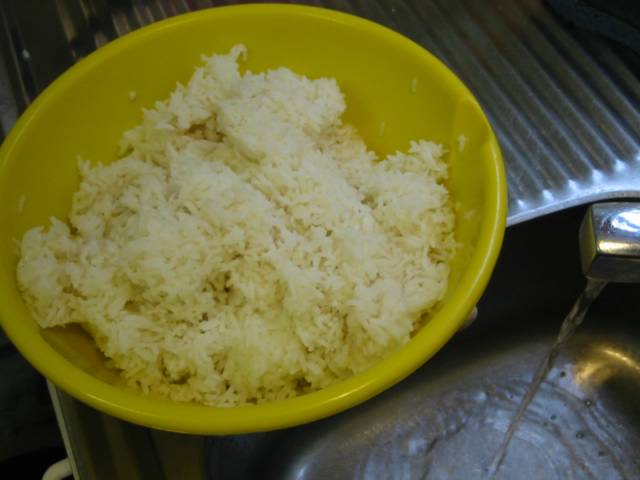
- Keep the cooked rice in the fridge to chill. This will make the rice easier to separate since they are less sticky in that state.
 Put the chilled rice in a bowl and mash them with your hands to separate the grains. While separating them, dip your hand in a bowl of water or stand by an open tap (faucet) and wet your hands from time to time. This will remove the stickiness from your hands and at the same time sprinkling the rice with water. You need the rice to be wet and soft because it will lose a lot of its moisture in the frying process. If not wet enough the resulting fried rice would be on the brittle side. However, if your rice is already 'malata' (soggy) then you do not need to wet it.
- Set aside for a few minutes to let the sprinkled water to seep in the rice.
Sinangag
(Garlic Fried Rice)
5 cups cooked rice - chilled and separated
1 1/2 Tbsp minced garlic
2 - 3 Tbsp oil
sea salt
- Heat oil in a wok or big pan. Saute garlic in low heat - do not burn it!
- Add in rice and season generously with salt. Mix from time to time.
- Cook for about 5 - 10 minutes. Serve hot.
How To Cook Tocino
- Make sure that the tocino meats are sliced thinly.
- Put the meat in a pan (preferably non-stick) and add about 1 cup of water for every kilo of tocino.
- Cover (optional), bring to boil and then simmer for 30 minutes. Add more hot water if it's drying up too soon.
- After 30 minutes, remove cover, add about 1 Tbsp oil then let the remaining sauce to dry up. Keep this at low heat to prevent the tocino from burning. This happens easily because of the sugar content.
- Add more oil if needed and fry until meat is well caramelised. Serve warm.
 Usually when I'm ill, feeling very down, and just want to sleep all day I often want to have one of my favourite comfort food - lugaw. It's also called a number of different names like - pospas, porridge, congee, and arroz caldo. Nothing beats the smell and taste and satisfaction of eating it while your nose is drooling from a bad cold or flu. If it's for someone with a stomach upset you cook and serve it without oil or meat. Normally the meat that accompanies the Filipino version is goto (beef tripe) or chicken. Since I do not want to spend a lot of time cooking it I often do the chicken version. It takes time to tenderise the beef tripe, you know.
The malagkit (glutinous rice) in the recipe is optional. It is added to make the soup a bit thicker. Another optional ingredient is the kasubha I think this is the Pinoy equivalent of saffron. It makes the lugaw a bit reddish/yellow which is not really essential and does not add much taste to it. And finally, the variation of adding vegetables came from my mother-in-law. It's not to everyone's liking although I love eating chunks of veggies in the lugaw. Slurp slurp ... aaahhhh!
Lugaw with Chicken
Usually when I'm ill, feeling very down, and just want to sleep all day I often want to have one of my favourite comfort food - lugaw. It's also called a number of different names like - pospas, porridge, congee, and arroz caldo. Nothing beats the smell and taste and satisfaction of eating it while your nose is drooling from a bad cold or flu. If it's for someone with a stomach upset you cook and serve it without oil or meat. Normally the meat that accompanies the Filipino version is goto (beef tripe) or chicken. Since I do not want to spend a lot of time cooking it I often do the chicken version. It takes time to tenderise the beef tripe, you know.
The malagkit (glutinous rice) in the recipe is optional. It is added to make the soup a bit thicker. Another optional ingredient is the kasubha I think this is the Pinoy equivalent of saffron. It makes the lugaw a bit reddish/yellow which is not really essential and does not add much taste to it. And finally, the variation of adding vegetables came from my mother-in-law. It's not to everyone's liking although I love eating chunks of veggies in the lugaw. Slurp slurp ... aaahhhh!
Lugaw with Chicken
500 g chicken - cut into bite-sized pieces
1 cup rice
1 Tbsp glutinous rice [optional]
2 Tbsp fish sauce (patis)
8 cloves garlic - minced
1 medium onion - chopped
1 square inch of ginger root - julienned
8 cups water or chicken stock
2 Tbsp oil
2 stalks green onion - chopped
chopped vegetables [optional]
pinch of kasubha (saffron) [optional]
- Heat oil in a big pot or saucepan.
- Saute garlic in low heat (so it will not burn) for a few seconds.
- Increase heat to medium and stir in onion and ginger until aromatic (about 1-2 minutes).
- Add chicken and patis, stir for a seconds then cover and simmer for about 5 minutes turning the chicken once in a while.
- Stir in all the rice and mix with the chicken and patis mixture.
- Add in the water and bring to boil while stirring the bottom from time to time to prevent the rice from sticking.
- Turn down heat to low and simmer for at least 45 minutes or until chicken is cooked and the soup is thick. Stir occassionally making sure the rice does not stick at the bottom of the pot.
- [Optional] At this point you can add chopped vegetables of your choice to the pot and cook until they are done. Favourites are broccoli, carrots, peas, etc.
- Ladle into bowls; sprinkle chopped green onion, kasubha, and fried garlic on top. Serve with lemon or calamansi juice and more patis.