Showing posts with label cookies. Show all posts

Tuesday, 15 August 2017

Thick and Chewy Chocolate Chip Cookies

Thick & Chewy Chocolate Chip Cookies

Here's another version of the classic chocolate chip cookie with emphasis on being thick and chewy. This recipe is adapted from The Best New Recipe of Cook's Illustrated. There is an optional step on chilling the dough to make it spread less when baking. I prefer to chill it after balling it since it is easier to do so rather than the other way around.


Thick and Chewy Chocolate Chip Cookies

300 g  [2 1/2 cups] plain flour
1/2 tsp  bicarbonate of soda
1/2 tsp  fine salt
185 g  [3/4 cups] unsalted butter - melted
200 g  [1 cup packed] light or dark brown sugar
70 g  [1/3 cup] granulated sugar
1 egg + 1 egg yolk
2 tsp  vanilla extract
200 g  [about 1 1/2 cups] chocolate chips
  1. Pre-heat oven to 180°C/fan 160°C/350°F. Grease or line baking sheets with baking paper.
  2. Combine the flour, bicarbonate of soda, and salt in a small bowl until well mixed.
  3. Mix, either by hand or electric mixer, the butter and sugars until well combined.
  4. Add eggs and vanilla and mix until well blended.
  5. Add the dry ingredients until combined.
  6. Add the chocolate chips with a wooden spoon and stir until combined.
  7. Roll the dough into 1 1/4-inch (about 50 g) balls.
  8. [Optional] Chill the dough balls for about 2 hours or until firm.
  9. Arrange dough balls on the baking sheets about 2 inches apart.
  10. Bake for about 11 minutes or until the outer edges start to brown and the centres are still soft and puffy.
  11. Cool the cookies right in the baking sheets for about 5-10 minutes.
  12. Remove from the baking sheets with a wide spatula and cool completely on a rack.

Saturday, 15 April 2017

Double Chocolate Cookies

Double Chocolate Cookies

This is another hit from my trusted The New Best Recipe cookbook from Cook's Illustrated. I especially love the intense chocolate taste of this cookie while remaining quite soft and chewy. I do have to go grocery shopping for 50% cocoa content dark chocolates since my baking chocolates in my pantry is always 70%. The coffee in my opinion can be omitted since it really made the flavour very intense. But other than that they were very nice cookies indeed.


Double Chocolate Cookies (Thick & Chewy)

260 g  [2 cups] plain flour
35 g  [1/2 cup] cocoa
2 tsp  baking powder
1/2 tsp fine salt
4 large eggs
450 g  dark chocolate (50% cocoa content) - chopped
2 tsp vanilla extract
1 tsp instant coffee (optional)
185 g  [3/4 cup] unsalted butter - softened
300 g  [1 1/2 cups packed] light brown sugar
100 g  [1/2 cup] granulated sugar
  1. Mix flour, baking powder, salt and cocoa in a bowl and set aside.
  2. Combine eggs and vanilla and beat lightly. If using, sprinkle the coffee over and beat until dissolved.
  3. Melt chocolate in a heat-proof bowl over a simmering saucepan of water. Cool slightly and set aside.
  4. Beat the butter with the sugars.
  5. Add the egg mixture while beating.
  6. Mix in the melted chocolate.
  7. Add in the combined dry ingredients while mixing at low speed or with a wooden spoon.
  8. [Optional] Cover bowl and chill in th fridge until scoopable (about 1 hour).
  9. Pre-heat the oven to 180°C/fan 160°C/350°F.
  10. Scoop or shape the dough into balls about 1 1/2-inch in diameter or about 55 g in weight and arrange in baking sheets 1 1/2-inches apart.
  11. Bake in the oven for about 11-12 minutes or until the edges have begun to set but the middle is still soft.
  12. Cool in the sheets for about 10 minutes and then transfer to racks and cool completely.

Wednesday, 15 June 2016

Chocolate Cranberrry Cookies

This recipe is from one of the hundreds of torn-off magazine pages that I save in the hope of trying it out "later". That "later" is now ten years and I reckon it's high time I try it again. The first time it was quite bland so I upped the sugar this time. It turned out quite good although it's more cake-like than a chewy/crispy cookie. The self-raising flour has a lot to do with that.

I adapted this from an advertisement feature in the BBC GoodFood magazine of December 2006 - almost 10 years!


Chocolate Cranberry Cookies


Chocolate Cranberry Cookies

125 g  [1/2 cup] unsalted butter - softened
200 g  [1 cup packed] light muscovado sugar
2 eggs
2 tsp  vanilla extract
225 g  wholemeal(or plain) self-raising flour
25 g  cocoa
75 g  dried cranberries
100 g  white chocolate chips
100 g  milk chocolate chips
12 pecan halves (optional)
  1. Mix together the butter and sugar in a bowl using a wooden spoon.
  2. Add eggs one at a time making sure to mix well everytime.
  3. Add vanilla extract.
  4. Sift the flour and cocoa into the bowl and mix well.
  5. Add in the cranberries and chocolate chips and combine well.
  6. Cover with cling film and chill in the fridge for about 1 hour.
  7. Preheat oven to 180°C/fan 160°C/350°F.
  8. Shape the dough into 2-inch (about 75 g) balls - yields 12-14 pieces.
  9. [Optional] Press a pecan piece on top of each of the balls.
  10. Arrange the balls about 1-inch apart on greased baking trays. Flatten them slightly. If necessary bake in batches.
  11. Bake for 15 minutes or until firm to the touch.
  12. Leave on the tray for about 5 minutes and transfer on a rack to cool completely.

Wednesday, 2 March 2016

Blondies

Blondies

I've never had blondies but have read about it in some American magazines for years. It intrigued me enough to put it in my list of things to bake if I have a chance. One came up recently when a colleague had a leaving do where we usually bring all manner of snacks and sweet things for everyone to partake.

My verdict? It's essentially a cookie dough baked in the shape of a bar or square. The dough have to be light in colour of course, afterall 'blondie' is the name. So nothing really like a major discovery here but it is delicious just the same. I adapted the recipe from the excellent The New Best Recipe (by Cook's Illustrated) cookbook.


Blondies

230 g  [1 3/4 cups] plain flour
1 tsp  baking powder
1/2 tsp  fine salt
185 g  [3/4 cup] unsalted butter - melted and cooled
300 g  [1 1/2 cups packed] light brown sugar
2 large eggs
1 1/2 tsp  vanilla extract
200 g  [1 cup] chocolate chips (milk, dark, white, or combination)
1 cup  pecans (or walnuts, macadamia nuts) - chopped
  1. Preheat oven to 180°C/fan 160°C/350°F.
  2. Grease and line a 13x9-inch baking pan with baking parchment.
  3. Combine the flour, baking powder, and salt in a bowl. Set aside.
  4. Mix the melted butter and brown sugar in another bowl.
  5. Add the eggs one at a time while whisking.
  6. Add vanilla and mix well.
  7. Fold the flour mixture into the egg mixture. Do not overmix.
  8. Next, fold in the chocolate chips and nuts and mix well.
  9. Pour into the prepared baking pan and bake for 23-25 minutes.
  10. Cool completely in the pan a wire rack.
  11. Remove from pan and transfer to a cutting board and cut into bars.

Sunday, 21 September 2014

White Chocolate Chip Cookies

White Chocolate Chip Cookies

This is more on the periodically running saga of using up ingredients about to expire. We had several bars of excellent Cailler baking white chocolate from my sister in Switzerland. It was expiring at the end of last month so we had to think of a way of using it very quickly! Fortunately, the cookie recipe we found in the Nestle website was really spot on. And it was so easy that my youngest was able to do all by herself. I think we just made a few adjustment on some ingredients and reduced the cooking time. Other than that it was really really good and delicious especially for a first time bake by a 13-year-old.

White Chocolate Chip Cookies


White Chocolate Chip Cookies

1 cup [250 g] butter - softened to room temperature
3/4 cup granulated sugar
2/3 cup firmly packed light brown sugar
1 tsp vanilla extract
2 large eggs
2 1/4 cups plain flour
2/3 cup cocoa
1 tsp bicarbonate of soda [baking soda]
1/4 tsp fine salt
2 cups [350 g] white chocolate chips
  1. Preheat oven to 180°C/fan 160°C/350°F.
  2. [Optional] Grease and line baking sheets.
  3. Combine the flour, baking soda, and salt in a small bowl. Set aside.
  4. Cream butter and both sugars in a bowl with an electric mixer. Beat until light and fluffy - about 5 minutes.
  5. Add vanilla and the eggs one at a time, mixing well after each addition.
  6. Mix in the flour mixture in batches into the butter mixture.
  7. Using a wooden spoon, stir in the white chocolate chips until well combined.
  8. Form into balls, about 1-inch in diameter, then arrange on the baking sheets making sure to leave enough room between for it to expand.
  9. Bake for 11-12 minutes.
  10. Cool on the baking sheets for 5 minutes then remove and cool completely on wire racks.

Thursday, 4 September 2014

Mini M&M Cookies

Mini M&M Cookies

Look, a yummy cookie recipe with only 5 ingredients! How's that for simplicity? I was trying to find a cookie recipe that would include M&M chocolates instead of the usual chocolate chips. The allrecipes website turned up with this gem of a recipe that not only is simple to make but is scrumptiously delicious, too. Plus, it does not use eggs so perfect for those with egg allergies. It was a definite thumbs up from the kids. We did change the volume, however, as in cut it in half since we don't really need that much cookies.

Mini M&M Cookies


Mini M&M Cookies

250 g  butter - softened to room temperature
125 g  caster sugar (superfine)
200 g  condensed milk (half of a 397 g  can)
312 g  self-raising flour - sifted
250 g   chocolate M&Ms
  1. Preheat oven to 180°C/fan 160°C/350°F. Grease baking trays.
  2. Beat together butter, sugar and condensed milk until light and creamy.
  3. Add flour and mix until well combined.
  4. Stir in the M&Ms with a wooden spoon and mix well.
  5. Roll tablespoonfuls of the mixture into balls (about 3/4 inch in diameter).
  6. Place on prepared trays and flatten slightly with a fork.
  7. Bake for 11-12 minutes or until lightly golden.
  8. Cool in the tray for 5 minutes then remove and transfer to wire racks to cool completely.

Tuesday, 31 January 2012

Butter Cut-Out Cookies

Butter Cut-Out Cookies

My youngest is doing her Confectioner's badge for her Girl Guides. One of the tasks is to do icings on cookies (biscuits). I took this opportunity to blog about this very simple recipe I found on the internet that I've been forgetting to post for the last 3 years!

I was trying to find a butter cookie recipe with the least amount of ingredients to make for my kids at the time. This recipe I adapted from the about.com website was the simplest but probably the most mouth-meltingly delicious butter cookie we've ever baked. It's got a very similar taste to those buttery, crumbly French sable breton that we were able to sample from my food-blogging friend Shalimar.

Anyway, my daughter was very much hands-on in the baking and especially in the decorating. She rolled the dough ...


Butter Cut-Out Cookies

Did her very first cookie decorations with royal icing ...


Butter Cut-Out Cookies

And finally the finished products ...


Butter Cut-Out Cookies

Best of all, her fellow Guides loved them a lot !


Butter Cut-Out Cookies

188 g  [3/4 cup] butter - softened
95 g  [3/4 cup] icing sugar
1 egg yolk
250 g  [2 cups] all-purpose flour
1/2 tsp vanilla (optional)
  1. Beat butter and icing sugar in a bowl until light and fluffy (about 3-5 minutes).
  2. Add in egg yolk and vanilla (if using) and mix until well combined.
  3. Tip in the flour and using a spoon, mix well with the butter mixture until you can form into a ball. If the dough is too soft, wrap in cling film or plastic bag and chill in the fridge for about 30 minutes or until firm enough to be rolled.
  4. Preheat oven to 190°C/fan 170°C/375°F degrees.
  5. Roll on a floured surface (or in between baking paper and cling film) to a even thickness of about 1/8 inch.
  6. Cut out or roll into shapes, arrange in a baking tray and bake for 10 minutes.
  7. Let cool in the baking tray for about 5 minutes then move onto racks to cool completely.
  8. If desired, decorate with icing, coloured sugars, or sprinkles.

Monday, 8 September 2008

Oreo Strategy


Oreo cookies has become a mainstay of UK supermarkets and grocies in recent times. We used to buy them in some obscure shop or ones that specialise in American products before we can have our fill of this chocolate biscuit of my youth. Fortunately my kids like them as well so we normally share them. I have to confess I've got a different way of eating Oreos from my kids. I only like the cookies itself and not the white cream filling. So the ritual of scoffing them involves pulling apart the twin cookies, scraping off the middle then that's the only time I can start eating the dark chocolate biscuits. Yum!

How about you how do you eat your Oreos?


Monday, 9 January 2006

Apricot Raisin Pecan Cookies

Apricot Raisin Pecan Cookie
This is part of my kitchen cupboard clean-up recipes. I had some chopped apricots and pecans expiring soon so it was good that I found this in one of our favourite cookbooks - The Genuine American Cookie and Muffin Book by Peter Shaffer. It's quite good with the cookie being more cakey if a little bit undercooked.


Apricot Raisin Pecan Cookies

200 g  [scant 1 1/4 cups] dried apricots - chopped
140 g  [1 cup] raisins or sultanas
1 cup water

490 g  [scant 3 2/3 cups] plain flour
1 tsp bicarbonate of soda
1 tsp baking powder
1/2 tsp ground cinnamon
1/2 tsp ground nutmeg
1 tsp salt
100 g  [3/4 cup] pecans - chopped

250 g  [scant 1 1/3 cups] soft demerara sugar
225 g  [scant 1 cup] butter - softened
2 large eggs
1 tsp vanilla extract
  1. Preheat oven to 180°C/fan 160°C/350°F/gas mark 4.
  2. Put apricots, raisins, and water in a saucepan. Cover and bring to boil. Bring down heat to low and simmer for 3-4 minutes. Remove from heat and cool. Do not drain.
  3. Combine the flour, bicarbonate of soda, baking powder, cinnamon, nutmeg, salt, and pecans in a bowl. Mix well.
  4. In a large bowl, beat the butter, sugar, and vanilla until light and fluffy.
  5. Add eggs one at a time and continue beating until well blended.
  6. Using a wooden spoon, stir in the raisin and apricot mixture. Mix well.
  7. Gradually fold in the dry ingredients into the butter mixture. Stir just enough to combine. Do not overmix.
  8. Using a tablespoon, drop dough by rounded portions (about 1.5 - 2 inches in size) onto baking sheets about 2 inches apart.
  9. Bake for 12 to 15 minutes for a soft centre.
  10. Allow cookies to stand for 1 to 2 minutes before removing from baking sheet and transferring to a wire rack to cool completely.

Apricot Raisin Pecan Cookie

Saturday, 24 December 2005

Lemon Squares

Lemon Squares
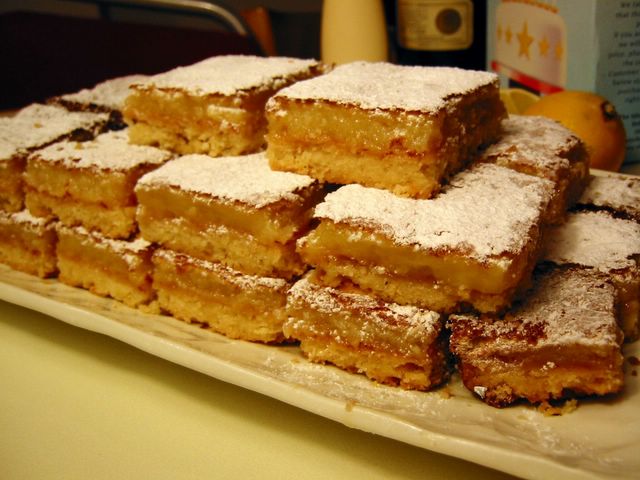
I don't know about you, but this icing sugar-dusted lemon squares sure makes me hear Bing Crosby's White Christmas in the background. I've been wanting to make these bars ever since I saw it in Moira's blog early in the year though it's only now that I found an excuse due to a glut of lemons that I really don't want to throw in the bin.

If we dissect these delectable little things, we find that it's essentially lemon curd on top of shortbread. Lovely contrast of sour-sweet topping with the crumbly bottom crust. Very very nice. Hmmm...

The original recipe from Moira can be found here, though I've changed just two things in it - the baking time (30 minutes) and the cutting of the butter in the flour (I forgot to freeze it).

Let me take this opportunity to give a very big thank you to Moira for sharing her heirloom family recipe.


Lemon Squares

*Crust:
2 cups flour
1/2 cup sifted icing sugar (confectioner's)
250 g  [1 cup] butter - frozen

* Filling:
4 eggs - beaten
2 cups sugar
1/3 cup lemon juice
2 tsp lemon zest
1/4 cup flour
1/2 tsp baking powder

extra icing sugar for dusting
  • Preheat oven to 350°F/180°C/fan 160°C/gas mark 4.
  • Lightly butter a 9 x 13-inch baking dish and line with parchment paper.
  • For the crust:
    1. Combine the dry ingredients together in a large bowl.
    2. Grate the frozen butter (using the large holes of a box grater) into the dry mixture. Or if you forgot to freeze the butter, cut it in the flour mixture with a pastry mixer or two butter knives.
    3. Toss the butter pieces to coat, then rub between your fingers until the flour turns into a coarse breadcrumb-like texture.
    4. Put the mixture into the lined pan and press firmly with your fingers to form an even crust.
    5. Bake for 20-25 minutes, or until golden brown.
  • For the filling:
    1. Mix the eggs, sugar, flour and baking powder together in a medium bowl.
    2. Add the lemon juice and zest and combine well.
    3. Pour mixture into the pan on top of the warm crust.
  • Bake for 25-30 minutes, or until the filling feels firm when touched lightly.
  • Transfer the pan to a wire rack and cool for 30 minutes.
  • Grasp the parchment and carefully lift the bars onto a cutting board.
  • Cut into serving size squares or bars, wiping your knife clean between cuts if necessary. Remove the parchment paper after cutting.
  • Sift icing sugar over bars and serve.

Wednesday, 7 December 2005

Flapjacks

Flapjacks
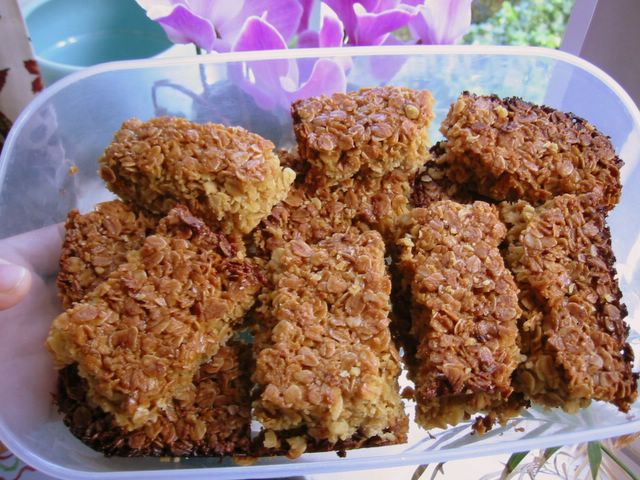
You might have noticed that a lot of the recipes I do here are quite 'basic'. To be frank, I only started cooking and baking in earnest in the last few years although I've been a lifelong enthusiastic eater and food lover. It's only when I lived on my own in Hong Kong and got married a year later that I was forced to cook everyday. However, the lack of kitchen implements, more importantly a decent oven, hindered my development as a cook. So now that I am sort of delving deeper into cooking and food appreciation that I began to educate myself of the basics in cooking. That is the reason why I have a lot of traditional or unsophisticated dishes here besides the fact that I love uncomplicated food. One advantage of this is you get to have new insights on the different variations you can do or perform the same techniques to a different dish.

When I was doing these classic flapjacks, I suddenly remember a coconut sweet snack that my mother made when we were young. And I realised that I could do it in a flapjack way, i.e. press in a baking pan and bake a little to make it come together and then cut into bars. Great! Now I have to call long distance to confirm the recipe with my Nanay.

As for this lovely snack, it is so moreish that I couldn't keep myself from eating them. It must be the nice combination of golden syrup and muscovado sugar plus the wholesome goodness of the oats. I suggest that the oats you use should have as much whole ones as much as possible, having porridge grade oats will make it quite crumbly. The BBC Good Food magazine's 101 Cakes and Bakes provided the recipe that I adapted.


Flapjacks

250 g  [heaping 2 2/3 cups] porridge oats or rolled oats
140 g  [scant 1/2 cup] golden syrup or light corn syrup
50 g  [scant 1/3 cup] light muscovado sugar
175 g  [scant 3/4 cup] butter - cut into pieces
  1. Preheat oven to 180°C/fan 160°C/350°F/gas mark 4. Line a 9-inch baking pan with grease-proof paper (if it's not non-stick).
  2. Put butter, syrup, and sugar in a saucepan and heat gently until sugar is dissolved.
  3. Remove from heat and add in the oats. Mix well.
  4. Press into the prepared baking pan and bake for 20-25 minutes or until top is golden brown.
  5. Cool in baking pan for 5 minutes and cut into squares or bars.
  6. Cool completely in the pan then remove carefully. This is to prevent it from falling apart.

Sunday, 4 December 2005

LP 4.5: Chestnut Squares

The Lasang Pinoy group decided to have a 'special edition' of the monthly food blogging event that showcases Filipino cuisine. Since it's in between the regular events, they christened it Lasang Pinoy 4.5 to underscore the issue of plagiarism in the blog world and in the internet as a whole. To be specific, this came about when pictures of Karen's and Market Man's yemas was printed in a Philippine broadsheet without their permission. Most bloggers are generous with their resources all one has to do is ask for their consent to use their pictures. There have been numerous cases of copying images (and contents) in blogs then published in some other websites or forums. But this is the first time (AFAIK) that images from food blogs ended up in print! It may be easy deleting webpages but having them in a published newspaper is a very strong and undeniable evidence of the dastardly deed. The issue, it seems, has not been resolved entirely. It might be better if you follow the whole controversy by visiting here and here.

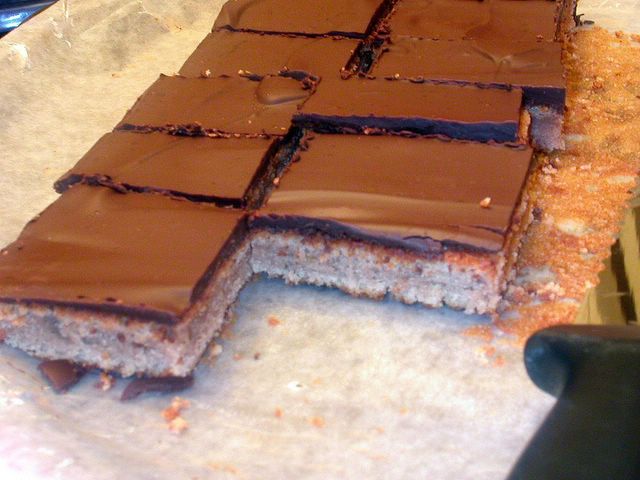
As for me, as a protest I borrowed Stel of Baby Rambutan's recipe and pictures with her permission - that is in bold letters. A few posts back, another food blogging friend gave me some yummy ingredients from her sojourn in France. That's why I ended up with chestnut puree/cream in my cupboard. I so love this confection and Stel's previous baking posts saved me from digging up recipes for it. You have to understand why I was so ecstatic with the results of my baking - it's the first time in about 15+ years that I baked a meringue-based cake! The last time it came out so hard even our dog won't eat it. :) But this time, hah! it was oh so springy and soft and well risen - and no raising agents at that - only the beaten egg whites. Wheee! I was so happy I did the dance of joy ... 'One for the money and the free rides. It's two for the lie that you denied. All rise (all rise)'. LOL!

According to Stel this recipe of hers, which I adapted, was in fact adapted also (2x times adapted will that make it original? Asa pa ako!) from The French Cookie Book by Bruce Healy with Paul Bugat. I did not use cream of tartar, it was already too late when I realised my pot was already expired. But even without it the egg whites peaked marvellously. Then I used half milk and half dark chocolates because I could imagine my kids not touching this with a ten-foot pole if they know it's plain dark chocolate. Lastly, I spread the choc topping while the cake is still in the baking pan. Why? So as not to waste the chocolate dripping needlessly by its sides. Well yes, I would surely scrape the drippings and eat them but it's nice to know they all ended up in the cake.
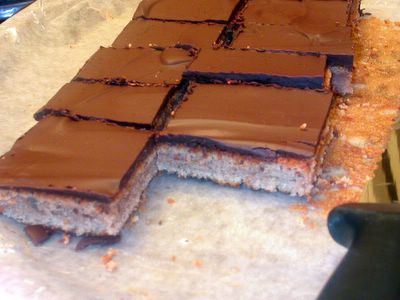
picture courtesy of Baby Rambutan


Chestnut Squares

[heaping 1/3 cup + 2 tsp] caster sugar (superfine)
2 large eggs - separated and at room temperature
1 tsp vanilla extract
250 g  [heaping 3/4 cup] chestnut cream (creme de marrons)
1/4 cup unsalted butter - melted
1/8 tsp cream of tartar (optional)
45 g  [1/3 cup + 2 tsp] plain flour

*Glaze:
200 g  dark cooking chocolate (70% chocolate content) OR combination of dark and milk chocolates
1 tsp almond oil or neutral vegetable oil (optional)
  1. Pre-heat oven to 425°F/220°C/fan 200°C.
  2. Butter and flour well a 9-inch square baking pan.
  3. Set aside 2 1/2 tsp of the sugar.
  4. In a bowl, beat the egg yolks with the rest of the sugar and vanilla with an electric mixer until light, thick and smooth.
  5. Add in the chestnut cream, followed by the butter. Mix well.
  6. Get another bowl and whip the egg whites with an electric mixer (make sure the beaters and bowl are clean and dry) on low speed until frothy. Add the cream of tartar at this point if you're using it.
  7. Increase the speed to medium-high until whites are stiff but not dry.
  8. Add the reserved sugar and continue beating at high speed for a few seconds to incorporate the sugar.
  9. Sift the flour over the chestnut-egg yolk mixture and mix with a wooden spatula.
  10. Add about 1/3 of the whipped egg whites into it and fold quickly.
  11. Then gently fold in the remaining egg whites. Do not overmix.
  12. Pour the batter in the prepared pan, spread evenly and smooth the surface.
  13. Bake for about 16-20 minutes or until lightly browned and springs back to the touch.
  14. Remove from pan and cool on a wire rack.
  15. Melt the chocolates by placing in a heatproof glass bowl over simmering saucepan of water.
  16. Pour melted chocolate on the cake, spreading it evenly, letting the excess flow down the sides. You can do this while the cake is still on the rack OR put back the cooled cake in the baking pan then pour the chocolate in the pan. The latter is to avoid wastage of chocolate.
  17. Cool and let the glaze set.
  18. Cut into squares and serve.


LasangPinoy 4.5

Monday, 19 September 2005

Nanaimo Bars


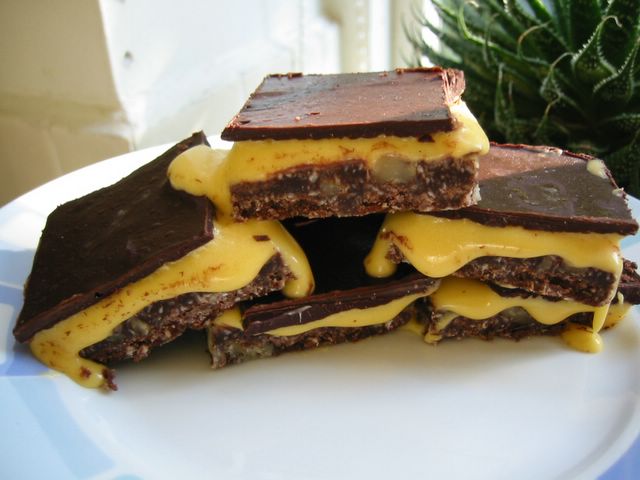
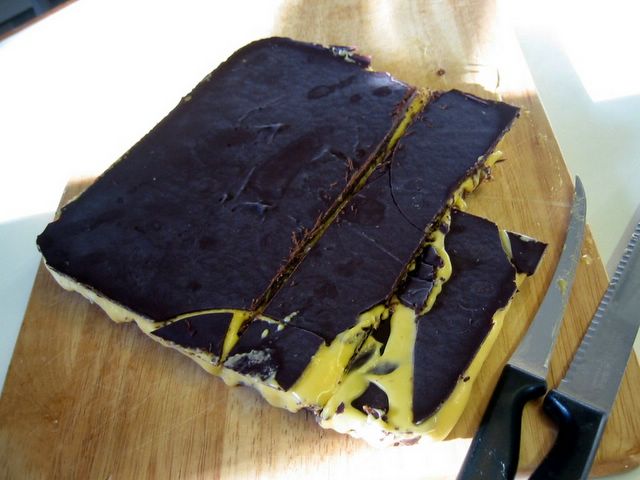
Disaster anyone? This was meant for the SHF 12 with a theme of custard but as you can see these Nanaimo Bars were not exactly a paragon of beauty. I don't know if I did anything wrong or there's something inherently flawed in the recipe itself. Mind you, it was only the middle custard part that didn't work. The base and topping were great but as you can see the middle layer is sooo gooey, it just collapses during cutting so I had to freeze it first *overnight*. Come morning, it was still gooey while the bottom and top were rock hard.


I tried hack it off with a variety of implements - bread knife, carving knife, chef's knife, etc. Could I have tried an axe? ;-p I tried warming the knives first but to no avail most of them still broke up though there were some little success but it's that darn custard that won't set !! Maybe I should have just served it on the side because the rest of it is absolutely delicious.

A little background on these rich delectable bar cookies (which I will not make again unless I come across a better technique or recipe for the custard), which were said to have originated in the town of Nanaimo in Vancouver, Canada. No one is certain on who originally came up with this recipe. But the same cannot be said of its deliciousness as it's certainly moreish minus the custard ;). The other thing going for this is the fact that it's a no-bake cookie bar. Sue Lawrence's cookbook Book of Baking is from where I adapted this mini disaster. :LOL:

In case you want to make yourself miserable ;) here's the recipe:


Nanaimo Bars

*Base:
100 g  unsalted butter
55 g  [heaping 1/4 cup] golden caster sugar (superfine)
5 Tbsp cocoa - sifted
1 large egg
1 tsp vanilla extract
140 g  digestive biscuit (or graham crackers) - crushed
70 g  [1 cup] dessicated coconut
70 g  [1/2 cup] chopped walnuts

*Filling:
100 g  unsalted butter - softened
5 Tbsp custard powder*
200 g  [1 1/2 cup] golden icing sugar (confectioner's)- sifted
1 large egg
1 tsp vanilla extract

*Topping:
140 g  dark chocolate
25 g  unsalted butter
1 Tbsp golden caster sugar (superfine)
  • Grease and line a 9-inch square baking pan.
  • For the base:
    1. Put the butter, sugar, cocoa, egg, and vanilla in a heatproof bowl and set over a saucepan of simmering water.
    2. Melt the mixture while stirring constantly.
    3. When it becomes smooth and slightly thick, remove from heat.
    4. Add in the biscuits and walnuts. Combine well.
    5. Press onto the prepared baking pan making sure to level it out. Chill in the fridge for at least 30 minutes.
  • For the filling:
    1. In a heatproof bowl, beat together the softened butter and custard powder.
    2. Beat in the icing sugar, egg and vanilla.
    3. Place carefully on a larger bowl filled with hot (not boiling) water. Continue beating for about 1-2 minutes.
    4. Leave for 5-10 minutes in the bowl of hot water then beat again for another 1-2 minutes.
    5. Tip this over the chilled base. Chill in the fridge again for at least 30 minutes.
  • For the topping:
    1. Put the butter, chocolate, and sugar in a heatproof bowl. Melt by putting the bowl over saucepan with simmering water. Stir until well combined and smooth.
    2. Tip on top of the chilled filling and base. Cool completely, then chill in the fridge for at least 30 minutes, then freeze for about 3 hours.
    3. Cut into squares while still cold and hard otherwise they will breakup.
Note: You can substitute vanilla pudding powder for the custard powder.


Tuesday, 23 August 2005

Shortbread


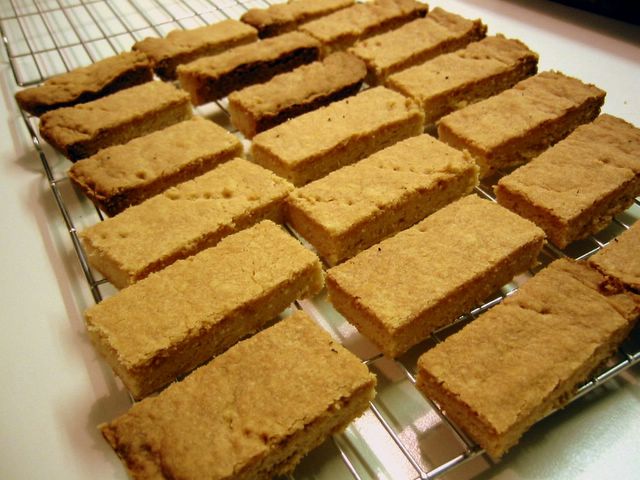
Don't they look like barges marching straight to your mouth? :LOL: What am I thinking?

My littlest one, J3, requested for shortbread since it's one of her favourite biscuits (cookies). I haven't done any shortbread in my life except for that Millionaire's Shortbread. This is very easy to make and can be varied according to one's texture preference. I used cornstarch for a melt in the mouth feel while if you want a bit more crunch use fine semolina. That's according to Sue Lawrence from whose Book of Baking cookbook I got this recipe. Some other versions use rice flour I'm not sure what the effect of that will be. I'm thinking of putting in pinipig (pounded rice) or puffed rice for added crunch, just not sure if it's going to make it over crumbly. You will hear of any triumphs or disasters here in case I make good of my 'threat'. ;)


Shortbread

250 g  butter - softened
115 g  [scant 2/3 cups] golden caster sugar (extra fine sugar)
225 g  [heaping 1 3/4 cups] plain flour
100 g  [1/2 cup + 1/3 cup] cornflour (cornstarch) or rice flour or fine semolina
  1. Preheat oven to 300°F/150°C/fan 130°C/gas mark 2. Butter a 13 x 9-inch baking pan.
  2. Beat the butter and sugar with an electric mixer until fluffy and light coloured (about 4-5 minutes).
  3. Sift in the flours into the mixture and mix by hand with a wooden spoon until just incorporated. Do not overmix.
  4. Pour into the prepared baking pan. With floured hands, press down the dough and pat level. Prick all over with fork.
  5. Bake for 45-50 minutes or until evenly golden brown.
  6. Remove from oven then cut into squares or fingers. Leave to cool for about 5-10 minutes then carefully remove each cut piece onto a wire rack to cool completely.

Thursday, 11 August 2005

Oatmeal Cookies


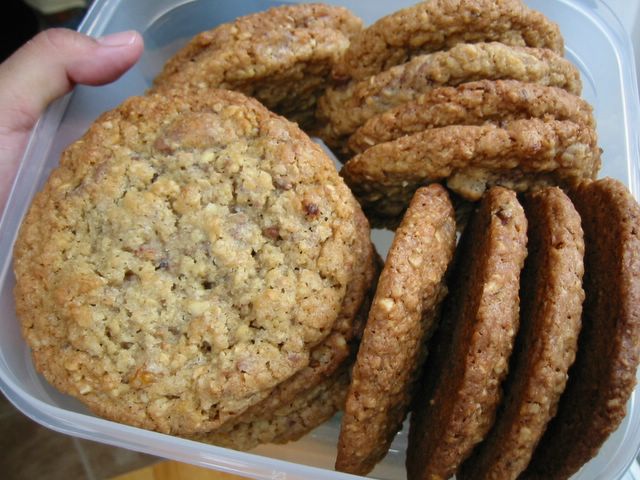
I've been itching to blog this and I just got my go ahead when Anne emailed me that she finally received my package as part of this month's EBBP event. Woohoo! I genuinely thought it got lost since the postman told me it will be in Sweden in 3 days, well she got it in 1 week! Serious slip in delivery time that is. I'm just glad it finally reached Anne and hope she liked it.

The mother and daughter team of Alisha delos Reyes and Susan Middleton made these oatmeal cookies at a US state fair and won the top prize. Problem is, I don't know which state or what year or what magazine I clipped the recipe from. A big thanks to them in coming up with these lovely cookies filled with morsels of apricot and chocolate chunks. And since I'm a nut lover the hazelnuts further endeared it to me.

I adjusted the recipe according to the preference of the main cookie customers in my family (meaning my kids). Originally they had white chocolates (Mec would love that!) but I subtituted milk chocs and reduced the salt plus altered the method a little bit. The dough was too soft to my liking after the final stir. Problem is, when it's too soft it melts easily once inside the oven resulting in flatter cookies. So I did what I usually do with my cookie dough - stuck it in the fridge (in the freezer actually since I'm in a hurry) for about 20-30 minutes until it's firm enough to handle. Sometimes I even put it back to the fridge after I formed them into balls - which I think results in even better cookie heights. With this extra step I sometimes use melted butter in the batter since I'll be chilling it anyway. If you forgot to take the butter out of the fridge way ahead of time it can be patience-trying waiting for it to soften. But thankfully I've solved that and I don't think the melting and chilling part is not detrimental to the taste of the cookie.

OT: All these talk of butter and batter reminded me of a tongue twister I learned in Grade 5. Yeah that long ago and I still remember it something along these lines:


Betty Botter bought a bit of butter.
But she said, "This butter is bitter."
"If I put it in my batter it will make my batter bitter."
"But a bit of better butter will make my batter better."
So she bought a bit of butter
Better than her bitter butter
To make her batter better


Oatmeal Cookies

250 g  [1 cup] unsalted butter - softened at room temperature
1 cup sugar
1 cup firmly packed light brown sugar
2 large eggs
1 tsp vanilla
1 1/2 cups all-purpose flour - sifted
1 Tbsp all-purpose flour (for dredging)
1 tsp bicarbonate of soda (baking soda)
1/2 tsp salt
2 1/2 cups porridge oats
1 cup finely chopped hazelnuts
1 cup finely chopped apricots
1 cup coarsely chopped white or milk chocolates
  1. Preheat oven to 180°C/fan 160°C/350°F.
  2. In a bowl combine 1 1/2 cup flour, salt and bicarbonate of soda until well mixed. Set aside.
  3. Toss the apricots with the 1 Tbsp flour in another container. Set aside.
  4. Beat together in a big bowl the butter, sugar, brown sugar, eggs, and vanilla at medium speed until well combined.
  5. Add in the flour mixture to the beaten butter mixture with a wooden spoon.
  6. Stir in oats and hazelnuts.
  7. Add in apricots and chopped chocolates. Mix well.
  8. Shape dough into 1 1/2-inch balls and flatten slightly. Place them about 2 inches apart on ungreased baking sheets.
  9. Bake for 11 - 13 minutes or until slightly moist in the centre and browned at the edges.
  10. Remove from oven and let cool for a couple of minutes before carefully removing from the baking sheets onto a cooling rack. Cool completely.
Note: If the dough is too soft, the baked result tends to be too spread out or flat. You can put the dough in the fridge for about 30 minutes before shaping them into balls. Or you can shape them into balls first then put in the fridge for the same amount of time or you can do both (chill before and after shaping into balls).


Wednesday, 10 August 2005

Millionaire's Shortbread

This is one homemade cookie that I was supposed to send to somewhere in the European continent as part of the EBBP#1 event. I baked it, sliced, packed and almost sent by post. Just so happened I forgot to include something in the box so I opened it again and saw that these delicate babies' topping and filling melted and smeared all over its plastic container. Not a very appetising sight. So I reluctantly removed it from my package. :sigh: Don't get me wrong this is a very nice cookie with your afternoon tea. I love it! If you use dark chocolate the more it will contrast with the sweetness of the dulce de leche and the relative blandness of the shortbread. Though if the temperature is too warm, it's best to put these in the fridge a few minutes before serving to avoid the choc and dulce from getting too runny. The only problem I can think of with chilling is that the 'bloom' of the chocolate might rise. These are light coloured spots on the chocolate which is actually the chocolate butter that separates when it's stored in a too warm place or if there is an extreme change in temperature. If yours has got this don't worry 'coz it's still edible and does not detract that much in the taste although it can feel grainy if there's too much.

As for the dulce de leche, you can substitute any caramel or toffee thick enough but spreadable. You can also make your own by cooking a whole can of condensed milk (not opened) in a simmering pot of water for about 2 hours. I don't know about you but I'm scared of trying (maybe if I'm desperate) for fear of explosions. I adapted this from Sue Lawrence's excellent Book of Baking - my favourite at the moment. Not sure why this is called "millionaire's". Maybe it makes you feel like a million bucks with the indulgent bites of the rich ingredients. ;)


Millionaire's Shortbread

450 g  [3 1/2 cups] plain flour - sifted
115 g  [2/3 cups] golden caster sugar (superfine sugar)
250 g  [1 cup] butter - softened

*For the filling and topping:
1 x 450 g  jar of dulce de leche
250 g  good quality milk or dark chocolate
  1. Butter a 13 x 9 inch baking pan. Preheat oven to 180°C/fan 160°C/350°F.
  2. Mix the flour and sugar in a bowl.
  3. Add in butter, kneading it in the flour mixture to form a dough. (This can be also done in a food processor.)
  4. Press the dough into the baking pan making sure to level it. Prick all over with fork.
  5. Bake in oven for 30 - 35 minutes or until pale golden brown.
  6. Remove pan from oven and cool for about 30 minutes.
  7. While it's cooling off, warm the dulce de leche either by: microwaving/steaming in the jar with the lid off *or* spoon into a saucepan and heat very gently.
  8. Once the pan (with shortbread) has cooled off, spread the warm dulce de leche evenly on top. Cool for about 30 minutes.
  9. Put a heatproof bowl on a saucepan of simmering water and let the chocolate melt in it.
  10. Spread it on top of the dulce de leche, gently spreading it to cover completely.
  11. Leave to cool completely before cutting into squares and removing from the pan.
*Note: You may substitute any thick caramel or toffee for the dulce de leche or make one yourself by cooking an unopened can of condensed milk in simmering water for about 2 hours.


Thursday, 7 July 2005

Muscovado Brownies


For industrial strength brownie lovers, I dedicate this one. (Am I not sounding like Master Yoda?) I found Sue Lawrence's Book of Baking at our local library and just wanted to try *everything* in that cookbook, forgetting that my ancient oven is not really up to scratch. But since the peculiar characteristic of burnt edges and undercooked middle is perfect for brownies so I gladly made this one. It is indeed intensely chocolately and if that's what you fancy then welcome to this post. Maybe next time I'll try to play around with the chocolate and sugar proportions to tame the chocolate a little bit. My previous brownie recipe of Banana Nut Brownies is not far off from this. I imagine this would be great with milk, ice cream, strong tea or even stronger coffee.


Muscovado Brownies

350 g  dark chocolate (60-70 per cent cocoa solids)
200 g  unsalted butter
250 g  [1 1/4 cups] dark muscovado sugar
3 large eggs
70 g  [2/3 cup] plain flour - sifted
1 tsp baking powder
1/4 tsp salt
  1. Preheat oven to 170°C/fan 150°C/325°F. Butter bottom and sides of a deep 9-inch square baking pan.
  2. Melt chocolate and butter in a heatproof bowl over simmering water in a saucepan. Stir and mix until smooth.
  3. In a container or bowl, combine well the sifted flour, baking powder, and salt. Set aside.
  4. In another bowl, put in the sugar, making sure to break up lumps if there are any.
  5. Add eggs one at a time, beating after each addition. Add this to the melted chocolate; combine well.
  6. Add in the flour mixture, gently folding together.
  7. Pour into the prepared baking pan and bake for 35 minutes or until a toothpick inserted in the middle comes out with moist crumbs. DO NOT OVERBAKE.
  8. Remove from oven and let cool for about 30 minutes. Cut into squares or desired serving sizes in the pan before allowing to cool completely. Remove from pan.

Wednesday, 13 April 2005

Banana Nut Brownies

Another brownie recipe. Blame the bananas. My abhorrence to throwing away overripe bananas from our fruit basket has led me to look for alternative uses to it all the time. Any new recipes are welcome. If the family loves it, it will become a classic to come back to over and over again. Otherwise, it's been nice trying them. This one is something of a delightful surprise whose taste, texture, and smell I truly truly love. The banana gives a wonderful aroma blended with the characteristic wonderful whiff of the chocolate while the muscovado sugar lends a treacle-like flavour. My kids though, find the flavours a bit too strong. For their benefit (maybe just maybe), next time I bake this I have to reduce the chocs and probably the sugar. But if you like your brownies very chocolatey, a little fudgy, crumbly, and quite moist then this is for you.

Adapted from BBC GoodFood Magazine's 101 Cakes & Bakes.


Banana Nut Brownies

175 g  butter - cut into pieces
300 g  [1 2/3 cups firmly packed] light muscovado sugar
150 g  dark chocolate - broken into pieces
100 g  [3/4 cup] nuts - chopped
3 eggs - beaten
1 cup mashed bananas (about 2-3 bananas)
100 g  [3/4 cup] self-raising flour
1 Tbsp cocoa powder [optional]
1/2 tsp baking powder
  1. Preheat the oven to 180C/fan 160C/350F/gas mark 4. Butter and line a 7 x 11-inch baking pan with greaseproof paper.
  2. Melt butter, chocolate, and sugar in a heatproof bowl over a saucepan of simmering water. Remove from heat.
  3. Sift flour, cocoa [optional], and baking powder in a separate bowl. Mix well.
  4. Add in nuts, mashed banana, and eggs to the chocolate mixture.
  5. Fold in the flour mixture to the chocolate-banana mixture.
  6. Pour batter into the lined baking pan and bake for 40 minutes or until firm in the centre.
  7. Cool in the pan; turn out and cut into squares.

*Update 26/05/07: Reduced chocolate from 175 gm to 150 gm. Reduced baking powder from 1 tsp to 1/2 tsp. Increased baking time from 35 mins. to 40 mins.

Thursday, 9 December 2004

Interesting Finds

I know, I know, you must be sick and tired of me saying Spanish this and that. But indulge me one last time, see the picture above? I got them from a grocery shop in Valencia. They're chocolate coated round-with-a-hole-biscuit (cookie) branded as Filipinos. Mabuhey! :-) They come in varieties coated with dark chocolate, milk chocolate, and white chocolate.

The first time I saw this years ago when my husband brought one from a business trip I was taken aback. Actually offended ! Why would anyone name a biscuit after us? Grrrrrr! To rub in our flat nose that we're brown skinned sweet nice smelling delicious like those biscuits? Uh, that doesn't sound bad really, does it? Then I thought it's a good product judging from the way me and my kids and their friends fight over it. (Waaah, nothing left in the fridge!) So me thinks it's not really dreadful being named after a good biscuit. I researched the origin of this in the internet several years back and there was a story that the recipe was bought by Nabisco from a baker somewhere in Spain who named his creation after his Filipino friends who like their namesakes are brown and very nice. Well not bad, afterall there are a lot of things we call after certain group of people - men wear 'Amerikanas', we make lantern with 'papel de Japon', we eat French fries, French bread, Swiss cheese, Belgian chocolate, Chinese dim sums, English Patis ... ooopss erase that last one. I was wondering though what's with the hole in the biscuit ??


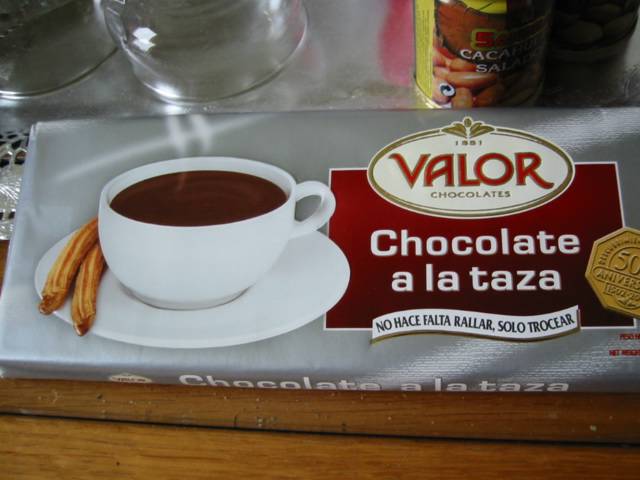
I've got Cadbury drinking chocolate powder in my cupboard, the 'tablea' drinking from the Phils. is shaped like a big pill, some of Hershey's drinking chocs are in gooey liquid form but this is the first time that I've seen it shaped into a bar (see above).

Sunday, 21 November 2004

IMBB #10 - Holiday Cookies

Holiday Date-Nut Cookies

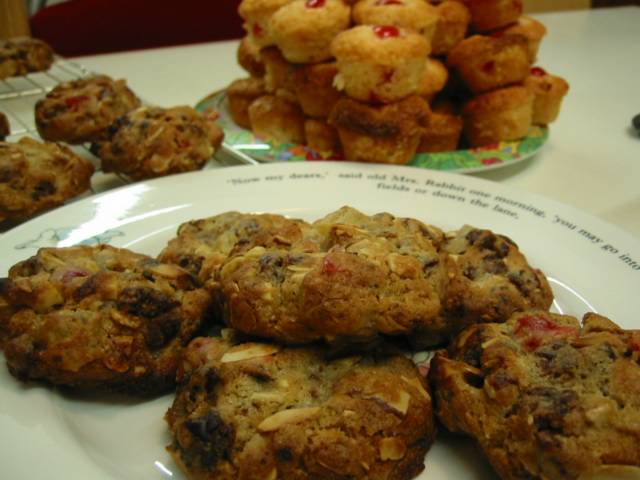
This month's 'Is My Blog Burning?' food blogging event number 10 is themed holiday cookies. A virtual cookie swap hosted by Jennifer the Domestic Goddess. I decided to make two cookies, well one is a real cookie while the other is "sort of" a cookie, a micro muffin actually.

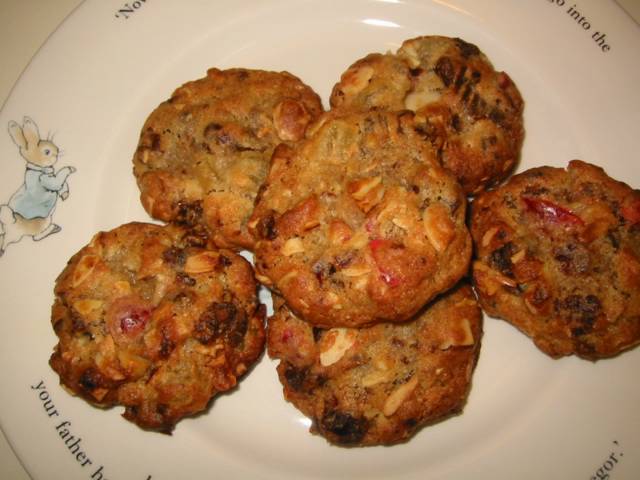
The one in the foreground in the picture above is a recipe I adapted from Epicurious. I wanted something chock-a-block with nuts and fruits. Something that would be on a theme with the hedonistic indulgence we go through every year during the Christmas season. This one is really packed with them no doubt about it. Almost like a fruit cake or Christmas pudding except in a cookie form. It's got so much nuts and fruits that was soooo hard to stir it at the end stage. Actually I was not stirring, more like pushing the fillings into the batter. But the result is a rich, crunchy at the edges, a little moist in the middle cookie (or biscuit as they call it around here in UK). I just found it a tiny bit sweet, maybe I should reduce the sugar next time or maybe it's the pineapple? Also, I will reduce the temperature next time 'coz I find it a bit too brown at the edges (I actually burned some of them) or maybe it's my oven? Yeah right, blame the oven!


Holiday Date-Nut Cookies

Holiday Date-Nut Cookies

500 g  pitted dates - chopped
1 2/3 cups [250 g] chopped candied pineapples
1 1/2 cups [200 g] coarsely chopped Brazil nuts
2 cups [250 g] slivered almonds - lightly toasted
2 1/2 cups flour
1 tsp baking soda
1 tsp cinnamon
1 tsp salt
1 cup [250 g] unsalted butter - room temperature
1 1/2 cups sugar
2 large eggs
  1. Preheat oven to 400°F/200°C/fan 180°C/gas mark 6. Grease cookie sheets if they are not non-stick.
  2. Combine fruit and nuts in a bowl. Add 1/2 cup flour and mix to separate pieces.
  3. Combine remaining 2 cups flour, baking soda, cinnamon, and salt in a small bowl. Mix well.
  4. Beat butter in a large bowl until light. Gradually add sugar, beating until fluffy.
  5. Beat in eggs 1 at a time.
  6. Fold in dry ingredients into the butter mixture.
  7. Mix in fruits and nuts.
  8. Form into balls about 1 1/4-inch in diameter, flatten a little bit and put in the prepare cookie sheets spacing 1 inch apart.
  9. Bake until cookies are golden brown, about 10 minutes.
  10. Cool 2 minutes in the cookies sheets. Transfer to rack and cool. (Can be prepared 1 week ahead. Store in airtight container.)


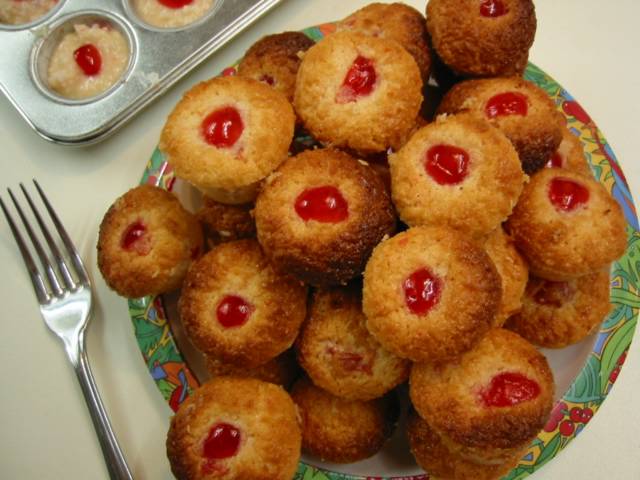
This next one is very easy peasy lemon squeezy. I added chopped glace cherries to give a 'holiday' look and feel. This recipe is from my sister-in-law in Toronto, Canada who very kindly give me lots of recipes and pointers in cooking and baking.

I was supposed to bake this as a cookie but I found the batter too runny very much suited to a muffin pan which was the intention of the recipe. I do not want to fiddle with the recipe because I know the proportion has been well tested by my SIL. Good thing I found 2 micro muffin pans in my cupboard. It is indeed micro because the diameter of the top is only 1 inch. I didn't have any muffin liners (at these sizes I don't know where I can get them). So I greased them and floured well. The resulting macaroons were absolutely cute! And most of all really scrumptious.


Coconut Macaroons

Coconut Macaroons

1/4 cup melted butter
1/2 cup [100 g] granulated sugar
2 eggs - beaten
1 tsp baking powder
2 cups [200 g] dessicated coconut
1 can condensed milk (400 gm)
1 tsp vanilla
1/2 cup [70 g] flour
1/2 cup chopped glace cherries (optional)
glace cherries - sliced into four lengthwise (optional)
  1. Preheat oven to 350°F/180°C/fan 160°C/gas mark 4.
  2. Mix melted butter, vanilla, eggs and condensed milk.
  3. Add in sugar, dessicated coconut, flour, and baking powder.
  4. Pour into lined or greased and floured muffin pans. Top with a quartered glace cherry.
  5. Bake for 12-15 minutes for micro muffins or 20 minutes for normal sized muffins.