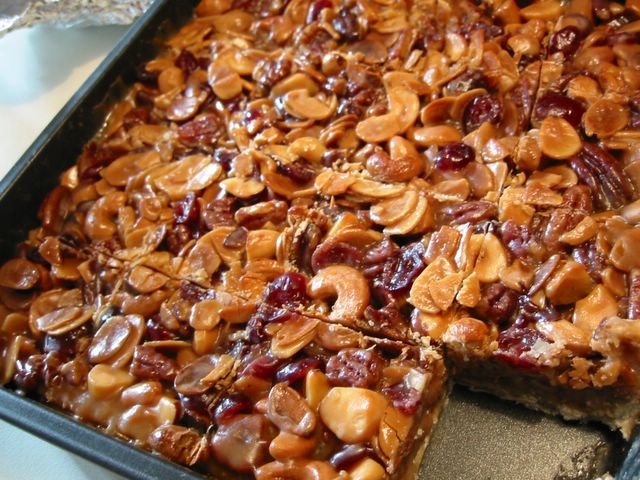
'Chocolate by Brand' is the current theme of one of the longest running event in the blogging world. David Lebovitz hosts this 27th edition of Sugar High Friday. He encourages us to make a dessert out of our chocolate bars and write about them.
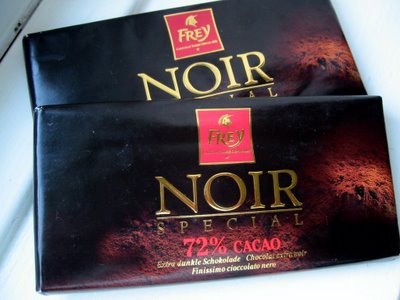
The chocolate bars I nabbed is by Frey - dark variety with 72% cocoa content. Wow, that's the highest I've used for cooking. Why I got it? It was on sale at the local Migros grocery near my sister's place when I visited her in Geneva a few months ago. You know me, I love value for money that means anything on sale!
Unlike some 70% chocolate I had before, this one is very deeply dark brown almost black actually. I savoured a small bite of it that showed it had smoothness, just the right amount of sugar and creaminess, a hint of coffee, with a little bitterness in the finish. Although I couldn't really tell how it would compare to one of those single-estate-organic-super-high-end types that your get from uber cool chocolate boutiques. All I can say is I like its smell, colour, and taste. Now let's see how it would fare when cooked.
I wanted to make something uncomplicated that would show the real qualities of chocolate. First thing that came to mind was chocolate truffles which I thought was perfect but then I've already posted one and for SHF, too! So out came this recipe from my burgeoning clippings from the BBC GoodFood magazine. It looks simple enough until I read closely about 'finely chopped' and 'crushed'. Turned out it requires more elbow grease. Oh well, things I have to do to have my sugar fix. :) The recipe originally asked for dried apricots but I bet any dried or candied fruit would be lovely in it. Things like cherries, pineapples, cranberries, even crystallised ginger! I did not include any chopped nuts because I thought there's too many things in it already. Maybe next time I'll lose the ground almond and put in the nuts. The chocolate itself had to be sufficiently chilled after melting to make it easy enough to mold into a log. Once you've done that the rolling on the crushed biscuits is easy peasy.
How did it taste? Well, the honey had a definite influence on it so other honey flavours would give it a different slant (even golden syrup would be interesting). Despite the number of distractions on this log (did I say I'm making something uncomplicated?), the chocolate still shone through. Dark, very slightly bitter, at the same time meltingly smooth in the mouth. Such a nice change from the gritty chocolates my husband brought home last Christmas.
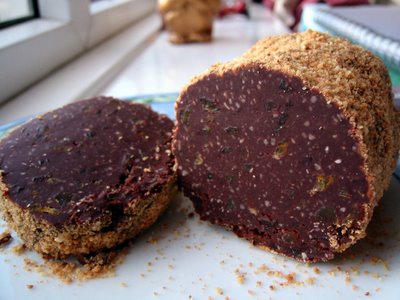 Chocolate Salami
250 g dark chocolate or combination of milk and dark chocolates
100 g butter
3 Tbsp clear honey
100 g ground almonds
100 g dried or candied fruits (apricots, cherries, etc.) - finely chopped
50 g toasted nuts (optional) - finely chopped
100 g amaretti biscuits - crushed
- Melt chocolate, butter and honey in a heatproof bowl over simmering water in a saucepan.
- Remove from heat and add almonds, toasted nuts (if using), and dried fruits.
- Cool completely and chill in fridge for about 1-2 hours until it is of dough-like consistency.
- Shape into a log (about 2 inches thick) and roll on crushed amaretti biscuits.
- Wrap in greaseproof paper and again tightly in foil.
Chill overnight in fridge.
- Before serving slice into rounds with sharp knife.
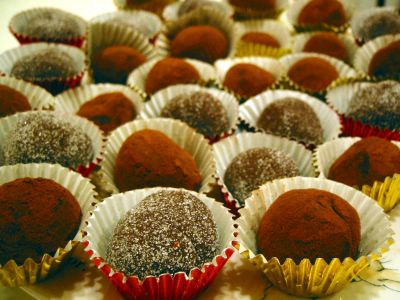 Johanna of the Passionate Cook was very enthusiastically encouraging us to create one of the more lusciously delicious concoctions man has ever created - chocolate truffles. I've always wanted to make one of these little pieces of delight. The sheer sensation of creamy melting chocolate in my mouth sealed my decision to participate in this 25th edition of the SHF.
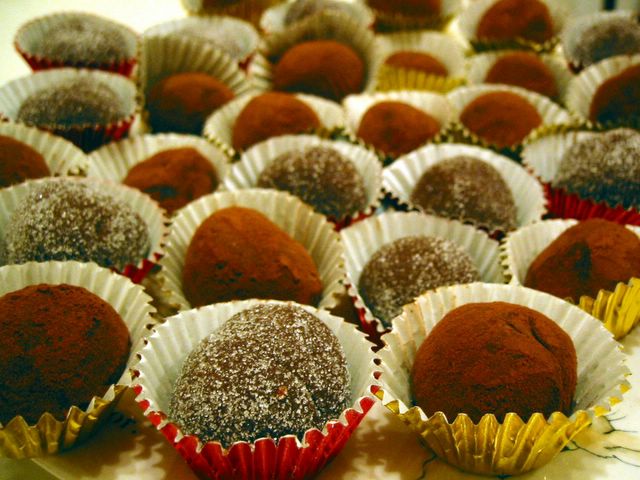
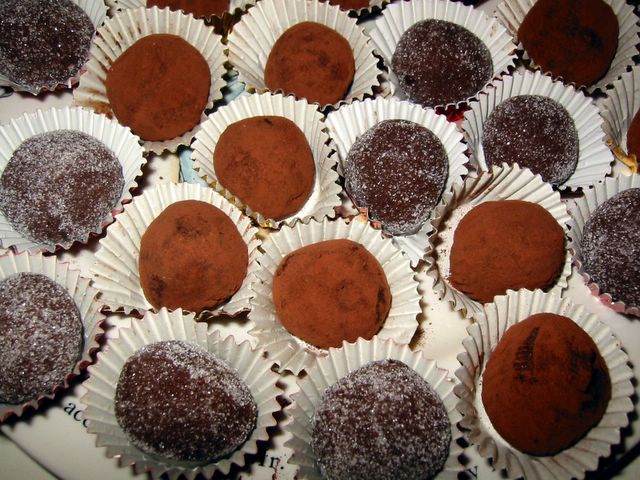
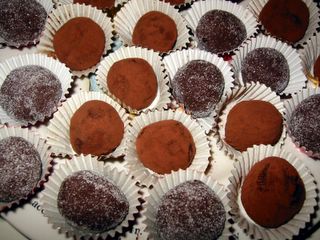
I wanted to create truffles that my kids would want to eat. So bitter chocolate is out while a little bit of sugar is in. This recipe I adapted from Phil Vickery's A Passion for Puddings cookbook was a little bit unusual since it uses condensed milk. I was a bit skeptical if it will be as meltingly luscious as ones made with double creams but it did convincingly deliver. The orange liquor had to be replaced with just normal orange extract for my kids' sake and although I didn't have any orange zest it was orangy enough to our taste. The ultimate taste was whether my kids will eat it. Well, as of this time they have eaten one each and reached for more. They naturally gravitated for ones rolled in vanilla sugar so I'll definitely remember that next time I make more of these moreish cloud of chocolate heaven.
Chocolate & Orange Truffle
200 g dark chocolate (70% cocoa solids)
300 g condensed milk
3 Tbsp double cream (heavy cream)
2 Tbsp orange liqueur or 1 tsp orange extract
finely grated zest of one orange (optional)
cocoa powder or icing sugar or vanilla sugar
- Melt chocolate, double cream, and condensed milk in a heatproof bowl over simmering water in a saucepan.
- Mix in the orange liqueur or orange extract and zest (if using).
- Remove from heat and cool completely to room temperature.
- Cover and chill in the fridge for about 4 hours or overnight.
- Spread cocoa powder or sugar on a wide plate.
- Have a bowl of iced water in your working area.
- Using a teaspoon, scoop a teaspoonful of the chocolate mixture and shape into balls using your hands then roll on the cocoa powder or sugar. Repeat until you have used up all the truffle mixture. Dip your hands from time to time in the iced water to cool it down and prevent the melting of the truffles while you're rolling it.
- Chill in the fridge.
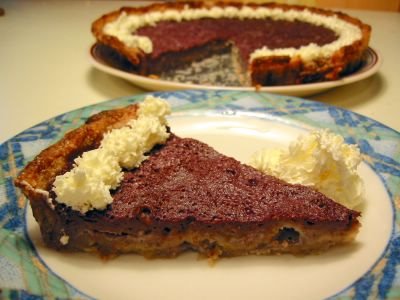 First thing that came to my mind for the current SHF 18 are one of those liquour-laced cakes or desserts. But I thought why put a puny little amount when you can have it as a main ingredient. Thanks to a recipe I found in Anne Willan's fabulous book, A Kitchen in Burgundy, I was able to do a certainly interesting dessert.
As usual I made some blunder. Instructions clearly said to bake blind but my eyes were wide open when I did - I forgot the baking beans! So the pastry was too puffed up to my liking but no matter it still did the job. In fact, it was a very nice butter biscuit/cookie base so good that I balled up the excess and baked into cookies.
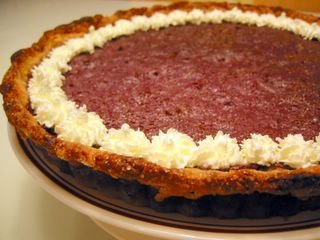
As for the filling, it didn't quite looked like the sea-of-tranquility smooth as that in Anne's book's picture. More like the Pink Floyd-y dark-side-of-the-moon pockmarked. But I was more surprised by the taste. I was preparing to dislike it or just have a passable 'okay' kind of flavour. However, it was only a little alcoholic, mildly bitter, and had an unexpected grape-y flavour (well *duh* wine is made from grapes for pete's sake!). I used (well actually used up left-overs) Merlot wine although Anne suggested to use Pinot Noir for a more fruity flavour. I have to say this is a keeper of a recipe although I definitely have to fiddle with the sugar in the pastry probably change it to caster sugar maybe even to icing sugar to remove the grittiness. And most of all to remember those blasted baking beans!
 Red Wine Tart
*Sweet Pastry (Pate Sucree)
175 g [1 1/2 cup] plain flour
100 g [7 Tbsp] butter - softened
3 egg yolks
100 g [scant 1/2 cup] caster sugar
1 tsp vanilla
*Filling:
2 tsp cornstarch
2 tsp ground cinammon
2 eggs
100 g [1/2 cup] sugar
250 ml [1 cup] red wine
1/2 cup double cream for decoration
- For the pastry:
- Mix salt and flour in a bowl. Cut in the chilled butter with a pastry cutter or with 2 butter knives. Rub butter in with your fingers until mixture resembles coarse breadcrumbs.
- Combine egg yolks and vanilla in a small bowl. Sprinkle this mixture to the butter-flour mixture and gather the dough into a ball.
- Knead and press dough between your hands just enough to hold it together. Do not over knead.
- Wrap in plastic and chill for 30 minutes. Preheat oven to 375°F/190°C/fan 170°C.
- Roll out into an 11-inch circle. Line and press into a 23cm [9-inch] fluted tart pan. Prick base with fork.
- Put an aluminium foil (shiny side down) on the pan and fill this with dry or ceramic beans.
- Bake for 15-20 minutes. Remove foil and beans and bake for another 5 minutes. Cool.
- For the filling:
- Combine cornstarch and cinammon and mix well.
- Whisk egg gently in a bowl and add the cornstarch mixture. Keep froth to minimum.
- Stir in the wine gently.
- Place the tart pan on a baking sheet. Put this on the oven shelf and while it's partially pulled out gently pour the filling in the pan. Push it gently in the oven.
- Bake for 20-25 minutes in 375°F/190°C/fan 170°C.
- Remove from oven and cool 5 minutes. Unmold. Cool completely.
- Before serving whip double cream until stiff peaks. Pipe on the edge of pie with a star tip.
 What a great idea to have a 'Sugar Low Friday' for the 15th edition of SHF. This time it's hosted by that lovely food blogger Sam in SFO whom I met a few months ago. As she said, after all the excesses most of us had during the Christmas holidays it's about time to balance off some of these rich food with something low in fat, low in sugar.
Actually my first attempt in this genre was with some cinnamon apple sauce mixed with yoghurt and whipped egg whites. It was really very low fat with no sugar and so healthy but ... bleccchh! It was so sour and had that strong taste of the egg whites that I didn't bother to let my other family members taste it. Down it went to the rubbish bin.
As the deadline came looming, I turned to my trusty Delia Smith cookbook (How To Cook Book 3) to give me one dessert that I know will surely work. For me, she is that reliable ... and she sure was! A bonus in this recipe is that it doesn't have any flour, perfect for people with wheat allergies. I used Fruisana in place of the 'granulated sweetener'. It's actualy fructose which is an all-natural fruit sugar extracted sweetener that's at least 30% sweeter than ordinary sugar. So it doesn't have that unpleasant aftertaste like that in artificial sweeteners.
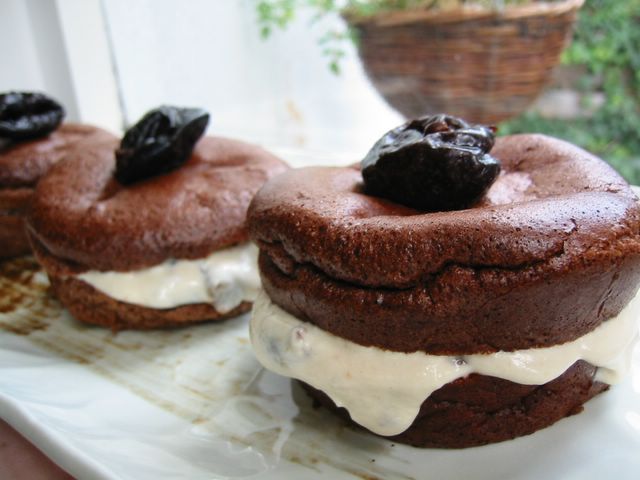
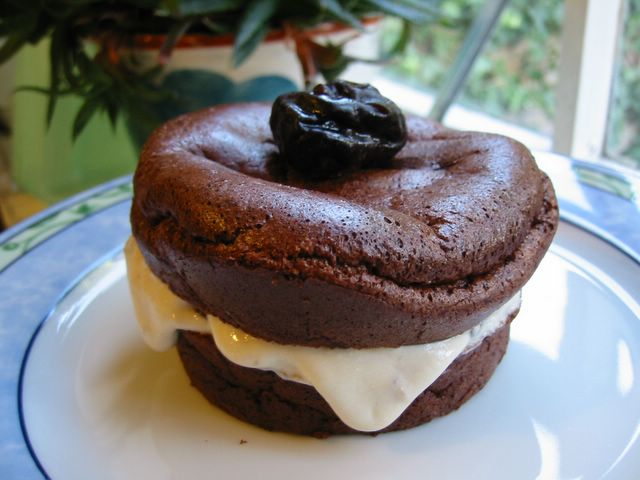
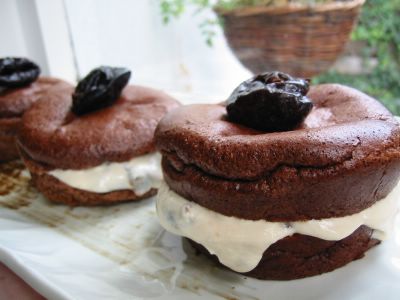
The cakes itself don't taste much really 'coz there's not much sugar in it. But combined with the creaminess of the creme fraiche filling and the natural sweetness of the rum-soaked prunes, it was gorgeous. Very very nice indeed! Definite thumbs up for this one. :)
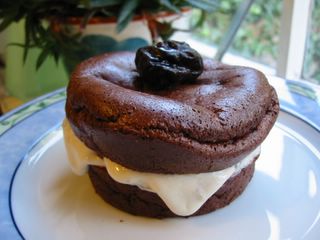 Squidgy Chocolate Cakes with Prunes
10 g [2 Tbsp + 1 tsp] cocoa powder
3 large eggs - separated
1 1/2 Tbsp granulated sweetener
oil for greasing
*For the filling:
12 ready-to-eat prunes
3 Tbsp marsala or rum or brandy
3 Tbsp low fat fromage frais or creme fraiche
2 tsp granulated sweetener (or to taste)
1 tsp chocolate or vanilla extract
- Put the marsala and prunes in a small saucepan. Heat the sauce pan and bring it up just to simmering point. Remove from heat and leave to cool. You may put this in a covered glass or plastic container and leave to soak for a few hours or overnight in the fridge.
- Preheat oven to 180°C/fan 160°C/350°F/gas mark 4. Lightly grease 4 ramekins - about 1.5 inches deep with a base of 3 inches.
- Beat the egg yolks in a bowl with the sweetener for about 1 minute.
- Sift the cocoa on the egg yolk mixture and mix well to blend.
- Beat the egg whites in another bowl until soft peak stage.
- Using a metal spoon, mix in about 1 Tbsp of the beaten egg whites to the cocoa batter to lighten it. Then gently fold in the rest of the egg whites.
- Pour and divide into the 4 ramekins.
- Bake for 13-15 minutes or until the top is crusty but still wobbly.
- Remove from oven and leave to cool. As soon as it's cool enough to handle, turn out from the ramekins by running a knife along the edges then prying it loose. Leave it to further cool on a wire rack.
- While the cake is cooling, mix the creme fraiche, sweetener, chocolate extract, and about 1-2 tsp of the rum marinade of the prunes (careful not to add too much or it will become runny).
- Reserve 4 of the prunes, chop the rest of it, then mix these to the creme fraiche mixture.
- Split the 4 cakes horizontally like a bun. Divide the creme fraiche filling among the lower half of the 4 cakes. Cover with the top half and then top with the reserved a prune in each.
Tagged with:
SHF # 15 +
Low Sugar
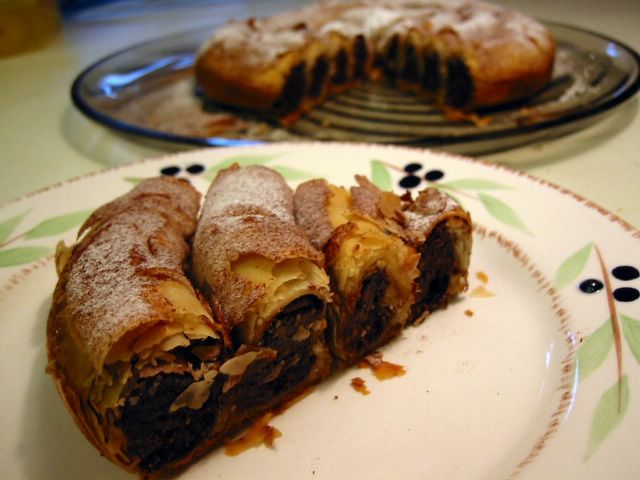
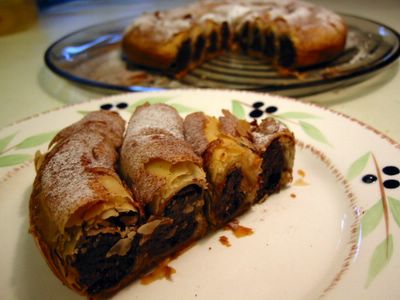 The current SHF hosted by Kelli at Lovescool is all about dark chocolates. We have to do and blog about a dessert or anything sweetish with it as an ingredient. Chocolate? No sweat. But, and a big but, she emphasised that it should be something different from what you normally do. Okay that got me thinking. Since chocolate is probably the most favourite dessert ingredient of anyone in the planet - I've done cakes, cookies, bars, countless brownies, muffins, etc. that I couldn't think of anything else to do with it. Hmmm, this is a job for a library visit. And away I went ...
Christine France's recipe in her book Chocolate Dreams caught my eye because it just is different, besides the fact that I haven't made anything like it, and also because I have all the ingredients at home. That made me doubly happy 'coz I don't have to spend anything extra. Well, to tell the truth I was semi-desperate to find a recipe for my filo pastry that's been sitting in my freezer for months. I hate waste and was afraid that it would expire before it can grace our table and stomachs.
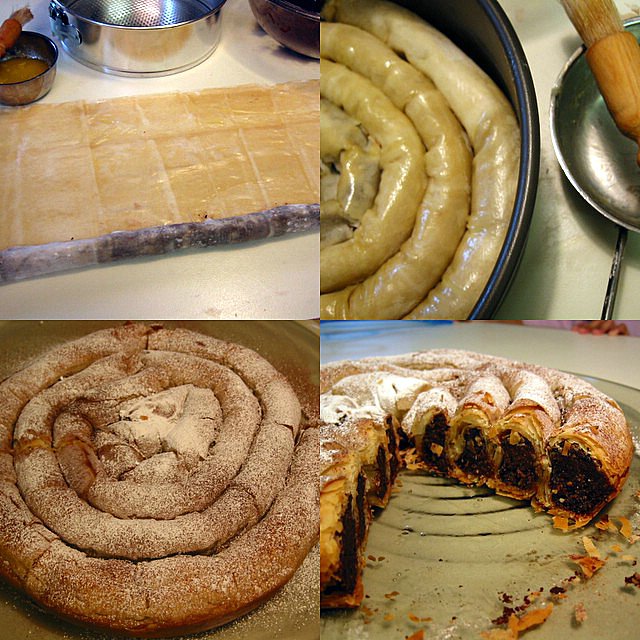
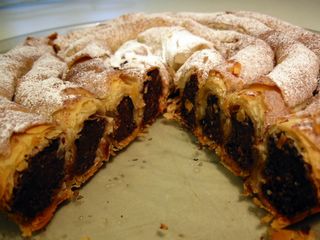 The size of the baking pan had to be changed to a smaller one since the pastry when rolled and coiled did not fill it up completely. I don't think it was meant to be donut-looking. Or maybe it's because about a quarter of the filo pastry was already soggy hence I couldn't include it. Anyways, it was quite easy to make, rolling the filling in the pastry a doddle, with only the coiling part in the pan making me work carefully 'coz I was afraid the pastry would break.
Taste wise it was good at least for me since I love nuts. The texture and pastry reminded me of baklava that got me thinking this must be a variation of that type. But I do love it in a very chocolatey-nutty way.
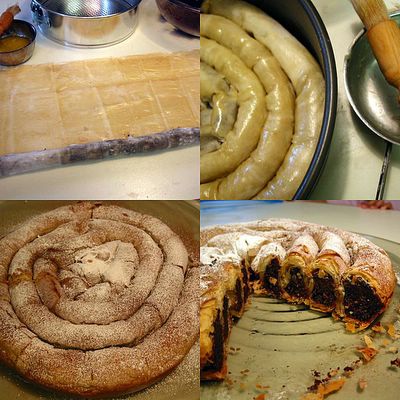 Chocolate Almond and Date Filo Coil
*Filling:
115 g dark chocolate (about 70% chocolate content) - broken into pieces
75 g unsalted butter
100 g [1 cup] ground almond
115 g [3/4 cup] chopped dates
75 g [1/2 cup] icing sugar (confectioner's)
1/2 tsp cinnamon
*Wrapper:
275 g filo pastry (about 6 sheets)
50 g unsalted butter - melted
*Garnish:
cocoa powder
cinnamon
icing sugar (confectioner's)
- Preheat oven to 180°C/fan 160°C/350°F/gas mark 4.
- Grease a 20cm (8-inch) round baking pan (springform or loose-bottomed would be better).
- Mix icing sugar and cinnamon in a bowl. Set aside.
- Toss the chopped dates in the ground almond making sure to separate the date pieces while doing so. Set aside.
- Melt chocolate and butter in a heatproof bowl over a pan of simmering water. Stir until well combined.
- Remove from heat and stir in the icing sugar mixture.
- Add the ground almond and dates. Mix until well combined. Cool.
- On a clean surface, layout one of the filo pastry sheets. Brush lightly with melted butter.
Put another sheet on top, repeat brushing of melted butter.
- Divide the chocolate mixture into three.
- Form one portion into a sausage-like log near the edge of the lower part of the long side of the pastry sheets. Roll up sheet to cover the chocolate, making sure to keep it even, all the way to the end.
- Coil this inside the round baking pan. Repeat with the other sheets until you have filled it all up.
- Finally, brush top of coiled pastry with melted butter. Bake in oven for about 30-35 minutes.
- Remove from heat, cool a little then remove from pan. Cool completely.
- Before serving, sift or sprinkle a little cocoa, cinnamon, and icing sugar on top.
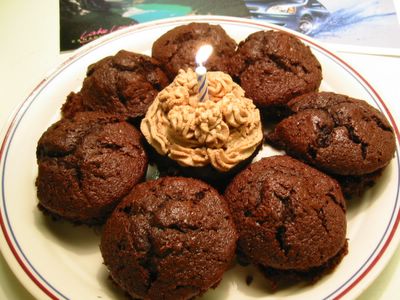 Talk about crisis, this post for the Sugar High Friday 11 (coffee) is so late. I meant to have an entry for SHF at the same time celebrate the 1 year anniversary of my blogging. I just hope Ronald would be kind enough to include this in the round up.
Yep folks, it's been 1 year (actually I started 8th Aug 2004) since I decided to join the horde of internet addicted people punching their keyboards for inane ramblings, recipes, experiences, rants and raves in the hope that at least 2 of their relatives and pets would read it. I have enjoyed this blogging experience immensely since. Not only did I get to record all my recipes (which is the raison d'etre of this food blog), hits and misses in the kitchen, but most of all I got to meet new online friends. Some of whom I've met, some I now harangue on the phone. ;)
As for the recipe, I took the easy way out (I'm in crisis remember!) and baked an easy cupcake also so I can stick a happy anniversary candle on it which J3 enjoyed blowing out over and over again. I ran out of paper liners so the soft moist cupcakes were practically falling apart when I pried them from the baking pans. :sigh: Even the icing joined in the crisis making itself overbeaten as reflected in all its lumpy glory. But that's okay, it still tasted great. Oh the cupcakes, I adapted them from a recipe in the Seasoned Cooking site. It's got that deep chocolatey-coffee flavour with a hint of cinnamon that I adore. Nice! And the delish icing is from the lovely Stel of Baby Rambutan. I just added just a tad bit more sugar and reduced the coffee. Regardless of all the problems, I would still do this cupcake again.
Mocha Cupcakes
1/2 cup boiling water
1 Tbsp instant coffee powder
1/2 cup melted butter
1 cup granulated sugar
1 egg
1 1/2 tsp vanilla
1/2 cup sour cream
1 1/3 cups flour
1/2 cup cocoa powder
1 tsp baking powder
1/2 tsp bicarbonate of soda (baking soda)
1/4 tsp salt
1/4 tsp ground cinnamon
- Preheat oven to 180°C/fan 160°C/350°F. Line a 12-hole muffin pan with paper muffin liners.
- Dissolve instant coffee in the boiling water. Let cool and set aside.
- Combine in a bowl - flour, baking powder, bicarbonate of soda, salt, cinnamon, and cocoa powder. Mix well.
- Beat the melted butter and sugar until well combined.
- Add the eggs, vanilla, and sour cream. Beat until well mixed.
- Using a spoon, stir in half of the flour mixure.
- Then add all the coffee mixture. Mix.
- Finally add the rest of the flour mixture. Stir until well combined.
- Spoon into the lined muffin pans.
- Bake for 20 minutes or until a toothpick inserted in the middle comes out clean.
- Remove from the pan and cool completely.
- [Optional] Frost with your favourite icing.
Mocha Cream Icing
1 cup whipping cream - chilled
1 1/2 Tbsp caster sugar (extrafine sugar)
1 tbsp cocoa powder
1/2 tsp instant coffee powder
- Chill the bowl and metal whisk (or electric mixer attachment) first before using.
- Mix all ingredients in the bowl and beat with an electric mixer at high speed until beater marks form (watch closely).
- Continue beating until stiff peaks form. Do not overbeat or the cream will be lumpy.
- Spoon or pipe decoratively on cake.
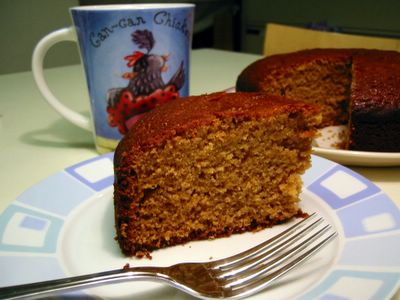 As you may have noticed by now, I'm partial to recipes that has few ingredients and/or easy and simple to make. The recent announcement of the current Sugar High Friday theme of honey, which by the way is hosted by Nic of Bakingsheet, got me scouring my cookbooks. Luckily the BBC GoodFood Magazine's 101 Cakes and Bakes yielded this one-saucepan simple and easy cake. But don't let its simplicity fool you for it resulted in a very moist and moreish cake perfect for afternoon tea. The nice thing about it is you can change the taste by using different flavoured honey instead of the usual clear one. You can have flavour as mild or as strong as you like depending on the honey you use. My work colleagues whom I gave a generous part of this cake gave it a resounding thumbs up. This is a definite keeper of a recipe.
Devonshire Honey Cake
225 g unsalted butter
250 g honey
100 g dark muscovado sugar
3 large eggs - beaten
300 g [2 1/4 cups] self-raising flour
2 Tbsp honey for glazing
- Preheat oven to 160°C/fan 140°C/300°F/gas mark 4. Grease and line a 20 cm/8-in round loose-bottomed baking pan.
- Melt butter, honey, and sugar slowly in a saucepan. Boil for one minute. Leave to cool.
- Beat in eggs one at a time in the saucepan.
- Add in the flour; mix well.
- Pour into the pan and bake for 50 minutes or until cake is golden brown and spring back when pressed.
- Turn out the cake onto a wire rack. Warm 2 Tbsp honey in a small saucepan and brush over the top of the cake to glaze. Leave to cool.
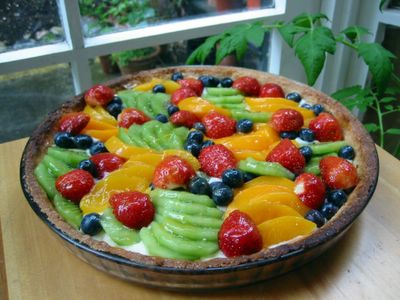
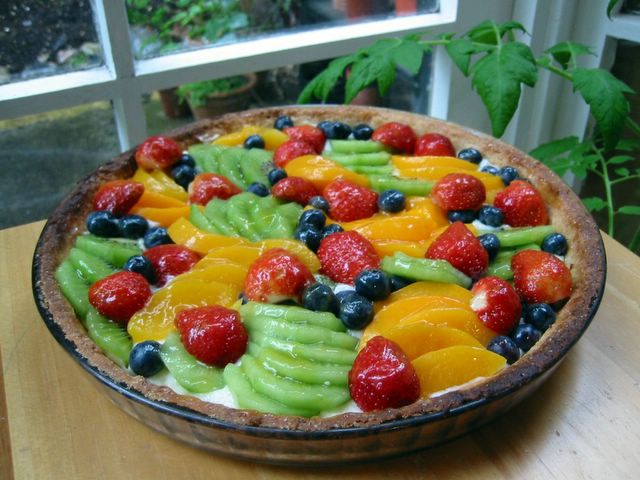
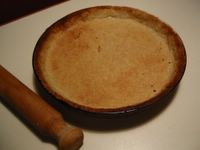
This is probably the worst food blogging event I've done. Not the theme of course (which by the way is tart), but my entry. I just can't hack this tart making more specifically the tart base. Why my first attempt was a resounding disaster because my tart almost burnt to cinders. The second one almost met the same fate. :sigh: My ancient oven seems to have a lot of hot spots.
The biscuit-like base was actually good which should be crunchy and on the brittle side but it got sooo hard when I made the mistake of chilling the whole thing. I was already contemplating on borrowing my neighbor's chainsaw to give myself a slice. Then there's the case of the pastry cream (creme patisserie) which tasted sort of ... ah ... 'cheap'. It must be the vanilla or maybe I should have used single/light cream instead of milk. I don't know, it just doesn't taste right. The only consolation I have is the sight of the fresh fruits arranged glistening on top. Really nice.
It only proves that I really learn a lot from these food blogging events. Lesson for today is - buy a new oven ! :lol:
[TV announcer lilting voice] This edition is brought to you by Red Beard at Life in Flow, A French Kitchen in Burgundy by Anne Willan for the tart base and French Cooking Made Easy (it's not bloody easy!!) by the Australian Women's Weekly. If you're masochistic enough to want to torture yourself, here's the recipe:
Fresh Fruit Tart
*For the sweet pastry (pate sucree):
1 1/2 cups flour
1/2 cup sugar
3 egg yolks
1 tsp vanilla
100 gm chilled butter
*For the pastry cream (creme patisserie):
1 1/4 cups milk
3 egg yolks
1 Tbsp flour
1 Tbsp cornflour
1/4 cup caster sugar (superfine)
1 tsp vanilla [optional]
*Topping:
sliced fresh fruits
3 Tbsp apricot jam
1 Tbsp water
*To make the base:
- Preheat oven to 200°C/fan 180°C/400°C/gas mark 6.
- Mix flour and sugar in a bowl. Cut in butter with a pastry blender or two butter knives until they resemble coarse breadcrumbs.
- In another bowl, gently mix egg yolks and vanilla. Add little by little into the flour mixture while tossing and mixing with a fork.
- Press and squeeze the mixture into a ball (if needed sprinkle a few tablespoon of water). Wrap in plastic film and refrigerate for 30 minutes.
- Take the dough from the fridge and roll out into a 13-14 inch circle. Lay out on a 10-inch tart pan and trim the edges. Prick the base all over with fork.
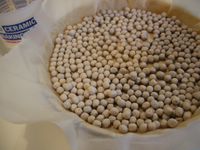
- Bake blind for 10 minutes. [To bake blind: cut parchment paper on tart base. Place baking beans or ceramic beans on top.]
- Remove beans and parchment paper and bake again for about 7 minutes. Remove from oven and cool completely.
*To make the pastry cream:
- Boil milk in a saucepan. While waiting for it to froth over, mix egg yolks, flours, sugar, and vanilla in a heatproof bowl.
- Once the milk boils, pour into the flour mixture in a thin stream while whisking constantly.
- Transfer back into the saucepan and let simmer until thick while stirring all the time.
- Remove from heat, put a moistened parchment paper on the surface (to prevent a film/crust from forming on top). Cool completely.
*To assemble:
- Heat apricot jam and water in a saucepan. Strain and cool.
- Spread the pastry cream evenly on the tart base. Arrange sliced fresh fruits on top.
- Brush the apricot jam mixture on the fruits using a pastry brush. Serve.

Almost didn't make it to this month's Sugar High Friday which is in its 8th edition. I had to email Jennifer of The Domestic Goddess and only found out last Wednesday that this is happening today 20th May and theme is Citrus hosted by Alice of Breadbox. Yikes! I got only 2 days to think of something to do. Good thing I bought the latest Delicious magazine June 2005 issue and there in the last few pages was a cake recipe that piqued my interest. I adapted the said recipe and voila! Here is my entry.
Actually, my previous post of Citrus Trifle would have been perfect. But, oh well, I already posted it here a month ago so had to find another. Since time was of the essence or rather not enough of it, a simple straightforward recipe would be the best answer. And this one did not disappoint at all despite its ease and simplicity of ingredients. Actually I was amazed with the aroma and marvellous blend of taste of the lime and the flour/oil/sugar/apricots. The cake was very moist and soft and sweetened just right with the sharp tang of the lime juice giving it a zing and fabulous whiff. That's why I love these blogging events. It gets me an excuse to try different flavours that I would have been too chicken to try under normal circumstances. I was aiming to use mango here but my local supermarket ran out of the dried stuff. Though, I think apricot did just fine and pineapple would have been great, too.
Apricot Lime Cake
125 g [3/4 cup] chopped dried apricot or mango or pineapple (reserve a few pieces)
125 g [1/2 cup] natural yoghurt or sour cream
1/2 cup sunflower oil, plus extra for greasing
175 g [1/2 + 1/3 cup] golden caster sugar (superfine)
175 g [1 1/3 cup + 1 Tbsp] plain flour
1 1/2 tsp baking powder
2 eggs - beaten
zest and juice of 1 lime
100 g [3/4 cup] icing sugar (confectioner's)
25 g [1/3 cup] dessicated coconut (may be sweetened)
- Preheat oven to 180°C/fan 160°C/350°F/gas mark 4. Grease a 2 lb (9 x 5-inch) loaf pan.
- In a container, sift flour and baking powder. Combine well and set aside.
- In a bowl, combine sunflower oil and sugar with a whisk.
- Add in lime zest, lime juice, eggs, yoghurt and apricots. Mix well.
- Stir in the flour mixture and beat until smooth.
- Pour into the greased loaf pan and bake in oven for 50 minutes or until a skewer inserted in the centre comes out clean.
- Remove from oven and let stand for 5 minutes. Turn out in a rack and cool completely.
*For the icing and toppings:
- Add just enough lime juice to the icing sugar to have a thick but slightly runny icing.
- Spread on top of the cake and sprinkle dessicated coconut and reserved apricots.
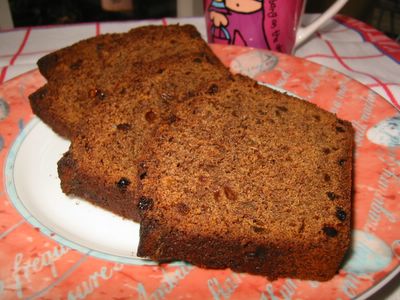
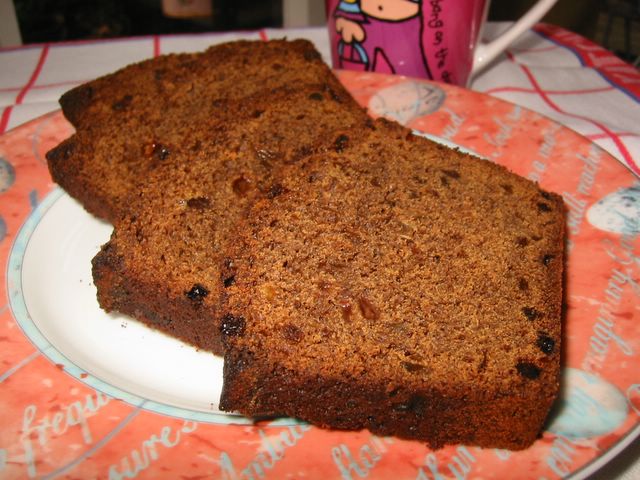
My 4-year-old daughter was jumping with joy when I told her I was making gingerbread. She thought people-shaped cookies would come out of the oven. I had to explain that it's gonna be as name implied - a bread. Good thing she 'helped' me in the baking nonetheless. First time for me to create this dark, smoky, rich bread. I actually was not very hopeful of a good outcome but other than the slightly burnt crust it was great. Admittedly the taste's not for everyone though my friends loved it. It's not very sweet and the tiny morsels of sultanas and ginger provides islands of pleasing jelly-like sugary nuggets. Brian Turner's Favourite British Recipes cookbook (where I adapted this recipe) suggested that it's very good served with vanilla ice cream or whipped cream and indeed it is!
Oh by the way, before I forget this is my entry to the Sugar High Friday #7 - the food blogging event currently hosted by Derrick of Obesssion with Food. Theme for this edition is molasses. Derrick said we could substitute treacle and thank god for that 'coz molasses is not very common in the supermarkets of this island. The ones I often come across is black treacle which I thought was just the British name for molasses. But I found out that technically there is a difference. See, molasses is created from the drainings of raw sugar during refining while treacle is obtained from syrup made from the sugar (whatever that means). A good website explaining this is in here.
Gingerbread
115 g unsalted butter - softened (scant 1/2 cup)
225 g plain flour (1 2/3 cup)
115 g golden caster sugar (1/2 cup)
2 eggs - beaten
225 g black treacle, lightly warmed (1/2 cup + 2 Tbsp)
55 g sultanas - finely chopped (1/3 cup)
85 g preserved ginger - finely chopped (1/3 cup)
2 tsp ground ginger
2 Tbsp double cream (heavy cream)
1/2 tsp bicarbonate of soda (baking soda)
- Butter and flour well a 2 lb (9 x 5-inch) loaf pan. Preheat oven to 160°C/fan 140°C/325°F/Gas Mark 3.
- Cream (beat) butter and sugar in a bowl.
- Mix in eggs, black treacle, sultanas, and preserved ginger.
- Stir in the flour and ground ginger.
- Warm the cream slightly then add in the bicarbonate of soda and mix into the flour mixture.
- Pour into the loaf pan and bake in the oven for 1 1/2 hours. Cover top with foil halfway through if it is browning too much.
- Remove from oven and leave to cool in the pan. Turn out into a serving plate. Serve slices with ice cream or whipped cream.
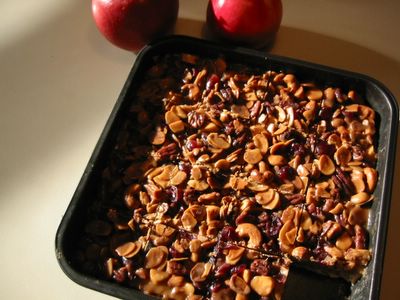
This is my entry to the monthly food blogging event Sugar High Friday (SHF). Initiated by the baking diva Domestic Goddess, this edition (which the 6th, BTW) is hosted by Debbie of Words To Eat By. SHF is a community effort of food bloggers from all over the world wherein the post in their blog at a certain date is of the theme set by the host. This 6th edition has the theme of caramel. Also, SHF is a spin-off from the highly successful and original food blogging event Is My Blog Burning? (IMBB), started by Alberto of Il Forno.
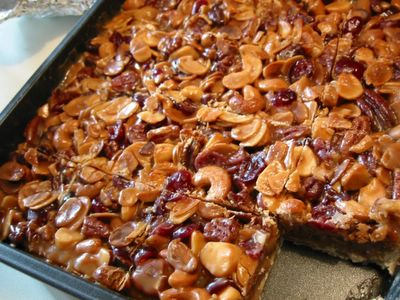
Okay on with the recipe, I found this recipe from the 101 Cakes & Bakes cookbook published by the BBC GoodFood Magazine. It was originally named Margaret's Caramel Nut Squares in honour of the chef who created it - Margaret Fineran. However, I decided to change it to Honey Caramel since the flavour of the honey is very dominant.
Probably because the cookbook is quite small (around 5x5 inches), the instructions were not very detailed. I now see several modifications I'd like to do to it. Like the pastry, instructions said to 'line' the pan. It didn't say to line just the bottom or including the sides. From the results, I think I will just line the bottom next time. Also the pastry came out dense. I don't know if it's supposed to be like this but I was half expecting it since you're supposed to pour the hot boiling caramel/nut mixture onto the pastry in the pan. And it was *bloody* hard to cut through it - maybe because it was still frozen. The caramel and nut filling was a bit soft when thawed after coming out of the freezer. Again I don't know if it's supposed to be like this. Despite all that I love the looks of it and the flavours are very nice with the honey flavour dominating the sweetness plus all those lovely combination of nuts and cranberries. All that coming from a nutter ... oh I mean a nut lover. ;)
Honey Caramel Nut Squares
* Pastry:
175 g plain flour
50 g icing sugar
85 g cold butter
1/4 tsp vanilla
1 small egg - beaten
*Filling:
85 g granulated sugar
175 g clear honey
50 g butter
284 ml tub of double cream (heavy cream)
100 g pecan nuts - toasted
100 g flaked almonds - toasted
100 g whole hazelnuts - toasted
100 g pistacios, unsalted - toasted
50 g dried cranberries
whipped cream, to serve
- Preheat oven to 180°C/fan 160°C/350°F.
*For the pastry:
- Mix flour and icing sugar in a bowl. Cut the cold butter
into the flour mixture with a pastry cutter until crumbly.
- Mix the vanilla and beaten egg; add to the flour mixture. Stir until the mixture comes off the side of the bowl. Form the dough into a ball and knead a little. Wrap in cling film and chill for 30 minutes.
- Roll out pastry dough on a lightly floured surface or floured greaseproof paper and use to line a 23cm/9-inch square pan. Bake for 7 minutes.
*For the filling:
- Heat the butter and double cream in a saucepan until hot.
- In another saucepan, put the sugar and honey and bring to boil without stirring. When the sugar mixture is boiling, pour the hot cream mixture in it and simmer while stirring for 2-3 minutes.
- Mix in the nuts and cranberries to the saucepan.
- Spoon the whole lot into the hot pastry case. Return to the oven for 7 minutes.
- Remove, cool, then cover and freeze for 3-4 hours.
- Cut into squares, thaw for 30 minutes, and serve with the whipped cream.
Note: You may use any combination of nuts as long as they weigh 400 g in total.

{Update}The lovely Tarte Tatin was invented because of an accident. In the 1880s, two sisters Stephanie and Caroline Tatin were running their family's Hotel Tatin in Lamotte-Beauvron, France. Stephanie was in charge of the kitchen and one time baked an apple tart where she erroneously put the apples first in the pan before the crust. She served this right away without even cooling it. Their customers loved it thus, the Tarte Tatin was born. For more info click here. Now that I've thought about it, seems like this was the precursor of the pineapple upside down cake. I might be wrong but I think the the principle is the same - fruit with caramelised sugar at the bottom with a flour based crust or cake on top.{End Update}
On to the baking, first I have to buy a skillet. We were at an outlet mall in the middle of Kent when I saw that there was a Le Creuset shop there. With my husband and kids in tow, I marched in and was greeted by the amiable shop assistant. She could probably see that steely determination in my eyes to walk off with a skillet. And my oh my, I saw my tarte tatin pan - not exactly skillet but more like a cake pan in cast iron with handles on the side. It can be used as a pot cover (if you buy the pot), a skillet, or a baking pan. Wonderful! Not only that, it's 50% off. Oh I'm in retail heaven! Out came the card from the wallet, kerchinggg! And I went home with my new cast iron pan grinning. No matter that I originally intended to buy shoes, but a cast iron pan is just as good although I can't wear it! Hehehe!
Next is the recipe, I found one in Delia Smith's How to Cook - Book 3. Very few ingredients and I hoped easy to make. It says in the original recipe to have 25 gm butter and 25 gm lard for the crust. Well I don't have lard so I just used 50 gm of butter.
 It was surprisingly easy to make. Except for the slight kneading and the peeling and coring apples it was quite straight forward. It needed some patience though, because in simmering the apples you have to start at very low heat. So it took about 10 minutes before you see some bubbles to come up. Then after that you have to watch it like a hawk when the heat is turned up otherwise you will end up with Tarte Burned. But it was really quite easy to make and that is coming from a baking klutz like me.
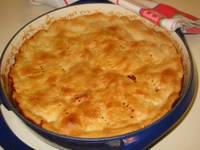 This is how it looks like when you put in the rolled pastry on top, prick it all over and bake it for 25 minutes.
As you can see the finished product on a plate looked sunken in the middle because I don't have a flat plate big enough for it.
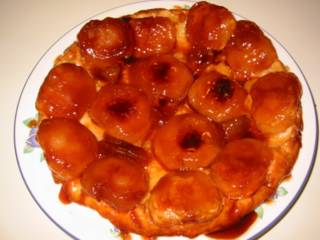
When I tasted it though, my oh my, it was really great! It would have been better if I had some whipped cream around. The caramelised sugar is similar to the that of the karyoka in the Philippines (skewered puffed glutinous rice balls with caramelised muscovado sugar sauce). Even my finicky son loved it but said he preferred just the crust with the syrupy sauce. The down side of it is that you have to serve it while still very warm because the sauce will harden as it cools - and it hardens quite a lot. I felt really pleased, afterall this is one of those rare occassions that I baked it right the first time!
[Note: I thought the sauce is on the sweet side so maybe next time I will reduce the sugar or not to reduce the sauce too much. But I retained the original sugar measure and will update it once I have test baked the reduced sugar version.]
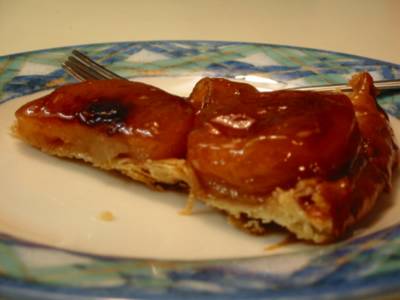 Tarte Tatin
*Pastry:
110 g plain flour
50 g unsalted butter - at room temperature, cut into small pieces
2-3 Tbsp cold water
*Filling:
8 large Golden Delicious apples (or Cox)
75 g unsalted butter - softened
175 g golden caster sugar
24 cm (9 1/2 inch) non-stick, heavy-based frying pan (ovenproof even the handle)
*For the Pastry:
- Sift the flour into a large mixing bowl from a height (to air it).
- Cut the fats into the flour with a knife (or pastry cutter), before rubbing the mixture lightly with your fingertips, lifting everything up and letting it fall back into the bowl to give it a good airing.
- When the mixture reaches the crumb stage, sprinkle in enough of the cold water, to bring it together to a smooth dough that leaves the sides of the bowl absolutely clean, with no crumbs left.
- Lightly knead to bring it fully together, then place the pastry in a plastic food bag and chill it in the fridge for 30 minutes.
*For the Filling:
- Peel the apples and cut them in half (or quarter) vertically and remove the core and pips.
- Spread the softened butter evenly over the base of the pan and sprinkle the sugar on top.
- Place the apples in concentric circles, cut side up. When you get to the centre you may have to cut them into quarters to fill in any gaps.
- Put pan over a low heat so the butter and sugar melt very slowly together. This might take around 8-10 minutes.
- Preheat oven to 425°F/220°C/fan 200°C/gas mark 7.
- Increase the heat slightly to make the sugar to caramelise. Watch it carefully and gently shake it from time to time so the apples do not stick and burn. Cook until the apples are soft but still retain their shape and the sugar a rich amber colour. This will take about 20-25 minutes. Remove from heat.
*To Bake:
- Get the pastry from the fridge and roll it out to an 11 1/2 inch (29 cm) round. (It can be done easier by rolling it between two plastic sheets such as cling films.)
- Fit it over the top of the pan allowing some to tuck down at the edge.
- Prick the the pastry base all over with a fork so the steam is released and the pastry don't go soggy.
- Place the pan in the centre shelf of the oven and bake for 20-25 minutes or until the pastry is crisp and golden brown.
- Remove from oven and allow it to cool for 5 minutes.
- Get a plate larger than the pan and put it on top (top side down). Holding both the pan and plate with gloves, invert the pan onto the plate giving it a little shake before.
- Serve the tart warm with some creme fraiche or whipped cream. Yum!