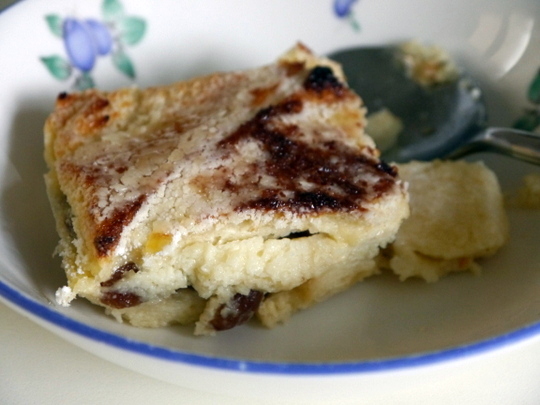
One of my favourite comfort food is Bread and Butter Pudding. It has that ability to be classified as both a dessert or a snack depending on how you serve or how much you eat.
A lot of bread puddings I have the experience of buying in shops are too stodgy. They resemble more like slightly sweetened thick chewy bread. But not this one. I do love this recipe because is lighter and the ratio of the egg to milk/cream is just right. Plus the sugar is just right - not too sweet. I got this from an old ripped-off page of the BBC Good Food magazine with the recipe coming from the chef Paul Heathcote. Thanks Paul.
I know I burned some of the pudding top but believe me it's not that badly burnt. It's probably just the lighting angle of the picture. Not a problem for me because I'm partial to slightly charred food!
6-7 slices of white bread - crusts removed
65 g [1/4 cup] butter - softened
100 g sultanas or raisins
250 ml [1 cup] full-cream milk
250 ml [1 cup] double cream (heavy cream)
3 medium eggs (or 2 large eggs)
50 g [1/4 cup] caster sugar
1 tsp vanilla extract
25 g icing sugar
25 g apricot jam - warmed and sieved (optional)
- Preheat oven to 190°C/fan 170°C/375°F. Grease a 1.5 litre ovenproof dish, about 2.5 inch deep.
- Butter the bread slices generously and cut each into 4 triangles.
- Arrange a layer of the bread in the prepared dish.
- Sprinkle the sultanas on top.
- Then arrange the remaining bread slices on top of this.
- Make the custard - mix the cream, milk, eggs, vanilla, and caster sugar in a bowl.
- Strain the cream mixture over the bread slices and leave to soak for about 5 minutes.
- Put the dish in a larger roasting tin in the oven. While the oven rack (with roasting tin) is about a third out of the oven, carefully pour hot water in the roasting tin to come halfway up the side of the dish.
- Bake for 30 minutes until the top is golden and the custard is lightly set.
- Remove the dish from the roasting tin and leave to cool for about 15 minutes.
- Preheat grill to the highest setting.
- Generously dust the top of the pudding with sifted icing sugar and glaze under the grill until golden brown. If it starts to puff up remove and leave to cool a little longer before returning to the grill.
Note: It will be more efficient if you use a cooking torch to glaze the icing sugar.
- [Optional] Brush the top with the warmed apricot jam. Serve with clotted cream or warm custard.
Here is another of our family's (and a lot other Filipino familys') favourite holiday food. We almost never make it at any other time of the year except during the New Year holidays. Not even on Christmas; only in the New Year. I never knew why but it must be one of those traditions that was kept on just because that's what we always had.
This is a perfect example of the predilection of the Pinoy palate to crave for the salty-sweet-tangy sour flavour combination. That and together with the richness of the mayonnaise and pasta makes it so irresistible to me as a snack. Actually, you'll be hard-pressed to classify this as savoury or sweet. Because they're really both!
By the way, the Philippines practically only have spaghetti and elbow macaroni in the pasta aisles of its supermarkets. Whereas here, I cannot find decent sized and shaped elbow macaroni. I have to either go to Italian delis or trek to Waitrose where, fortunately, I found this Chiferri Rigate pasta.
Macaroni Salad
500 g elbow macaroni pasta
2 1/2 cups shredded cooked chicken meat
1/3 cup pickle relish
1/3 cup finely minced celery
1 1/2 cups canned pineapple chunks in syrup - well drained
1 cup raisins
1/2 cup finely minced cooked carrots
1/3 cup finely minced onion (optional)
1/3 cup grated cheddar cheese (optional)
3 cups mayonnaise
Salt and freshly ground black pepper to taste
- Combine all in a bowl and mix well. Chill in the fridge for a few hours before serving.
The October Daring Cooks’ Challenge was brought to us by Andrea from 4pure. She introduced us to one of her family favorites which is soon to become one of yours, too. Welcome to the world of Dutch Bitterballen!
Actually before I made these Dutch treats I haven't tried nor heard about bitterballen. But it's not foreign to most people - it is a variant of a deep-fried croquette. I did the cheese bitterballen and was gearing up to make the prawn version but I ran out of time for the deadline. You can head to the Daring Kitchen's website for the recipes of the beef and prawn renditions of this delicious snack.
I froze my bitterballen for deep-frying a week later. They froze rather nicely.
As instructed by Andrea, you have to add 1 minute to the deep-frying time for frozen bitterballen. It was delicious! Although next time I would do the egg dip and breadcrumbs at least twice to make the breaded crust thicker and crunchier. Plus also making the balls smaller - perhaps 3/4-inch in diameter only. I would prefer more starch/crust in the crust-cheese ratio to make it less rich. All these personal changes are reflected in the recipe below.
Everyone in the family loved it including my youngest who was busy speed reading the very recently released book of her favourite novel series.

1/2 cup [125 g] butter
3/4 cup [110 g] plain flour
2 cups [500 ml] full-fat milk
1/2 tsp grated nutmeg
2 egg yolks
1/3 cup [80 ml] single cream (light cream)
2 tsp gelatine
80 g hard cheese (parmesan, grana padano, pecorino, etc.) - grated
80 g soft cheese (brie, camembert, cream cheese, etc.) - sliced into small pieces
80 g matured cheddar - grated
salt and pepper
*For the breading:
plain flour
2 eggs - beaten
dry breadcrumbs
- Melt butter in a heavy-based saucepan.
- Add flour all at once and stir to cook for 3 minutes on medium heat.
- Add milk and bring to boil while stirring continously.
- Bring heat to lowest and simmer for about 10 minutes stirring from time to time.
- While it is simmering, dissolve gelatin with about 2 Tbsp water. Set aside.
- Add nutmeg. Taste sauce and add appropriate amount of salt (about 1/2 tsp) and pepper.
- Stir in the cheese until well mixed in the sauce.
- Add in the dissolved gelatine and stir until well combined.
- Remove from heat and spread out the sauce in a baking dish or plate.
- Cool for about 30-60 minutes then cover and refrigerate for at least 2 hours or overnight.
*Breading:
- After refrigeration, the mixture would have hardened. With a spoon, scoop out enough cheese mixture to form into a 3/4 - 1-inch ball.
- Roll the ball in the plain flour; then dip in the beaten egg; then roll in the breadcrumbs. (The breading may be repeated if you want a thicker crust.) Do the same for the rest of the mixture.
- Rest the breaded balls on a plate in the fridge for about 30 minutes.
- At this point you may freeze the bitterballen if you wish.
*Deep frying:
- Heat at least 3/4-inch of oil in a heavy saucepan to 180°C/350°F.
- Deep fry the bitterballen for 3-4 minutes until golden. (For frozen bitterballen, add 1 more minute in cooking time.)
- Serve warm with mustard or chutney.
Fudges has been quite generous to send me some of their delectable savoury biscuits. I'm quite familiar with the brand although only their sweet cookies are ones I have repeatedly purchased before. And like their sweet products, these new savoury biscuits are very good. We lost no time in trying them with different spreads, dips, drinks (teas and coffees) but I personally like them with soups which in these increasingly colder weather is very welcome indeed.
My favourite is the mature cheddar flavour while my husband prefer the stilton and walnut ones. Thanks Fudges Bakery!
I forgot to include in my previous post of favourite things this ampaw that I can't resist. In my younger years, whenever we go back home to Amaya I never fail to ask for this peanut covered ampaw when we pass by a bakery in Zapote. I know this has a Chinese name but just can't remember it now.
As you can see the outside has been rolled in crushed peanuts while the inside is all crispy puffy ... things. The ingredients list says that it contains glutinous rice, sugar, glucose, water, and peanuts. Very few ingredients but the technique and procedure for making it looks complicated. But it doesn't matter I have no intention of making this at home because I'm afraid I'll scarf them all down if I learn to make them. Yum yum!
What can I say? I had a great two-week break back home in the Philippines. As expected I didn't fail to eat all my favourite things. Though sometimes with all my yakking with friends and relatives I forgot to take pictures of some. Fortunately here are a few that I made sure to make kodak of.
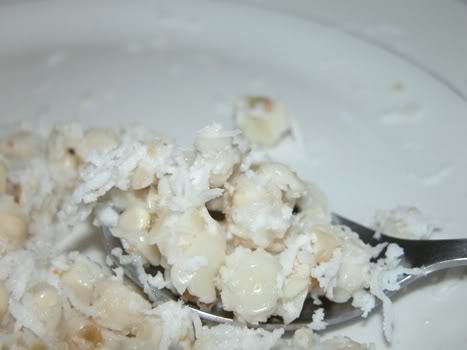
My first morning there saw me staring at a plastic bag of bualaw (binatog for the rest of the Phils.). This is one of my all time favourites that I continually reminded my mother to get me it before I flew in. The simplicity of the cooked, slightly sticky corn mixed with freshly grated coconut then simply enhanced by a sprinkling of salt makes me want to eat it all day. Give me more please!
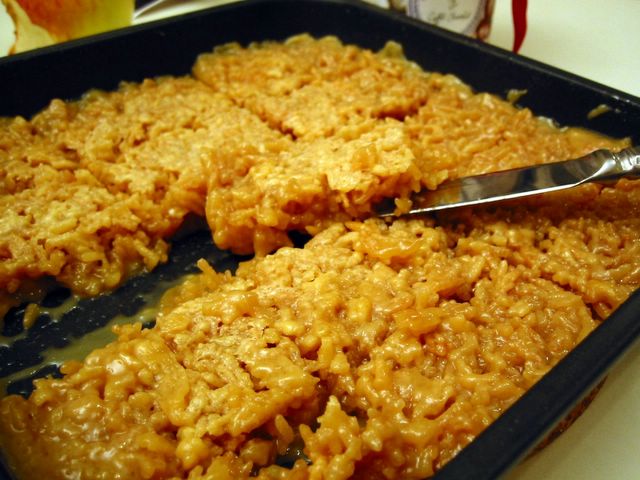
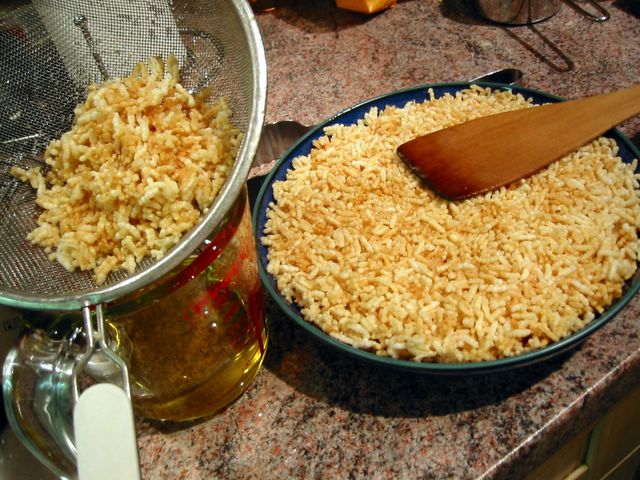
Next in line is the venerable karyoka. A snack or dessert (depending on how hungry you are) that is made of fried puffed glutinous rice balls drenched in some sweet sauce made from panucha (a type of muscovado sugar) and coconut milk. Like most of my favourite things - simple but yummy!
That karyoka was delivered via a family gathering held just before I left for the UK. A sort of despedida. You won't know my family (or probably any Pinoy family) unless you see the amount of food we have in this kind of gathering. We had pancit luglog, lumpiang shanghai, lumpiang sariwa, Pinoy spaghetti (thus sweetish), tokwa't baboy - these are the ones cooked from scratch by my dear aunts. Bought food are the karyoka, pizza, ice cream and all the drinks. This is supposed to be snacks, okay, not dinner or supposed to be heavy.
Before all these I had a chance to have lunch at Dencio's restaurant in the atmospheric city of Tagaytay. Our table was in roofed but open-sided/open-air veranda that over looks Taal volcano. Lovely! The great food also completed our visit. I have here only a few of the ones that are memorable. The crispy pata was so-so hence not included. It didn't taste fresh enough or crispy enough for me. Although I forgot to take a picture of our appetiser, the excellent Crispy Kangkong, because I was too busy trying to dissect the dish and plotting on how to make it at home. There's a picture in the internet here if you're interested.
The pancit canton was good although a little more sauce would be nice.
The sizzling bangus belly was nice, too. My mother was complaining about the amount of cholesterol in it but even she couldn't help to take a bite.
And the winner is --> pork sisig! This is the best tasting pork sisig I have had so far. Just plain pork sisig with the right tutong (crispy bits) at the bottom and no creamy dressing whatsoever. Yum-my!
If all that eating had us tired, all we had to do was turn on our side and gaze at the view of Taal Volcano right there on our table. *sigh* I wish I could come back soon.

 It was a case of long-time-no-see. My son brought this home a few weeks ago. I haven't seen this one favourite crisp (potato chips for the 'Merkins) flavour of mine for years! Supermarkets used to stock these in small and big packets and I never leave for home without it. I wonder why Walker's discontinued selling these? They haven't even distributed them in big supermarkets. The only places we can get these are in small corner shops or news agents. Anyhow, it's nice to enjoy one of my all-time favourite crisp flavours back in town.
Since we're talking about kitchen machines, I happily stumbled upon a long sought after machine/cooker. I first saw this 'automatic' crepes maker when I visited relatives in Toronto way back in 1994. Ate Eva, my SIL and popular cook among friends and relatives, was making crepes with this machine for use in lumpiang sariwa she's making. Ever since then I've been trying to bag one of those effort-saving crepe maker. And even Ate Eva was searching since her's conked out a few years ago. Seems like they don't sell them anymore in US and Canada and not at all here in UK. I've all given up until I saw this in my sister's kitchen in Geneva! It's branded as Trisa of Switzerland though there's no indication on the box on where it was actually made.
She and my BIL were generous enough to give it to me. They probably saw how desperate I was. :)
It comes with all these accessories (see above). The manual was right it was very easy to use and because the hotplate's surface is teflon coated it's easy to clean as well.
All I have to do is heat up the hotplate then mix up a batter for crepes. Transfer it to the plastic batter pan. Then simply dunk the hotplate onto the batter pan, turn the hotplate up and let it cook. When one side is browned, lift it and cook the other side.
Here's a tip: the longer you hold the hotplate in the pan, the thicker the crepe will be. Now isn't that easier than the usual way of swirling the batter in a crepe pan which invariably takes time and practice to perfect. While with this machine you get right at your first go.
Our favourite filling is the finger-lickingly good Nutella, golden syrup, or just plain sugar. As you can see the batter was not mixed well. My kids couldn't wait to cook them and they're willing to eat blobby crepes just so they can try the crepe maker.
Just a couple of gripes, once you lifted the hotplate from the pan and turn it for browning there would almost always be one of two holes on the crepe. And then there's the size which is limited to the size of the hotplate. You can't make it any bigger.
Here's a basic crepe batter recipe from the accompanying manual:
Crepes
450 ml whole milk
2 large eggs - beaten
50 g butter - melted
pinch of salt
250 g plain flour
- Mix milk, eggs, and salt in a bowl.
- Add flour and melted butter.
- Beat until there are no more lumps and is well combined.
- Cook either in a crepes machine or by spreading about 1/4 cup at a time on a heated crepe pan.
 It's the first time I've baked pizza completely from scratch - well actually I didn't make the mozarella and pepperoni - but other than those I made ones from raw flour, yeast, etc. to make the dough. I especially like the dough kneading and rising. One tick in my list of things I wanted to do all my baking life plus one less block off my phobia of yeast.
I love the texture and billowy softness of the dough after the overnight rising. It was like a baby's bottom. Though it's also this quality that makes it a bit tricky to stretch and toss since the softness makes it so easy to expand it too thin. My dough actually suffered holes in the first two times which reminded me not to do too much stretching. Only one toss is for me is enough. More than one toss and you're really stretching it too far.
The Daring Bakers are the 'culprits' in this latest experimentation. This month's theme is currently hosted by Rosa and is also done in memory of Sherry who was supposed to be the co-host until her untimely death last July of a massive heart attack. Here's to you Sherry wherever you are.
It's funny, we were asked by Rosa to take pictures of ourselves tossing the pizza but my kids were more afraid of me dropping the dough on them or worse on the floor. Nothing of the sort happened of course but no picture materialized.
I know what you're gonna say - why make a boring pepperoni pizza? Well it's the topping that my family likes so I don't really care what anyone says. Also, for me to experiment I have to start from the most basic before moving on to more adventurous pastures. Avoiding waste was also in mind since I was wary that it would all go wrong so I don't really want to buy exotic pizza toppings for now.
I don't have a pizza stone so I thought the next best thing would be to use the smooth underside of my cast iron grill. It worked particularly well if I must say so, turning out crisp evenly baked crust.
My problem was in the transferring of the assembled pizza to the hot cast iron pan in the oven. I didn't have any semolina or cornmeal to slide it in easily. So I used a lot of flour on the chopping board though it doesn't work all the time which sometimes make the pizzas into odd shapes. Well, rounded or not the pizzas were gobbled up as soon as they come out of the oven. So the irregular shape really does not matter as much as the all important taste.
I'd just like to say thank you for the great dough recipe which is adapted from The Bread Baker's Apprentice by Peter Reinhart. It's something that me and my family would definitely have again and again.
Basic Pizza Dough
4 1/2 cups white bread flour, chilled
1 3/4 tsp fine salt
1 tsp instant yeast
1/4 Cup olive oil or vegetable oil
1 3/4 Cups water, ice cold (4.5°C/40°F)
1 Tbsp sugar
Semolina/durum flour or cornmeal for dusting
*Day One
- Mix together the flour, salt and instant yeast in a big bowl.
- Add the olive oil, sugar and cold water and mix well with a wooden spoon to form a sticky ball of dough.
- On a clean surface, knead for about 5-7 minutes, until the dough is smooth and the ingredients are well distributed. If it is too wet, add a little flour (not too much, though) and if it is too dry add 1 or 2 teaspoons extra water.
NOTE: If you are using an electric mixer, switch to the dough hook and mix on medium speed for the same amount of time.The dough should clear the sides of the bowl but stick to the bottom of the bowl. If the dough is too wet, sprinkle in a little more flour, so that it clears the sides. If, on the contrary, it clears the bottom of the bowl, dribble in a teaspoon or two of cold water. The finished dough should be springy, elastic, and sticky, not just tacky, and register 10°-13°C/50°-55°F.
- Flour a work surface or counter. Line a baking sheet with baking paper/parchment. Lightly oil the paper.
- With a metal or plastic dough scraper, cut the dough into 6 equal pieces. You may weigh them to divide them equally. Each piece should be about 180 gm in weight.
NOTE: To avoid the dough from sticking to the scraper, dip the scraper into water between cuts.
- Sprinkle some flour over the dough. Make sure your hands are dry and then flour them. Gently round each piece into a ball.
NOTE: If the dough sticks to your hands, then dip your hands into the flour again.
- Transfer the dough balls to the lined baking sheet and mist or brush them generously with spray oil. Slip the pan into plastic bag or enclose in plastic food wrap.
- Put the pan in the frige and let the dough rest overnight or for up to three days.
NOTE: You can store the dough balls in a zippered freezer bag if you want to save some of the dough for any future baking. In that case, pour some oil(a few tablespooons only) in a medium bowl and dip each dough ball into the oil, so that it is completely covered in oil. Then put each ball into a separate bag. Store the bags in the freezer for no longer than 3 months. The day before you plan to make pizza, remember to transfer the dough balls from the freezer to the refrigerator.
*Day Two
- Exactly 2 hours before you make the pizza, remove the desired number of dough balls from the refrigerator. Dust the counter with flour and spray lightly with oil. Place the dough balls on a floured surface and sprinkle them with flour. Dust your hands with flour and delicately press the dough into disks about 1/2 inch/1.3 cm thick and 5 inches/12.7 cm in diameter. Sprinkle with flour and mist with oil. Loosely cover the dough rounds with plastic wrap and then allow to rest for 2 hours.
- At least 45 minutes before making the pizza, place a baking stone or a cast iron pan upside down (you will use the underside of the pan for baking) on the upper third of the oven. Preheat the oven as hot as possible (around 260°C/fan 240°C/500°F).
- Generously sprinkle the back of a jelly pan or chopping board with semolina/durum flour or cornmeal. Flour your hands (palms, backs and knuckles). Take 1 piece of dough by lifting it with a pastry scraper. Lay the dough across your fists in a very delicate way and carefully stretch it by bouncing it in a circular motion on your hands, and by giving it a little stretch with each bounce. Once the dough has expanded outward, move to a full toss.
NOTE: Make only one pizza at a time. During the tossing process, if the dough tends to stick to your hands, lay it down on the floured counter and reflour your hands, then continue the tossing and shaping. In case you would be having trouble tossing the dough or if the dough never wants to expand and always springs back, let it rest for approximately 5-20 minutes in order for the gluten to relax fully, then try again. You can also resort to using a rolling pin, although it isn’t as effective as the toss method.
- When the dough has the shape you want (about 9-12 inches/23-30 cm in diameter - for a 180 g/6 oz piece of dough), place it on the back of the jelly pan, making sure there is enough semolina/durum flour or cornmeal to allow it to slide and not stick to the pan.
- Lightly top it with sweet or savory toppings of your choice.
NOTE: Remember that the best pizzas are topped not too generously. No more than 3 or 4 toppings (including sauce and cheese) are sufficient.
- Slide the garnished pizza onto the stone in the oven or bake directly on the jelly pan. Close the door and bake for abour 4-6 minutes.
NOTE: After 2 minutes baking, take a peek. For an even baking, rotate 180°. If the top gets done before the bottom, you will need to move the stone or jelly pane to a lower shelf before the next round. On the contrary, if the bottom crisps before the cheese caramelizes, then you will need to raise the stone or jelly.
- Take the pizza out of the oven and transfer it to a cutting board or your plate. Rest it for 3-5 minutes before slicing or serving to allow the cheese to set a little.

A reader recently asked on how to make tuna sandwich. I told her I will posting something about sandwich fillers. Little did I realise that the pictures and my post saved on draft for the past year do not have the tuna one she needs. I had to quickly do some this morning so I could post the pictures here. It would have been complete if I had something for cheese pimiento. Maybe I can do that some other time.
These are very simple sandwich spreads which I am posting mainly for my kids. You must have noticed "sarnie" at the title. Like a lot of things here in Britain, that is the nickname for sandwich. As for the name itself, it was bestowed on two slices of bread with a meat (usually) in the middle after the Earl of Sandwich. The medieval earl apparently loved to eat these a lot.
Chicken Sandwich Spread
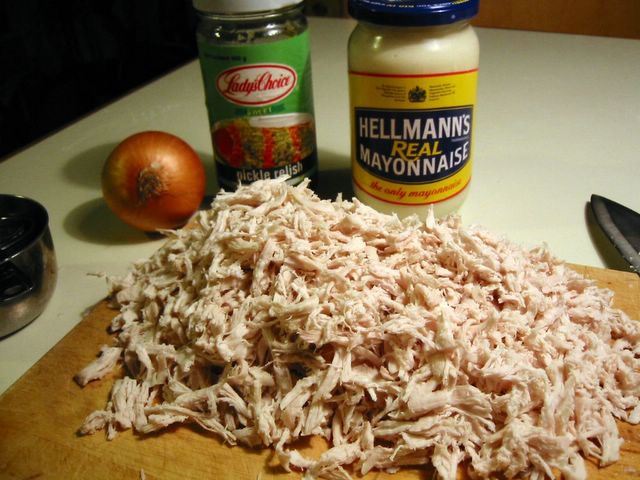
3 cups cooked chicken meat - chopped or flaked
1 1/3 cup mayonnaise
3 1/2 Tbsp chopped sweet pickle relish
2 Tbsp finely chopped onion
freshly ground salt and pepper
- Combine all ingredients in a bowl. Taste and season with salt and pepper if needed.

Egg Mayo
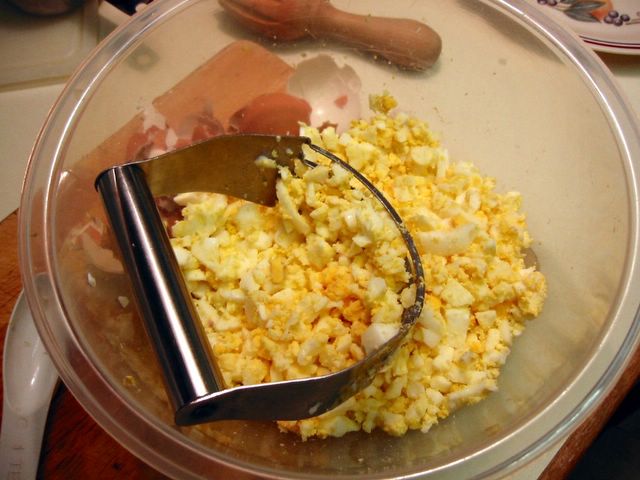
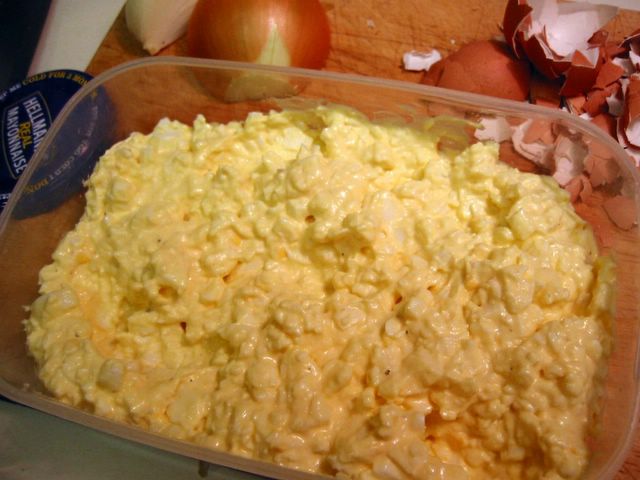
5 hard boiled eggs - chopped
2/3 cup mayonnaise
freshly ground pepper
- Combine all ingredients in a bowl. Taste and season with salt and pepper if needed. If you use Hellmann's mayonnaise, usually no additional salt is necessary.
Tuna-Mayo-Sweetcorn
2 x 185 g cans of tuna in oil
1/2 cup cooked sweetcorn (or sweetcorn from cans)
1/3 cup mayonnaise
salt and pepper to taste
- Drain tuna from oil then flake it in a bowl. Add all other ingredients. Taste and add salt and/or pepper if needed.
Tuna Mayonnaise
2 x 185 g cans of tuna in oil
2 Tbsp chopped onion or green onion
1 Tbsp chopped sweet pickle relish
salt and pepper to taste
- Drain tuna from oil then flake it in a container. Add in all other ingredients. Taste and add salt and/or pepper if necessary.
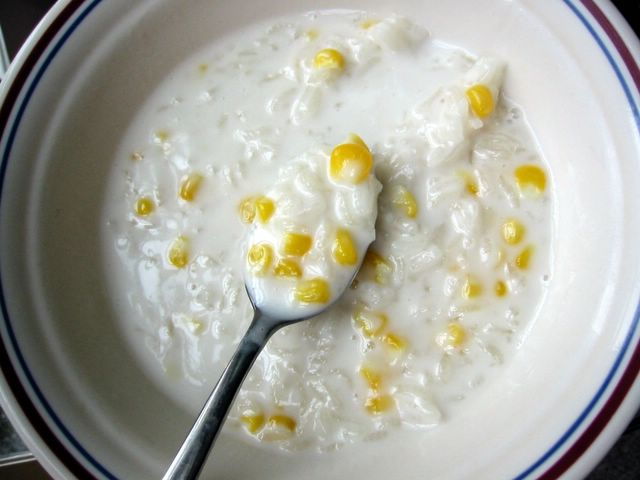
 Here is a snack or 'in-between-meals' meal that I often had as a child growing up in Cavite. It's very similar to the previous Ginataang Totong I blogged more than a year ago. The abundance of coconuts in the Philippines means that a lot of its by-products find its way into the local cuisine and snacks are no exceptions. So you can find a lot of variation with sweet coconut soup with glutinous rice then flavoured with some other ingredients such as mais (corn), munggo (mung beans), chocolate, etc. These are often served hot but a lot of people love it chilled cold from the fridge.
If you can get fresh corn on the cob then by all means please use that. The flavour it imparts in the soup is the best. Shred or remove the kernels (yasyasin) by sliding off a knife diagonally across the side of the cob. It may be a bit messy but it just ensures that it will bring out the flavour from the cut kernels as which is much better than having the kernels intact. But if in a bind, you can use thawed frozen sweetcorn though not as packed with flavour as the fresh ones.
Ginataang Mais
(Coconut Soup with Glutinous Rice and Sweetcorn)
1 cup fresh shredded sweetcorn kernels (or thawed frozen ones)
1/2 cup glutinous rice
5 cups coconut milk
1/3 cup sugar
1 tsp sea salt
1/3 cup coconut cream (optional)
- In a pot, bring to boil the coconut milk with the sugar and salt. Taste the soup to see if it is sweet enough for you. If not, add more sugar.
- Add the glutinous rice, bring back to boil then lower down the heat and simmer until the rice is almost cooked.
- Stir in the corn and simmer again until rice is cooked.
- Serve hot or cold with some coconut cream on top.
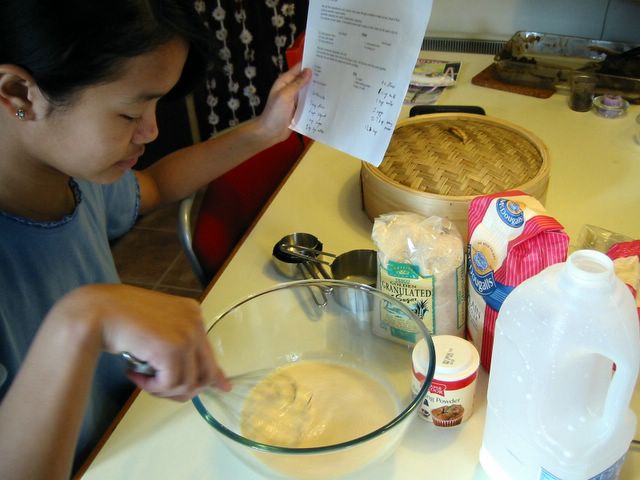
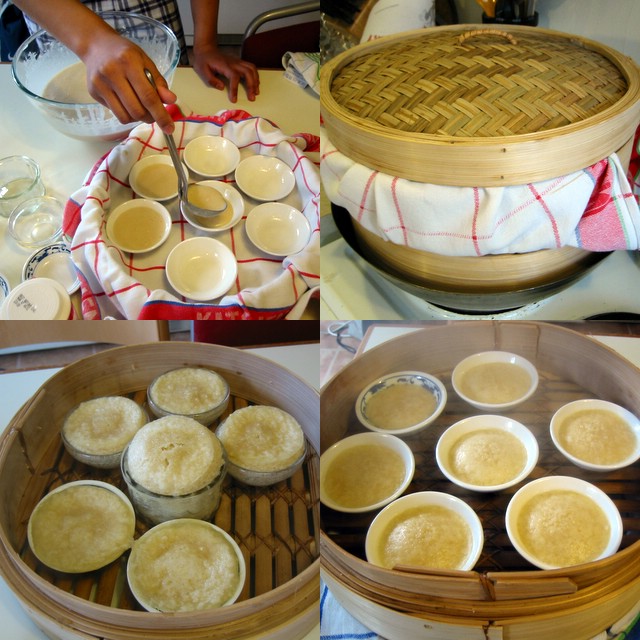
 The current theme of the eighth Lasang Pinoy, hosted by the lovely Iska of Edible Experiments, is centered on food for/by children. I wanted to create my husband's favourite childhood snack of bibingkang malagkit but my recipe fell short of expectations. The bottom - soggy, the top - too sweet. Maybe I'll blog it some other time. So off I went recruiting my kids in making a very simple Filipino steamed cake - puto. Mind you this is not your regular traditional puto which is made of malagkit (sticky rice) flour. This is of recent provenance, probably as early as the 80s when the popular Filipino bakeshop, Goldilocks, came up with this rich cake-like puto. There are very few ingredients to have and it's just a matter of mixing them all up in a bowl which a kid can easily do. My eldest daughter remarked that the batter is very much like that of a pancake. Well what do you know, she was right of course. More like a very sweet pancake version which is steamed instead of panfried. My kids are usually enthusiastic with 'helping' out in cooking and baking especially ones where they are actively involved in as opposed to just watching. I hope this would encourage them to be more adventurous in eating as well as in kitchen activities.
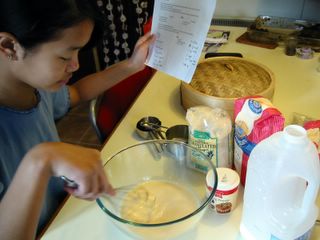
You don't know how much frustrations this seemingly innocuous snack has given me for the last ... oh ... 15 years. It's not a problem in the batter, more on the process of making these cakes rise in the steaming. The biggest Darth Vader-like enemy of steaming puto is water or condensation dripping/forming on top while it's cooking. Once water dripped on top then your puto is doomed to be earthbound. Never to rise in all its peaked glory. I've had this problem over and over again in the years that I was trying to make it. Often times I have to disguise my failure from our guests by saying it's actually my new version of kutchinta. LOL! I changed steamers, used rice cookers, metal steamers, and now just about having moderate success using a cheap and simple bamboo steamer. Really, sometimes you don't need high-tech gadgets to achieve good results.
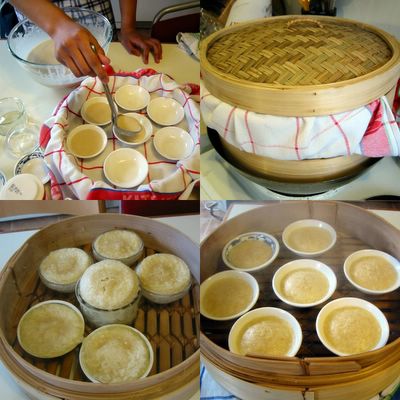
The recipe is something I got from my sister-in-law, Ate Eva, in Toronto which in turn she got from a friend of hers. I have to tone down the recipe considerably because it was cloyingly rich (nakaka-uta). The original measure of 2 tablespoons baking powder is I think too much. It actually have an slight aftertaste which I don't like so I proceeded to halve the baking powder. Same with the milk and eggs. I also added salt since I noticed that it doesn't rise as much as I want to and as you know, salt reacts with the baking powder that causes cakes to swell. As for my dreaded steaming, normally I would cover the baking pan to prevent condensation to drip on it. But since I'm using small (different sized at that) moulds, it would be truly troublesome to cover them all individually. Life is too short for me to get that tedious. So I covered the top of the steaming basket itself with a cloth. That didn't work since the water vapours came in unimpeded thru the slats at the bottom. So I moved the cloth onto the bottom of the first level basket. Finally, I had my well-risen puto (well most of the time).
 Rich Puto
2 cups plain flour
1 cup milk
1 cup water
1 egg - slightly beaten
1 Tbsp baking powder
scant 1/2 tsp fine salt
1 1/3 cup sugar
- Mix all ingredients well.
- Pour into small cake moulds. (Any small ramekins or tiny bowls/plates may be used). Cover with aluminium foil, tea towels or cloth (or you may cover the steamer itself with cloth).
- Steam in medium heat for about 20-25 minutes.
- Remove from heat and pry off the puto from the moulds with a butter knife. Serve warm or cold.
*Variation: Mix grated or slivers of cheese just before steaming.