I love nuts and its but natural to have them as often as I can even among savoury food. One staple Chinese take away dish that I really enjoy is the stir-fried chicken with cashews. I found this recipe in my trusted Chinese Cuisine by Huang Su-Huei and decided to give it a go. It is quite good if I may say so myself although I think I would increase the sauce to double it the next time.
Chicken with Cashews
500 g boneless chicken meat - cut into bite-sized pieces
2 green onions - cut into 1-inch pieces
1 cup diced cucumbers
1/2 cup cooking oil
1 cup fried cashews
*Marinade:
1/4 tsp fine sea salt
1 Tbsp cooking wine
1 1/2 Tbsp cornflour (cornstarch)
1 1/2 Tbsp water
1 Tbsp cooking oil
*Sauce:
1/2 tsp fine sea salt
1 tsp sugar
dash of black pepper
dash of sesame oil
6 Tbsp water
2 tsp cornflour (cornstarch)
- Combine the sauce mixture and stir to dissolve the salt and water. Set aside.
- Combine marinade and stir to dissolve the salt. Add chicken and marinate for about 15-20 minutes.
- Add in the cornflour, water, and 1 Tbsp cooking oil to separate the meat.
- Heat the 1/2 cup cooking oil in a wok and fry the chicken in medium heat for about 3-4 minutes or until cooked and golden brown. Set aside.
- Remove the oil from the wok but retain about 1 Tbsp in it. Reheat and stir fry the green onions until aromatic.
- Add in the cucumbers and stir fry for about 1 minute.
- Stir in the chicken and cashews and stir for a few seconds.
- Add the sauce and stir until thick and covers all the ingredients. Dish up and serve.
Okay I'm not too familiar with this Parmesan Chicken over on this side of the pond. I would assume this is name is popular over in the US. Over here it is called other things like chicken schnitzel or escalope. They may or may not have parmesan cheese but sure does make it very tasty. Some other variations of these involves brining the meat and also putting some tomato sauce and mozarella on top before grilling it for a few minutes. So those would be my next experiments in the mean time I leave you this recipe which I got from the lovely Ina Garten over at the Food Network.
Parmesan Chicken
(Chicken Escalope / Schnitzel)
2 chicken breasts
65 g [1/2 cup] plain flour
1/2 tsp fine sea salt
1/4 tsp ground black pepper
1 large egg
1 1/4 cups breadcrumbs
1/4 cup grated parmesan cheese
olive oil
unsalted butter
- Butterfly each of the chicken breast into two thin pieces. Pound each piece so that it will be about 1/4-inch thick.
- Combine the flour, sea salt, and black pepper. Set aside.
- Beat the egg with a teaspoon of water.
- Combine the breadcrumbs and parmesan cheese. Set aside.
- Dredge the pieces in flour then dip in the egg and then finally coat it with the breadcrumb mixture.
- Heat 1 Tbsp of the butter and 1 Tbsp of the olive oil in a pan. Fry the battered chicken pieces in the pan on medium-low heat of about 2 minutes each side.
- Serve with green leafy salad with vinaigrette.
Chicken lollipops are good appetizers and very popular among kids. There's something about having a 'handle' on a piece of fried chicken that entice everyone. It is essentially fried chicken wings that are easy to make and you can use any type of marinade you like. The only hard thing about it is the preparation of the wing drummette itself where you have to scrape the meat from the bone without detaching completely and then pushing the meat all the way to the end of the bone. It is much better and easier if you can find a butcher who can do this for you. For instructions on how to do this, here a couple of links from Saveur and a video from Stella Culinary.
I've used a very simple lemon and soy sauce marinade here to make Filipino-style chicken lollipops. It was quite effective since the taste is not mixed with so many other spices and flavours. But if you want a more 'sophisticated' taste then go ahead and add more spices to the marinade.
Chicken Lollipop
1 kg chicken wings
2 Tbsp lemon juice
3 Tbsp soy sauce
1 egg - beaten
1 Tbsp milk (optional)
plain flour
Panko breadcrumbs
- Cut, separate and prepare the chicken wings using the instructions in this link and/or in here.
- Mix the marinade of lemon juice and soy sauce in a bowl. Taste to see if the sour-salty combination is according to your liking. If not, adjust lemon juice and soy sauce.
- Marinate prepared chicken wings for about 1 hour.
- Drain chicken from marinade.
- Arrange flour and breadcrumbs in separate shallow bowls. Beat egg with milk (if using) in another bowl.
- Dredge chicken wings in flour first then dip in egg mixture and finally roll in the breadcrumbs. Let rest on a rack for about 30 minutes.
- Deep fry for 10 minutes or until golden brown.
This is one of my experiment last Christmas. It turned well actually. The chicken had a lot of flavour and was juicy. Although I thought there should be less molasses (black treacle) to reduce the darkness and richness of the marinade so it is reflected in the recipe below. I adapted this from my ancient Maya Cookbook. The cover has been ripped off and is currently missing so I don't really know the actual name of the book. But it has served me well (like my old Nora Daza cookbook) as a reference.
Lechon Manok
(Filipino-style Roasted Chicken)
*Marinade
2 Tbsp lemon or calamansi juice
1/4 cup patis
2 Tbsp sea salt
2 Tbsp liquid seasoning (Maggi or Knorr)
1 tsp ground black pepper
2 Tbsp molasses or black treacle
1 whole chicken
- Combine all the marinade except the molasses. Taste the marinade, it should have the right balance between sourness and saltiness. Adjust according to your taste. Add in the molasses and mix well.
- Marinate the chicken for at least 2 hours or overnight.
- Preheat oven to 160°C/fan 140°C/325°F. Roast chicken for 30 minutes then increase temperature to 180°C/fan 160°C/350°F for an hour or until juices coming out of pierced thigh is clear. *OR* Grill in charcoal barbecue for maximum flavour.
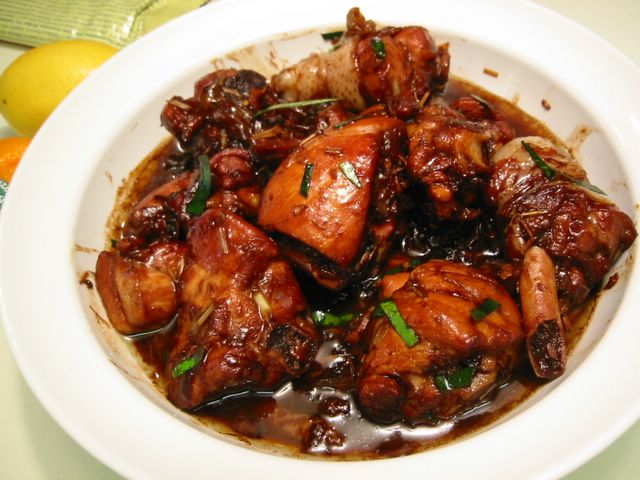
My kids took after my husband, they so love noodle soups especially the ones with egg noodles. So whenever we go to a Chinese restaurant my kids would almost always order noodle soups. It's one way to test if the restaurant is any good. My son would get the braised beef while the girls would more often than not order the soya chicken noodle soup.
This delicious soya chicken dish (sometimes called soy chicken) it involves braising a whole chicken in soy sauce and spices and then hanged to dry and crisp up. You can usually see this hanging with roast ducks and crispy roast pork in Chinese restaurants serving roast meats. It is great with noodles (both the stir-fried and soupy varieties) or simply with steamed rice.
Here is an attempt to re-create soya chicken at home to reduce our visits to noodle restaurants. I did not bother to use a whole chicken and dispensed with the air-drying thing. It is delicious nonetheless.
Soya Chicken
1 cup dark soy sauce
1 cup light soy sauce
1/2 cup Chinese rice wine or dry sherry
1/2 cup packed brown sugar or 1/2 cup Chinese rock sugar
1 tsp fennel seeds
3 whole star anise
1 tsp Szechuan peppercorn - roasted
1 inch fresh ginger - peeled and lightly smashed
1 cinnamon stick
500 g chicken legs
- Combine all ingredients except the chicken in a pot. Bring to boil in medium heat.
- Add in the chicken and bring back to boil.
- Lower heat and simmer for 30 minutes. Turn or braise chicken with the sauce from time to time.
- Turn off heat, cover pot (if not yet covered) and let sit for 1 hour.
- Remove chicken from sauce. Cut up into serving pieces and serve with steamed rice or noodles in soup.
Note: The sauce can be re-used. Just re-boil it, strain the spices and discard, cool the sauce completely and then store in a glass or plastic container in the fridge.
My oldest and youngest kids love things Japanese. And that includes watching lifestyle shows in NHK World channel - the only one in our cable subscription that caters for anything Japanese. Well nowadays I'm watching them, too, but as expected mainly the food and cooking shows. One of these is the very informative Dining with Chef. They do step-by-step demonstrations of dishes including a lot of tips and tricks from Chef Tatsuo Saito.
One particular dish I adapted from that show is the fried chicken wings. Wings are my favourite part of a chicken. But to be honest I really only care for the middle section. I'm not particularly fond of the little wing drumettes. So to find this recipe from the Dining with Chef using only the middle section really delighted me. And it's so good especially when paired with the sauce. You should try it with hot steamed rice.
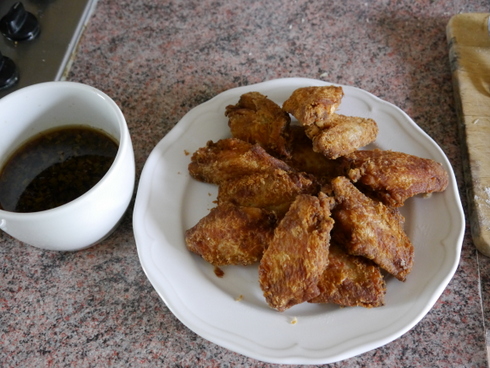
(Japanese Fried Chicken Wings)
12 mid-section chicken wings
1 Tbsp sake or rice wine
1 Tbsp soy sauce
plain flour
oil for deep frying
*For the sauce:
1 Tbsp sesame oil
2 Tbsp chopped green onions
1 Tbsp chopped ginger
1/3 cup dashi or chicken stock
3 Tbsp soy sauce
2 Tbsp rice vinegar
1 Tbsp sugar
- Dry the chicken wings with kitchen towels. Make a cut between the bones on the underside of the chicken wings - do not cut all the way but at the tip separate the wing bones by cutting through the joint. For illustrations go to the Dining with Chef website.
- Combine the sake and soy sauce in a bowl. Mix in the prepared chicken wings and marinate for about 30 minutes.
- Dredge wings in flour and deep fry in oil heated to 180°C/350°F for about 4 minutes or until crispy.
- Serve hot or warm with the sauce.
*Sauce:
- Saute the green onions and ginger in the sesame oil in a pan. Cook until aromatic.
- Add in the rest of the ingredients. Bring to boil then lower heat and simmer for 2-3 minutes or until the sugar is fully dissolved.

For the April Daring Cooks Challenge, Lisa from Parsley, Sage and Sweet has challenged us to debone a whole chicken, using this video by Jacques Pepin as our guide; then stuff it, tie it and roast it, to create a Chicken Ballotine.
A few years' ago I was an eager participant to the Daring Baker's food blogging monthly event. It has now morphed into a Daring Kitchen which includes the Daring Cooks challenge. Well, I say the more the merrier! I wanted to get going again after a few years absence but since my big oven conked out months before, all I could participate in is the Daring Cooks challenge.
I love this month's one, deboning a whole chicken. I've always wanted to learn how to do it but always beaten back by procastination. So this kind of dare is the very thing to spur me on. This particular technique of Jacques Pepin, is the simpler one since the back of the chicken is cut open. Next time I hope to learn the more tricky way of deboning poultry without cutting the skin which is the one used in the Filipino chicken relleno or chicken gallantina.
How did I fare? Well, I watched the video at least three times to remember the techniques and the order of the steps. Going back and forth to the computer while my hands are soiled is not something I planned on doing. So after memorizing the process, the deboning itself was quite straight forward. It's the sliminess that I found difficult at times usually when I have to grab the bones. But other than that I must say it went quite well. What I found tricky was the tying of the string! I can't make it 'link' to one another. So I had to refer to the end of the video and had to see it several times. Jacques did it very quickly and I didn't notice at first that he turned his hand to twist the string!
I didn't make the sauce in the recipe and instead used my usual gravy one but included it here in case I'll have the chance to make it next time around. The stuffed, bound and tied chicken was brushed with melted butter and sprinkled with a little salt and pepper then roasted. I served this for our Easter family dinner and it went down quite well. There's something about slicing so easily into that chicken without worrying about bones that makes this so appealing. I'm definitely doing this again.

1 whole chicken (about 1.8 kg) - deboned
1/4 tsp sea salt
1/4 tsp freshly ground black pepper
Red Rice Stuffing or Spinach, Cheese, and Bread Stuffing (see below)
*Gravy Sauce:
1/3 cup water
1/2 cup dry red wine or chicken stock
1/2 cup diced celery stalk
1 small onion - diced
1/3 cup diced carrot
1/2 tsp potato starch or cornstarch/cornflour dissolved in 1 Tbsp water
1 Tbsp dark soy sauce
1 Tbsp chopped fresh parsley
melted butter
- Preheat oven to 200°C/fan 180°C/400°F/gas mark 6.
- Lay the deboned chicken skin side down and sprinkle the salt and pepper.
- Spread the cooled stuffing mixture evenly over the chicken - stuffing the legs, too. If using the spinach stuffing, sprinkle the cheese and bread cubes on top of the spinach.
- Roll the chicken up, tie it with kitchen string, brush with melted butter and place in a roasting pan.
- Roast in the oven for about 45 mins - 1 hour or until the temperature in the centre of the chicken ballotine is 70°-74°C/160°-165°F. Check the chicken midway through the roasting time to see if it is browning too much in which case you can reduce the temperature to 190°C/fan 170°C/375°F/gas mark 5.
- Remove from oven and lift from pan into a serving platter. Let rest for at about 10 minutes before serving.
*For the gravy sauce:
- Skim off and discard most of the fat from the drippings in the pan. Add water and wine (or stock) to deglaze the pan, and heat over medium heat, stirring to loosen and melt the solidified juices.
- Strain the juices into a saucepan. Add the celery, onion and carrot. Bring to a boil in high heat. Cover, reduce the heat to low and boil gently for 5 minutes.
- Stir in the dissolved potato starch and soy sauce. Bring back to boil while stirring to thicken it. Remove from the heat.
Red Rice Stuffing
115 g [1/2 cup] Wehani rice
300 ml [1 1/4 cups] chicken or vegetable stock
1/4 tsp sea salt
15 g [1/2 cup] dried mushrooms (such as porcini) - rinsed and broken into pieces
1 cup chopped leek (white part)
1 onion - chopped
1 Tbsp olive oil
60 ml [1/4 cup] water
- Combine the rice, stock, salt and dried mushrooms in a large saucepan. Bring to a boil, cover and reduce the heat to low. Cook for 1 hour or until the rice is tender. Set the rice aside in the pan, uncovered.
- In another saucepan, combine the leek, onion, oil and water and bring to boil. Cover, reduce the heat, and cook in gentle heat for 5 minutes. Remove the lid and continue to cook until all the water is gone.
- Add the rice, mix well and let cool to room temperature.
Spinach, Cheese, and Bread Stuffing
1 Tbsp olive oil
1 tsp finely chopped garlic
140 g baby spinach leaves
1/4 tsp sea salt
1/4 tsp freshly ground black pepper
1 cup grated Gruyere or matured cheddar or mozzarella cheese
1 1/2 cups cubed bread
- Heat the oil in a large saucepan or skillet. Add the garlic, spinach, salt, and pepper. Cook for 1 minute or until the spinach is wilted.
- Transfer to a sieve set over a bowl. Drain and let cool to room temperature.

Most of the recipes I read in the internet said not to scrimp on the spices. Most also suggest to marinate for 1 hour only. But I did get a lot of flavour when I extended that to 6 hours. It was great tasting!
One of the secrets, according to Mang Melchor, is in the vinegar. Use your best and most acidic 'native' vinegar and you cannot go wrong. A lot of people swear by the use of Star margarine or butter in the basting sauce. But on my two trials I used the rendered fat from the chicken itself with nothing but achuete to colour it and it came out good. Next time I'll put some butter and salt in it. We'll see ...
This recipe is still in the tweaking stage so the proportion and ingredients will most likely change later on as I continue to discover the best way of grilling these chicken delights.
Chicken Inasal
1 kg chicken legs
6 Tbsp vinegar
6 Tbsp calamansi or lemon juice
1 Tbsp sea salt
2 tsp brown sugar
3 Tbsp minced garlic
3 Tbsp minced ginger
1 piece tanglad (lemongrass) - chopped into 1-inch pieces
freshly ground black pepper
*Basting Sauce:
3 Tbsp rendered chicken oil or vegetable oil
1 Tbsp achuete (annatto) seed
- Trim excess fat and skin from the chicken and set aside. Make diagonal slits on both sides of the chicken legs.
- Combine all other ingredients then put in a plastic ziploc bag together with the chicken legs. Marinate for at least 2 hours.
- For the basting sauce, cook the reserved chicken fat and skin with a little water. Once the water evaporates, drizzle a little oil. Fry the chicken fat until well crisp.
- Remove the crispy chicken fat/skin and add the achuete seeds. Lower heat and cook for about 1 minute or until the achuete gives off its deep red colour. Strain the achuete seeds and discard. Set aside the coloured oil for basting.
- [Optional] Place the chicken legs in a baking pan tightly covered by aluminum foil. Bake at 180°C/fan 160°C/350°F for 25 minutes.
- Grill chicken on a charcoal barbecue while basting with the achuete oil from time to time. Cook until outside is crisp and well browned.
Note: If you skipped the oven-cooking, grill the chicken on indirect heat in the barbecue for at least 15-20 minutes to ensure that the inside is cooked. Then move it to direct heat for the last 5-10 minutes of browning.
It's nearly bye-bye time for the Miele Steam Oven that I blogged about a few weeks ago. They're picking it up next week. During the three weeks that we had the privilege of trialling it, we cooked a varied number of dishes besides the fact that my kids used it a lot for re-heating food. They're actually sad that it's going soon.
One of the things I used it for is on embutido. Everyone knows that you have to steam them for 1 hour which is not a problem in this oven.
I found it very useful in steaming a batch of potatoes for one evening that we need it for mashed potatoes.
Several times I steamed veggies in it like these broccoli. It was excellent, the broccoli retained its vibrant green colour while being cooked through and full of flavour.
The one we were wanting most to steam was a fresh sea bass. We got our wish when we visited the Bull Ring Indoor Market in Birmingham and came away with a good sized one to steam Chinese-style.
I also managed to try new recipes like this steamed chicken that I adapted from my well thumbed Chinese Cuisine cookbook by Huang Su-Huei.
Steamed Chicken with Green Onion
1 kg whole chicken of whole legs
1 Tbsp cooking wine
1 Tbsp salt
1 green onion - cut into 4 pieces
2 slices of ginger
1/2 cup shredded green onion
4 Tbsp shredded ginger
fresh ground black pepper
1/2 Tbsp cornstarch
1 Tbsp water
- Combine the cooking wine, salt, green onion (the one cut into 4 pieces), and the slices of ginger. Set aside.
- Combine the cornstarch and water in another bowl. Set aside.
- Wash the chicken and pat it dry.
- Rub both the outside and inside of the chicken with the salt mixture. Leave the mixture inside the chicken. Let stand for 1 hour.
- Place in a steamer breast-side up and steam over high heat for about 35 minutes.
- Remove the chicken and reserve the liquid.
- Chop the chicken into bite-sized pieces and put in on a serving platter.
- Sprinkle the shredded onion, ginger, and ground black pepper on top.
- Heat 1/2 cup of the reserved steaming liquid up to a boil.
- Stir in the cornstarch mixture. Let cook for a few seconds or until thick. Pour over the chicken.
 When I saw the picture of this dish in Ken Hom's Hot Wok cookbook, I thought I just gotta make one like it. The combination of chicken and broccoli I definitely cannot resist. But you know how it is with Ken Hom's recipes, you have to tone the saltiness way way down. I wonder if he has any kidney problems?
The very first time I cooked this it was sooo salty that me and my husband were not able to continue after a few spoonfuls. So this time the patis is reduced to a third, oyster sauce and soy sauces reduced as well and I eliminated the salt. Perfect!
Broccoli Chicken
500 g boneless chicken thighs - cut into 1-inch pieces
2 Tbsp chopped garlic
1 medium onion - quartered
2 Tbsp rice wine or cooking wine
2 Tbsp water or chicken stock
3 medium tomatoes - quartered
2 Tbsp oyster sauce
1/2 Tbsp patis (fish sauce)
1 tsp sugar
1/2 tsp freshly ground black pepper
2 tsp sesame oil
450 g broccoli - cut into small florets
1/2 cup cooking oil
*Marinade
1/4 tsp freshly ground black pepper
1 tsp patis (fish sauce)
1 tsp light soy sauce
cornflour - for dusting
- Marinate the chicken meat in the black pepper, patis, and light soy sauce for about 30 minutes.
- Drain meat from marinade and roll the pieces in cornflour, shaking off excess.
- Mix the oyster sauce, fish sauce, sesame oil, pepper, and sugar in a small bowl and set aside.
- Boil or steam the broccoli until just cooked. Immediately plunge in cold water. Drain thoroughly.
- Heat a wok with the cooking oil over medium heat. Once hot, fry the meat pieces until golden brown. Drain on paper towels and set aside.
- Drain off all the oil. Heat the wok again and add 1 Tbsp oil. When it is hot add the garlic and onion. Stir fry for 1 minute.
- Add the broccoli and continue to stir fry for 1 more minute.
- Add the rice wine and water and continue to stir fry on medium-high heat for 4 minutes.
- Stir in the oyster sauce mixture and the tomatoes. Continue to stir fry for 30 seconds.
- Add the chicken and stir-fry for another 2 minutes or until the chicken is heated through.
- Dish up to a warm platter and serve at once.


 Sorry Andrew, although you asked us to make something more uncommon Indonesian fares for the latest installment of WTSIM, I just couldn't help doing this chicken satay recipe that I have bookmarked about two years ago. When I read how Mike of Lafang gushed about his friend's satay recipe I thought just have make this and the current theme of Indonesian for WTSIM seems the perfect excuse for me to do it.
The very first time that I had Indonesian food was when I lived in cosmopolitan Hong Kong. Back then I was aware that our country's neighbor's food is similar to ours although a bit more on the spicy side. So when a Dutch friend invited us in Cinta restaurant down in Wan Chai, we didn't lose time ordering the likes of rijsttafel, nasi goreng, sago malacca, and of course chicken satay. The latter was served imaginatively where a small charcoal grill is brought to the table and you grill the skewered chicken on right there. Lovely!
As can be gleaned from some of the names of traditional Indonesian dishes, there were Dutch influences in the country by way of the Dutch East India company that colonised it starting in the 17th century. Rijsttafel - means rice table and is a collection of small amounts of different dishes, rice or vegetables in a wide platter. Sort of like a precedent of the tasting menu. It was perfect for me since I love sampling different dishes in one sitting.
Anyway, this satay recipe is really good. I just made a small adjustment in the salt department. I thought it needs a little bit more seasoning so the adjustment is already there. The one lesson for me here is to cut the meat in chunks not in thin slivers! At the grill, my slivers were either sticking to the metal grills or disintegrating altogether. But they were oh so tender. Love them!

1/2 tsp ground fennel seeds
1/2 tsp ground coriander seeds
1 medium onion or 6 shallots - chopped
2 cloves garlic
1 stalk lemon grass, white part only - chopped
1 tsp turmeric
1 inch fresh ginger - peeled
2 tsp sugar
1/2 tsp fine salt
1 tbsp vegetable oil
750 g chicken thighs or breasts - cut into 1-inch chunks
bamboo skewers
- Grind or pound the garlic, ginger, fennel, coriander, onion, lemon grass, turmeric into a paste.
- Add sugar and salt, mix well.
- Marinate chicken into this mixture for at least 2 hours or overnight.
- Soak bamboo skewers in water for about 30 minutes. Thread the marinated chicken through the skewers.
- Brush with oil and grill on hot charcoals.
- Serve with peanut sauce and fresh salad.
Peanut Sauce
1 medium onion or 6 shallots - chopped
2 cloves garlic
2 stalks lemon grass, white part only - flattened or chopped
2 dried red chillies - soaked, drained and chopped
4 tbsp peanut oil
1 tsp ground coriander seed
1 tsp ground turmeric
1 1/2 cups coconut milk
1 1/2 Tbsp sugar
1/2 Tbsp fish sauce
1/2 cup peanuts - finely chopped
1 1/2 Tbsp tamarind paste
salt to taste
- Grind or pound the onion, garlic, lemon grass, and chillies into a paste.
- Heat the peanut oil in a saucepan.
- Saute the onion mixture in the hot oil on medium heat for a few minutes or until fragrant.
- Add the coriander and turmeric. Cook for about a minute.
- Stir in the coconut milk and bring slowly to a boil while stirring continously.
- Add the fish sauce, sugar, tamarind paste, and peanuts. Simmer while stirring occasionally until thick or desired consistency is achieved.

Inasmuch as I'd like to have a perfect smooth-skinned roasted chicken, my picture belies the fact that I use a rack. Having a rack tends to dry out the bottom of the pan a little. I like to have some crusted bits in there to give lots of flavour to the gravy.
There are so many ways of roasting chicken. Some recipes have the chicken positioned upright, some puts the chicken on one side then move to the other side after a period of time, for some you have to put in butter underneath the skin, some asks you to put in everything with it, and so on. What I'm recording here is the very simplest way that I know to roast a chicken while still retaining that all-important juiciness in the meat - specifically in the breast (picho) area.
To do this, you can see in my procedures that for the first half of the baking/roasting the chicken is placed breast-side down. This makes the juices to run down to the breast area and keep it moist. The downside is it will result in a little bit flattened breast in the final product. Silicone anyone? ;) But I'm sure you'd trade flat chests ... er... breasts with extra juiciness, wouldn't you?
Okay so much for breasts. Lemon is optional because recently I've been noticing that sometimes it lends some bitterness in the underside of the chicken. This comes from the lemon skin and I really have no clue how to resolve it. Though it does give a boost of a little sourness in the gravy which greatly enhances it. If I don't use lemon in the inside I just squeeze about a tablespoon of lemon juice in the gravy.
If price is no object, I would definitely suggest you use organic free-range chicken. In my experience, they consistently give the best flavour not only in the meat but results in much better gravy as well. I have heard from Stel and read from my current cookbook bible (The New Best Recipe) that brining the chicken before roasting improves the flavour by a mile. I shall try that next time and report the results here.
Roast Chicken
1 whole chicken (about 1.8 kg)
3 tbsp butter - either in room temperature or melted
salt and pepper
herbs and spices (optional)
lemon (optional)
- Preheat the oven to 190°C/fan 170°C/375°F.
- If you buy the chicken from supermarkets they are usually bound by a string around the wings, legs and feet. Remove all the strings from the chicken but keep the wings tucked under the chicken.
- Tie the chicken around the feet only.
- (Optional) You may use half or a whole lemon. Pierce it all over by a fork then put it in the breast cavity via the hole at its end.
- If using melted butter, spread it all over the chicken with a pastry brush.
- If using room temperature softened butter, use your fingers to slather the butter all over the chicken.
- Sprinkle salt and pepper all over.
- (Optional) Sprinkle all over whatever herbs or spices you want to put on it. If need be, omit the salt and pepper.
- To calculate how long to bake, give 25 minutes for every 500 g of chicken. So our 1.8 kg bird is to roast in the oven for a total of 90 minutes.
- Place the chicken breast-side down in a metal roasting pan (you may use a rack if desired). Bake in the preheated oven for half its baking time (in this case 45 minutes).
- Remove from oven and turn it so that it is now breast-side up. At this point I usually sit it on a rack but it's up to you if you want to or not.
- Immediately return back to the oven and bake for the remainder of its baking time.
- When done, remove from oven and place on a serving dish. Cover loosely with foil and let rest for about 10-15 minutes while you're making gravy.
- Serve sliced with roast potatoes, gravy and veggies.
Chicken Gravy
2 Tbsp chicken fat or butter or vegetable oil
2 heaping Tbsp flour
2-3 cups chicken stock (approximate)
salt and freshly milled black pepper
2-3 tsp lemon juice (optional)
- Remove the chicken fat or drippings from the roasting pan but retain about 2 Tbsp.
- Put the roasting tin on the cooker hob and heat up the fat.
- Once moderately hot, sprinkle the flour on it. Cook the flour (preferably with a wire whisk) with the fat for a few minutes.
- Add the stock gradually in 1/2 - 1 cup batches. For each addition, bring the mixture back to boil while continually stirring making sure to scrape the bottom for all the roasting bits left in the pan.
- Once all the stock is added, bring back to boil and then lower heat to simmer for about 2-3 minutes.
- If the stock is too thick add more water or chicken stock. If too thin then simmer it longer until the desired thickness is achieved.
- [Optional] Add a squeeze of lemon juice.
- Taste the gravy and add salt and/or pepper if necessary. Strain liquid into a serving jug. Serve hot.

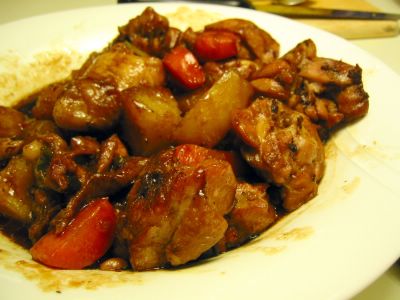 "Chicken again?!" is my kids' gripe whenever they see a winged creature on my chopping board. I was afraid they might picket outside the kitchen to demand other food. Well, what can I do? Barring bird flu or salmonella, chicken is probably the cheapest meat you can have. We really prefer fish and other seafood but my gulay! The prices of fish here in London! No way we can afford them everyday. Unlike back in the Phils. where fish is so commonplace that people turn up their noses on galunggong (fish similar to mackerel). Getting back to my cooking, I came face to face with some chicken and this laziness to go to the supermarket for additional ingredients. Solution -> find a recipe which uses the usual cupboard ingredients or ones that I already have and voila mwala! Here comes the Chinese Cooking for Beginners by Huang Su-Huei to the rescue.
Chicken Soy Sauce
"Chicken again?!" is my kids' gripe whenever they see a winged creature on my chopping board. I was afraid they might picket outside the kitchen to demand other food. Well, what can I do? Barring bird flu or salmonella, chicken is probably the cheapest meat you can have. We really prefer fish and other seafood but my gulay! The prices of fish here in London! No way we can afford them everyday. Unlike back in the Phils. where fish is so commonplace that people turn up their noses on galunggong (fish similar to mackerel). Getting back to my cooking, I came face to face with some chicken and this laziness to go to the supermarket for additional ingredients. Solution -> find a recipe which uses the usual cupboard ingredients or ones that I already have and voila mwala! Here comes the Chinese Cooking for Beginners by Huang Su-Huei to the rescue.
Chicken Soy Sauce
500 g - 600 g chicken legs or wings - cut into bite-size pieces
1 Tbsp soy sauce
oil for deep-frying
1 potato (about 250 g) - cut into bite-size pieces
1 medium carrot - cut into bite-size pieces
1 green onion - cut into 1/2-inch pieces
1 1/2 Tbsp cooking wine
*Sauce:
1 cup water
1/2 Tbsp sugar
2 Tbsp soy sauce
*Thickener:
1 Tbsp water
2 tsp cornstarch
- Marinate the chicken in the 1 Tbsp soy sauce for about 20 minutes.
- Mix the sauce and thickener in separate containers. Set aside.
- Heat the oil in the wok and deep-fry the marinated chicken for about 4 minutes or until golden. Remove and drain briefly in paper towels. Set aside.
- Deep-fry the potatoes and carrots until golden (about 3 minutes). Drain and set aside.
- Remove the oil from the wok and then add 1 Tbsp oil.
- Stir fry the green onions until aromatic.
- Add the chicken, wine and sauce. Cover, bring to boil and simmer for 5 minutes.
- Add in the potatoes and carrots. Cook for a further 10 minutes.
- The sauce should reduce to about 1/2 cup. Stir in the thickener and bring gently to boil. Dish up and serve.
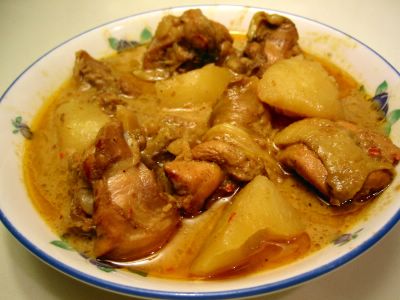 I can still smell the pungent rich aroma of this nice curry. Lots of spicy tang from the tanglad (lemon grass), belachan (shrimp paste), lots of ginger, and of course the curry powder. Then enriched with the addition of coconut milk. Yum! This is more of a Southeast Asian type of curry rather than the Indian type which is noticeable with the lemon grass and belachan.
I've been hankering for a nice hot curry probably prodded on by the cold weather permeating Southern England right now. Instead of buying or borrowing another cookbook, I rummaged through all of mine scattered throughout the house where I found this gem of a recipe from one of my oldest cookbooks that hails all the way from Hong Kong (circa 1991), Cecilia Au-Yeung's Chopsticks Recipes: Introduction. And I just love love love the resulting aroma in this fabulous keeper of a dish. The only thing I had a problem with was the ginger juice. I didn't have enough of the root crop to squeeze that much besides I thought it's too much work for moi. So I just julienned about 2-square inch of it for the marinade and removed them before adding in the chicken. Other than that, it would help if you have an electric chopper so you could just whiz all the spices and wouldn't have to pound away with a heavy mortar and pestle. So if you find yourself in an Oriental store one time, pick up a few of the more exotic ingredients (the rest are common in kitchens everywhere) then do try this one - I highly recommend it!
Chicken Curry
1 1/2 kg chicken - cut into serving pieces
2 onions - mashed or pureed
3 Tbsp curry powder
1 tsp turmeric
2 Tbsp ginger juice*
2 Tbsp cooking wine
2 slices ginger
1 lemon grass
5 Tbsp oil
3 garlic cloves
2-3 chillies - seeded and chopped
2 tsp belachan (shrimp paste)
500 g waxy potatoes - peeled and quartered
1/2 cup water
2 cups coconut milk
2 tsp sea salt
1 Tbsp sugar
1/2 tsp chicken powder
- Mix the ginger juice, 1 Tbsp of the curry powder, and wine with the chicken. Marinate for at least 1 hour. Set aside.
- Remove outer skin of the lemon grass. Lightly mash then chop into smallish pieces.
- Using a mortar and pestle (or an electric blender/chopper) mash the lemon grass, garlic, ginger, belachan, and chillies into a smooth paste. Set aside.
- Combine 1 Tbsp of the oil with the turmeric powder and 2 Tbsp of the curry powder to make a thick paste.
- Heat a pan with 1 Tbsp oil and saute the pureed onions until aromatic.
- Add in the curry mixture and fry for about 30 seconds. Remove from heat.
- Mix in the lemon grass mixture and stir to combine well.
- In a medium sized pot, heat 3 Tbsp oil and saute the curry-lemon grass mixture over low heat until pungent.
- Stir in the chicken with the marinade and cook for about 2-3 minutes.
- Add in the water, salt, sugar and chicken powder. Simmer for 20 minutes.
- Tip in the potatoes and simmer for about 10 minutes or until potatoes are cooked.
- Stir in the coconut milk and bring to boil again.
- Remove from heat and dish up.
*Note: If you don't have the equipment nor the inclination to make ginger juice, peel and julienne a 2-inch square piece of ginger and use this instead.
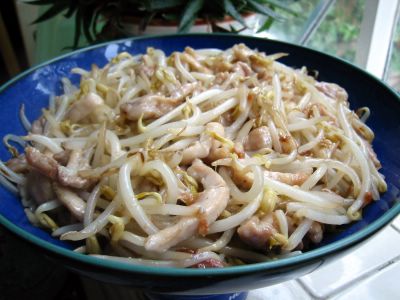 Here's a recipe where you can use up your extra toge or beansprouts. I seem to always buy too much of it whenever I need some for stir fries and noodle dishes. So this is handy if you don't want to just throw them in the bin. The chicken gives it the protein you need to balance out the veggie plus if you've been cooking a lot of leche flans or creme caramel, this is one way to use up the egg whites though at just half a piece it probably won't dent your surplus that much. The recipe is adapted from Huang Su-Huei's Chinese Cuisine cookbook.
Stir-fried Beansprouts with Chicken
Here's a recipe where you can use up your extra toge or beansprouts. I seem to always buy too much of it whenever I need some for stir fries and noodle dishes. So this is handy if you don't want to just throw them in the bin. The chicken gives it the protein you need to balance out the veggie plus if you've been cooking a lot of leche flans or creme caramel, this is one way to use up the egg whites though at just half a piece it probably won't dent your surplus that much. The recipe is adapted from Huang Su-Huei's Chinese Cuisine cookbook.
Stir-fried Beansprouts with Chicken
250 g boneless chicken meat - shredded or jullienned
250 g bean sprouts
1/4 cup oil
*Marinade:
1/4 tsp salt
1/2 Tbsp cooking wine
1/2 egg white - slightly beaten
3/4 Tbsp cornstarch
*Sauce:
1 tsp cornstarch
1 tsp cooking wine
3/4 tsp salt
3/4 tsp sugar
1 1/2 Tbsp water
black pepper
dash of sesame oil
- In a bowl, mix the marinade: stir the salt in the cooking wine until dissolved.
- Add in the chicken, mix well. Mix in the egg white, mix well. Then add the cornstarch, mix well again. Set aside for about 20-30 minutes.
- Mix all the ingredients for the sauce in another bowl. Set aside.
Heat the wok and pour in the oil.
- Mix additional 1 Tbsp oil into the marinated chicken to make them separate easily during cooking.
- Once the oil in the wok is smoking, tip in the chicken and stir fry for about 3-4 minutes or until cooked. Remove from the wok and drain on paper towels.
- Remove the oil from the wok but retain about 2 Tbsp in it. Reheat wok.
- Stir fry the bean sprouts for a few minutes until slightly wilted.
- Add in the chicken and stir fry for 30 seconds.
- Turn up heat to high and mix in the sauce. Stir for a few seconds or until the sauce has thickened. Dish up and serve.
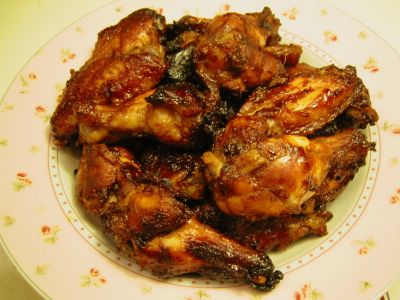 Judging from the number of my recipes under the 'chicken' category, you can easily tell that my favourite part is the wings. Here's another rendition of the standard barbecue sauce for wings. I liked the little sharp tinge of spiciness from the Tabasco and the paprika although you can entirely omit these two and it can still stand on its own. I adapted this from one of those free recipe leaflet in Morrison's (a local supermarket). Quite tasty and would not go amiss in the barbecue come summer time.
Sticky BBQ Wings
Judging from the number of my recipes under the 'chicken' category, you can easily tell that my favourite part is the wings. Here's another rendition of the standard barbecue sauce for wings. I liked the little sharp tinge of spiciness from the Tabasco and the paprika although you can entirely omit these two and it can still stand on its own. I adapted this from one of those free recipe leaflet in Morrison's (a local supermarket). Quite tasty and would not go amiss in the barbecue come summer time.
Sticky BBQ Wings
1 kg chicken wings
2 Tbsp soy sauce
4 tsp Worcestershire sauce
5 Tbsp ketchup
2 tsp Dijon mustard
1 tsp Tabasco sauce or to taste (optional)
2 tsp paprika
2 Tbsp honey
1 tsp minced garlic
cooking oil
- Combine together all the ingredients in a bowl (except the chicken and oil). Marinate chicken for at least 2 hours or overnight.
- Preheat oven to 200°C/fan 180°C/400°F.
- Remove the chicken wings from the marinade. Arrange on a baking tray. Brush lightly with oil.
- Bake for about 35-40 minutes or until the meat is no longer pink in the bone and turning the wings from time to time.
- You may also cook this in a barbecue in which case it has to be grilled for 6-8 minutes on one side. Then turn and cook for another 10-12 minutes. Before removing check first if the meat is thoroughly cooked.
- Serve warm.
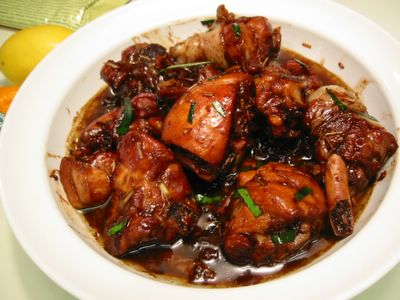 The moment I saw this dish in Stel's blog, adapted from the cookbook Shiok! by Terry Tan and Christopher Tan, I was enamored. I felt I had to try it since we often have chicken at home, much more than any other meat and had to find other ways of serving it from the usual. Both me and my husband love the salty-sweet taste plus the subtle flavour of the blachan which is very similar to the Pinoy's bagoong. Stel was right, hot steaming rice is the perfect accompaniment with this dish plus any salad or stir fried vegetables.
The blachan or shrimp paste that I got from our local Chinese grocery is from Thailand branded as 'Tranchang'. Malaysia and Indonesia also have this pungent ingredient. It's drier, finer and more concentrated than our bagoong but imparts similar taste and aroma. If you can't find it, I think you can substitute bagoong. The only complain my husband had was he got pricked with the lemon grass while eating because what I did was to chop it into small pieces and mash with mortar and pestle. After conferring with the chef Stel, next time I'll cut them into bigger pieces, just slightly bruise them so it can be easily fished out before serving. So here's my take on this tasty dish and thanks to Stel for sharing it.
Ayam Tempra
(Spicy-Sour Stir-fried Chicken)
750 g chicken - cut into serving pieces
2 Tbsp oil
1 tsp minced garlic
1 medium onion - quartered
1 stalk lemongrass - cut diagonally into 1 inch pieces, pounded slightly
1 long green chilli pepper - sliced (optional)
1 bird chilli - sliced (optional)
1/2 cup chicken stock/broth
3 Tbsp lime juice
3-4 Kaffir lime leaves - midrib removed and leaves finely sliced
*Marinade:
1/2 Tbsp minced garlic
1 stalk lemongrass - cut diagonally into 1 inch pieces, pounded slightly
1 tsp shrimp paste (blachan)
3 Tbsp ketjap manis (thick sweet soy sauce), or dark soy sauce
1 1/2 Tbsp water
1 1/2 Tbsp crushed palm sugar
- In a mortar and pestle mix and mash all marinade ingredients and pour over chicken. Set aside and let sit for at least an hour. Drain and reserve marinade.
- In a wok, heat the oil over medium high heat. Saute the garlic, onion, lemongrass, and chili, until fragrant.
- Add chicken pieces and stir fry until chicken is well browned.
- Pour in the marinade and chicken broth. Bring to boil then lower heat to a simmer.
- Stir from time to time, adding more broth or water a little at a time if it gets too dry. Cook until chicken is tender, about 25-30 minutes.
- [optional] Remove lemongrass.
- Add in lime juice, Kaffir lime leaves, and salt to taste. Stir well and remove from heat. Serve.
Note: If using boneless chicken meat, cooking time is cut drastically and you may not need to add more broth or water.
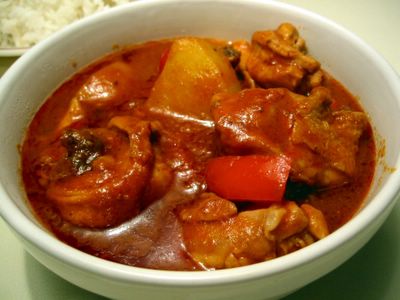
I've done several recipes for caldereta with different takes on this spicy dish. But I always comeback to this version which is the simplified amalgamation of most of the calderetas I have tasted. Goat's meat is traditionally used in the Filipino caldereta. The spiciness lends well and sort of masks the 'gamey' taste of the goat's meat and since it's quite tough the dish benefits from the long simmering making the sauce quite rich. Like any popular dish, it's got lots of variations and mine here uses chicken instead of red meat. I tone down the spiciness if I know my children are having it otherwise I add the full gamut of fresh chillies and Tabasco sauce. Also for everyday use I often skip the chorizo and olives. This recipe can be adapted for red meats as well such as goat's meat, mutton, beef, lamb, etc. The only difference that I could think of is that you have to marinate the red meat longer and obviously simmer/cook it for a longer time.
Chicken Caldereta
1 kg chicken - cut into serving sizes
1/3 cup vinegar
2 tsp salt
1/2 tsp black peppercorns - lightly cracked with mortar and pestle
1/2 Tbsp minced garlic
1 medium onion - chopped
oil for frying
500 g passata (tomato sauce)
1/4 cup coarse grained liver pate (or mashed cooked liver or 85gm can of liver spread)
125 g chorizo - chopped into 1/2-inch slices [optional]
1/2 bell pepper - seeded and sliced
1 green or red fresh chilli [optional]
hot chilli sauce (or Tabasco)
1/3 cup bottled olives - drained [optional]
1/3 cup peas (fresh or frozen)
250 g potatoes - peeled and quartered
1/2 cup grated cheddar cheese
- Mix vinegar, salt, garlic, and peppercorns in a bowl. Add chicken pieces, mix well. Marinate chicken for at least 2 hours.
- In a big pot, heat oil for frying. Drain chicken from marinade and brown briefly in the oil in batches. Set aside.
- Remove oil from the pot but leave about 2 Tbsp. Heat up again and saute the onion on medium heat until soft and translucent (about 4-5 minutes).
- Scoop out the garlic and peppercorns from the marinade and add to the onion. Saute for a few minutes.
- Add in the browned chicken, stir for a minute.
- Add the rest of the marinade, stir and cook for about 30 seconds.
- Stir in the passata and bell pepper. Bring to boil then turn down the heat.
- Add the chorizo and fresh chilli (if using). Simmer until meat is almost done.
- Stir in the liver pate and mix well to combine.
- Add potatoes and peas. Simmer until potatoes are cooked.
- Add grated cheese, mix well until cheese has melted.
- Taste sauce and correct seasonings adding hot chilli sauce if preferred.
- Add olives just before removing from heat. Serve warm.

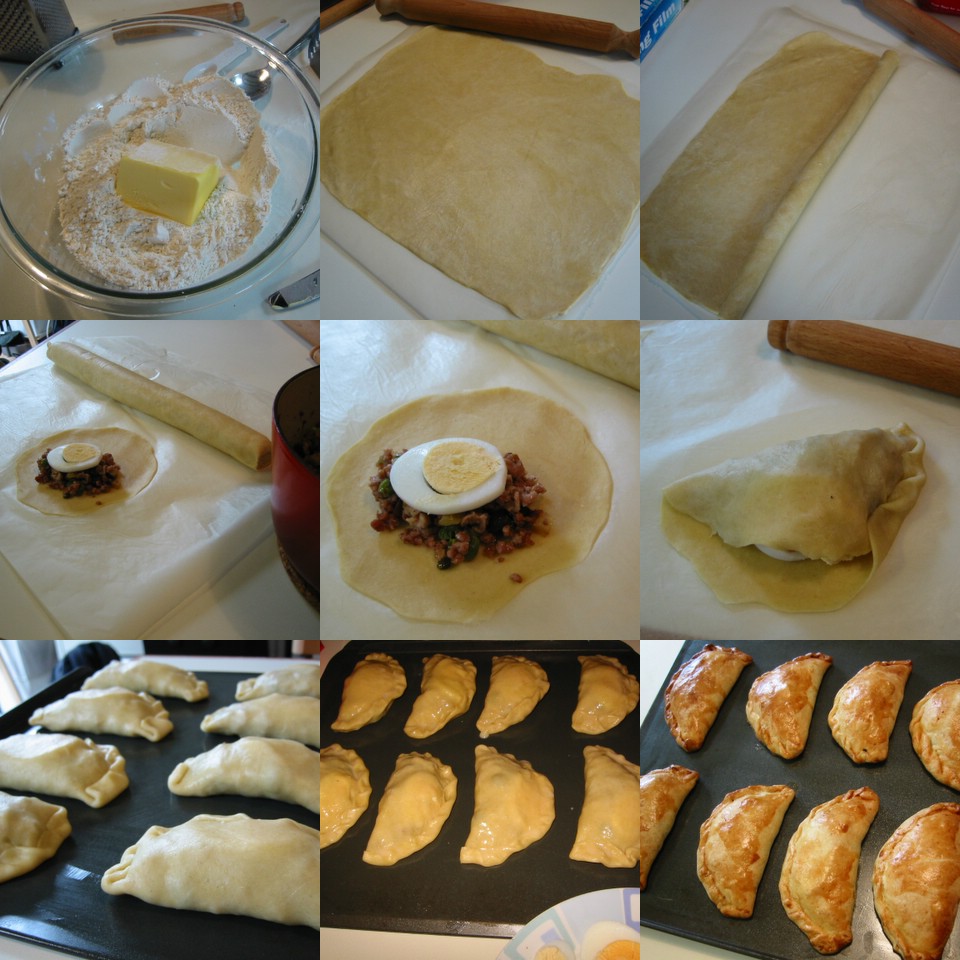
The last time I made these was about seven years ago. Too long ago that I almost forgot how to flute the edges of the pastry. Obviously this is Spanish in origin, although the Iberian version is more savoury usually with chorizos while this Filipino version is on the sweet side. Made with sweet raisins on the inside and the pastry added with some sugar.
I'd like to think these meat filled pastries are universal. Virtually every region in the world has a version of it. They vary in size and in fillings and obviously called different names but still is essentially the same 'ol thing. Called empanada in Spanish influenced countries and birdie in Scotland. Make them a bit bigger and they are called pasties in Cornwall.
I was supposed to do Stel's chicken empanada but I didn't make it to the supermarket to buy the all important asparagus soup. So I scrounged for a recipe where I had all the ingredients and found Carolina Acosta's handiwork in the Maya Cookfest 1 cookbook. Some things I have to change like omitting the hotdogs (I didn't have them) and increasing the pork and chicken. I did not precook the chicken just cooked them from raw. And as usual reduced the oil and butter. Turned out okay I thought, however, I surmised I should have stuffed more fillings in each parcel.
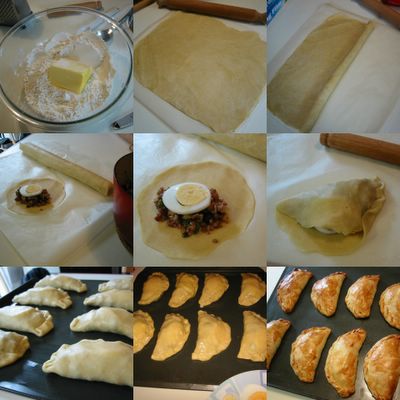
Pork-Chicken Empanada
*Filling:
1 Tbsp cooking oil
1 Tbsp butter
1 tsp minced garlic
1 medium onion - chopped
1/2 cup finely chopped bacon
1 cup minced pork
1 cup chopped chicken meat
1 cup peeled and diced potato
1 tsp Worcestershire sauce
1 tsp sugar
salt and pepper (to taste)
1/2 cup frozen peas
1/2 cup raisins - chopped
2 hardboiled eggs - sliced
chicken stock
*Pastry:
2 cups plain flour
1/2 tsp baking powder
1/2 tsp salt
2 tsp sugar
1/2 cup butter
5-6 Tbsp cold water
*For filling:
- Saute garlic and onion in oil.
- Stir in the bacon and fry for a few minutes.
- Add pork, cook in medium heat for about 15 minutes. Mash from time to time to break up meat. Add chicken stock 1-2 Tbsp at a time if the pork is getting too dry.
- Add seasonings - Worcestershire sauce, sugar, salt and pepper.
- Add chicken, cook in medium heat for a further 10 minutes or until chicken meat is opaque and cooked thru. Again add chicken stock a little at a time if it's getting too dry.
- Add potatoes, peas, and raisins. Cook until peas and potatoes are cooked through (about 5 minutes). Blend in the butter.
- Remove from heat and cool.
*For the pastry:
- Combine well the flour, baking powder, salt and sugar in a bowl.
- Cut in butter to the flour mixture with pastry cutter or two butter knives until particles are pea-sized.
- Add water a tablespoon at a time while tossing the flour mixture with a fork until all the flour is moistened and can be formed into a ball. Press the dough ball while turning a few times to incorporate all the flour in.
- Wrap in plastic cling film and chill in the fridge for 30 minutes.
*To assemble:
- Preheat oven to 200°C/fan 180°C/400°F/gas mark 6.
- Remove cling film from the dough and flatten with a rolling pin on a floured table or surface and shape into a log. (I usually use greased paper at the bottom and plastic cling film on top)
- Cut a piece and form into a ball about the size of a golf ball (1-inch in diameter).
- Flatten on the surface and roll out thinly into more or less a round shape.
- Put a heaping tablespoon of the filling mixture on the rolled out dough and top with a slice of hard-boiled egg.
- Pull one end or half of the dough over the other forming a half-circle shape.
- Seal edges by pinching by hand or with the tines of fork while cutting excess dough in the process. Repeat with the rest of the dough and fillings.
- Arrange empanadas on a lightly greased baking sheet and brush tops with egg wash (1 egg beaten with 1 tsp milk).
- Bake in oven for 20-25 minutes. Remove and serve warm or cold.
*Note: You may also deep-fry the empanadas instead of baking.
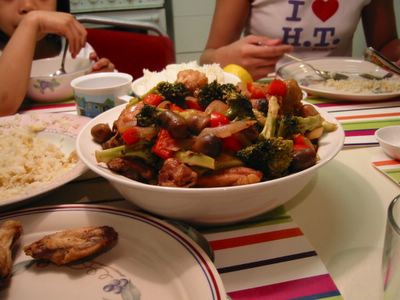
I enjoyed this dish though I can't say the same with my children. You know how children turn up their noses with new flavours. So I had to eat this alone (husby was out of the country) for 3 dinners! If I wasn't careful I'd be crowing already like a rooster!
If you notice, the sauces' measurements all had 1/2 Tbsp with it. It's because I got this from the Australian Women's Weekly's Chinese Cooking Class cookbook. In case you don't know, Aussie tablespoon measurement is 20 ml (4 teaspoons) as opposed to the 15 ml (3 teaspoons) for the US and UK. So it was either I keep the measurements and reduce the water or convert it to the US/UK equivalent and keep the water level the same. I chose the latter because I need enough moisture to cook the broccoli which refuses to cook evenly unless I cover the pan and let it simmer through.
Hoisin Chicken
1 kg chicken - cut into serving pieces
cornflour
oil for deep frying
2 Tbsp oil
1 inch piece of ginger - peeled and grated
1 medium onion
250gm broccoli - washed and cut into small flowerets
1 red bell pepper - deseeded and cut into 1/2-inch cubes
1 x 425 g can straw mushrooms
1 1/2 Tbsp soy sauce
2 1/2 Tbsp hoisin sauce
2 1/2 Tbsp cooking wine
2 Tbsp vinegar
1 cup water
2 chicken stock cubes
1/2 tsp sesame oil
1 Tbsp cornflour
2 Tbsp water extra
salt
- Dissolve 1 Tbsp cornflour in the 2 Tbsp water.
- Dissolve stock cubes in the water (I use hot water then let it cool down). Add in all ingredients for the sauce - soy sauce, hoisin sauce, wine, vinegar, sesame oil.
- Dredge chicken in cornflour. Deep fry until golden brown, drain.
- In a wok, heat 2 Tbsp oil with ginger gently. Once hot and sizzling, add onion; saute for 1-2 minutes.
- Tip in broccoli, pepper and mushrooms; cook for 2 minutes.
- Add sauce and cover and simmer until broccoli is cooked through.
- Mix in the cornflour-water mixture and boil until thick.
- Add the fried chicken and cook for 2 minutes more. Taste and correct seasonings. Serve.