Showing posts with label Lasang Pinoy. Show all posts

Monday, 29 October 2007

Lasang Pinoy 21: Pancit Bihon Guisado

The 21st edition of Lasang Pinoy is brought to you by Bryan of Fire Water Husband (blog under renovation) who has this great idea of Cooking for Heroes. It's just as well that our current logo features the exact hero I want to cook for - Andres Bonifacio.

Even in my elementary school days I feel our dear old Andy Boni got a raw deal. I do believe he should be our national hero for he started the Katipunan, he started the ball rolling to begin the revolution and break free from the colonial masters. And what did he get for all his heroism and troubles? He got salvaged (executed) for being a rival party in the election for the head honcho of the revolutionary government. Then he lost out again almost a hundred years later in being a national hero. If that's not a raw deal I don't know what is.

It's no use arguing now about his place in history but what is undeniable is his courage, heroism, and his love of his country and fellow Filipinos. To you Andres, a big lambanog toast for being a real Pinoy! Thank you for all the things you have done for us.

What I have in mind to cook for him is something that can be considered essentially Filipino and at the same practical and nutritious for a revolutionary who had to eat on the go. And I thought why not our classic pancit. It's a complete meal in itself. It's got carbs, protein from the meat, and some wholesome veggies thrown in the process. Sounds like a good idea to me. :)

Pancit Bihon Guisado

For the pancit recipe itself, this is the culmination of several years of my family's sacrifice of eating pancit as soggy and undercooked or dry and a bit tough or almost tasteless (prompting lots of toyo and lemon juice heaped on it). It took me awhile to get the hang of cooking the noodles just right. There is also the case with the oil, I used to put as little oil as possible while at the same time wondering what makes my mother's pancit well separated and really nice. Well I increased the oil exponentially with each batch - et voila! The oil is crucial! (I bet my doctor's not happy about this.) Too little will make it dry (obviously) and will tend to make it clump together. I also took my mother's advice of cooking the veggies separately to prevent it getting soggy. So like most dishes, cooking pancit successfully has a lot to do with timing. One revelation as well is that the richer your stock the better tasting your pancit will be. That my friend is guaranteed. :)


Pancit Bihon Guisado

250 g  thin or medium rice noodles (bihon)
3 Tbsp oil
1 Tbsp minced garlic
1 medium onion - sliced
1/3 cup jullienned carrots
1/4 cup sliced celery (optional)
15 pieces mangetout (sitcharo)
1 cup shredded cabbage
1 cup sliced meat - chicken, pork, shrimp or combination of these*
1 1/2 cups rich stock
2 Tbsp dark soy sauce
freshly ground pepper
salt
additional stock or water
  1. Soak the noodles in tepid water for about 20 minutes or until soft. Using scissors, cut into desired lengths. Drain and set aside.
  2. In a wok, heat 1 Tbsp of the oil in medium heat. Saute half of the garlic and half of the onions.
  3. Add the meat and stir fry a little. Season with salt and pepper.
  4. Add about 1/4 cup stock or water and simmer until done. You may have to add a bit more stock from time to time to keep it from drying out.
  5. When the meat is done, add the carrots, mangetout, and celery. Stir to combine. There should still be some liquid in the wok if not add about 2-3 Tbsp stock and then cook under cover for 2 minutes.
  6. Add the cabbage, stir fry for a few seconds and cook under cover for 1 minute.
  7. Remove from heat and transfer to a dish. Set aside.
  8. Using the same wok (no need to wash unless there's some burnt crust in the bottom), heat the remaining 2 Tbsp oil on medium heat.
  9. Saute the remaining garlic and onion until onion is translucent.
  10. Tip in the stock and any sauce drained from the meat and veg mixture.
  11. Add the soy sauce and season with black pepper.
  12. Bring to boil then add the noodles. Cover and bring to boil again then lower heat to medium-low.
  13. Once the sauce starts getting absorbed by the noodles (about 5 minutes), toss and stir the noodles (preferably with large forks for easier tossing) until all the sauce is absorbed and the noodles are fully cooked. The tossing also make sure that the strands are separated and do not clump together. Don't worry if the bottom is getting a bit crusty. At the end there should be no sauce left but the noodles should still be moist, cooked but not soggy.
  14. Add half of the meat/veg mixture and toss to mix.
  15. Dish up and transfer to a dish. Top with the rest of the meat/veg mixture. Serve with calamansi or lemon on the side.
*Note: You may use precooked meat in which case add it in at the same time as the carrots and mangetout.


Monday, 30 July 2007

Lasang Pinoy 20: Lumpiang Sariwa

The current theme of the 20th edition of Lasang Pinoy blogging event is called binalot or 'wrapped-up'. Mita of The Unofficial Cook, who is hosting it this time, announced this blogfest a few weeks ago.

I already knew what I was going to make and dutifully called my mother and aunt at the weekend to get the recipe right. This is my very first time to make Lumpiang Sariwa so please give me some slack if you think it looks a bit far off from the traditional.

Lumpiang Sariwa literally means 'fresh springroll'. Well it's not exactly all fresh because the filling is fully cooked although that lone leaf of raw lettuce would probably qualify it for freshness. I guess it's called 'fresh' as opposed to the usual fried lumpia. The traditional wrapper for this is the same one that you use for the fried lumpias. But in the recent years it became more crepe-like in size, taste and texture.

The recipe is a medley of my family's and my sister-in-law, Ate Eva, in Toronto. And I just remembered (it's been years since I ate one of these) as I was taking a bite that I really don't like camotes or potatoes in it. I much prefer it with just veggies and whatever meat is included. I also found the wrapper quite rich so next time I'm gonna reduce the eggs and probably add a little salt to make it more savoury. The sauce or paalat reminded me that fresh minced garlic is preferred over crispy fried ones. Well, like most first time attempt of mine these are just a few from a litany of changes I plan to make next time I make it besides the fact that I should really make the size of the lumpia smaller.


Lumpiang Sariwa


Lumpiang Sariwa
(Fresh Springrolls)

*Filling:
100 g  pork belly - thinly sliced
200 g  shirmps or prawns - roughly chopped
2 cups julienned sweet potatoes
3 cups shredded cabbage
2 cups shredded green beans (bitchuelas)
1 cup shredded water chestnut (apulid)
1 cup julienned carrots
1 cup bean sprouts
1/2 cup stock
2 Tbsp oyster sauce
1/2 Tbsp minced garlic
1 medium onion - sliced
1/2 tsp salt
2 Tbsp oil
  1. Put sliced pork in a pot and add salt and just enough water to cover it.
  2. Bring to a boil then simmer until all the water evaporates. As soon as it starts sizzling add the oil and fry the pork until golden brown. Set aside.
  3. Saute garlic and onion until the onion is translucent.
  4. Stir in the shrimps and cook for 2 minutes.
  5. Pour in the stock. Add the oyster sauce. Bring to boil.
  6. Add the sweet potatoes; cover and cook for 2 minutes on medium heat.
  7. Add the carrots, beans and water chestnuts. Cook under cover for another 2 minutes.
  8. Add the bean sprouts and cabbage. Cover and cook for another 2 minutes.
  9. Remove from heat. Cool and drain in a colander for several hours. Reserve drained liquid.

*Wrapper:
3 eggs - beaten
1 1/2 cups water
2 Tbsp melted butter
1 1/4 cups flour
  1. Mix eggs, water, and butter.
  2. Add flour and beat until smooth and lump-free.
  3. Gently heat a 10-inch wide non-stick pan (a crepe pan would be best). Brush it with a little butter.
  4. Once hot enough pour in 1/3 cup of the batter. Swirl quickly to cover the bottom of the pan completely.
  5. Cook on low heat until the edges start to peel off the pan. Turn over and cook for a few seconds more. Dish up and repeat.
Note: I usually put butter for the first wrapper only.


*Sauce (Paalat)
stock
1/2 cup brown sugar
2 Tbsp dark soy sauce
1 tsp salt
2 Tbsp cornstarch
3 Tbsp water
  1. Dissolve the cornstarch in the water. Set aside.
  2. Take the liquid drained from the filling and add enough stock to make up 2 cups.
  3. Put this in a saucepan and add brown sugar, soy sauce, and salt. Bring to boil.
  4. Add the cornstarch mixture and bring to boil again. Remove from heat.

*To serve:
2 Tbsp minced garlic
roughly ground roasted peanuts
fresh lettuce leaves

 
Lay the wrapper on a plate. Put a lettuce on top then put about 2 Tablespoonfuls of the filling. Sprinkle some ground peanuts on top.

Lumpiang Sariwa 
Fold the wrapper to enclose the fillings.
Serve with the minced garlic, ground peanuts and the paalat sauce.


Saturday, 21 April 2007

Lasang Pinoy 17: Egg Pie

Lasang Pinoy 17Well, thank goodness the resurrection of Lasang Pinoy coincided with my re-entry into the fold of Pinoy food blogging. It was fortuitous enough for me to have a post waiting for a chance to be published. This edition is hosted by Afbeercan of Eat Matters - a food blog with beautiful delectable pictures.


More than a month ago, Stel and Sha were witness to my obsession with custards at the time. I baked daan tart (Chinese egg tarts) - the delectable kind you find in dimsum trolleys. A Chinese dim sum cookbook (with English translations of course) was whipped out and I followed the recipe to the letter. My kids were eagerly awaiting the tarts, anxiously peering through the oven glass door. Five minutes after I took it out of the oven they were gobbling it up. They only ate one each and left the rest to completely cool off. But when it did it was met with "Yecchh! It's green !" Indeed, the custard turned greyish-green. Hahaha! It was all right when I tasted it but had that very unappetising colour of molting fungus. Did I overcook it? Could it be that the only ingredients of the custard are egg yolks and syrup? I didn't try to find out because I've just about given up on having a 'eureka' moment for daan tart (that was my fourth experiment).

Instead I turned my obession to egg pies. You know, that type of custard set on a pastry case. Of course my earliest memories of these would be the one you get from bakeries on the Philippines - less eggy more on the milky side set on sweet shortcrust crumbly pie shell with a very dark skin on top. Lately in my travels here and in France I would encounter something similar various names - creme tart, creme flan, nature flan, custard tart, etc. but it would always be that same custard on a pie crust. Although I have to admit the European model is more on the eggy side.
My search for a recipe in the internet started several years ago but I can't find a decent one. Then when I was flicking through various cookbooks that has been neglected gathering dust in the book shelves, I came upon Gordon Ramsay's Sunday Lunch cookbook. (Even though I abhor his constant swearing on the telly, his recipes has been very reliable, quite accurate and really works based on my experience.) He has in there a custard pie recipe which I didn't lose time in adapting and trying out. It turned very very successful ! At last my long lost egg pie/creme flan/creme tart I've found you !

I will have to make it another time without the beating of the egg whites. Let's see if adding whole eggs without beating it separately will result in the same delicious pie. Take note, this is not exactly like the commercial version we buy in the Phils. This is a more eggy version which for me is preferable. Try to use the best possible eggs and milk. If budget permits organic, go for it. As always, the quality will shine through the finished product.


Egg pie


Egg Pie
(Custard Pie/Tart)

* For the pastry:
125 g  [1/2 cup] unsalted butter - at room temperature
90 g  [1/3 cup + 1 Tbsp] caster sugar (superfine)
250 g  [1 cup + 2/3 cup] plain flour
1 egg - beaten
1-2 Tbsp cold water

* For the filling:
2 1/3 cup milk
4 eggs - separated
100 g  [1/2 cup] caster sugar (superfine)
1 1/2 Tbsp cornflour (cornstarch)
  • To make the pastry:
    1. Combine flour and sugar in a bowl.
    2. Cut in the butter with two butter knives or a pastry cutter. Then rub in the butter with your fingers until it resembles coarse breadcrumbs.
    3. Mix in lightly the egg and knead the dough until it just about comes together. If necessary sprinkle cold water if the dough seems dry.
    4. Knead for a short while and form into a ball. Do not over knead or it will be difficult to roll out.
      Wrap in plastic or cling film and chill in the fridge for about 30 minutes to firm it up.
    5. Roll out thinly on a floured table top to a circle about 12 inches in diameter.
    6. Line a 23 cm (9 inch) pie pan or fluted flan tin making sure to press the pastry well into the sides.
    7. Put the tin on a baking sheet and bake blind: line the pastry with foil and baking beans.
    8. Bake in a preheated oven to 200°C/fan 180°C/400°F/gas mark 6 for 15 minutes.
    9. Remove foil and baking beans then return to oven to bake for another 5 minutes.
    10. Trim the excess pastry from the edge of the flan tin with a knife.


  • To make the filling:
    1. Turn the oven temperature down to 180°C/fan 160°C/350°F/gas mark 4.
    2. In a bowl, mix the flour, sugar, and egg yolks.
    3. Stir in the milk into the mixture.
    4. In a separate bowl, whip the egg white to soft peaks and fold gently into the milk/egg yolk mixture with a metal spoon.
    5. Place the pastry lined flan tin on a baking sheet.
    6. Pour the filling in the tin and bake for 20 minutes until the top is brown.
    7. Bring down oven temperature to 110C/fan 90C/250F and bake for a further 1 hour until the custard is just set. The centre should wobble a little.
    8. Remove from oven and cool completely.


Monday, 6 November 2006

LP 15: Ampaw Flapjacks

LP 15Waste not want not - the recycling mantra. When you don't have much resources (aka money) you think of lots of ways to save. That includes recycling clothes, everyday things, and most of all food. Recycling is more or less a way of life in the Philippines. You just don't throw things away. Things have to be re-used until they've broken down to pieces or if it's of no use to anyone. As for food, you don't let it spoil either by eating it all or recycling it. It takes some imagination and skill to successfully do the latter while making the food remain edible and tasty. The current edition 15th edition of Lasang Pinoy (hosted by Mike of Lafang) hopefully will showcase all the wonderful ways of recycling food.

My mother has been doing homemade rice crispies (ampaw) for as long as I can remember. Before cleaning out our rice pot with soap and water she always saved the water soaked rice remains - you know those little bits of rice left when you've more or less scraped the bottom - instead of just throwing them away. She would put it in a bilao - a wide shallow winnowing basket - and dry it in the hot midday sun. The dried rice would then be collected in a jar. She would do this more or less everyday. Once we have enough then she would fry it to make the ampaw then sweeten it with a mixture of evaporated milk and sugar. It was comfort food for us kids especially during rainy days when we were bored to death of not doing anything (this was the time before computers and Nintendo games!). She would pile the sweetened ampaw in a bowl which we unceremoniously attack armed only with a spoon each. :)

This recipe is exactly how my mother made them except I patted it down in a baking pan and cut them into bars. But you really don't have to do it that way you can always start eating it as soon as it got off from the wok - just like we did. We somehow prefer it warm with that sweet caramelly flavour of the reduced evaporated milk and sugar. My mother emphasised that I put in a pinch of salt to blend in with the toffee-like flavour. So don't forget that if you're ever going to make this.

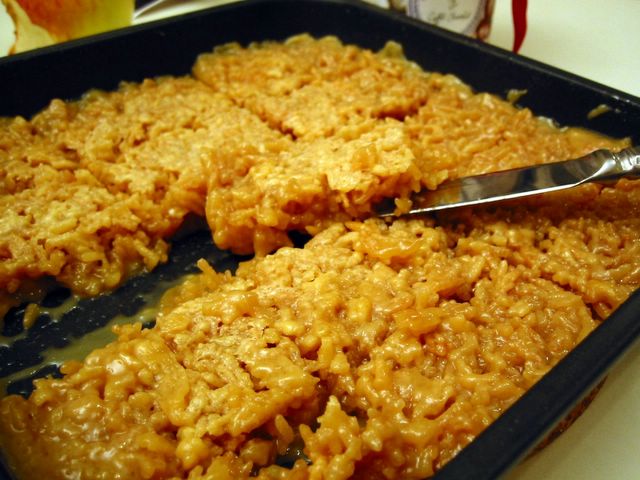
My first try after about 20 years has not been a complete success. I had too much sauce and too little ampaw which explains the wet appearance in the picture. I'll make sure to dry more rice before doing this!


Ampaw Flapjacks
(Rice Crispies Flapjacks)
  • To dry the rice:
    1. You need the rice pot where you've just cooked rice and had some left overs or tutong (crust of rice at the bottom). Fill up the pot with water *do not put soap!* and soak until all the rice is soft and separated.
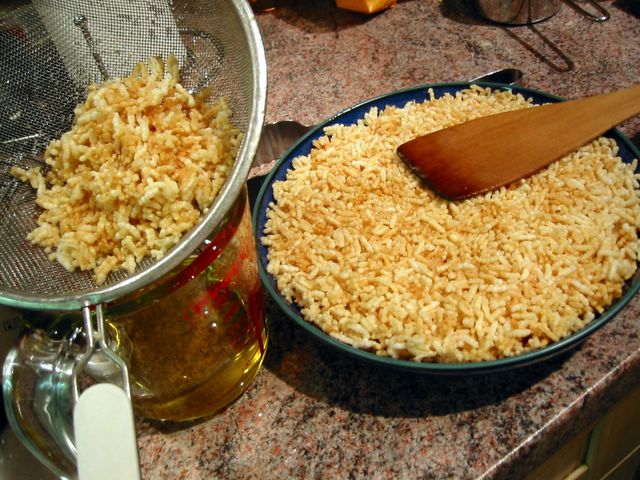
    2. Drain the rice from the pot and spread on a bilao (Filipino winnowing basket) or any similar container. Leave it out in direct sunlight to dry until the grains are hard and brittle.
      *OR*
      Spread the drained rice on a baking sheet and put in a 150C/fan 130C/300F preheated oven. Let it dry there for about 30 minutes or until completely dry and brittle.

  • For the flapjacks:

    4 cups dried rice
    oil for frying
    1 x 400 g  can of evaporated milk
    1 cup sugar
    large pinch of salt

    1. Heat oil in a wok or saucepan until quite hot. Drop a piece of dried rice to test it - it should puff up right away.
    2. Fry the dried rice about a fistful at a time and be prepared to scoop it out after only a few seconds. It burns easily so don't let it hang around floating there in the hot oil. One thing I do is once it all puffs up I take the wok off the heat so that the heat would be reduced while I'm busy scooping it out and prevent it from burning. Repeat until all the rice is puffed.
    3. In another wok, tip in the evaporated milk, sugar and pinch of salt. Bring to boil then turn down heat and simmer while constantly stirring until slightly thick.
    4. Turn off heat and put in all the ampaw in the wok and stir until sauce and ampaw are well mixed.
    5. Put in a non-stick or greased baking pan and pat it down level. Cool slightly and then cut into bars or squares. Cool completely.


Lasang Pinoy 15

Tuesday, 25 April 2006

LP 9: Lengua Estofado

Lengua Estofado
I know Cia encouraged us to make something different out of innards and offal. But I'm pretty helpless on this since I really do not cook offals that often. So you would have to forgive me if I make this thoroughly standard fiesta dish. Cia, as mentioned, of Pabulum is currently hosting the 9th edition of Lasang Pinoy.

I had a lot of fun making this I must say. Starting with shopping for the tongue. Now I wouldn't find this in any ol' supermarket around here so off I went to Tooting (no kidding!) which has a very lively (and cheap) market. (I must blog about this place soon). Lots of fresh veggies and fruits plus this is where I get my fix on pork legs (properly cut), goat meat, whole baby back ribs, fresh chicken liver galore, and supermarket-rare offals - all in very reasonable prices. I went in a butcher shop and got this big boy of a tongue.

Lengua Estofado

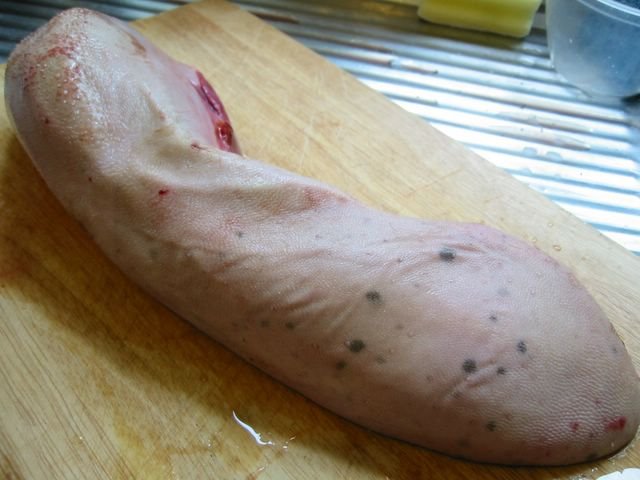
It was more than 14 inches long and ... well ... resembles something like ... oh never mind. Hehehe! Finding a big pot to fit it in was a challenge but I managed to unearth one of my moth-balling-seldom-used stock pots and just about fit it in. The removal of the skin was a joy - not! Reynaldo Alejandro's recipe from The Food of the Philippines (where I adapted this from) said to scrape or peel. Well I scraped and scraped and scraped but most of the white film is still there. So I had to slice it off trying to take off as little and as thinly as possible. After a prolonged struggle with a double dead tongue I finally got it all off! Hurray, on to the cooking!

The marinade was quite good, though, I noticed that you can substitute cooking wine or lemon for the vinegars. I bet it would taste great as well. The only problem I had was in the browning of the meat since the marinade has sugar hence the residue got burned. I had to wash up the pot pronto before continuing with the sauteing. I know I lost some good flavours with all those drippings washed away but it was burned and I don't want that to ruin the sauce. Other than that everything else was surprisingly a breeze. And I originally thought it would be horrific including the taste and texture of the meat. The first time I had this was when I was 12 years old and even then, even though I had a pretty fussy tastebud I loved that properly tenderly cooked lengua from a relative's wedding banquet. Finally, I was able to recreate it.


Lengua Estofado

1.5 kg  beef tongue

*Marinade:
1 tsp peppercorns
1 bay leaf
3 Tbsp cider vinegar or white cooking wine
3 Tbsp soy sauce
3 Tbsp sugar
2 tsp sea salt
1 cup water

3 Tbsp oil
1/4 cup minced garlic
1/2 cup minced onions
1/2 cup finely chopped tomatoes
350 g  potatoes - peeled, quartered and sliced
1 big carrot - peeled and sliced
salt and freshly milled black pepper
1/3 cup pimiento-stuffed olives
1 cup button mushrooms - halved or sliced
  1. Boil the tongue in a large pot of water for 20 minutes. (You may cut the tongue in half if it cannot fit). Drain from water and leave until cool enough to handle.
  2. Peel off the (usually white) outer skin. You may have to use a very sharp carving knife for this. Trim ends and wash.
  3. Combine all marinade ingredients and marinate the tongue for 1 hour or overnight.
  4. In a large pot heat the oil and brown the tongue on all sides. Remove and set aside.
  5. If the residue in the pot is not burned, use it with the same oil, if it is then clean the pot and heat it up again with about 2 Tbsp oil.
  6. Saute garlic for about 2 minutes in gentle heat - *do not* burn it.
  7. Turn up the heat and add in the onion, cook for about 4-5 minutes or until translucent.
  8. Add in the tomatoes and cook until soft.
  9. Put the tongue back in the pot together with the marinade.
  10. Add about 1/2 cup water. Bring back to boil and then simmer for 2.5 hours or until tender. Prick the tongue to let the liquid penetrate. You may add more boiling water a little at a time if it is drying out too much.
  11. Tip in the potatoes and carrots - cook for about 5 minutes.
  12. Add in the mushrooms and cook for another 5 minutes.
  13. Just before serving, remove tongue from sauce and slice crosswise. Arrange in a platter and ladle sauce and vegetables on top. Serve hot.

Friday, 31 March 2006

LP 8: Puto

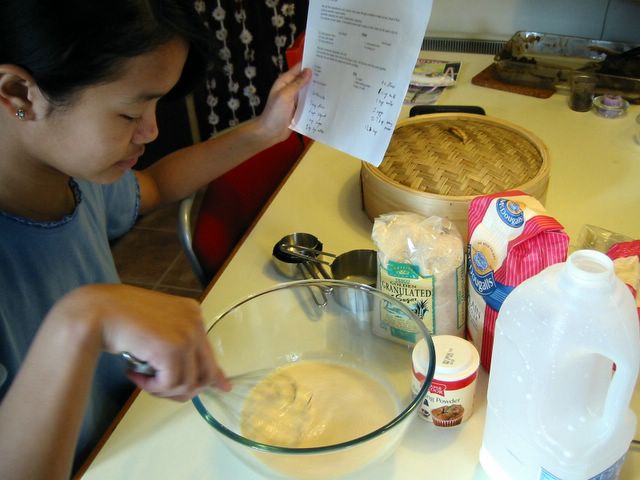
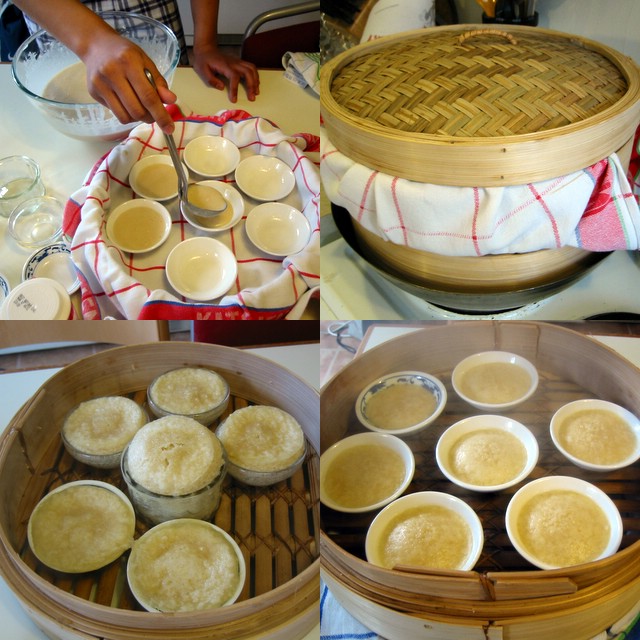
The current theme of the eighth Lasang Pinoy, hosted by the lovely Iska of Edible Experiments, is centered on food for/by children. I wanted to create my husband's favourite childhood snack of bibingkang malagkit but my recipe fell short of expectations. The bottom - soggy, the top - too sweet. Maybe I'll blog it some other time. So off I went recruiting my kids in making a very simple Filipino steamed cake - puto. Mind you this is not your regular traditional puto which is made of malagkit (sticky rice) flour. This is of recent provenance, probably as early as the 80s when the popular Filipino bakeshop, Goldilocks, came up with this rich cake-like puto. There are very few ingredients to have and it's just a matter of mixing them all up in a bowl which a kid can easily do. My eldest daughter remarked that the batter is very much like that of a pancake. Well what do you know, she was right of course. More like a very sweet pancake version which is steamed instead of panfried. My kids are usually enthusiastic with 'helping' out in cooking and baking especially ones where they are actively involved in as opposed to just watching. I hope this would encourage them to be more adventurous in eating as well as in kitchen activities.

J2 mixing it
You don't know how much frustrations this seemingly innocuous snack has given me for the last ... oh ... 15 years. It's not a problem in the batter, more on the process of making these cakes rise in the steaming. The biggest Darth Vader-like enemy of steaming puto is water or condensation dripping/forming on top while it's cooking. Once water dripped on top then your puto is doomed to be earthbound. Never to rise in all its peaked glory. I've had this problem over and over again in the years that I was trying to make it. Often times I have to disguise my failure from our guests by saying it's actually my new version of kutchinta. LOL! I changed steamers, used rice cookers, metal steamers, and now just about having moderate success using a cheap and simple bamboo steamer. Really, sometimes you don't need high-tech gadgets to achieve good results.

puto galore
The recipe is something I got from my sister-in-law, Ate Eva, in Toronto which in turn she got from a friend of hers. I have to tone down the recipe considerably because it was cloyingly rich (nakaka-uta). The original measure of 2 tablespoons baking powder is I think too much. It actually have an slight aftertaste which I don't like so I proceeded to halve the baking powder. Same with the milk and eggs. I also added salt since I noticed that it doesn't rise as much as I want to and as you know, salt reacts with the baking powder that causes cakes to swell. As for my dreaded steaming, normally I would cover the baking pan to prevent condensation to drip on it. But since I'm using small (different sized at that) moulds, it would be truly troublesome to cover them all individually. Life is too short for me to get that tedious. So I covered the top of the steaming basket itself with a cloth. That didn't work since the water vapours came in unimpeded thru the slats at the bottom. So I moved the cloth onto the bottom of the first level basket. Finally, I had my well-risen puto (well most of the time).


Rich Puto


Rich Puto

2 cups plain flour
1 cup milk
1 cup water
1 egg - slightly beaten
1 Tbsp baking powder
scant 1/2 tsp fine salt
1 1/3 cup sugar
  1. Mix all ingredients well.
  2. Pour into small cake moulds. (Any small ramekins or tiny bowls/plates may be used). Cover with aluminium foil, tea towels or cloth (or you may cover the steamer itself with cloth).
  3. Steam in medium heat for about 20-25 minutes.
  4. Remove from heat and pry off the puto from the moulds with a butter knife. Serve warm or cold.
*Variation: Mix grated or slivers of cheese just before steaming.


Tuesday, 28 February 2006

LP7: Pan de Sal

Pan de Sal
Gising na! Wake up! Breakfast time ... that's the current theme of the 7th Lasang Pinoy ably hosted by the early-morning-food blogger Joey of 80 Breakfasts.

The traditional breakfast of Filipinos has been rice or garlic fried rice with either fried/grilled fish, tocino, or longganisa. But in our family, a lot of our mornings are filled with that ubiquitous crusty roll endemic to Filipinos called Pan de Sal (also spelled without the spaces - pandesal) which means literally bread with salt. I could imagine the original pan de sal must have been more on the salty side rather than the sweet one that is common now which is how I have always known what a pandesal should taste. There was a long time in my youth that I could not imagine a morning without a warm pandesal to satiate my hunger. It's very versatile you see, you can spread a variety of things between its fluffy insides such as butter, liver spread (pate), jams, preserves, matamis na bao, peanut butter, pancit, ice cream - you name it. Or you simply dunk it in coffee or tea.

Sometimes even in the evenings when someone in the household comes home late, passes by a bakery then buys fresh-off-the-oven pandesal. You can bet that anyone among us kids will awaken with the fragrant waft of the hot pandesal. Down the stairs we came to partake in the midnight snack. I love it smeared with liver spread. Yum!

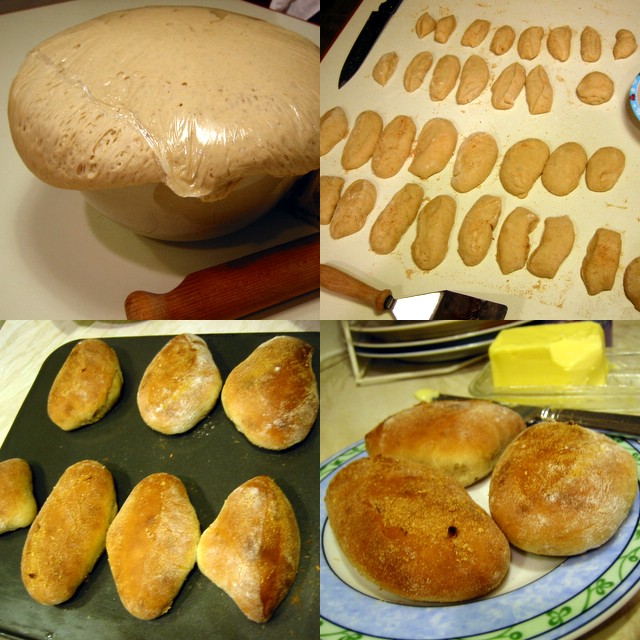
This is my very first time to bake pandesal and I had to call my aunt in Cavite to get her recipe which she got from her Home Economics subject when she was studying in Teacher's College about 35 years ago. Yeah that long ago. Now I don't know if I misheard the measurement of the liquids because the dough turned out very sticky and really hard to handle. I don't know if it's supposed to be like this. I think I'll be calling my aunt again in the weekend. Despite the intense stickiness, I managed to knead it (with a lot of help from sprinkled flour) and let it rise. She said it will double in bulk after 2 hours, I think mine tripled that's one reason why I suspect there's too much yeast. Maybe the yeast that I use here is more potent/concentrated. I'll certainly have to play around with the proportions in this recipe later. It was also hard for me to cut it to uniform-sized individual rolls since it's very soft. Thank goodness it came out alright from the oven - fragrant and crusty though somewhat moist inside. I don't know if it's supposed to be like this but it certainly was good enough for my family. :)

Pan de Sal


Pan de Sal

8 cups plain flour
1/4 tsp salt
1 cup sugar
1/2 cup cooking oil
2 1/2 cups cold water
1/2 cup lukewarm water
1 Tbsp yeast
  1. In a small bowl, combine the lukewarm water, 1 tsp of the sugar and yeast. Let stand for about 15 minutes in a warm area. By this time it will be foamy; whisk well.
  2. In a big bowl, mix cold water with oil, salt and the rest of the sugar. Stir until sugar and salt are dissolved.
  3. Add the yeast mixture and 1 cup of the flour. Stir to combine.
  4. Add the rest of the flour a little at a time. Mix with a wooden spoon until dough pulls away from the sides of the bowl.
  5. Knead the dough on a floured surface until smooth. If needed sprinkle some more flour to keep the dough from sticking too much.
  6. Put in a greased bowl and turn to coat the dough all over with oil.
  7. Cover and let rise in warm place for 2 hours.
  8. Punch dough and turn out on a floured surface.
  9. Divide into 4 and roll each into logs. Cut the logs into individual rolls.
  10. Sprinkle breadcrumbs on the rolls and arrange in greased baking sheets.
  11. Cover with a damp cloth and let rise for 30 minutes.
  12. Bake in a preheated oven of 200°C/fan 180°C/400°F for 13-15 minutes.
  13. Remove from baking sheet. Serve hot or cold.

Tuesday, 31 January 2006

LP 6: Bagis

This month's edition of Lasang Pinoy is hosted by the lovely Ting of Worldclass Cuiscene with a theme of 'pulutan'. When you hear 'pulutan' you should think along the same vein as the Spanish tapas. It's usually a dish that is specifically eaten with alcoholic drinks. Because of the close similarity, the concept might have come from the Spanish. (Please don't hold me hostage with that last statement, I'm just speculating from the obvious.) Due to the nature of its purpose, it's usually very spicy or at least very tasty to encourage you to drink more.

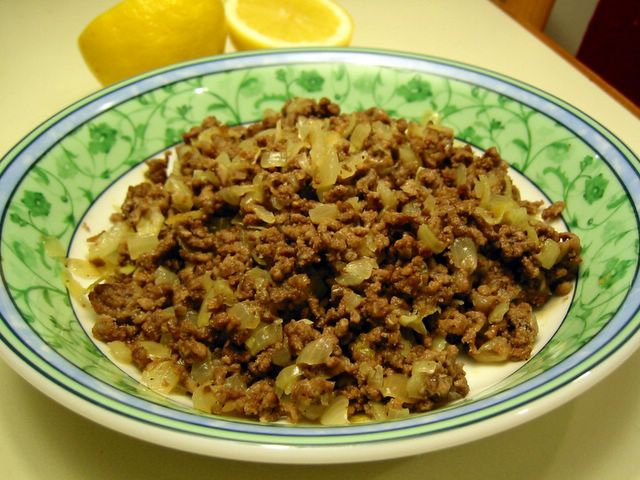
When the theme was announced it stupefied me since I haven't cooked pulutan to anyone. The one dish I wanted to try was sisig but pork cheek and/or ears are not normally what you see lying around the supermarket shelves here. The only other one I know is spicy adobong mani (garlic fried peanuts) which I think is so simplistic. Well Lasang Pinoy, in my opinion, deserves better than that. So what other recourse I had than call for help from the mga manginginom (drunken masters) I know. Good thing they came up trumps with this Kapampangan (Ilokano?) dish of bagis which was sooo tasty and so easy to do even a half-inebriated guy can whip this up in no time at all. A big thanks is in order to my BIL Derek and his friend Al Dayao (who gave the original recipe) for sharing this with us. Tagay na !


Bagis

Bagis

500 g  minced beef
2-3 Tbsp lemon juice (from about 1 whole lemon)
1 1/2 cups chopped onions (about 2 medium)
1 tsp Tabasco sauce (or to taste)*
1 1/2 tsp sea salt
freshly milled black pepper
  1. Marinate the minced beef in lemon juice for 24 hours or overnight.
  2. Combine the marinated beef (including the marinade) and the rest of the ingredients in a pan and cook in medium heat. As it cooks, the beef will render its juice and fat so you do not need to put any water or oil.
  3. Once the mixture starts bubbling away, turn down heat and simmer until all the liquid has evaporated and the beef starts sizzling from its own fat. Dish up and serve with some stiff drinks. :p
*Note: You may use fresh chopped chillis or dried chilli flakes in place of the Tabasco.

Sunday, 8 January 2006

LP5: Pinoy Christmas Around The World

London Christmas 2005
The Christmas season 2005 for me was like a whirlwind that grew into a tornado, swept me off and deposited me helplessly at the state I'm in now. I should have clicked my heels before to regain my sanity but then I needed red shoes for that. ;) What I wanted to say was it so busy and hectic for me what with the numerous Christmas parties at work, with friends, and with relatives. Add more of the usual shopping madness and Christmas card postings plus the added worry of being made redundant - but that's another story.

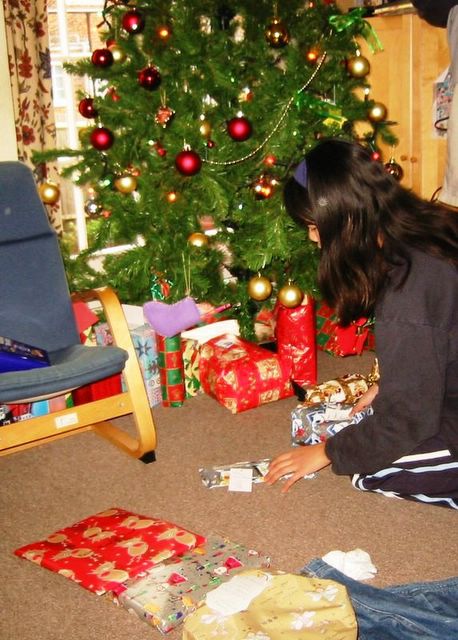
I'm beating around the bush! Just trying to excuse myself for being late with my entry and for completely forgetting to take pictures of our decors. And have you heard? My supposed traditional rellenong manok (stuffed chicken) morphed into a beef roast. Of all the years I've been living here in UK, the ones that run out everytime before Christmas are the turkeys. Why oh why could I not find any whole chicken two days before C-day? I searched high and low in all butchers that abound and the supermarkets littering our high street but no freakin' chicken!! In my exasperation, I picked up the last remaining slab of prime rib of beef on the counter and proceeded to harass Stel on the phone on how to roast the darn thing. Kind and ever helpful, she put me thru the paces even though she was frantically preparing for their own Christmas family do. Despite my initial bad impression with our main course, it turned out beautifully - delicious actually! So simply cooked with all the traditional sides and a great gravy that my family wanted me to do it again at the earliest possible time. The lovely Stel of Babyrambutan provided the easy peasy recipe. Thanks dear!

This 5th edition of Lasang Pinoy is hosted by Mike of Lafang. Oh yeah, I forgot to tell you how we spend our Christmas - in the days before we usually go round some friends' houses to give out our gifts. We try to attend a Christmas eve mass but there are years like this one that was just so so busy. Usually we have either a sumptous Christmas lunch or dinner but this year, ostensibly to let me have a relaxing Christmas day, we had our celebratory meal on Christmas eve dinner. Morning after that were spent ripping out gift boxes and saying our thank yous to everyone and phoning all the friends and relatives to wish them a happy Christmas. I wish my children can experience the magic of Christmas right in the Philippines but since they can't I'm sure we captured the spirit by being together and cherishing our company with our little meals and whatever gifts we can come up with. :)


Roast Ribs of Beef

Roast Ribs of Beef

one whole slab of prime ribs or forerib of beef (on the bone)
sea salt
  1. Preheat oven to 240°C/fan 220°C/475°F.
  2. Place beef on a roast pan and rub all over with the sea salt. If meat has some fat on one side/edge, try to position it so that the fat is at the top so that the fat rendered will drip down on the meat and keep it moist.
  3. Bake in oven for about 15 minutes.
  4. Lower heat to 180°C/fan 160°C/350°F and bake with the additional cooking time depending on the weight of the beef. The general rule of thumb would be 20 minutes per pound of meat for rare, 25 minutes for medium rare, and 30 minutes for well done. You may baste the meat from time to time with its own dripping.
  5. Remove from pan (do not discard drippings) and transfer to a serving platter cover with foil and let rest for up to 30 minutes before slicing and serving.

Beef Gravy

beef fat and drippings
2 heaping Tbsp flour
2-3 cups stock (approximate)
salt and freshly milled black pepper
  1. Remove the beef fat from the roasting pan but retain about 2 Tbsp.
  2. Put the roasting tin on the cooker hob and heat up the fat.
  3. Once moderately hot, sprinkle the flour on it. Blend in the flour well (preferably with a wire whisk)with the fat.
  4. Add the stock gradually while continually stirring making sure to scrape the bottom for all the roasting bits left in the pan.
  5. Bring to boil. Add more stock or water if it's too thick.
  6. Taste the gravy; add salt and/or pepper if necessary. Serve hot.


Now this one, I was quite amazed how homemade roast potatoes would taste so invariably superior to store bought ones - frozen or otherwise. It was simply superb my kids were raving about it. I adapted this from the November 2005 edition of the BBC Good Food magazine which they dubbed as 'The Ultimate Roast Potatoes'.

Roast Potatoes

Roast Potatoes

1.5 kg  floury potatoes (preferably Maris Piper) - peeled and evenly quartered
2 tsp flour or cornflour (cornstarch)
1/3 cup oil (goose fat, olive oil, vegetable oil, etc.)
sea salt
  1. Preheat oven to 200°C/fan 180°C/400°F.
  2. Put potatoes in a saucepan. Add salt (about 1 tsp) and enough water to cover it. Bring to boil. Once it boils, lower heat to medium-low and start timing it for 2 minutes.
  3. Pour oil in a clean roasting pan and place it in the oven.
  4. Drain water completely from the saucepan. Put the cover on then shake the pan back and forth. This is to rough up the outside of the potatoes to give it that crispy outer covering.
  5. Sprinkle the flour on the potatoes and shake it some more.
  6. Carefully put the potatoes in the hot fat in the roasting pan. Spread in a single layer making sure they have plenty of room. Turn or baste them to make sure they are coated with oil all over.
  7. Roast for 20 minutes then take them out of the oven and turn the potatoes over.
  8. Return to the oven for another 15 minutes and turn them over again.
  9. Roast a further 10-20 minutes or however it takes to make them golden and crisp.
  10. Sprinkle sea salt over, put in serving platter and serve right away.

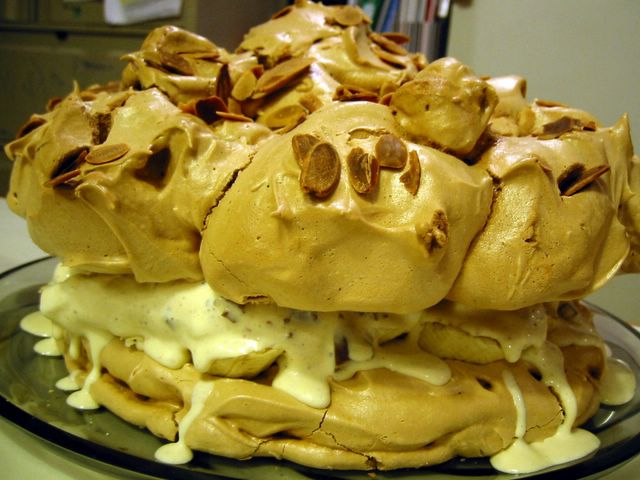
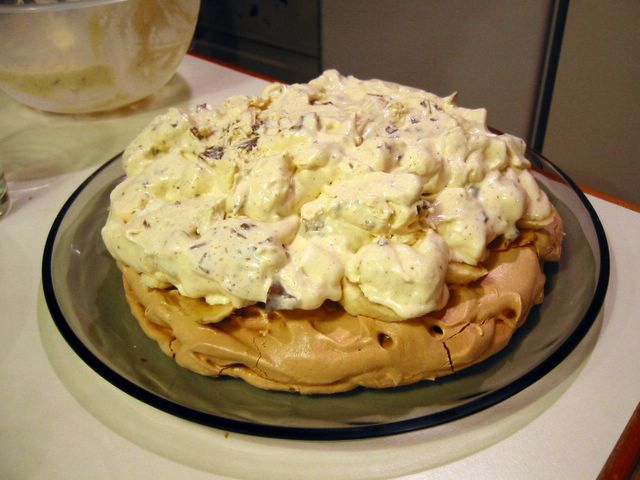
Okay are you ready to see a monster? I made a leche flan a few days before and I thought I would use up the extra egg whites by making this longed for dessert that I saw in the Good Housekeeping magazine eons ago. I didn't bargain for it to be this humongous. Even when I was beating it up, my puny little handheld mixer was drowning from too much meringue that I thought it was gonna die on me. But still I plodded on and out came this huge ... thing ... which would be perfect as a some 'shock and awe' type of dessert in dinner parties. Not for small family dinners because no matter how delectable it is (which this certainly was) there's just too much of it to be consumed in 1, 2, even 3 sittings. Though I did love the nuggets of marshmallows and chocolates in the ice cream (shades of rocky road!) then combined with the freshness of the banana then the crunch of the meringue with almonds. Hmmmm ...


Marshmallow Meringue Cake

225 g  [scant 1 cup] caster sugar (superfine)
125 g  light brown sugar
6 large egg whites
1 tsp cornflour
1/2 tsp vinegar
50 g  flaked almonds - toasted (optional)
150 g  small white marshmallows
1 liter good quality vanilla ice cream
150 g  dark chocolate - chopped
4 bananas - sliced
chocolate savings and icing sugar to dust
  1. The meringue must be done at least a day before serving. Trace two 23cm (9 inch) circles on two baking parchment paper set on two baking sheets.
  2. Sift the caster sugar and brown sugars together in a bowl. Set aside.
  3. Preheat oven at 120°C/fan 100°C/250°F.
  4. In a large bowl, whisk the egg whites until they're stiff and dry.
  5. Whisk in the sugars, one tablespoon at a time, until mixture is glossy and very stiff (about 5 minutes).
  6. Then whisk in the cornflour and vinegar.
  7. Spoon half the meringue on one of the baking parchment papers in a garland shape.
  8. Spread the other half in the other parchment paper evenly to cover it completely.
  9. Sprinkle both with the toasted almond flakes.
  10. Bake for 2-2.5 hours. Turn off oven and leave the meringues inside to cool for at least 30 minutes (or you may leave it there overnight).
  11. A few hours before serving, soften the ice cream by transferring it to the fridge for about 30 minutes.
  12. Once soft, put in a bowl and fold in the marshmallows and chopped chocolates.
  13. Put back in the freeze for about 30 minutes to firm it up.
  14. To assemble, place the meringue circle on a large serving plate. Arrange the sliced bananas on top in a single layer. Spoon the ice cream mixture over the bananas. Then place the garland meringue on top. Decorate with chocolate shavings and dust with some icing sugar. Serve.
Note: To freeze ahead: complete the whole recipe without decorating with chocolate shavings and icing sugar; wrap it and freeze. To serve, take from the freezer and unwrap. Place in the fridge for 1-2 hours, then leave at room temperature for 30 minutes. Decorate and serve.


Lasang Pinoy 5

Sunday, 4 December 2005

LP 4.5: Chestnut Squares

The Lasang Pinoy group decided to have a 'special edition' of the monthly food blogging event that showcases Filipino cuisine. Since it's in between the regular events, they christened it Lasang Pinoy 4.5 to underscore the issue of plagiarism in the blog world and in the internet as a whole. To be specific, this came about when pictures of Karen's and Market Man's yemas was printed in a Philippine broadsheet without their permission. Most bloggers are generous with their resources all one has to do is ask for their consent to use their pictures. There have been numerous cases of copying images (and contents) in blogs then published in some other websites or forums. But this is the first time (AFAIK) that images from food blogs ended up in print! It may be easy deleting webpages but having them in a published newspaper is a very strong and undeniable evidence of the dastardly deed. The issue, it seems, has not been resolved entirely. It might be better if you follow the whole controversy by visiting here and here.

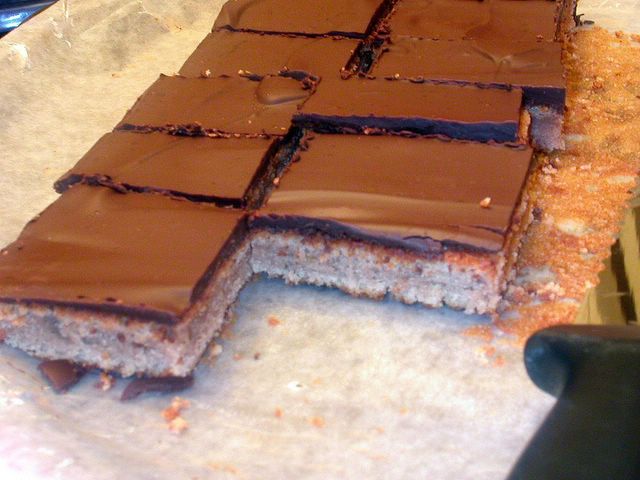
As for me, as a protest I borrowed Stel of Baby Rambutan's recipe and pictures with her permission - that is in bold letters. A few posts back, another food blogging friend gave me some yummy ingredients from her sojourn in France. That's why I ended up with chestnut puree/cream in my cupboard. I so love this confection and Stel's previous baking posts saved me from digging up recipes for it. You have to understand why I was so ecstatic with the results of my baking - it's the first time in about 15+ years that I baked a meringue-based cake! The last time it came out so hard even our dog won't eat it. :) But this time, hah! it was oh so springy and soft and well risen - and no raising agents at that - only the beaten egg whites. Wheee! I was so happy I did the dance of joy ... 'One for the money and the free rides. It's two for the lie that you denied. All rise (all rise)'. LOL!

According to Stel this recipe of hers, which I adapted, was in fact adapted also (2x times adapted will that make it original? Asa pa ako!) from The French Cookie Book by Bruce Healy with Paul Bugat. I did not use cream of tartar, it was already too late when I realised my pot was already expired. But even without it the egg whites peaked marvellously. Then I used half milk and half dark chocolates because I could imagine my kids not touching this with a ten-foot pole if they know it's plain dark chocolate. Lastly, I spread the choc topping while the cake is still in the baking pan. Why? So as not to waste the chocolate dripping needlessly by its sides. Well yes, I would surely scrape the drippings and eat them but it's nice to know they all ended up in the cake.

picture courtesy of Baby Rambutan


Chestnut Squares

[heaping 1/3 cup + 2 tsp] caster sugar (superfine)
2 large eggs - separated and at room temperature
1 tsp vanilla extract
250 g  [heaping 3/4 cup] chestnut cream (creme de marrons)
1/4 cup unsalted butter - melted
1/8 tsp cream of tartar (optional)
45 g  [1/3 cup + 2 tsp] plain flour

*Glaze:
200 g  dark cooking chocolate (70% chocolate content) OR combination of dark and milk chocolates
1 tsp almond oil or neutral vegetable oil (optional)
  1. Pre-heat oven to 425°F/220°C/fan 200°C.
  2. Butter and flour well a 9-inch square baking pan.
  3. Set aside 2 1/2 tsp of the sugar.
  4. In a bowl, beat the egg yolks with the rest of the sugar and vanilla with an electric mixer until light, thick and smooth.
  5. Add in the chestnut cream, followed by the butter. Mix well.
  6. Get another bowl and whip the egg whites with an electric mixer (make sure the beaters and bowl are clean and dry) on low speed until frothy. Add the cream of tartar at this point if you're using it.
  7. Increase the speed to medium-high until whites are stiff but not dry.
  8. Add the reserved sugar and continue beating at high speed for a few seconds to incorporate the sugar.
  9. Sift the flour over the chestnut-egg yolk mixture and mix with a wooden spatula.
  10. Add about 1/3 of the whipped egg whites into it and fold quickly.
  11. Then gently fold in the remaining egg whites. Do not overmix.
  12. Pour the batter in the prepared pan, spread evenly and smooth the surface.
  13. Bake for about 16-20 minutes or until lightly browned and springs back to the touch.
  14. Remove from pan and cool on a wire rack.
  15. Melt the chocolates by placing in a heatproof glass bowl over simmering saucepan of water.
  16. Pour melted chocolate on the cake, spreading it evenly, letting the excess flow down the sides. You can do this while the cake is still on the rack OR put back the cooled cake in the baking pan then pour the chocolate in the pan. The latter is to avoid wastage of chocolate.
  17. Cool and let the glaze set.
  18. Cut into squares and serve.


LasangPinoy 4.5

Wednesday, 23 November 2005

LP 4: Suman Sa Lihiya


The current edition of Lasang Pinoy (hosted by Minette) for the month of November is all to do with 'soul' food ... OR ... food we have during All Soul's Day (2nd Nov). Well, I'll stretch that out a little bit and include Undras or All Saints' Day (1st Nov) which is the day before. Since my soul food are all pretty ordinary, I thought of blogging about what our family had to prepare every year on that Philippine holiday.

As a backgrounder, Filipinos do not traditionally celebrate the evening of 31st October which is Halloween - that came with the onslaught of the American TV/Hollywood influence only in the latter years. What get us all so busy in preparing for a 'celebration' (if you can call it that) is the paying of respects to our dead family members on the 1st day of November. Everyone treks to the family plots in cemeteries up and down the country, light up candles and offer prayers. But you know us Pinoys, no matter what the occasion we never forget to stuff ourselves silly and generally have a party. So even though it should be a solemn event, people take a lot of food and stereo hi-fis in the cemetery and have a picnic. For more info on this click here and here.

In our family, the few days before Undras is a flurry of activities for everyone. Besides the cleaning of the house and yard, cleaning and repainting of the nitcho (tomb) of our dear departed relatives, my maternal side's family in Cavite always make Suman Sa Lihiya every year without fail. Since I practically grew up there, from a very early age I was sat down on a bangko (stool) and helped in this activity that involved the whole family. Invariably, it was my late Lolo Apeng (maternal grandfather) who orchestrated everything. He was a stickler for details and a perfectionist. Usually, he's the one who's at the end of the assembly line - tying together the suman at the same time acting as a QA - scrutinizing everything in our handiwork. And woe is to anyone who did not measure up, for sure he/she will get a yelling right there and then.

Suman, (in case you don't know) is a Filipino snack usually made of sticky rice or some other root crops such as cassava and tightly wrapped in leaves (usually banana). In fact, the word suman can also mean something or someone encased in something very tight. 'Para kang suman sa suot mo.' 'You look like a suman with what you're wearing.' Meaning the clothes are very tight. ;)

I surely miss those times in Cavite during Undras, besides the food, I miss the trek me and my cousins make to the cemetery to visit our great grandparents' tombs. Unlike other families, we were not allowed to bring along any food though that did not prevent us from having streetfood galore from the numerous vendors around. Nor were we allowed any radio/stereo sets so all we have to pre-occupy ourselves were the candles and we had great time trying to outdo one another in collecting the dripping wax and forming the biggest candlewax ball of all (which my aunts later make into floorwax). Only downside of this was regularly losing almost all of my fringe (bangs) from those pesky candles. ;)

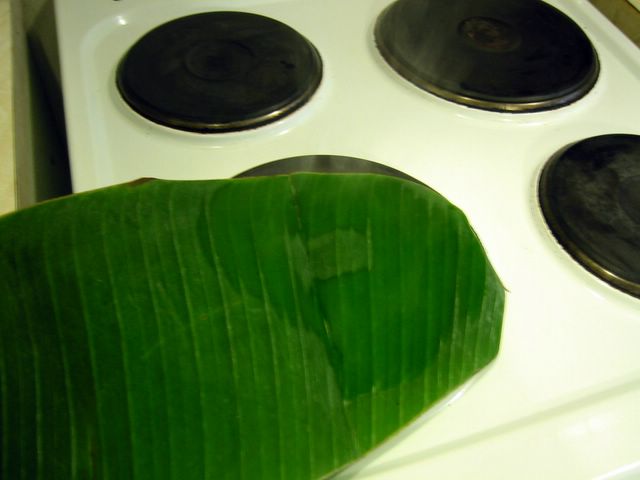
Since I was only little then, I only get to do the darang sa apoy (singeing/scorching) of the banana leaves and its preparations. That was my territory I was the banana leaf queen. My grandmother said that the best banana leaf for making suman is from the butuhan variety. They are thicker, less brittle and more flexible thus less likely to fall apart although I can't say much with its fruit whose name is so appropriate.

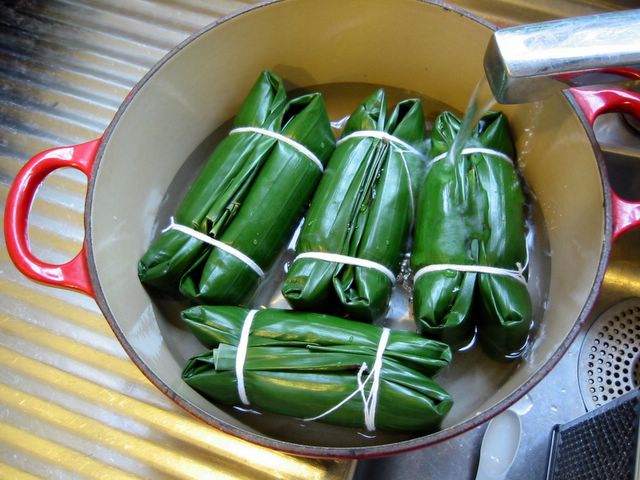
To be honest, this is actually the first time I've done this suman from start to finish. Although I watched my relatives so many times doing this, I have yet to actually wrap and tie one until today. As I was struggling to put my gingerly tied sumans in the pot, I suddenly realised the reason for my Lolo Apeng's suman boiler's shape. For decades I wondered how come the big 'pot' (I think he had it made to order) he used was shaped like a big suitcase. It was rectangular and even had a nice fitting lid. Well of course the suman when tied and assembled is rectangular in shape - rather like a brick. So his pot, shaped as it is, perfectly maximizes space in cooking the suman. How ingenious!


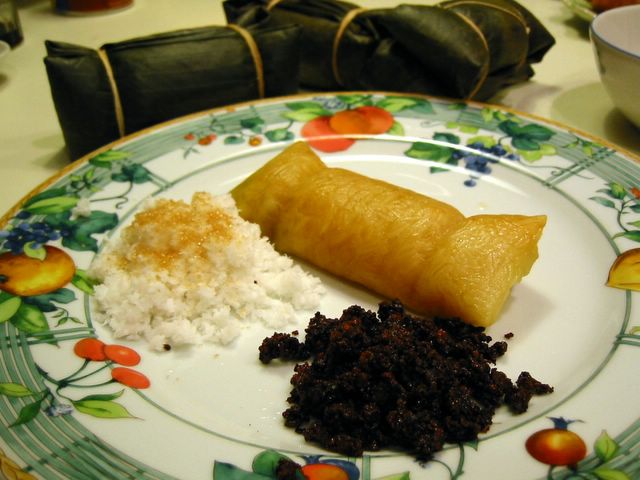
For this dish (snack?), I presented it with the different dips we use in eating it. Since the Suman sa Lihiya is very bland with just a hint taste of lye water and the banana leaves, you have to have at least some sugar to dip it in. For me the best is still the grated coconut with brown sugar. We also use latik and in my eagerness to perfectly capture a picture, I promptly burned the latik (yikes!) though it's still edible (in a dark bitter way). When we get sick and tired of eating it as it is, we pan-fry it for breakfast, slather on some butter and dip in the same suspects. Though in the mornings we're too lazy to get anything else so it would usually be just sugar.

Speaking of pictures, I got a bit trigger happy so apologies if you get bored with too many images of banana leaves and sumans.

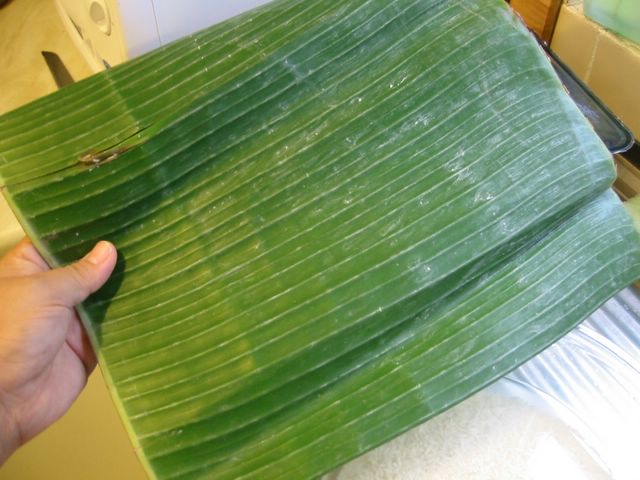
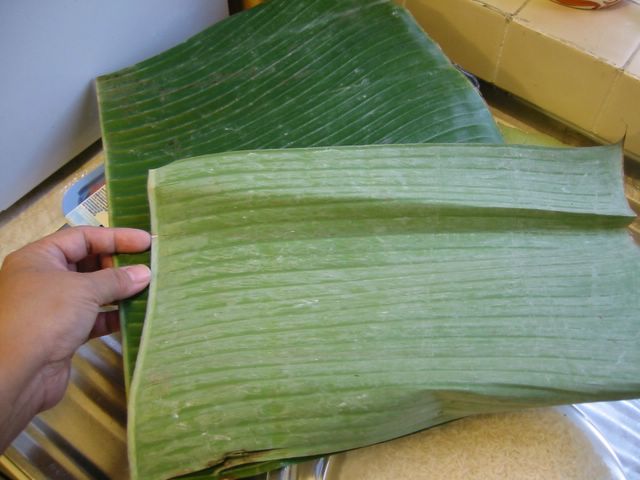
I know most of you know this but this one is for my kids - below are pictures showing how the topside and underside of the banana leaf looks like:


banana leaf topside &nbsp&nbsp&nbsp&nbsp&nbsp&nbsp&nbsp&nbsp &nbsp&nbsp&nbsp&nbsp&nbsp&nbsp&nbsp&nbsp&nbsp&nbsp&nbsp&nbsp&nbsp&nbsp&nbsp&nbsp banana leaf underside

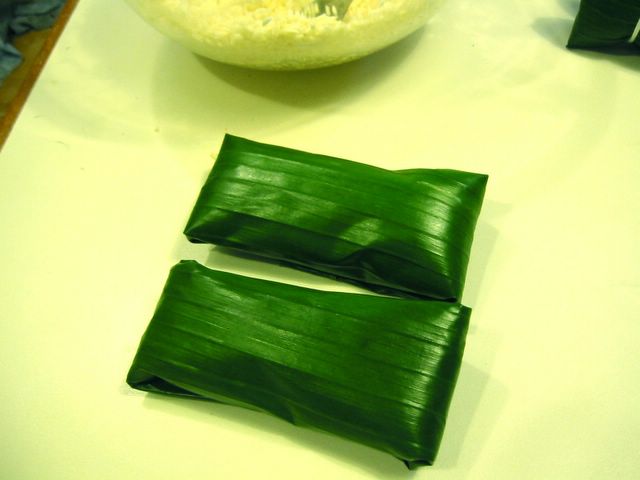
*To prepare the banana leaf: &nbsp Singe or scorch the leaves on an open flame or hot burner with the underside DOWN. You are in effect 'cooking' the underside. This only takes a few seconds, once you see the leaves changing opacity or colour then move it to other areas that's not yet singed. Turn the leaf over and very briefly heat the top side all over. DO NOT burn the leaves. This exercise will make the leaves less brittle and more flexible.


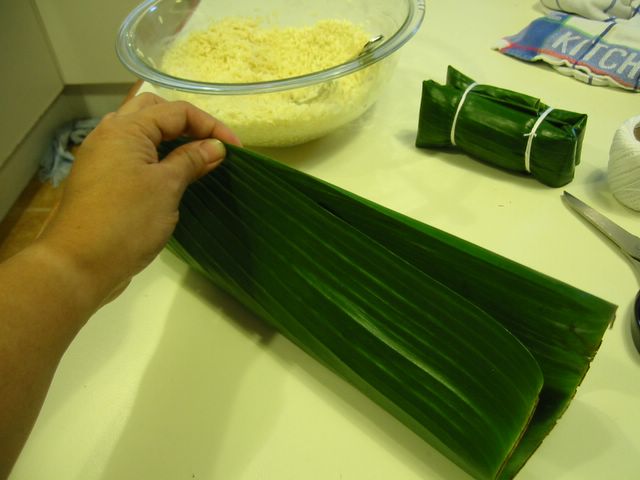
After this when it has cooled down, wipe down both sides of the leaf with a clean cloth. Cut off the central ribs of the leaves.


Suman Sa Lihiya

1 kg  malagkit na bigas (glutinous rice)
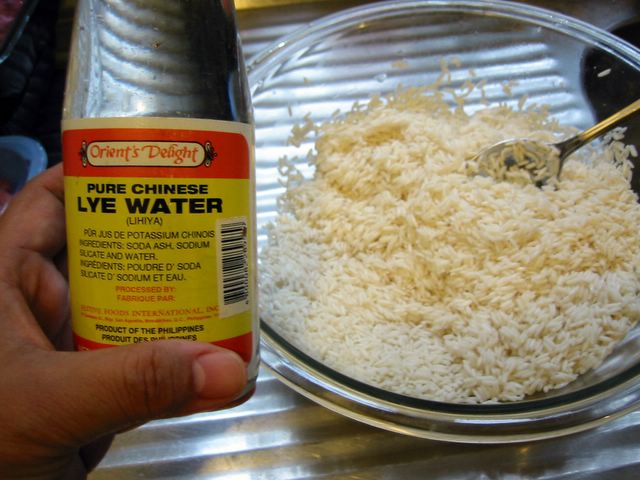
2 tsp lihiya (lye water)
prepared banana leaves
thin cotton strings

*Condiments:
grated coconut
brown sugar
Latik


  • Cut or separate banana leaves into two sizes (all approximates) - one 9 x 11-inch size and the other 5 x 5-inches.

Soak the glutinous rice in water for about 1-2 hours.


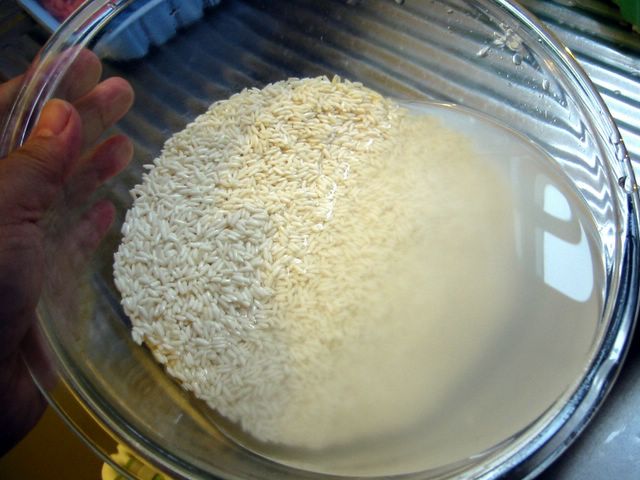
Drain and mix in the lye water. It should turn yellowish (this would depend on the strength of the lye water), if not add more lye water a little at a time until it turns yellowish. Mix well.


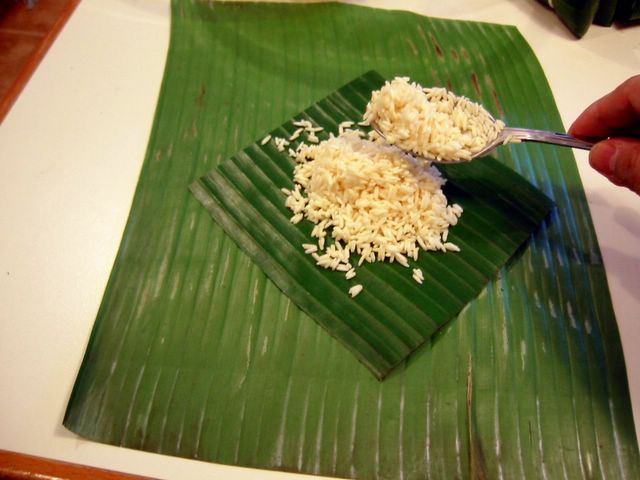
Put the big sized leaf lengthwise on a working surface - topside down. Then put the smaller one on top of it - topside up and aligned either same as the bigger piece OR positioned with the one of the corners pointing to the narrow side of the bigger piece.


Place about 3 tablespoonfuls of the glutinous rice mixture on the smaller piece of leaf.


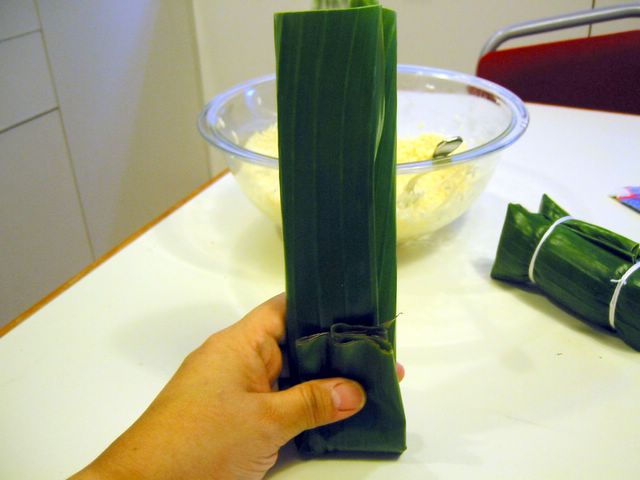
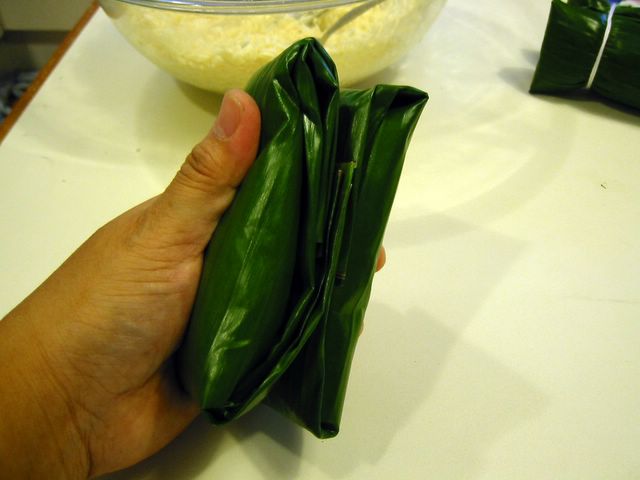
Grab the 2 long sides of the bigger piece and bring them together. Fold or roll that side to enclose the rice (about 3 half-inch folds). It is now long and narrow shaped.


Fold about the lower 1/4 of the parcel towards the center.


While firmly holding the folded end of the parcel, put it upright and tap it on the table to pack in the rice and if need be add more rice through the open end.


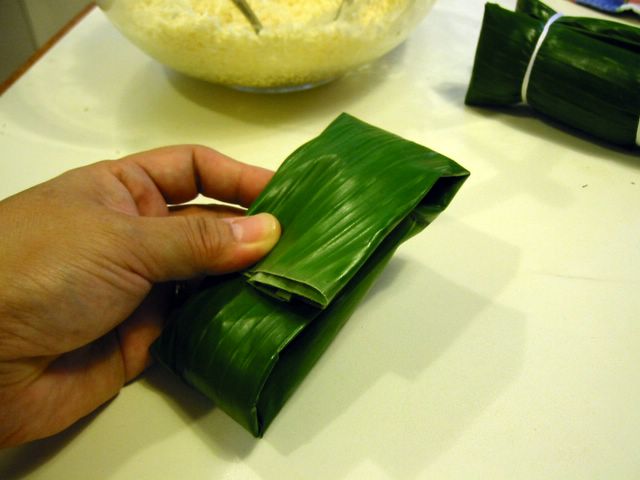
Fold the top end towards the center. You should have a parcel about 5 x 2-inches in size.


Make another suman parcel of roughly the same size.


Pair these two parcels with the folded sides facing together.


Using thin cotton strings, tie the two ends together tightly.


Place the assembled pieces in a big pot and add enough water to cover the suman.


  • Bring to boil and bring down heat to low and simmer for about 1 1/2 hours.
  • Serve warm or cold with grated coconut and sugar.


* For the Latik:

  • Add 2 Tbsp sugar and pinch of salt to a 400 ml can of coconut milk in a wok or pan (preferably non-stick). Stir until sugar and salt is dissolved.
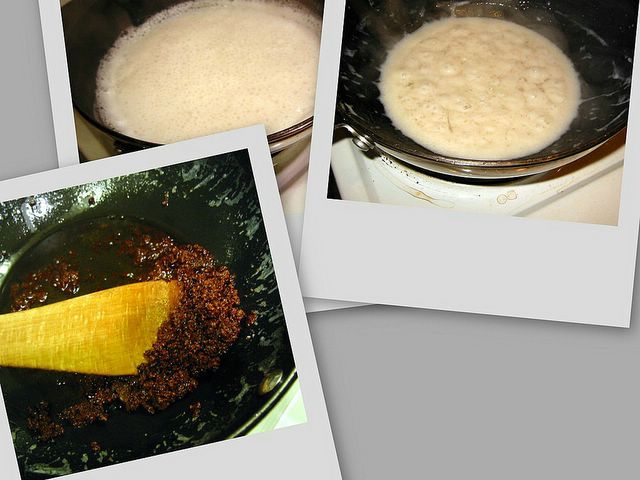
  • Bring to boil then lower heat and simmer until it renders oil and sediments (the latik) start to stick to the bottom.
  • At this point watch it very closely and stir it frequently (it burns easily) and fry the sediments until golden brown.
  • Remove from oil with slotted spoon. Serve with the suman.

Sometimes when we get tired of eating it the usual way, we pan-fry it for breakfast and have it with butter and then dipped it in grated coconut with sugar or just plain sugar.


Lasang Pinoy 4

Sunday, 23 October 2005

LP 3: Pork Barbecue

Filipinos has got this great snacking culture. Our foodcentric way of life can be gleaned from the numerous times we eat in a day. In between main meals we have the proper snacks or merienda then besides these, we constantly munch on little snacks such peanuts, watermelon seeds, crispy fried corn kernels, etc. It's no wonder that there is a great proliferation of street sides snacks up and down the country. And I loved a great deal of them. From the bualaw (binatog), adobong mani, kornik, inihaw na mais, sago gulaman, to the heavier kakanin of puto, kutchinta, suman, etc. or even goto, and pancit.

I was often dissuaded by my mother from buying street side snacks because of unsanitary conditions of some vendors. Often, I sneakily buy bola-bola or fishballs dipped in that spicy semi-thick sauce. Yum! It's alright with them if I buy banana cues or valencia (turons). I think their main concern with the bola-bola is that all the customers dip in the same sauce. It can be unhealty but so far (touch wood) I haven't gone down with anything with all the copious amount I've eaten.

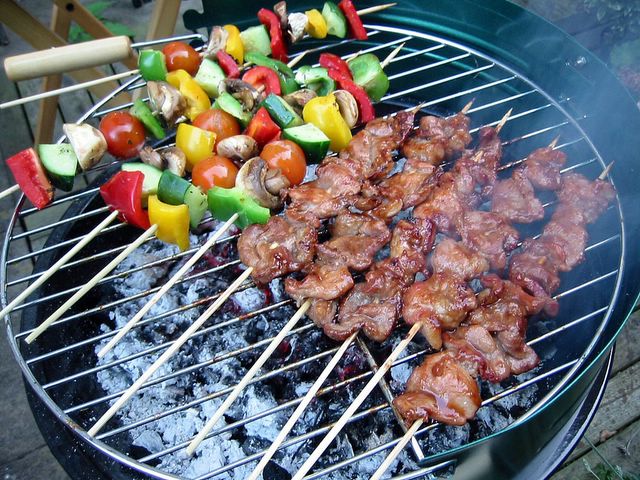
But the one thing I simply cannot resist at the first whiff of the smoky grilling meat is pork barbecue. The thought of sinking my teeth in those slightly charred but juicy tangy-salty-sweet slivers of pork skewered in bamboo sticks with its smoky smell makes my mouth water. Ahhh, how I wish I could have one right now.

Mind you, this recipe of mine is still being tweaked. I have not found the right taste equilibrium yet that I am seeking for. So just play around with the proportions according to your taste. Actually, no matter how 'right' my recipe is, it would still not taste the same as the street side ones because you need the dust and fumes from the passing jeepneys and buses, the dirt from the street or even maybe a little sweat from the vendor (yikes) to have that authentic taste. ;) Nyahahaha!

A tip in barbecueing is to get a meat cut with some fat in it and arrange the meat a bit packed together in the skewer. These will keep it moist and juicy in the grilling. Do not grill it too well done or it will turn hard and tough. I assume you know how to start a charcoal barbecue, but just in case here it goes - wait until the charcoals have a grey ash coating (about 20-25 minutes after you start the fire) before you begin grilling. Then if your grill have graduated levels, start at a fairly high level at the beginning then lowering it as the heat dissipates or cools down.

The current host of this interesting theme of the 3rd Lasang Pinoy is Kai of Bucaio. The said blogging event were originally started by Karen and Stef as a way of showcasing the Philippine's varied food beyond the ubiquitous adobo, pancit, and lumpia plus to generally have fun in cooking and blogging about Pinoy food.


Pork BBQ grilling


Pork Barbecue

1 kg  pork meat - sliced thinly into about 1.5 square inch pieces
1/2 cup soy sauce
1/3 cup lemon juice
1/4 cup ketchup
1/4 cup honey or brown sugar
salt and pepper (to taste)
3/4 cup 7-Up
1/2 Tbsp garlic - pounded
  1. Mix soy sauce and lemon juice; taste it. If need be add more lemon juice or soy sauce to get the right salty-sour balance according to your taste.
  2. Add all the other ingredients except the pork. Taste again and adjust seasonings if desired.
  3. Marinate pork in this mixture overnight.
  4. Soak bamboo sticks in water for about 30 minutes.
  5. Skewer pork meat close together in the bamboo sticks.
  6. Bring to boil the remainder of the marinade in a saucepan. Set aside as a basting sauce.
  7. Grill pork barbecues over hot coals while basting with the reserved sauce.


Lasang Pinoy 3