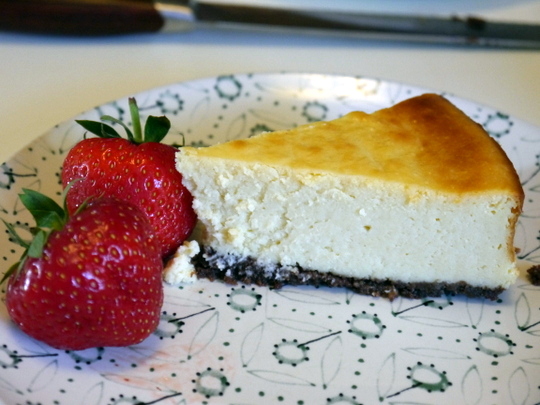
I saw this in the latest edition of the Good Housekeeping magazine and thought how seasonally appropriate it is. The cake came out quite nice especially if served with some custard. Although I thought the cake itself is quite crumbly so I adjusted the milk in the recipe to 1/4 cup. This is highly recommended for your afternoon tea and to use up your strawberries.
The picture is not particularly stellar because I honestly thought it would not taste good so I didn't expend much effort in getting a better image. How wrong I was!
Strawberry Streusel Loaf
175 g [scant 3/4 cup] unsalted butter - softened
175 g [scant 1/2 + 1/3 cup] caster sugar
2 large eggs
250 g [scant 2 cups] self-raising flour
1/4 cup milk
grated zest of 1 lemon (optional)
200 g strawberries - hulled and quartered
*Streusel Topping
20 g [4 tsp] unsalted butter - chilled
20 g [scant 3 Tbsp]
1 Tbsp demerara sugar
1 Tbsp chopped roasted hazelnuts
- Preheat the oven to 180°C/fan 160°C/350°F. Grease a 9x5-inch loaf pan.
- Beat the butter and caster sugar until light and fluffy.
- Add the eggs one at a time until well combined.
- Using a spatula or wooden spoon, fold in the flour and lemon zest (if using), then milk until well combined.
- Spread 1/3 of the batter in the prepared pan. Scatter half of the strawberry on top of it.
- Repeat once more ending with the streusel topping.
- Bake for 1 hour or until a skewer poked in the middle comes out clean.
- Cool in the pan for about 10 minutes. Remove from pan and cool completely on a rack.
I got this from bonus recipe card from the BBC FoodFood magazine years ago. We paired it with sweet English strawberries which are very much in season today. I only ever buy English strawberries and only when it is in season which is around late May to August.
This is a baked cheesecake compared to some of my other cheesecake here in this blog which required no baking. Maybe later I would try baking this in a waterbath.
White Chocolate Cheesecake
*Base:
12 chocolate digestives (or graham crackers)
85 g [1/3 cup] butter - melted
2 tsp cocoa powder
1 Tbsp caster sugar (superfine)
*Filling:
900 g cream cheese (room temperature)
4 eggs
3 Tbsp plain flour
200 g [scant 1 cup] caster sugar
1/2 tsp vanilla extract
100 g white chocolate - finely grated
*Topping:
2-3 chocolate flakes (optional)
icing sugar (optional)
- Preheat oven to 180°C/fan 160°C/350°F. Grease and line the bottom of a 23 cm/9-inch springform pan.
- Crush the digestives by putting it in a plastic bag and then bashing it with a mallet or rolling pin.
- Mix the crushed biscuits with the rest of the base ingredients. Pour this in the prepared pan. Press the mixture with the back of a spoon to cover the bottom of the pan.
- Bake in the oven for 5 minutes. Remove from oven and cool.
- In a big bowl, combine all the filling ingredients with an electric mixer until well combined.
Pour mixture on top of the biscuit base in the pan.
- Bake for 50 minutes until almost firm but with a slight wobble in the middle.
- Remove from oven and cool completely in the pan.
- To serve, remove the cheesecake from the cake pan.
- [Optional] Dust the cheesecake with icing sugar. Break a few pieces of the chocolate flakes on top.

This is this year's birthday cake for myself. Very nice, moist and chocolatey. I especially like the cream cheese icing. I think I prefer it chilled straight from the fridge since the icing is on the soft side when at room temperature which caused a bit of problem when I brought it to work for my colleagues. The cling film covering it stuck on it so much that it didn't look too appetising.
This recipe is from my favourite epicurious.com food website
Sour Cream Chocolate Cake
195 g [1-1/2 cups] plain flour
3/4 cup cocoa powder
3/4 tsp bicarbonate of soda
1-1/2 tsp baking powder
1/2 tsp fine salt
1 cup sour cream
1/3 cup water
2 tsp vanilla extract
250 g [1 cup] unsalted butter - softened
270 g [1-1/3 cups] light brown sugar - firmly packed
3 large eggs
*For icing:
185 g [3/4 cup] unsalted butter - softened
250 g [1 cup] cream cheese - room temperature
115 g dark chocolate (70% cocoa) - melted and cooled
1 tsp vanilla
2 cups icing sugar - sifted
- Preheat oven to 180°C/fan 160°C/350°F.
- Grease and flour two 9-inch pans or 13 x 9-inch baking pan.
- Sift all the dry ingredients into a bowl. Set aside.
- Combine the sour cream, water, and vanilla in another bowl. Set aside.
- In a large bowl, using an electric mixer, beat butter and brown sugar until fluffy.
- Add eggs one at a time making sure to beat well after adding.
- Add flour mixture in batches alternating with the sour cream mixture beating well until well blended.
- Pour and spread the batter equally between the pans and smooth the top.
- Bake for 25 - 30 minutes for the 9-inch pans (40 minutes for 13x9-inch) pan or until a skewer poked in the middle comes out clean.
- Cool in pans for about 10 minutes. Turn out in rack and cool completely.
- Cake layers can be made 1 week ahead and frozen, wrapped well in plastic wrap. Thaw layers before putting on the icing.
*For the icing:
- Cream butter and cream cheese until light and fluffy.
- Add remaining ingredients and beat until well combined.
*To assemble:
- Lay first layer on the cake plate and spread some icing on it.
- Top with the second layer and spread the rest of the icing on top and around the cake.
It's that time of the year again for my husband's birthday. Another excuse to experiment with one of the listed cake recipes in my to-bake list. I chose a caramel cake because I know my husband's fond of caramel. So Corinne's wonderful looking Filipino-style caramel cake recipe gets taken out.
It is essentially an airy chiffon cake with a pourable icing. The cake was good although I would have liked the caramel icing to be a little bit sweeter so I adjusted the recipe. And be very careful in caramelizing the sugar. I found out it burns very easily after it starts turning brown. Also, I didn't bother with cutting the cake in half horizontally and ice the middle. I thought there was not enough icing to spread around. This step is marked optional because our cake was just fine as it is.
Filipino-Style Caramel Cake
*For the Vanilla Chiffon Cake:
4 large egg whites
1/4 tsp cream of tartar
1 cup plus 2 Tbsp sifted cake flour (or plain flour)
1 1/2 tsp baking powder
1/2 tsp salt
3/4 cup white sugar - divided
1/4 cup corn or vegetable oil
4 large egg yolks
1/3 cup water
1/2 tsp vanilla extract
- Preheat oven to 180°C/fan 160°C/350°F.
- Line the bottom of an ungreased 20cm/8-inch round 3-inch high pan.
- In a large bowl, beat the egg whites and cream of tartar on high speed until frothy.
- Add in half of the sugar (6 Tbsp) gradually while beating until stiff peaks form.
- In another bowl, combine the cake flour, baking powder, salt and the rest of the white sugar. Mix well.
- Add in the egg yolks, water and vanilla. Beat with electric mixer or by hand until smooth and well blended.
- Pour batter into the prepared pan.
- Bake for about 50 minutes or until top springs back when lightly touched or a skewer poked in the middle comes out clean.
- Invert pan into wire rack immediately and cool completely. To release cake from pan, carefully run a thin knife around sides of pan and invert cake onto a large serving plate.
- [Optional] Cut the cake in half horizontally. Invert the top half onto a cake plate and spread a little icing on it. Top it with the other cake half cut side down.
- Pour the rest of the icing on the cake spreading evenly on top and the sides.
**Tip: For easier handling, wrap your cake very well in cling film, then refrigerate overnight before frosting.
*For the Caramel Icing:
2 egg yolks
1/2 cup white sugar - divided
1 1/2 cups evaporated milk (one 375 ml can) - divided
1 1/2 Tbsp cornstarch
1/4 cup boiling water
1/4 cup butter - cubed
1/2 tsp vanilla extract
- Whisk the egg yolks with 2 Tbsp of the sugar in a small bowl/jug. Add in 1/4 cup of the evaporated milk and all of the cornstarch. Mix well and set aside.
- In a heavy saucepan, over low to medium heat, carefully caramelize the remaining (1/4 cup) sugar.
- When sugar is completely melted and a golden brown colour, add boiling water (careful it will splatter).
- Bring back to a boil while stirring ocassionally making sure all the caramel well mixed into the water.
- Gradually add in the rest of the evaporated milk (1 1/4 cups) while stirring. Heat mixture just until it starts to boil.
- Without turning off the heat, pour a little of the caramel mixture into the egg yolk mixture while constantly stirring to temper the eggs. Mix until smooth.
- Pour this back into the remaining caramel mixture in the saucepan. Mix until icing reaches a thick consistency.
- Remove from the fire and then add in the butter and vanilla extract. Let cool just a little bit, whisking once in while. The mixture will thicken more as it cools.
- Pour onto cake while still warm.
Note: This icing is pourable. Let it flow smoothly over the top and sides of the cake. Put strips of baking paper under your cake to catch the drips.
Mamon is a well-loved little sponge cake snack in the Philippines. For this recipe, the sponge is essentially a chiffon cake. I adapted the recipe from the wonderful baking blog Heart of Mary which is penned by a Filipina based in Australia.
She suggested there that greasing of the little cake tins is optional. Well you know me, anything to save labour is most welcome. But it did not work for me. The cakes stuck in the tins especially at the bottom. So that's one thing required in mine - grease the tins well.
The cakes came out really fluffy and they did not sink (which I was afraid it might do). They tasted wonderful, too, and not dry at all. I just had to reduce the salt because it came out a bit salty. So this recipe is well recommended.

{A}
1 cup plus 2 Tbsp sifted cake/plain flour
1 1/2 tsp baking powder
1/4 tsp fine salt
6 Tbsp white sugar
{B}
1/4 cup vegetable oil or melted butter
4 large egg yolks - at room temperature
1/3 cup water
1/2 tsp flavouring (vanilla, butter, lemon, or orange extract)
{C}
4 eggwhites
1/4 tsp cream of tartar
{D}
6 Tbsp white sugar
- Preheat oven to 180°C/fan 160°C/350°F.
- Grease 10 small mamon tins. You can also use small brioche tins or small metal pudding moulds.
- In a bowl, beat {C} on high speed until frothy. Gradually add in the sugar {D} and beat until stiff peaks are formed.
- In another large bowl, combine {A}, mix well. Add in {B}. Beat with electric mixer or by hand until smooth and well blended.
- Gradually and gently fold in egg whites into the egg yolk mixture.
- Pour the cake batter equally into the 10 tins. Give the tins a gentle shake and a tap to remove air bubbles and to level off the batter. Arrange them on a large baking tray.
- Bake for 25-30 minutes or until tops are golden brown and a skewer inserted into the centre of the cakes come out clean.
- Immediately invert the tins onto a baking paper-lined wire rack. Tap the tins to release the cakes. Turn the cakes over and let ir cool off completely.
- [Optional] While still warm, brush the tops with melted butter. This will allow the cakes to absorb some of the butter thus giving it more flavour. Finish off by sprinkling some granulated sugar on the tops.

I quickly post any recipe I find that worked marvellously first time I tried it. This particular one came from the recent Waitrose Magazine for September 2016. The combination of chocolate (milk or dark) with the banana and toffee glaze is so moreish. My only complaint is that it is hard to make the glaze settle on top since the suggested cake tin is a bundt cake pan. Next time I will bake this in a square or rectangular pan so that the delicious glaze will stay on top and nothing will go to waste.
For the Daim chocolate bars, the equivalent of these are Hershey's Skor or Heath bars or any chocolate covered hard toffee bars.
Chocolate Banana Toffee Cake
200 g unsalted butter - softened
75 g caster sugar (suprefine sugar)
100 g light muscovado sugar
4 large eggs
4 very ripe medium bananas - mashed (about heaping 1-1/2 cups)
3 Tbsp sour cream
2 tsp vanilla extract
50 g cocoa powder (plus extra for dusting)
225 g plain flour
50 g cornflour (cornstarch)
2 tsp baking powder
1 tsp bicarbonate of soda (baking soda)
75 g chopped Daim bars or dark/milk chocolate chips (plus some chopped for topping)
Glaze:
200 g light muscovado sugar
75 g unsalted butter
100 g double cream
25 g dark chocolate - chopped
1/2 tsp vanilla extract
pinch of salt
- Preheat oven to 190°C/fan 170°C/375°F. Butter 10-inch bundt pan and then dust with cocoa powder. Tap out the excess cocoa powder.
- In a bowl, mix thoroughly the plain flour, cocoa powder, cornflour, baking powder, and bicarbonate of soda.
- In another bowl, add sour cream to mashed banana and vanilla.
- Cream the softened butter and the caster and muscovado sugars in a big bowl for about 5 minutes or until light and creamy.
- Keep beating while adding eggs one at a time.
- Add the banana mixture. Beat until well combined.
- Using a wooden spoon or spatula, fold in the flour mixture.
- Fold the chopped Daim chocolate bars or chocolate chips (whichever you're using).
- Pour into the prepared pan and bake for 40 minutes or until a skewer poked in the middle comes out clean.
- Take out of the oven, cool for 5-10 minutes and then invert into a rack and cool completely.
*For the glaze:
- Gently heat butter, cream and sugar in a small saucepan until the sugar is dissolved.
- Bring to boil, lower heat and simmer for 30 seconds.
- Remove from heat and add dark chocolate, vanilla and pinch of salt. Stir until smooth.
- Cool for 10 minutes or until a bit thickened while stirring from time to time.
- Drizzle over the cake. Let set for a few minutes.
- [Optional] Scatter chopped Daim over the top.
How nice to use up my expiring sour cream and a glut of in-season lemons. This is the reason why I like recipes in website that's got reader reviews. You cannot go wrong with a highly rated one with hundreds of reviewers like this keeper of a recipe from my favourite Epicurious website. My daughter and I thought we were going to have a great big mound of a lemon-flavoured pound cake with most of it going to waste. Thankfully we were wrong. We love it to bits so much so that we actually finished it a couple of days later.
Lemon Sour Cream Pound Cake
3 cups cake flour (or plain flour)
1 tsp bicarbonate of soda (baking soda)
1/2 tsp fine salt
1 cup unsalted butter - softened at room temperature
2 1/2 cups sugar
5 eggs - room temperature
1/3 cup fresh lemon juice
2 Tbsp grated lemon peel
1 cup sour cream
*Glaze:
2 cups icing sugar (confectioner's) - sifted
2 Tbsp lemon juice
- Preheat oven to 160°C/fan 140°C/325°F. Grease 10-inch tube or bundt pan. Dust pan with flour; tap out excess flour.
- Sift flour, baking soda and salt into a bowl - combine well.
- Using an electric mixer, beat butter in large bowl at medium speed until fluffy.
- Gradually add sugar and beat 5 minutes.
- Add eggs 1 at a time, beating just until combined after each addition.
- Beat in lemon juice and peel.
- Using a wooden spoon or rubber spatula, fold in the flour mixture.
- Mix in the sour cream. Transfer batter to prepared pan.
- Bake cake until skewer inserted near center comes out clean, about 1 hour 30 minutes.
- Let cake cool in pan on rack 15 minutes. Turn out cake onto a rack.
- Carefully turn cake right side up on rack (if using tube pan) and cool completely. (Can be prepared 2 days ahead. Wrap in foil and let stand at room temperature.)
*For the glaze:
- Combine the icing sugar and lemon juice. If it's too thick, add water a little at a time to get a pouring consistency.
- Once cake is completely cool, drizzle with the lemon glaze.

I've always wanted to combine the two most favourite fruits our family like to include in baking - apples and bananas. The experimentations over the years were not very successful at all. Most of the recipes were from the internet and they range from the really soggy ones (too much bananas) to the dry ones (not enough moisture) and the too sweet ones.
This one fits the bill, although I have to adapt and reduce or increase some of the ingredients, but generally it's quite good and not overly sweet which I guess is why it's called a 'bread'. That's one of my dilemna, do I call it a bread or a cake? For me, it can be classified as a cake but then it's not very sweet so a bread then? Whatever it is, teatime or coffee time would be better with this addition.
Thanks to Kelly in Just A Taste for the great recipe I adapted.
Banana Apple Bread
260 g [2 cups] plain flour plus 1 Tbsp extra
1 tsp bicarbonate of soda (baking soda)
1/2 tsp fine salt
1 tsp ground cinnamon
95 g [6 Tbsp] unsalted butter - melted
150 g [3/4 cup] granulated sugar
2 large eggs
2 tsp vanilla extract
1/4 cup buttermilk
1 cup mashed overripe bananas (about 2-3 bananas)
1 large baking apple - diced small (about 1 1/4 cups)
2-3 Tbsp demerara sugar or granulated sugar for sprinkling
- Preheat oven to 180°C/fan 160°C/350°F. Line a 9x5-inch loaf pan with baking parchment.
- Combine flour, cinammon, salt, and bicarbonate of soda in a bowl.
- Sprinkle 1 Tbsp flour on the diced apples and toss to coat. Set aside.
- In another bowl, mix sugar with melted butter.
- Add eggs one at a time and beat each time.
- Add bananas and vanilla, stir to mix.
- Fold dry mixture to the wet mixture alternately with the buttermilk.
- Then fold in the apple.
- Pour into the prepared loaf pan.
- [Optional] Sprinkle top generously with demerara sugar.
- Bake for 55 minutes or until a skewer pierced in the middle comes out clean.

I named it Dark Carrot Cake, instead of just Carrot Cake as Angela Nilsen did in The Ultimate Recipe Book where I adapted this from, because I plan to bake other types of carrot cakes among the thousands out there online and on cookbooks. The darkness stems from the dark muscovado sugar it uses which lends it a nice treacly smell and taste. Although it is also the source of my mild irritation because dark muscovado tends to ball-up into lumps when mixed with liquid. You can bet I did a lot of smashing and pressing to get rid of the lumps. But if you use newly bought or fresh from the box one, it won't lump that much. If you're not interested in pressing away lumps, just replace the dark muscovado with light muscovado.
Despite this, the cake is lovely especially when made a day ahead and paired with the accompanying cream cheese icing. Enjoy!

85 g nuts (walnuts, brazil nuts, etc.)
1 medium orange
115 g [scant 1 cup] raisins
225 g self-raising flour
1 1/2 tsp bicarbonate of soda
1 tsp ground cinnamon
175 g dark muscovado sugar
175 ml sunflower oil
3 eggs
280 g finely grated carrots (about 2-3 medium carrots)
*Icing:
100 g full-fat cream cheese - room temperature
50 g unsalted or slightly salted butter - softened
50 g [heaping 1/3 cup] icing sugar
1 tsp lemon juice
- Preheat oven to 160°C/fan 140°C/325°F.
- [Optional] Toast nuts in a baking sheet in the oven for about 5-10 minutes.
- Finely chop nuts. Finely grate the zest from the orange set aside.
- Squeeze 2 Tbsp of juice from the orange and pour it over the raisins in a bowl. Leave to soak for about 20 minutes while you make the cake.
- Grease and line the base of a 8-inch/20 cm round or square baking pan with baking parchment.
- Combine the flour, cinnamon, and bicarbonate of soda.
- Put sugar in mixing bowl. Rub between fingers to break up lumps.
- Add in oil and beat with electric mixer on low speed until well mixed and have broken down as much of the little lumps as you can.
- Beat in eggs one at a time.
- Gently stir in the flour mixture with a large metal spoon.
- Fold in carrots, nuts, raisins (with the liquid), and orange zest.
- Pour into the prepared baking pan and bake for 45-50 minutes for a round pan and 55-60 minutes for a square pan or until a skewer poked in the centre comes out clean.
- Let the cake cool in the pan for 5 minutes.
- Turn out on a wire rack, peel off the lining and let it cool completely.
- Mix all icing in a bowl. Spread over cake. Best if cake is left for a day or two before icing and eating.
'Twas my birthday and the kids decided to bake something for me. How nice! They were thinking of doing the Chocolate Date Fudge Cake. But I told them that it's too complicated for beginners like them and just steered to something simpler. They came up with this keeper of a recipe from Sue Lawrence's Book of Baking.
Why is it called a 'surprise' cake? Well, it's got mayonnaise in it! At first I thought it was odd but come to think of it - mayonnaise consists of eggs and oil which is precisely what you put in a cake. I tell you, it was really easy to do and it turned out quite well. It's a shame my pictures don't give it justice. We had slices of it with custard and it was so delicious.

250 g self-raising flour
50 g cocoa powder
1/4 tsp baking powder
200 g caster sugar
2 tsp vanilla extract
200 g good quality mayonnaise
1 medium egg
160 ml [2/3 cup] cold water
- Preheat oven to 180°C/fan 160°C/350°F. Butter and flour a 9-inch/23cm round pan or 8-inch/20cm square pan.
- Sift (optional) the flour, cocoa, and baking powder into a large bowl.
- Stir in the sugar. Make a well in the centre.
- Add in all the other ingredients.
- Beat with electric mixer until smooth.
- Pour into the prepared pan and bake for 30 minutes or until a skewer inserted into the centre comes out clean.
- Cool on a wire rack and remove from pan.
- Ice with fudge frosting or serve with custard/cream.
Here's one buttery cake recipe that I bake as an alternative to Victoria sponge. Usually this gets made when there's an excess or about to expire sour cream. Highly recommended for its fluffiness and scrumptiousness. I found this recipe that I adapted from the Food Network as part of Paula Deen's recipe collection there. It really is very good.
Sour Cream Pound Cake
125 g [1/2 cup] butter - softened
300 g [1 1/2 cups] white sugar
1/2 cup sour cream
3 eggs
1/2 tsp vanilla
1 1/2 cups all-purpose flour
1/4 tsp bicarbonate of soda (baking soda)
- Preheat oven to 180°C/fan 160°C/350°F/gas mark 4. Grease and flour a 9x5 inch loaf pan.
- Mix the flour and bicarbonate of soda (baking soda) in a bowl. Set aside.
- In a large bowl, cream/beat butter and sugar until light and fluffy.
- Add sour cream, eggs, and vanilla. Mix well.
- Add the flour mixture, mix well. Pour into the prepared pan.
- Bake for 50 mins - 1 hour, or until a toothpick inserted into center of cake comes out clean.
The work 'scrumptious' can aptly describe this cake. It is really that good. Funny enough, like most of my experimental recipes, I stumbled across this one because I have a white chocolate bar that's about to expire and a bunch of overripe bananas nearer to the side of rotten. Thanks to member toms112 of the BBC GoodFood website who provided this delicious loaf cake. I will always go back to this recipe whenever a banana cake is requested - promise!
Banana White Chocolate Chip Cake
125 g [1/2 cup] butter
150 g [2/3 cup] caster sugar (superfine)
1 large egg
1 tsp vanilla extract
3 very ripe bananas - mashed
190 g self-raising flour
1/4 cup milk
100 g white chocolate chips
- Grease a 9 x 5-inch loaf pan. Pre-heat oven to 170°C/fan 150°C.
- If the butter is softened to room temperature, beat in a bowl with the caster sugar using an electric mixer until fluffy and light.
OR
Melt the butter with the sugar over medium heat. Remove from heat and cool slightly. Transfer to a mixing bowl.
- Add in the egg and vanilla, mix well.
- Add the mashed banana and mix well.
- Fold in the flour alternately with the milk using a wooden spoon. Mix just enough to incorporate the flour.
- Add the white chocolate chips and fold to mix.
- Pour batter into the prepared cake tin. Bake for 50-55 minutes or until a skewer poked in the middle comes out clean.

It was indeed a challenge for me. Seriously, I thought it's one of those experiments that would end up in the rubbish bin. I decided to adapt the recipe of Kerry's fabulous rainbow cake from her blog Kerry Cooks since it is based in a Victoria sponge which I know would guarantee deliciousness. And here was where the first of near misses happened - I said I 'adapted' the recipe which means I used an 8-inch cake pan versus her 6-inch ones. Well, the batter were quite thin when I spread it in the pan and naively I though they would rise evenly. Ha! It rose in the middle and tapered to nothingness towards the edges. They look like small hills complete with bulging boulders on the sides!
The the icing would cover all that up, says moi. But then when I reached for the icing sugar in my pantry there was hardly any in the bag. Drat! Okay, I had to think quickly otherwise my youngest would be really disappointed. What I had in abundance was eggs, sugar, and butter so my light bulb idea was to adapt Corinne's Swiss Meringue Buttercream frosting. Gosh I was nervous because it was the very first time I did that. Nevertheless, glorious billowy white buttercream emerged. This one was delicious and not too sweet - definitely my kind of frosting.
The frosting came out all right but as I was slathering it between layers I realised I hardly have enough to cover it well! Oh darn, it must be mercury retrograde since nothing's going right. I had to use every bit of the icing and as precisely as I could to spread on all the cracks and crannies. Thank goodness there was just enough to cover the whole cake.
Those were not my only firsts in this exploit. The lettering on the cake was a first as well. Looking at it now, I guess there's no other alternative for me but to improve. Despite all my trials, the best part was cutting the cake. It was an unexpected delight to see that it had all come together in all its colourful glory. Really fab! Best of all, the cake with the meringue icing combination tasted great - that was according to my daughter. Mission accomplished!

*Batter: (x2)
250 g self raising flour
250 g butter - softened
250 g granulated sugar
4 eggs
2 tsp vanilla
1/4 cup milk
gel paste colourings (red, orange, yellow, green, blue, and purple)
Note: Mix two batches of this batter and divide each of them into 3 thereby creating 6 layers.
- Preheat oven to 180°C/fan 160°C/350°F. Grease three 8-inch round pans.
- Cream butter and sugar in a bowl with an electric mixer until light and fluffy.
- Add in vanilla and eggs one at a time; mixing well after each addition.
- Add flour and then milk into the butter mixture just enough to mix it in.
- Divide equally into three smaller bowls and tint each one with a different colour. Mix the gel colour well in the batter.
- Spread batter evenly in the three prepared baking pans.
- Bake for about 20 minutes or until a toothpick inserted in the middle comes out clean.
- Cool 5 minutes in pan and then remove. Cool completely on a wire rack.
- [Optional] Wrap the cooled cake layers in cling film and chill in the fridge for several hours. It is easier to assemble it if the cake layers are chilled or even frozen.
*Swiss Meringue Buttercream Icing:
5 egg whites
1 cup granulated sugar
250 g unsalted butter - softened but not melting
1 tsp vanilla
pinch of fine salt
- In a bowl set on a simmering saucepan of water (bottom not touching the water), whisk egg whites and sugar until the sugar is dissolved. You can test this by feeling a little of the mixture between your fingers. If you can't feel any grittiness then it is done.
- Remove the bowl from the saucepan and whip the egg white mixture with an electric mixer and beat until stiff peaks stage.
- While still beating, add the softened butter a spoonful at a time.
- Once all the butter has been incorporated, add the vanilla and salt.
- Mix on high speed until the icing is light and fluffy.
*To assemble:
- On a cake board or plate, put a thin layer of icing in between cake layers while stacking it on top of each other.
- Put icing on top and all along the sides of the cake. Decorate as you please.
The September Daring Bakers’ challenge was brought to us by Lucie from ChezLucie. She challenged us to make a true Czech treat –Kolaches!
Quite an interesting challenge considering I've never tried kolach before. So how was it? Well, as of posting time it is still cooling on a wire rack and I only tried a little portion without the cream filling. It was a bit bland though springy and soft which makes it perfect for some sweet or creamy filling. I was intrigued by the mayonnaise in the recipe but if you think about it mayonnaise is made up of oil, eggs, and vinegar or lemon juice. These ingredients are ubiquitous in cakes and breads so I was not surprised it worked.
A number of tweaks were done in the recipe such as reducing the size of the bread itself, added more baking time, and halved the streusel topping. Otherwise, it is a great recipe as an introduction to the world of kolaches!

*Cake:
250 g [1 3/4 cups] plain flour
7 g active dry yeast
2 Tbsp granulated sugar
5 Tbsp milk - warmed
1/2 cup mayonnaise
1 egg - slightly beaten
1/2 tsp fine sea salt
*Streusel topping:
3 Tbsp plain flour
2 Tbsp caster sugar (superfine)
1/4 tsp ground cinnamon
2 Tbsp butter - chilled
*For finishing:
1 egg - beaten
*Cream filling:
2 cups full-fat milk - divided
1/2 cup granulated sugar
1 tsp vanilla extract
1/2 cup custard powder (vanilla pudding powder)
1/4 cup unsalted butter - room temperature
5 Tbsp double cream - chilled
*For cake:
- In a large bowl, sift flour and make a hole in the middle.
- Pour the yeast, 1 tsp of the sugar, and 1 Tbsp of the warm milk in the hole. Lightly mix the yeast, sugar and milk with a fork and sprinkle the surface with a little flour.
- Cover the bowl with kitchen towel and let rise for 15 minutes.
- Add the rest of the ingredients and knead with dough hook or by hand until you have a smooth dough (about 10 minutes).
- Lift the dough from bowl. Lightly flour the bottom of the bowl and set the dough on it. Cover with clingfilm or towel and let rise for an hour until double its volume.
- Punch dough and knead a little. Form the dough into a ball and place onto a baking sheet lined with greaseproof paper.
- Press the dough with your hands to shape it to a disc about 7 inches (18 cm) in diameter and 3/4-1 inch thick (2-2.5 cm). Cover with clingfilm and let rise for 30 minutes.
- Preheat oven to 325°F/160°C/fan 140°C.
- Brush top of the cake with the beaten egg. Sprinkle the streusel topping generously.
- Bake for 25-30 minutes or until golden brown. Cool completely on a wire rack.
- Cut the cooled cake crosswise and spread the cream onto the bottom half. Cover with the upper half.
*For the streusel:
- Combine the flour, sugar, and cinnamon in a small bowl.
- Cut in the chilled butter in the flour mixture with a pastry cutter until crumbly.
*For the cream:
- Mix 1/2 cup of the milk with the custard powder in a small bowl. Set aside.
- In a saucepan mix the rest of the milk and sugar and bring to a gentle boil.
- Add the custard powder mixture and simmer for 3-5 minutes while stirring constantly.
- Remove from heat, transfer to a bowl of your electric mixer and cool completely while blending at low speed.
- Add diced butter and beat until well mixed in.
- Whip the double cream in a separate bowl into stiff peaks. Fold in the custard mixture into the double cream.
As always I'm on the lookout for use of apples in anything baked. I found this Rachel Allen recipe in the Good Food Channel website. This is one very fluffy, soft, and yummy apple cake. The only thing I changed is the way the sliced apple is added to the batter. I didn't put it on top as she suggested but put it about 2/3 down the way in the cake tin to make sure they sink to the bottom. Otherwise, it's perfect as it is.
Dutch Apple Cake
175 g caster sugar (superfine)
2 eggs
1/2 tsp vanilla extract
1/2 cup milk
85 g [1/3 cup] butter
125 g plain flour
1/2 tsp cinnamon
2 1/4 tsp baking powder
2 cooking apples - peeled, cored, sliced thinly
1 Tbsp sugar
- Preheat oven to 200°C/fan 180°C/400°F. Line and butter an 8 x 8-inch (20 x 20 cm) baking pan with greaseproof paper.
- Melt the butter with the milk in a saucepan. Set aside.
- Sift and combine the flour, cinnamon, and baking powder in a bowl. Set aside.
- Beat the eggs and sugar in a bowl with an electric mixer for about 5 minutes or until the mixture is thick and mousse-like.
- Pour the melted butter and milk into the egg mixture while whisking all the time.
- Fold the flour mixture carefully into the mixture just enough to wet the dry mixture.
- Pour about 1/3 of the batter into the prepared baking pan.
- Arrange the sliced apple on top and then pour the rest of the batter to cover it. This is to make sure that the apple slices sink to the bottom.
- Sprinkle the 1 Tbsp sugar all over the top.
- Bake for ten minutes. Reduce oven temperature to 180C/fan 160C/350F and bake for a further 20-25 minutes or until well risen and golden brown.
- Remove from the oven and allow to cool in the baking pan for 10-15 minutes. Remove from pan and cut into squares. Serve warm with cream.


Originally, this was sourced from the BBC Food website but has since discovered that it was virtually the same as Hershey's Perfectly Chocolate Cake except for the salt and sugar! So I will credit them both since I combined them for this version of mine.
Easy Chocolate Cake
225 g [1 3/4 cups] plain flour
375 g [1 3/4 cups] granulated sugar
90 g [3/4 cup] cocoa powder
1 1/2 tsp bicarbonate of soda (baking soda)
1 1/2 tsp baking powder
1/2 tsp salt
1 cup milk
1/2 vegetable oil
2 eggs
2 tsp vanilla extract
1 cup boiling water
*For icing: use Chocolate Ganache or Chocolate Buttercream Icing (even plain buttercream is good)
- Preheat oven to 180°C/fan 160°C/350°F.
- Grease and flour two 9-inch round (or one 13 x 9-inch) baking pans.
- Combine all ingredients except the boiling water in a bowl and beat until well combined.
- Add the boiling water a little at a time while beating until the batter is smooth.
- Divide the batter into the prepared pans and bake for 30-35 minutes (for 13x9 cake tin - 35-40 mins.) or until a skewer poked in the middle comes out clean.
- Remove from the oven and cool completely while still in the pan.
*To assemble: Remove the cakes carefully from the tin and spread a little of the icing on top of one then put the other cake on top. Spread the rest of the icing on top and all around of the cake stack.

Again, the thought of throwing out a soon-to-be-expiring can of coconut milk brought out the daring in me. This, I believe, is the first time I have combined coconut and lime in a cake. And take my word for it - it's sublime! Gregg Wallace's recipe in the BBC Good Food magazine of January 2007 provided the source that I adapted. Things I changed: I didn't bother with the sugar sprinkle and I poked (stabbed more like it) the cake many times before pouring in the syrup icing just like the lemon drizzle version.
Lime & Coconut Drizzle Cake
100 g butter - softened
175 g caster sugar
2 eggs
175 g self-raising flour
1 tsp baking powder
400 g coconut milk - divided
finely grated zest of 2 limes
*For icing
half of coconut milk from the cake
150 g caster sugar
juice of three limes
*For sugar sprinkle [optional]
50 g caster sugar
finely grated zest of 1 lime
- Heat oven to 180°C/fan 160°C/350°F/gas mark 4. Butter and line a 9 x 5-inch loaf pan with baking parchment.
- Put all the ingredients in a bowl and beat everything with an electric until batter is smooth and well combined. Add and stir in enough coconut milk (about 1/3 cup) to make the batter into droppable consistency.
- Pour mixture in the prepared loaf pan and bake for 40 minutes or until a skewer poked in the middle comes out clean.
- While the cake is baking, make the icing syrup: mix the coconut milk with 150 gm of the caster sugar in a saucepan. Boil for about 10-15 minutes, while stirring from time to time, until syrupy and you can see the bottom of the pan when stirred.
- Stir in the lime juice, remove from heat and set aside.
- If using sugar sprinkle, crush the remaining sugar with the lime zest until it becomes a damp green paste. Set aside.
- When the loaf has finished baking, remove from oven; [optional] poke the cake many times with a thin skewer. Pour the icing a little at a time, waiting for the cake to absorb it before adding more. Leave the cake to cool in the pan.
- Once completely cool, remove from pan and sprinkle with lime sugar (if using).
Note: The original recipe did not require poking the finished cake. I just did this so that the icing syrup would penetrate the cake down in the middle more. It is up to you if you want to do this.
It's been awhile and this summer cake is just waiting to be posted. This is a simple and tasty way of serving up your superfood blueberries. Superbly complimented by that cream cheese-sour cream combination topping for the icing. Lovely eaten with hot or cold tea. Sorry I couldn't remember where I got this recipe but I will surely do the attribution once I find my missing notes.

175 g butter - room temperature
175 g caster sugar
225 g self-raising flour
1 tsp baking powder
3 eggs
1/4 cup sour cream
375 g fresh blueberries
* Frosting:
200 g cream cheese - room temperature
100 g icing sugar - sifted
3 Tbsp sour cream
- Preheat oven to 180°C/fan 160°C/350°F. Grease and line an 8-inch/20cm round cake pan.
- Mix the dry ingredients - flour and baking powder and set aside.
- Cream butter and caster sugar in a bowl.
- Add eggs one at a time and beat well after each addition.
- Add in the sour cream and beat until combined.
- Using a wooden spoon fold the dry ingredients in the batter.
- Then fold in the fresh blueberries.
- Pour in the prepared pan and bake for about 50 minutes or until a stick poked in the middle comes out clean.
- Cool in the pan for 5-10 minutes. Remove and cool completely on a rack.
- Spread frosting on top and sides.
*For the frosting:
- While the cake is baking, beat the cream cheese, sour cream and icing sugar together until well combined.