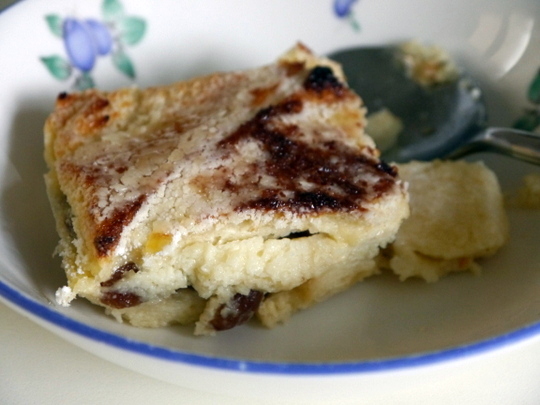
One of my favourite comfort food is Bread and Butter Pudding. It has that ability to be classified as both a dessert or a snack depending on how you serve or how much you eat.
A lot of bread puddings I have the experience of buying in shops are too stodgy. They resemble more like slightly sweetened thick chewy bread. But not this one. I do love this recipe because is lighter and the ratio of the egg to milk/cream is just right. Plus the sugar is just right - not too sweet. I got this from an old ripped-off page of the BBC Good Food magazine with the recipe coming from the chef Paul Heathcote. Thanks Paul.
I know I burned some of the pudding top but believe me it's not that badly burnt. It's probably just the lighting angle of the picture. Not a problem for me because I'm partial to slightly charred food!
6-7 slices of white bread - crusts removed
65 g [1/4 cup] butter - softened
100 g sultanas or raisins
250 ml [1 cup] full-cream milk
250 ml [1 cup] double cream (heavy cream)
3 medium eggs (or 2 large eggs)
50 g [1/4 cup] caster sugar
1 tsp vanilla extract
25 g icing sugar
25 g apricot jam - warmed and sieved (optional)
- Preheat oven to 190°C/fan 170°C/375°F. Grease a 1.5 litre ovenproof dish, about 2.5 inch deep.
- Butter the bread slices generously and cut each into 4 triangles.
- Arrange a layer of the bread in the prepared dish.
- Sprinkle the sultanas on top.
- Then arrange the remaining bread slices on top of this.
- Make the custard - mix the cream, milk, eggs, vanilla, and caster sugar in a bowl.
- Strain the cream mixture over the bread slices and leave to soak for about 5 minutes.
- Put the dish in a larger roasting tin in the oven. While the oven rack (with roasting tin) is about a third out of the oven, carefully pour hot water in the roasting tin to come halfway up the side of the dish.
- Bake for 30 minutes until the top is golden and the custard is lightly set.
- Remove the dish from the roasting tin and leave to cool for about 15 minutes.
- Preheat grill to the highest setting.
- Generously dust the top of the pudding with sifted icing sugar and glaze under the grill until golden brown. If it starts to puff up remove and leave to cool a little longer before returning to the grill.
Note: It will be more efficient if you use a cooking torch to glaze the icing sugar.
- [Optional] Brush the top with the warmed apricot jam. Serve with clotted cream or warm custard.

Oeufs à la neige or Snow Eggs is a favourite of my husband. Whenever we were in France and it's on the menu he often orders it. My cooking/baking to do list had this for a long time. At last this challenge from the Daring Cooks finally forced me to confront this intimidating recipe.
And challenged indeed I was. I halved the recipe since this was an experiment I didn't want to waste too much if anything goes wrong. The meringue was easy enough to do with the help of my hand mixer. But the poaching was something else. I had to emphasize in the recipe that the poaching liquid should be barely simmering. Mine seemed like it was quite hot because the meringues were getting overcooked into shriveled white things. So the poaching time was done very quickly more like 30-45 seconds instead of 2 minutes per side. Also, when you shape the meringues, make sure to use *big* spoons not like the dessert spoons I used. Because they do shrink in size a little after poaching.
Then the caramelised almond slivers came into play. Well I did it all right (although it was a little on the dark caramel side) and set it out in the dining table to cool. By the time I was to sprinkle it on the snow eggs almost all of it was gone! The husband and kids discovered them! Oh well, there was just enough bits I scraped to put as topping.
What of the dessert? How did it go? I was quite eggy, as my daughter said. Well that is a given! For me and the husband, it was very nice although the custard was a bit too sweet for me. I made the adjustments in the recipe below. Other than that I heartily recommend it. Next time I would make the presentation better such as put it in nicer bowls and opt for caramel syrup as well.
The main recipe was adapted from The Encyclopedia of Classic French Pastries by Susan Whatley and the almond praline fron Rachel Khoo's recipe of Floating Island.

(Snow Eggs)
*For the praline:
1/2 cup granulated sugar
2 Tbsp water
1/2 cup slivered almonds
- Line a baking tray with baking paper.
- Put sugar and water in a heavy bottomed saucepan and bring to a boil.
- Add the slivered almonds to the boiling syrup and keep stirring continuously.
- The sugar will being melting again and will take on a golden colour.
- Once it turns golden, pour out onto the prepared baking tray and quickly spread as thinly as possible (they set fast). Leave to cool completely.
*For the meringue:
3 large egg whites
5 Tbsp granulated sugar
pinch of salt
1 3/4 cup whole milk
- Put the egg whites in a mixing bowl with the pinch of salt. Beat with an electric hand or stand mixer on medium speed until soft peaks form.
- Increase the speed to high and add the sugar gradually while beating until all the sugar has been added.
- Beat until stiff peaks form (you should be able to hold the bowl of beaten egg whites upside down without any spilling out).
- While you are beating the egg whites, bring the milk on saucepan to a gentle simmer. Lower heat futher until there are only little bubbles at the edges.
- Using 2 big dinner spoons, form the meringue into oval shapes. Carefully drop the oval meringues into the simmering milk and poach for about 1-2 minutes each side or until puffed up and set.
- Remove from the milk with a slotted spoon and place on a sheet of tea towels or paper towels. Cool and store in the fridge tightly covered until needed.
*For the creme anglaise:
3 egg yolks
1/4 cup sugar
1/4 tsp vanilla
pinch of salt
remaining milk from poaching the meringue
- Combine the egg yolks, vanilla and sugar in a heat-resistant bowl with a whisk. Gently pour a little at a time of the still warm poaching milk on to the mixture while constantly stirring.
- Return the egg-milk mixture to the poaching saucepan and cook at low heat while constantly stirring. There should be about a little less than 2 cups of the mixture. If not, top up with more milk up to roughly that amount.
- Cook gently (do not stop stirring) until the mixture thickens to the consistency of a single cream. It should coat the back of a spoon.
- Strain the sauce and cool in the fridge covered until thoroughly chilled.
*For the caramel sauce (optional):
1/2 cup granulated sugar
2 Tbsp water
- Prepare a bowl full of tap water (preferably in a sink). The bowl should be bigger than the saucepan to be used for cooking. Set aside.
- Put the sugar and water in a heavy bottomed saucepan. Bring to boil.
- Continue boiling until it becomes golden coloured. Lower heat and cook until it is of the shade of golden colour desired. Immediately put the bottom of the pan into the bowl full of tap water to stop the caramel from cooking further.
- Use the caramel immediately
*To assemble:
- Put about 1/3 - 1/2 cup of creme anglaise in a small serving cup or bowl. Place two or three meringues on top and decorate with almond praline and/or caramel sauce.

This festive dessert I could imagine more in summer feasts because it's quite refreshing in the palate despite the richness of the white binding jelly. Although, this would not go amiss as a foil to all the richness of Christmas season food.
I thought I could get away with using her exact recipe but I couldn't find any thickened cream (Nestle) that is quite common in the Philippines. Good thing I read the voluminous comments of that blog to find that I can use regular double cream (heavy cream) but had to increase the gelatine in the binder. With the first make under my belt, I could see that two jelly moulds could be used in this recipe because I didn't use up all the coloured jellies. So I'll do that next time.
As you can see, I made a mistake in unmoulding the whole thing. It won't come out readily so I immersed the bottom in a bowl full of warm water for, I thought, a few seconds. But it seems I dipped it too long. The top melted and wasn't the ridged smooth gelatine I was expecting. But, nevermind, the taste more than made up for the botched unmoulding. Corinne was right in claiming that it is delicious - it was so yummy. And when I cut it to reveal the inside - wow! To see those colourful jellies floating in white was really really satisfying.
Happy New Year everyone !!
Cathedral Windows
*For coloured jellies:
5 different flavoured and coloured unset jellies*
1 cup boiling water (x5)
1 cup cold tap water (x5)
1 Tbsp sugar (x5)
1 Tbsp unflavoured gelatine powder (x5)
*For binder jelly:
3 Tbsp unflavoured gelatine powder
2 cups apple juice
4 egg yolks
3/4 cup granulated sugar
1 Tbsp lemon juice
1 cup evaporated milk
1 cup double cream (heavy cream)
For the coloured jellies:- Mix the coloured jelly with 1 cup of boiling water, 1 Tbsp sugar, and 1 Tbsp unflavoured jelly powder.
- Stir from time to time until everything is dissolved.
- Add in 1 cup of cold tap water.
- Pour into a moulding container (plastic, glass, or ceramic; preferably rectangular or square) and chill in the fridge overnight.
- Repeat steps 1 to 4 for the rest of the coloured jellies.
For the binder jelly:- Heat the apple juice until very hot but not boiling.
- Add the unflavoured gelatine, remove from heat and stir until completely dissolved.
- In another saucepan, combine the egg yolks, sugar, and lemon juice.
- Cook over low heat while stirring until the mixture is thickened.
- Pour in the apple mixture and remove from fire. Stir to mix.
- Add the evaporated milk and double cream to the mixture and stir to mix.
To assemble:- Before cooking the binder jelly, cut up the different coloured jellies into about 3/4 - 1 inch cubes. Put in a heat resistant bowl.
- Wash the final presentation jelly mould with water. Drain water from the inside but do not wipe dry. This is to make the unmoulding of the jelly easier.
- Make the binder jelly and while it is still liquid (it sets quickly!) pour it over and combine with the cut-up jellies.
- Carefully pour in the jelly mould. Cover and chill in the fridge overnight or until completely set.
*Notes: - I used the locally available Hartley's jelly in lime, lemon, orange, blackcurrant, and strawberry flavours.
- I actually combined the coloured jellies and binder in the jelly mould itself. I just carefully mixed them with a spoon and distributed the coloured jellies evenly.
- I didn't have one of those nice Tupperware jelly moulds so I just used my regular bundt pan that I use for baking and it wasn't too bad.

Originally, this was sourced from the BBC Food website but has since discovered that it was virtually the same as Hershey's Perfectly Chocolate Cake except for the salt and sugar! So I will credit them both since I combined them for this version of mine.
Easy Chocolate Cake
225 g [1 3/4 cups] plain flour
375 g [1 3/4 cups] granulated sugar
90 g [3/4 cup] cocoa powder
1 1/2 tsp bicarbonate of soda (baking soda)
1 1/2 tsp baking powder
1/2 tsp salt
1 cup milk
1/2 vegetable oil
2 eggs
2 tsp vanilla extract
1 cup boiling water
*For icing: use Chocolate Ganache or Chocolate Buttercream Icing (even plain buttercream is good)
- Preheat oven to 180°C/fan 160°C/350°F.
- Grease and flour two 9-inch round (or one 13 x 9-inch) baking pans.
- Combine all ingredients except the boiling water in a bowl and beat until well combined.
- Add the boiling water a little at a time while beating until the batter is smooth.
- Divide the batter into the prepared pans and bake for 30-35 minutes (for 13x9 cake tin - 35-40 mins.) or until a skewer poked in the middle comes out clean.
- Remove from the oven and cool completely while still in the pan.
*To assemble: Remove the cakes carefully from the tin and spread a little of the icing on top of one then put the other cake on top. Spread the rest of the icing on top and all around of the cake stack.

I thought it was time to make Creme Caramel which is the Western world's version of our very own leche flan. Afterall, I live in the Western world where the ingredients for it are abundant and cheap.
My effort was not particularly stellar as you can see with the various holes. The oven was probably quite hot that's why it's overcooked. Though thankfully this did not affect the overall quality of the custard. It was still smooth and silky with just the right sweetness.
The recipe I adapted is from The New Best Recipe cookbook from Cook's Illustrated.

1 cup granulated sugar
2 Tbsp light corn syrup or golden syrup
1/2 cup water
1/4 tsp lemon juice (optional)
1 1/2 cups whole milk
1 1/2 cups single cream (light cream)
3 large eggs
2 large egg yolks
2/3 cups granulated sugar
1 1/2 tsp vanilla extract
pinch of salt
*For the syrup:
- In a saucepan, combine the sugar, water, syrup, and lemon juice. Bring to a simmer without stirring on medium heat.
While doing this, wipe the sides of the saucepan with a wet cloth or a wet brush to remove any sugar crystals that can turn the syrup grainy.
- Continue to cook the syrup until it turns golden (about 8 minutes). Occasionally swirl the saucepan gently for even browning.
- Cook for a further 4-5 minutes while swirling the saucepan gently and constantly until the syrup turns honey-caramel in colour.
- Remove from the heat and immediately pour and divide into ramekins or baking moulds you are using. Careful when doing this because the syrup is very hot at this point. Let the caramel cool and harden completely in the moulds.
*For the custard:
- Preheat oven to 180°C/fan 160°C/350°F.
- Heat the milk and cream in a saucepan over medium heat. Stir from time to time and cook until steam appears (about 7 minutes). Remove from heat.
- Mix gently the eggs, egg yolks, and sugar in a large bowl. Add the heated milk mixture, salt, and vanilla while stirring gently. Whisk until just combined but not foamy. Strain the mixture through a fine sieve.
- Boil about 5 cups of water in a kettle. Put a folded tea towel to fit in the bottom of a large baking pan.
- Divide the custard mixture in the ramekins or moulds. Arrange the moulds on the tea towel in the baking pan making sure they do not touch.
- Position the pan in the middle of the oven. Pull the oven rack and the pan about less than half-way out.
Pour the hot water in the baking pan to reach halfway up the side of the ramekins. This is called a bain-marie or water bath.
- Cover the entire pan loosely with aluminium foil. Bake until a skewer or small knife inserted between the centre and edge of the ramekin comes out clean. Baking time for small ramekins is about 35-40 minutes while for larger baking dish is about 70-75 minutes.
- Remove from the bain-marie and cool completely on a wire rack. [Optional] Cover individually with plastic wrap and refrigerate up to 2 days.
- To unmould, run a knife all around the edge of the ramekin. Cover it with a plate and turn it upside down. Shake the ramekin gently to release the custard.
It's not very pretty. In fact it looks like some ... oh never mind. I never thought meringue making is this easy. It only consisted of 3 ingredients, imagine that! It was so easy even our 14-year-old nephew was able to make it all by himself. Thus the poo-looking mounds in the picture. Hahaha!
Actually he was the one who made the second batch because the first one I made was gone in a minute. Really yummy! The recipe was adapted from Angela Nilsen's The Ultimate Recipe Book
Next time I will make some Eton Mess with it. Thinking of which, I have to hurry up because strawberries will be disappering soon.
Meringues
4 egg whites
115 g icing sugar (confectioner's)
115 g caster sugar (superfine)
- Preheat oven to 120°C/fan 100°C/250°F. Line baking sheets with parchment or baking non-stick paper.
- Beat egg whites with an electric mixer on medium speed until stiff peaks stage (stands up in stiff peaks when the blades are lifted).
- Continue beating though this time on high speed. Start adding the caster sugar one tablespoon at a time. Continue beating 3-4 seconds after each addition. It should be thick and glossy after all the sugar has been added.
- Sift one-third of the icing sugar on the beaten egg whites. With a metal spoon or rubber spatula, gently fold in it. Continue sifting and folding the icing sugar a third at a time. Do not over mix.
- Using a dessert spoon, heap the mixture into small mounds (or you can pipe them) onto the lined baking sheets.
- Bake for 1 1/2 hour or until the meringues sound crisp when tapped at the bottom.
- Leave to cool completely on a wire rack.
- Suggested serving: sandwich two meringues with softly whipped cream

 This was intended as an entry for the SHF #38 with a theme of pudding. I thought the deadline was end of the month I forgot that this is a Friday event. Duh! So I missed it again as I always do ... arrrgggghhhh!
Nevermind, I still want to include this in my list of recipes here as a reference for moi. For I have found my ultimate sticky toffee pudding - at last! I first sighted this in the Good Food magazine as far back as 2006. I have made this before but just forgot (there's that word again) to take a picture. So Christmas dinner this year provided the perfect excuse to indulge in our most favourite of all puddings.
Among the commercial varieties the only one that pass my family's finicky taste is Marks & Spencers. My husband buys only their sticky toffee pudding when he occasionally hankers for one. The rest of the store-bought ones didn't get enough points for us to buy a second time.
This type of pudding is typical of traditional British ones. Though upon research I found out that it was anything but ancient. There is controversy regarding its origins. Some say it's from a Lake District hotel some say it's from somewhere else. In any case, hats off to whoever it was for inventing a totally addictive pud.
When I was making this I realised that the most important bit is really the toffee sauce. Once you get the right balance of the ingredients for the sauce, it does not matter whether the pudding itself does or not have any dates in it. Actually I think even if you have just plain sponge as a base but have the perfect toffee sauce then it is all well and good exactly like the better store-bought ones.
The recipe is very good and easy to do. My only gripe is the black tracle in the toffee sauce causes it to turn a slight greyish tint when it cools off which can be a little off-putting for some people. So I'm recording that down as optional. I highly recommend this especially when served warm with cream or custard. Yum!

*Pudding:
200 g pitted and chopped dates
2/3 cup boiling water
1 tsp vanilla extract
2 eggs
175 g self-raising flour
1 tsp bicarbonate of soda (baking soda)
85 g butter - softened
140 g demerara sugar
2 tbsp black treacle or dark molasses
1/3 cup + 1 1/2 Tbsp milk
cream or custard to serve
*Toffee Sauce:
175 g light muscovado sugar
50 g butter
1 cup double cream
1 Tbsp black treacle or dark molasses (optional)
- Pour the boiling water on the dates in a bowl. Let soak to soften for at least 30 minutes. Mash the dates with a fork or puree with a liquidiser. Set aside.
- Pre-heat the oven to 180°C/fan 160°C/350°F/gas mark 4. Butter and flour seven small pudding molds or cups (about 200 ml in size).
- Mix the flour and bicarbonate of soda well. Set aside.
- Cream the butter and sugar with an electric mixer for several minutes.
- Add eggs one at a time mixing well after each addition.
- Beat in the vanilla extract, then the black treacle.
- Using a large metal spoon, fold in one-third of the flour mixture alternately with half of the milk while making sure not to overmix. Repeat until all the flour and milk are used.
- Add in the mashed dates and stir until just incorporated.
- Divide the batter evenly among the seven pudding molds. Place molds on a baking sheet and bake for 20-25 minutes.
- Remove from the oven, cool for a few minutes then loosen them by running a butter or pallet knife on its side. Turn out from the molds to cool completely.
- While the pudding is baking, make the sauce by combining the sugar, butter and half of the double cream in a saucepan.
- Bring to boil in medium heat while stirring all the time until sugar has dissolved.
- (Optional) Stir in the black treacle if using.
- Let it simmer away for about 2 minutes while stirring from time to time making sure it does not burn.
- Remove from heat then stir in the rest of the double cream.
- To serve, pour the sauce over the upturned pudding in individual plates or bowls with cream or custard.
*Note: The pudding will taste even better if it sits in the sauce for a day or two. Cover the bottom of a baking dish with some of the sauce. Sit the upturned puddings on the baking dish and pour the rest of the sauce over it. Cover with a loose tent of foil so it will not smudge the sauce.
To reheat, you can put the covered baking dish in a 180°C/fan 160°C/350°F oven for 15 minutes. Though I prefer to microwave the individual puddings because baking tends to dry out the sauce a little making it a tad sweeter than I would like it to be.
'Chocolate by Brand' is the current theme of one of the longest running event in the blogging world. David Lebovitz hosts this 27th edition of Sugar High Friday. He encourages us to make a dessert out of our chocolate bars and write about them.
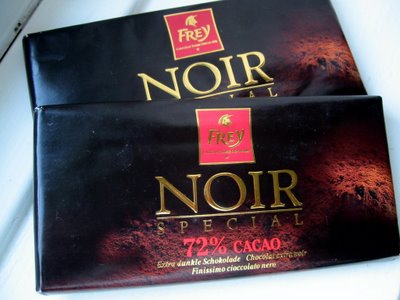
The chocolate bars I nabbed is by Frey - dark variety with 72% cocoa content. Wow, that's the highest I've used for cooking. Why I got it? It was on sale at the local Migros grocery near my sister's place when I visited her in Geneva a few months ago. You know me, I love value for money that means anything on sale!
Unlike some 70% chocolate I had before, this one is very deeply dark brown almost black actually. I savoured a small bite of it that showed it had smoothness, just the right amount of sugar and creaminess, a hint of coffee, with a little bitterness in the finish. Although I couldn't really tell how it would compare to one of those single-estate-organic-super-high-end types that your get from uber cool chocolate boutiques. All I can say is I like its smell, colour, and taste. Now let's see how it would fare when cooked.
I wanted to make something uncomplicated that would show the real qualities of chocolate. First thing that came to mind was chocolate truffles which I thought was perfect but then I've already posted one and for SHF, too! So out came this recipe from my burgeoning clippings from the BBC GoodFood magazine. It looks simple enough until I read closely about 'finely chopped' and 'crushed'. Turned out it requires more elbow grease. Oh well, things I have to do to have my sugar fix. :) The recipe originally asked for dried apricots but I bet any dried or candied fruit would be lovely in it. Things like cherries, pineapples, cranberries, even crystallised ginger! I did not include any chopped nuts because I thought there's too many things in it already. Maybe next time I'll lose the ground almond and put in the nuts. The chocolate itself had to be sufficiently chilled after melting to make it easy enough to mold into a log. Once you've done that the rolling on the crushed biscuits is easy peasy.
How did it taste? Well, the honey had a definite influence on it so other honey flavours would give it a different slant (even golden syrup would be interesting). Despite the number of distractions on this log (did I say I'm making something uncomplicated?), the chocolate still shone through. Dark, very slightly bitter, at the same time meltingly smooth in the mouth. Such a nice change from the gritty chocolates my husband brought home last Christmas.
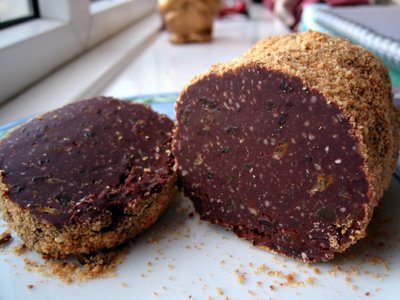 Chocolate Salami
250 g dark chocolate or combination of milk and dark chocolates
100 g butter
3 Tbsp clear honey
100 g ground almonds
100 g dried or candied fruits (apricots, cherries, etc.) - finely chopped
50 g toasted nuts (optional) - finely chopped
100 g amaretti biscuits - crushed
- Melt chocolate, butter and honey in a heatproof bowl over simmering water in a saucepan.
- Remove from heat and add almonds, toasted nuts (if using), and dried fruits.
- Cool completely and chill in fridge for about 1-2 hours until it is of dough-like consistency.
- Shape into a log (about 2 inches thick) and roll on crushed amaretti biscuits.
- Wrap in greaseproof paper and again tightly in foil.
Chill overnight in fridge.
- Before serving slice into rounds with sharp knife.
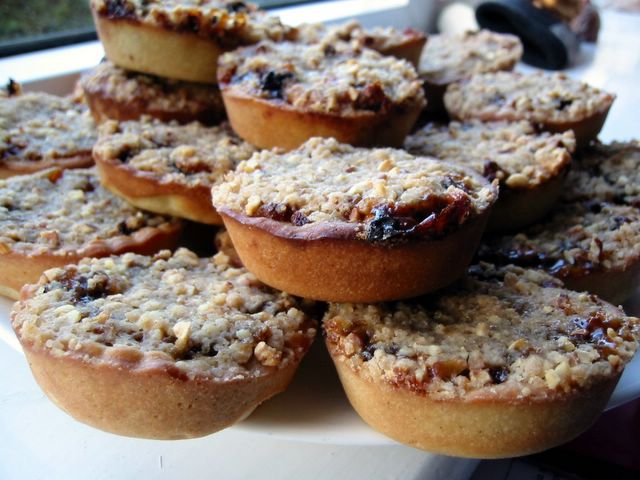
 I used to dread the omnipresence of mince pies in these foggy isles every Christmas. They have definitely grown on me (means I can tolerate the shop-bought variety) these past few years though I'm still not fond of them. So I was always on the lookout for recipes that is less sweet, less boozy, and with much better pastry. I spied Gordon Ramsay's mince pie recipe from a Sunday newspaper a few weeks ago which I promptly clipped and stowed away. Last weekend I decided to give it a go. Although I found the pastry making a bit on the fiddly side, the rest was quite straight forward and not too complicated. One significant adjustment I made was that I have to reduce the liquid in the pastry by half because it made it very soft so I consequently had problems doing the cutter routine that in the end I just pressed them all in the muffin pans.
The product of my labour only satisfied my tastebud a day after baking. Imagine, I was ready to chuck it down the bin after I've baked it since I found it a bit too sweet but a day or two later it cooled off completely and the flavours mellowed - it tasted fab! It still had that strong punch from the mince meat (no meats in it really), the nuts giving it some interesting texture and nutty background (duh!) and just enough sugariness to qualify it to the level of dessert. Well, here's another item in my Christmas bake-off that I'll be pressing in my long-suffering friends' hands. :)
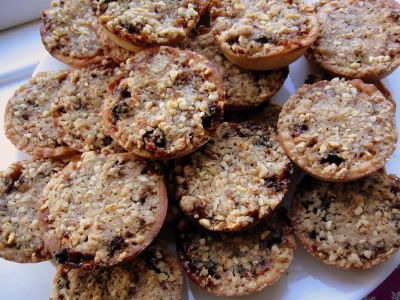 Mince Pies
*For the mincemeat:
1 crisp dessert apple - grated
100 g [scant 1/2 cup] butter - melted and cooled
110 g [3/4 cup] finely chopped dried apricots
250 g [1 1/2 cups] sultanas or raisins
175 g [packed 1/2 cup + 1/3 cup] soft dark brown sugar
zest and juice of 1 small orange
zest and juice of 1 unwaxed lemon
50 g chopped toasted almonds
1/4 tsp ground nutmeg
1/2 tsp ground allspice
1/2 tsp ground cinnamon
2 Tbsp dark rum
2 Tbsp brandy
*For the pastry:
125 g [1/2 cup] cold unsalted butter - diced
250 g [heaping 2 cups] plain flour
125 g [3/4 cup + 2 Tbsp] icing sugar (confectioner's)
pinch of sea salt
1 vanilla pod
1 large egg - lightly beaten
*For the crumble topping:
75 g [1/2 cup] plain flour
1/2 tsp ground cinnamon
50 g unsalted butter
3 Tbsp chopped roasted hazelnuts
50 g [1/3 cup] demerara sugar
- For the mincemeat:
- Mix all ingredients in a bowl until well combined.
- Cover with clingfilm and let marinate overnight in the fridge.
- For the pastry:
- Split the vanilla pod lengthwise and scrape the seeds in the beaten egg, mix well.
- Tip in the flour, salt, icing sugar, and diced butter in a food processor and blitz until mixture resembles breadcrumbs.
*OR*
- In a bowl, combine the flour, salt, and icing sugar.
- Cut in the diced butter in the flour mixture with a pastry cutter or 2 butter knives until mixture resembles breadcrumbs.
- Add in the egg and vanilla mixture and pulse/mix until it comes together into a dough.
- On a lightly floured surface, knead the dough lightly for a few seconds just long enough to make it smooth.
- Wrap in clingfilm and chill in fridge for about 30 minutes.
- For the topping:
- Sift flour and cinnamon in a bowl.
- Cut in the diced butter in the flour mixture and rub in until it resembles coarse breadcrumbs.
- Add in the sugar and hazelnuts. Set aside.
- To assemble:
- Roll out the pastry to a thickness of about 1/8 inch.
- Cut out 3-inch/8-cm rounds and press into muffin or minced pie pans.*
- Put about 1 heaping tablespoon of the minced meat in the pastry shell.
- Sprinkle enough topping to cover the minced meat.
- Bake in a preheated oven of 190°C/fan 170°C/375°F for 15 minutes.
- Let cool in the pan for about 2 minutes then pry off and cool completely on a wire rack. This is best eaten 1 or more days later.
*Note: You can also roll the pastry into 1-inch balls and press it in the bottom and sides of the muffin pan.
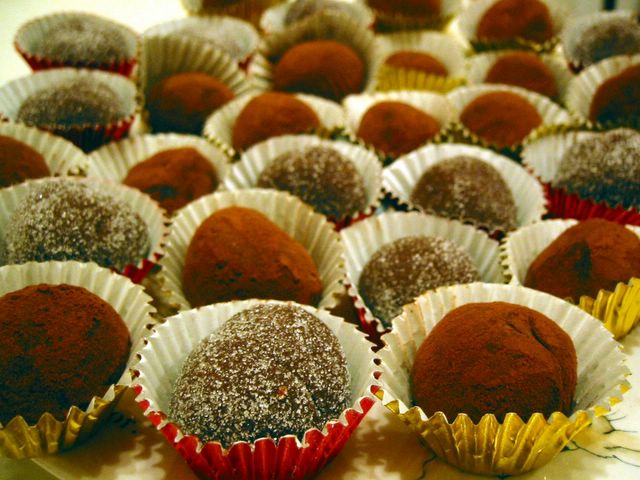
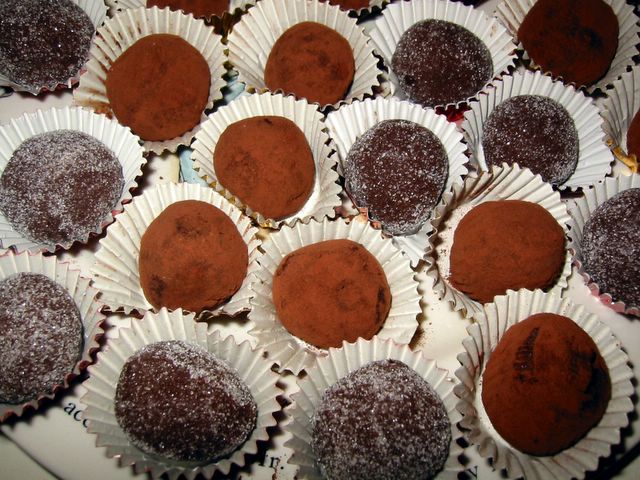
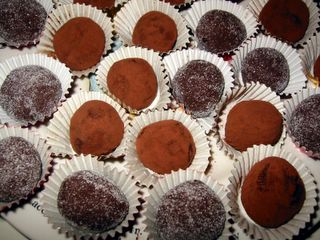
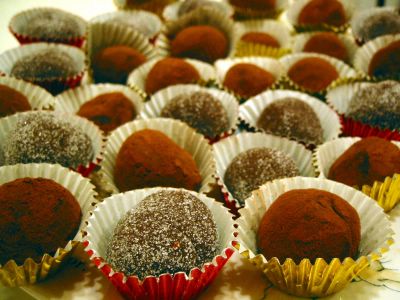 Johanna of the Passionate Cook was very enthusiastically encouraging us to create one of the more lusciously delicious concoctions man has ever created - chocolate truffles. I've always wanted to make one of these little pieces of delight. The sheer sensation of creamy melting chocolate in my mouth sealed my decision to participate in this 25th edition of the SHF.
I wanted to create truffles that my kids would want to eat. So bitter chocolate is out while a little bit of sugar is in. This recipe I adapted from Phil Vickery's A Passion for Puddings cookbook was a little bit unusual since it uses condensed milk. I was a bit skeptical if it will be as meltingly luscious as ones made with double creams but it did convincingly deliver. The orange liquor had to be replaced with just normal orange extract for my kids' sake and although I didn't have any orange zest it was orangy enough to our taste. The ultimate taste was whether my kids will eat it. Well, as of this time they have eaten one each and reached for more. They naturally gravitated for ones rolled in vanilla sugar so I'll definitely remember that next time I make more of these moreish cloud of chocolate heaven.
Chocolate & Orange Truffle
200 g dark chocolate (70% cocoa solids)
300 g condensed milk
3 Tbsp double cream (heavy cream)
2 Tbsp orange liqueur or 1 tsp orange extract
finely grated zest of one orange (optional)
cocoa powder or icing sugar or vanilla sugar
- Melt chocolate, double cream, and condensed milk in a heatproof bowl over simmering water in a saucepan.
- Mix in the orange liqueur or orange extract and zest (if using).
- Remove from heat and cool completely to room temperature.
- Cover and chill in the fridge for about 4 hours or overnight.
- Spread cocoa powder or sugar on a wide plate.
- Have a bowl of iced water in your working area.
- Using a teaspoon, scoop a teaspoonful of the chocolate mixture and shape into balls using your hands then roll on the cocoa powder or sugar. Repeat until you have used up all the truffle mixture. Dip your hands from time to time in the iced water to cool it down and prevent the melting of the truffles while you're rolling it.
- Chill in the fridge.
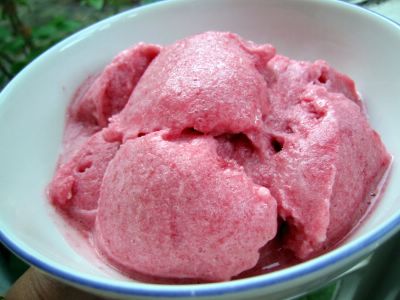 Hey, stay awhile and have some raspberry sorbet. We gotta beat this summer heat with other than sitting in front of an electric fan or lying on the beach. Cold and icy confections are one of my favourite things in summer. One of the more popular one is the sorbet. Very much like an ice cream except there's nary a drop of dairy in it. Because of its ultra low fat properties it's well loved by dieters and the health conscious.
Well, I do diets but I wasn't too keen on sorbets before until I made this one last week. The intensity of the fruits' flavour and its instant yumminess further reinforced the idea that homemade is better than shop-bought. Just look at that pink confection speckled by pockets of raspberry pulp. Isn't it pretty?
I found this recipe by chance when I was lazily surfing at the Daily Telegraph's Food and Drink Section whereupon I saw Tom Norrington-Davies' article and recipes of sorbets. Thanks Tom!
I chose to make this one chiefly because I've got all the ingredients right in my fridge. Besides raspberries are everywhere in the shops so it makes sense to buy and use what's in season to take advantage of its freshness at the peak of its flavours. He was right when he said that the raspberry and banana combination was a revelation. It was indeed with the banana giving it a creamier body and nicely combining with the distinctive taste of the raspberry.
This time I followed Tom's recipe to use fresh egg whites. Next will be time to try the booze. See these two are used to slow down the formation of ice crystals as you freeze it. I try to avoid using fresh egg as much as possible so we'll see how it goes next time I make a sorbet.
Raspberry-Banana Sorbet
*For the sugar syrup:
250 g granulated sugar
250 ml [1 cup] water
250 g raspberries
1 very ripe banana
juice of half a lemon
350 ml [1 1/3 cups + 2 Tbsp] syrup
1 egg white
- For the sugar syrup:
- Place the sugar and water in a saucepan. Stir to dissolve the sugar.
- Bring to boil then cool completely.
- For the sorbet:
- Puree the banana, raspberries, lemon juice, and syrup in a food processor or blender.
- Pass through a sieve to remove the pips.
- Beat the egg white to soft peaks then fold into the fruit mixture.
- Put the mixture in a bowl (if it is not yet in one) and then put it in the freezer.
- Freeze for one hour.
- Remove from freezer and you should see a rim of soft, frozen sorbet around the edge.
- Whisk it back into the middle using a hand whisk or a fork.
- Freeze it again this time for 2 hours.
- Beat the sorbet again.
- Freeze for the third time for 1 hour.
- Beat it for the last time and transfer it to a tub or container for the final freezing.
- If you freeze it completely, let it stay in the fridge for about 15 to 20 minutes before serving it.
- Suggested serving: pair with rich chocolate ice cream.
*Note: You can skip all the freezing and beating by using an ice cream machine.
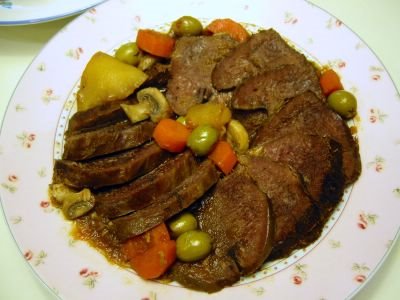 I know Cia encouraged us to make something different out of innards and offal. But I'm pretty helpless on this since I really do not cook offals that often. So you would have to forgive me if I make this thoroughly standard fiesta dish. Cia, as mentioned, of Pabulum is currently hosting the 9th edition of Lasang Pinoy.
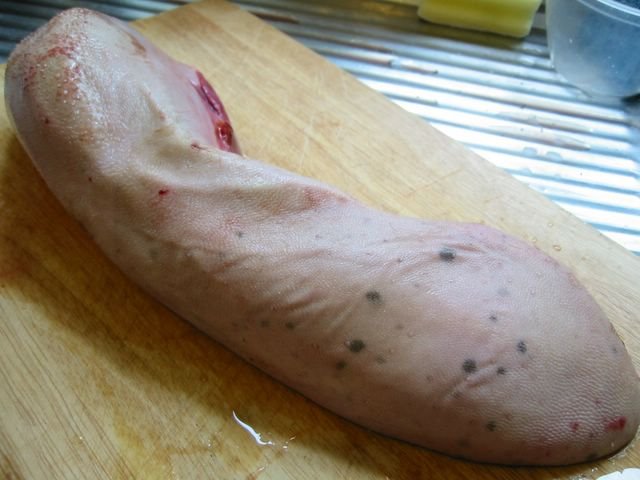
I had a lot of fun making this I must say. Starting with shopping for the tongue. Now I wouldn't find this in any ol' supermarket around here so off I went to Tooting (no kidding!) which has a very lively (and cheap) market. (I must blog about this place soon). Lots of fresh veggies and fruits plus this is where I get my fix on pork legs (properly cut), goat meat, whole baby back ribs, fresh chicken liver galore, and supermarket-rare offals - all in very reasonable prices. I went in a butcher shop and got this big boy of a tongue.

It was more than 14 inches long and ... well ... resembles something like ... oh never mind. Hehehe! Finding a big pot to fit it in was a challenge but I managed to unearth one of my moth-balling-seldom-used stock pots and just about fit it in. The removal of the skin was a joy - not! Reynaldo Alejandro's recipe from The Food of the Philippines (where I adapted this from) said to scrape or peel. Well I scraped and scraped and scraped but most of the white film is still there. So I had to slice it off trying to take off as little and as thinly as possible. After a prolonged struggle with a double dead tongue I finally got it all off! Hurray, on to the cooking!
The marinade was quite good, though, I noticed that you can substitute cooking wine or lemon for the vinegars. I bet it would taste great as well. The only problem I had was in the browning of the meat since the marinade has sugar hence the residue got burned. I had to wash up the pot pronto before continuing with the sauteing. I know I lost some good flavours with all those drippings washed away but it was burned and I don't want that to ruin the sauce. Other than that everything else was surprisingly a breeze. And I originally thought it would be horrific including the taste and texture of the meat. The first time I had this was when I was 12 years old and even then, even though I had a pretty fussy tastebud I loved that properly tenderly cooked lengua from a relative's wedding banquet. Finally, I was able to recreate it.
Lengua Estofado
1.5 kg beef tongue
*Marinade:
1 tsp peppercorns
1 bay leaf
3 Tbsp cider vinegar or white cooking wine
3 Tbsp soy sauce
3 Tbsp sugar
2 tsp sea salt
1 cup water
3 Tbsp oil
1/4 cup minced garlic
1/2 cup minced onions
1/2 cup finely chopped tomatoes
350 g potatoes - peeled, quartered and sliced
1 big carrot - peeled and sliced
salt and freshly milled black pepper
1/3 cup pimiento-stuffed olives
1 cup button mushrooms - halved or sliced
- Boil the tongue in a large pot of water for 20 minutes. (You may cut the tongue in half if it cannot fit). Drain from water and leave until cool enough to handle.
- Peel off the (usually white) outer skin. You may have to use a very sharp carving knife for this. Trim ends and wash.
- Combine all marinade ingredients and marinate the tongue for 1 hour or overnight.
- In a large pot heat the oil and brown the tongue on all sides. Remove and set aside.
- If the residue in the pot is not burned, use it with the same oil, if it is then clean the pot and heat it up again with about 2 Tbsp oil.
- Saute garlic for about 2 minutes in gentle heat - *do not* burn it.
- Turn up the heat and add in the onion, cook for about 4-5 minutes or until translucent.
- Add in the tomatoes and cook until soft.
- Put the tongue back in the pot together with the marinade.
- Add about 1/2 cup water. Bring back to boil and then simmer for 2.5 hours or until tender. Prick the tongue to let the liquid penetrate. You may add more boiling water a little at a time if it is drying out too much.
- Tip in the potatoes and carrots - cook for about 5 minutes.
- Add in the mushrooms and cook for another 5 minutes.
- Just before serving, remove tongue from sauce and slice crosswise. Arrange in a platter and ladle sauce and vegetables on top. Serve hot.
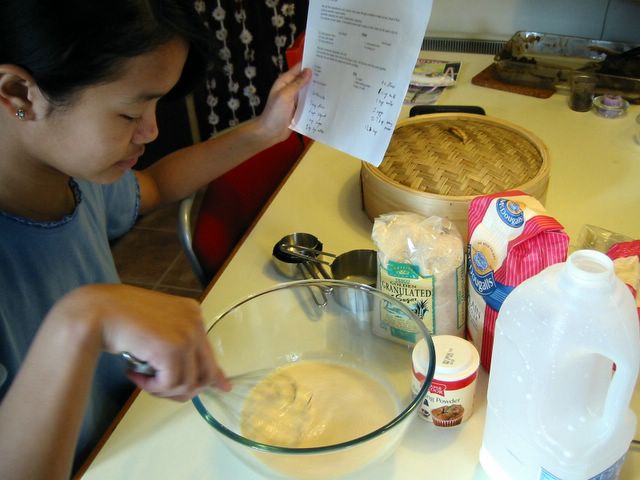
 The current theme of the eighth Lasang Pinoy, hosted by the lovely Iska of Edible Experiments, is centered on food for/by children. I wanted to create my husband's favourite childhood snack of bibingkang malagkit but my recipe fell short of expectations. The bottom - soggy, the top - too sweet. Maybe I'll blog it some other time. So off I went recruiting my kids in making a very simple Filipino steamed cake - puto. Mind you this is not your regular traditional puto which is made of malagkit (sticky rice) flour. This is of recent provenance, probably as early as the 80s when the popular Filipino bakeshop, Goldilocks, came up with this rich cake-like puto. There are very few ingredients to have and it's just a matter of mixing them all up in a bowl which a kid can easily do. My eldest daughter remarked that the batter is very much like that of a pancake. Well what do you know, she was right of course. More like a very sweet pancake version which is steamed instead of panfried. My kids are usually enthusiastic with 'helping' out in cooking and baking especially ones where they are actively involved in as opposed to just watching. I hope this would encourage them to be more adventurous in eating as well as in kitchen activities.
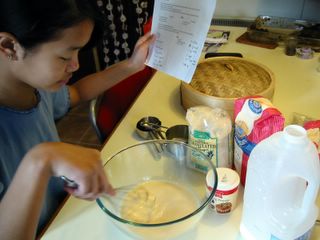
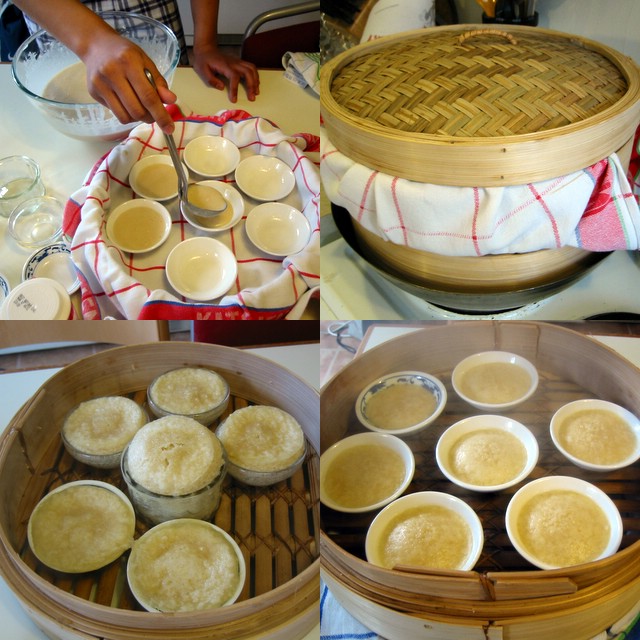
You don't know how much frustrations this seemingly innocuous snack has given me for the last ... oh ... 15 years. It's not a problem in the batter, more on the process of making these cakes rise in the steaming. The biggest Darth Vader-like enemy of steaming puto is water or condensation dripping/forming on top while it's cooking. Once water dripped on top then your puto is doomed to be earthbound. Never to rise in all its peaked glory. I've had this problem over and over again in the years that I was trying to make it. Often times I have to disguise my failure from our guests by saying it's actually my new version of kutchinta. LOL! I changed steamers, used rice cookers, metal steamers, and now just about having moderate success using a cheap and simple bamboo steamer. Really, sometimes you don't need high-tech gadgets to achieve good results.
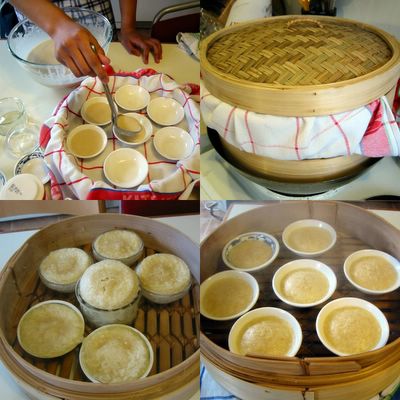
The recipe is something I got from my sister-in-law, Ate Eva, in Toronto which in turn she got from a friend of hers. I have to tone down the recipe considerably because it was cloyingly rich (nakaka-uta). The original measure of 2 tablespoons baking powder is I think too much. It actually have an slight aftertaste which I don't like so I proceeded to halve the baking powder. Same with the milk and eggs. I also added salt since I noticed that it doesn't rise as much as I want to and as you know, salt reacts with the baking powder that causes cakes to swell. As for my dreaded steaming, normally I would cover the baking pan to prevent condensation to drip on it. But since I'm using small (different sized at that) moulds, it would be truly troublesome to cover them all individually. Life is too short for me to get that tedious. So I covered the top of the steaming basket itself with a cloth. That didn't work since the water vapours came in unimpeded thru the slats at the bottom. So I moved the cloth onto the bottom of the first level basket. Finally, I had my well-risen puto (well most of the time).
 Rich Puto
2 cups plain flour
1 cup milk
1 cup water
1 egg - slightly beaten
1 Tbsp baking powder
scant 1/2 tsp fine salt
1 1/3 cup sugar
- Mix all ingredients well.
- Pour into small cake moulds. (Any small ramekins or tiny bowls/plates may be used). Cover with aluminium foil, tea towels or cloth (or you may cover the steamer itself with cloth).
- Steam in medium heat for about 20-25 minutes.
- Remove from heat and pry off the puto from the moulds with a butter knife. Serve warm or cold.
*Variation: Mix grated or slivers of cheese just before steaming.
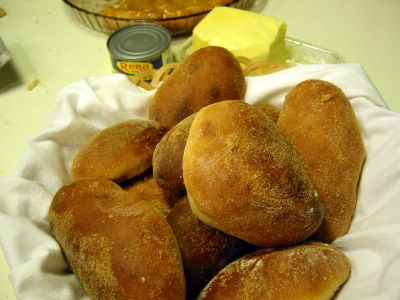 Gising na! Wake up! Breakfast time ... that's the current theme of the 7th Lasang Pinoy ably hosted by the early-morning-food blogger Joey of 80 Breakfasts.
The traditional breakfast of Filipinos has been rice or garlic fried rice with either fried/grilled fish, tocino, or longganisa. But in our family, a lot of our mornings are filled with that ubiquitous crusty roll endemic to Filipinos called Pan de Sal (also spelled without the spaces - pandesal) which means literally bread with salt. I could imagine the original pan de sal must have been more on the salty side rather than the sweet one that is common now which is how I have always known what a pandesal should taste. There was a long time in my youth that I could not imagine a morning without a warm pandesal to satiate my hunger. It's very versatile you see, you can spread a variety of things between its fluffy insides such as butter, liver spread (pate), jams, preserves, matamis na bao, peanut butter, pancit, ice cream - you name it. Or you simply dunk it in coffee or tea.
Sometimes even in the evenings when someone in the household comes home late, passes by a bakery then buys fresh-off-the-oven pandesal. You can bet that anyone among us kids will awaken with the fragrant waft of the hot pandesal. Down the stairs we came to partake in the midnight snack. I love it smeared with liver spread. Yum!
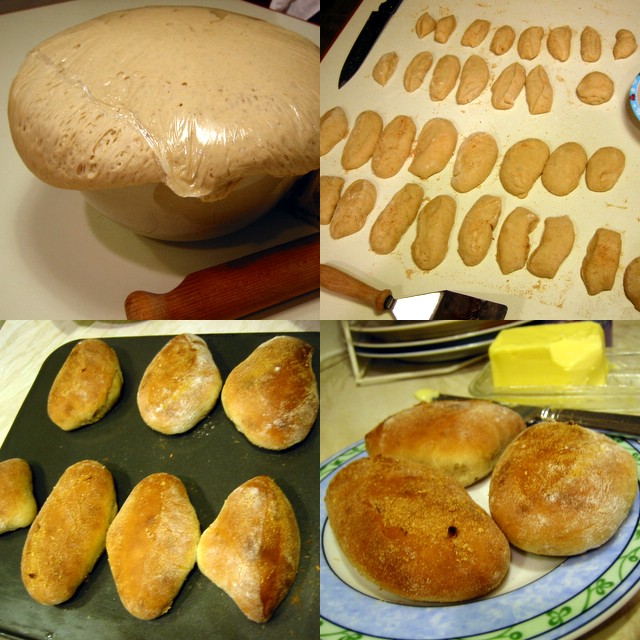
This is my very first time to bake pandesal and I had to call my aunt in Cavite to get her recipe which she got from her Home Economics subject when she was studying in Teacher's College about 35 years ago. Yeah that long ago. Now I don't know if I misheard the measurement of the liquids because the dough turned out very sticky and really hard to handle. I don't know if it's supposed to be like this. I think I'll be calling my aunt again in the weekend. Despite the intense stickiness, I managed to knead it (with a lot of help from sprinkled flour) and let it rise. She said it will double in bulk after 2 hours, I think mine tripled that's one reason why I suspect there's too much yeast. Maybe the yeast that I use here is more potent/concentrated. I'll certainly have to play around with the proportions in this recipe later. It was also hard for me to cut it to uniform-sized individual rolls since it's very soft. Thank goodness it came out alright from the oven - fragrant and crusty though somewhat moist inside. I don't know if it's supposed to be like this but it certainly was good enough for my family. :)
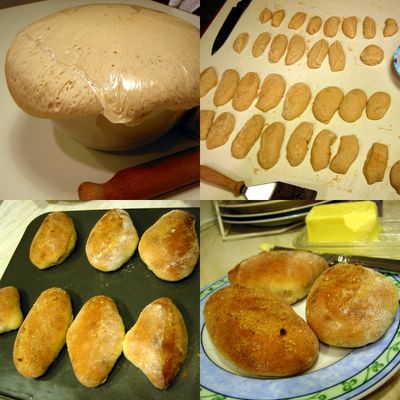 Pan de Sal
8 cups plain flour
1/4 tsp salt
1 cup sugar
1/2 cup cooking oil
2 1/2 cups cold water
1/2 cup lukewarm water
1 Tbsp yeast
- In a small bowl, combine the lukewarm water, 1 tsp of the sugar and yeast. Let stand for about 15 minutes in a warm area. By this time it will be foamy; whisk well.
- In a big bowl, mix cold water with oil, salt and the rest of the sugar. Stir until sugar and salt are dissolved.
- Add the yeast mixture and 1 cup of the flour. Stir to combine.
- Add the rest of the flour a little at a time. Mix with a wooden spoon until dough pulls away from the sides of the bowl.
- Knead the dough on a floured surface until smooth. If needed sprinkle some more flour to keep the dough from sticking too much.
- Put in a greased bowl and turn to coat the dough all over with oil.
- Cover and let rise in warm place for 2 hours.
- Punch dough and turn out on a floured surface.
- Divide into 4 and roll each into logs. Cut the logs into individual rolls.
- Sprinkle breadcrumbs on the rolls and arrange in greased baking sheets.
- Cover with a damp cloth and let rise for 30 minutes.
- Bake in a preheated oven of 200°C/fan 180°C/400°F for 13-15 minutes.
- Remove from baking sheet. Serve hot or cold.
 This month's edition of Lasang Pinoy is hosted by the lovely Ting of Worldclass Cuiscene with a theme of 'pulutan'. When you hear 'pulutan' you should think along the same vein as the Spanish tapas. It's usually a dish that is specifically eaten with alcoholic drinks. Because of the close similarity, the concept might have come from the Spanish. (Please don't hold me hostage with that last statement, I'm just speculating from the obvious.) Due to the nature of its purpose, it's usually very spicy or at least very tasty to encourage you to drink more.
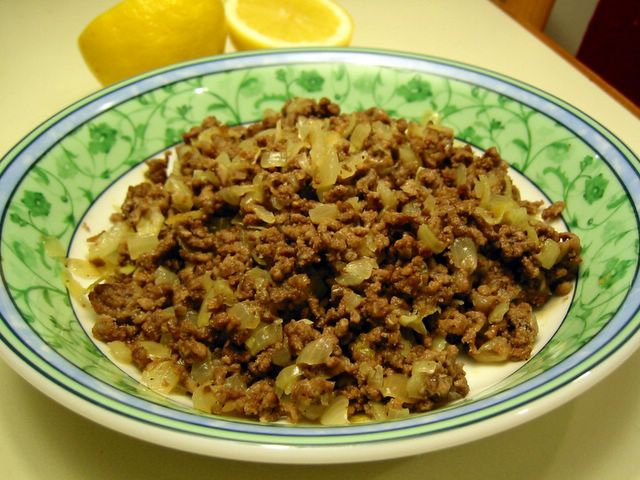
When the theme was announced it stupefied me since I haven't cooked pulutan to anyone. The one dish I wanted to try was sisig but pork cheek and/or ears are not normally what you see lying around the supermarket shelves here. The only other one I know is spicy adobong mani (garlic fried peanuts) which I think is so simplistic. Well Lasang Pinoy, in my opinion, deserves better than that. So what other recourse I had than call for help from the mga manginginom (drunken masters) I know. Good thing they came up trumps with this Kapampangan (Ilokano?) dish of bagis which was sooo tasty and so easy to do even a half-inebriated guy can whip this up in no time at all. A big thanks is in order to my BIL Derek and his friend Al Dayao (who gave the original recipe) for sharing this with us. Tagay na !
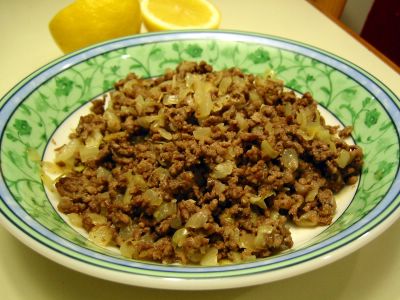 Bagis
Bagis
500 g minced beef
2-3 Tbsp lemon juice (from about 1 whole lemon)
1 1/2 cups chopped onions (about 2 medium)
1 tsp Tabasco sauce (or to taste)*
1 1/2 tsp sea salt
freshly milled black pepper
- Marinate the minced beef in lemon juice for 24 hours or overnight.
- Combine the marinated beef (including the marinade) and the rest of the ingredients in a pan and cook in medium heat. As it cooks, the beef will render its juice and fat so you do not need to put any water or oil.
- Once the mixture starts bubbling away, turn down heat and simmer until all the liquid has evaporated and the beef starts sizzling from its own fat. Dish up and serve with some stiff drinks. :p
*Note: You may use fresh chopped chillis or dried chilli flakes in place of the Tabasco.
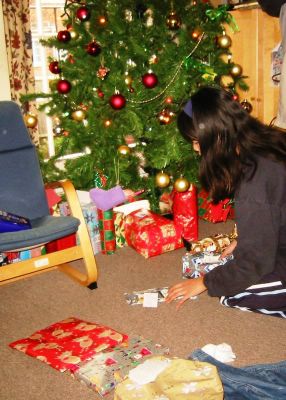
The Christmas season 2005 for me was like a whirlwind that grew into a tornado, swept me off and deposited me helplessly at the state I'm in now. I should have clicked my heels before to regain my sanity but then I needed red shoes for that. ;) What I wanted to say was it so busy and hectic for me what with the numerous Christmas parties at work, with friends, and with relatives. Add more of the usual shopping madness and Christmas card postings plus the added worry of being made redundant - but that's another story.
I'm beating around the bush! Just trying to excuse myself for being late with my entry and for completely forgetting to take pictures of our decors. And have you heard? My supposed traditional rellenong manok (stuffed chicken) morphed into a beef roast. Of all the years I've been living here in UK, the ones that run out everytime before Christmas are the turkeys. Why oh why could I not find any whole chicken two days before C-day? I searched high and low in all butchers that abound and the supermarkets littering our high street but no freakin' chicken!! In my exasperation, I picked up the last remaining slab of prime rib of beef on the counter and proceeded to harass Stel on the phone on how to roast the darn thing. Kind and ever helpful, she put me thru the paces even though she was frantically preparing for their own Christmas family do. Despite my initial bad impression with our main course, it turned out beautifully - delicious actually! So simply cooked with all the traditional sides and a great gravy that my family wanted me to do it again at the earliest possible time. The lovely Stel of Babyrambutan provided the easy peasy recipe. Thanks dear!
This 5th edition of Lasang Pinoy is hosted by Mike of Lafang. Oh yeah, I forgot to tell you how we spend our Christmas - in the days before we usually go round some friends' houses to give out our gifts. We try to attend a Christmas eve mass but there are years like this one that was just so so busy. Usually we have either a sumptous Christmas lunch or dinner but this year, ostensibly to let me have a relaxing Christmas day, we had our celebratory meal on Christmas eve dinner. Morning after that were spent ripping out gift boxes and saying our thank yous to everyone and phoning all the friends and relatives to wish them a happy Christmas. I wish my children can experience the magic of Christmas right in the Philippines but since they can't I'm sure we captured the spirit by being together and cherishing our company with our little meals and whatever gifts we can come up with. :)
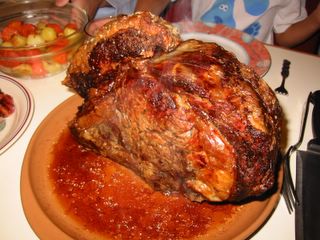 Roast Ribs of Beef
one whole slab of prime ribs or forerib of beef (on the bone)
sea salt
- Preheat oven to 240°C/fan 220°C/475°F.
- Place beef on a roast pan and rub all over with the sea salt. If meat has some fat on one side/edge, try to position it so that the fat is at the top so that the fat rendered will drip down on the meat and keep it moist.
- Bake in oven for about 15 minutes.
- Lower heat to 180°C/fan 160°C/350°F and bake with the additional cooking time depending on the weight of the beef. The general rule of thumb would be 20 minutes per pound of meat for rare, 25 minutes for medium rare, and 30 minutes for well done. You may baste the meat from time to time with its own dripping.
- Remove from pan (do not discard drippings) and transfer to a serving platter cover with foil and let rest for up to 30 minutes before slicing and serving.
Beef Gravy
beef fat and drippings
2 heaping Tbsp flour
2-3 cups stock (approximate)
salt and freshly milled black pepper
- Remove the beef fat from the roasting pan but retain about 2 Tbsp.
- Put the roasting tin on the cooker hob and heat up the fat.
- Once moderately hot, sprinkle the flour on it. Blend in the flour well (preferably with a wire whisk)with the fat.
- Add the stock gradually while continually stirring making sure to scrape the bottom for all the roasting bits left in the pan.
- Bring to boil. Add more stock or water if it's too thick.
- Taste the gravy; add salt and/or pepper if necessary. Serve hot.
Now this one, I was quite amazed how homemade roast potatoes would taste so invariably superior to store bought ones - frozen or otherwise. It was simply superb my kids were raving about it. I adapted this from the November 2005 edition of the BBC Good Food magazine which they dubbed as 'The Ultimate Roast Potatoes'.
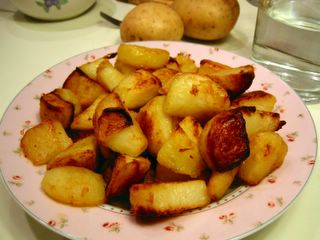 Roast Potatoes
1.5 kg floury potatoes (preferably Maris Piper) - peeled and evenly quartered
2 tsp flour or cornflour (cornstarch)
1/3 cup oil (goose fat, olive oil, vegetable oil, etc.)
sea salt
- Preheat oven to 200°C/fan 180°C/400°F.
- Put potatoes in a saucepan. Add salt (about 1 tsp) and enough water to cover it. Bring to boil. Once it boils, lower heat to medium-low and start timing it for 2 minutes.
- Pour oil in a clean roasting pan and place it in the oven.
- Drain water completely from the saucepan. Put the cover on then shake the pan back and forth. This is to rough up the outside of the potatoes to give it that crispy outer covering.
- Sprinkle the flour on the potatoes and shake it some more.
- Carefully put the potatoes in the hot fat in the roasting pan. Spread in a single layer making sure they have plenty of room. Turn or baste them to make sure they are coated with oil all over.
- Roast for 20 minutes then take them out of the oven and turn the potatoes over.
- Return to the oven for another 15 minutes and turn them over again.
- Roast a further 10-20 minutes or however it takes to make them golden and crisp.
- Sprinkle sea salt over, put in serving platter and serve right away.
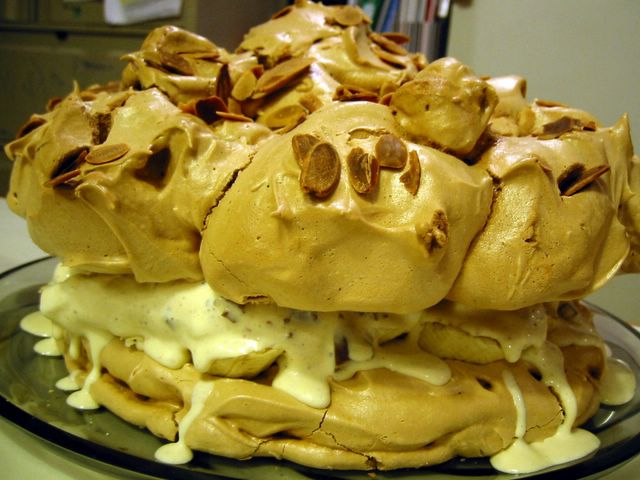
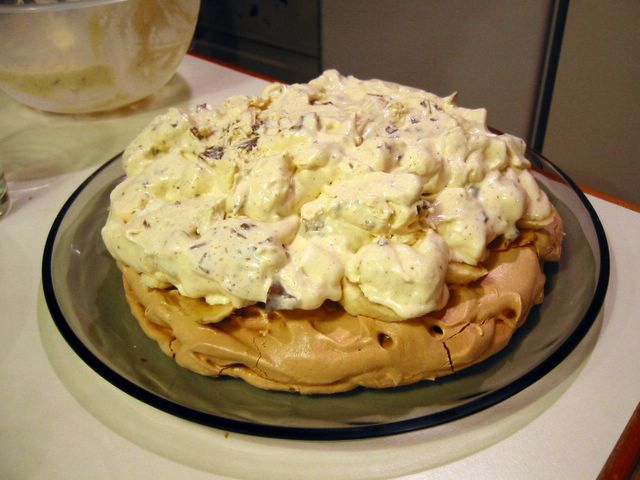
Okay are you ready to see a monster? I made a leche flan a few days before and I thought I would use up the extra egg whites by making this longed for dessert that I saw in the Good Housekeeping magazine eons ago. I didn't bargain for it to be this humongous. Even when I was beating it up, my puny little handheld mixer was drowning from too much meringue that I thought it was gonna die on me. But still I plodded on and out came this huge ... thing ... which would be perfect as a some 'shock and awe' type of dessert in dinner parties. Not for small family dinners because no matter how delectable it is (which this certainly was) there's just too much of it to be consumed in 1, 2, even 3 sittings. Though I did love the nuggets of marshmallows and chocolates in the ice cream (shades of rocky road!) then combined with the freshness of the banana then the crunch of the meringue with almonds. Hmmmm ...
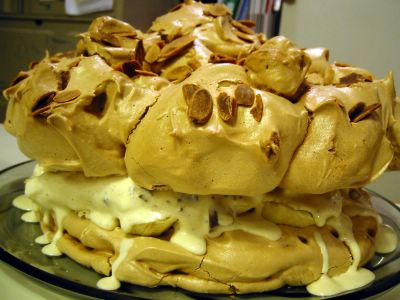 Marshmallow Meringue Cake
225 g [scant 1 cup] caster sugar (superfine)
125 g light brown sugar
6 large egg whites
1 tsp cornflour
1/2 tsp vinegar
50 g flaked almonds - toasted (optional)
150 g small white marshmallows
1 liter good quality vanilla ice cream
150 g dark chocolate - chopped
4 bananas - sliced
chocolate savings and icing sugar to dust
- The meringue must be done at least a day before serving. Trace two 23cm (9 inch) circles on two baking parchment paper set on two baking sheets.
- Sift the caster sugar and brown sugars together in a bowl. Set aside.
- Preheat oven at 120°C/fan 100°C/250°F.
- In a large bowl, whisk the egg whites until they're stiff and dry.
- Whisk in the sugars, one tablespoon at a time, until mixture is glossy and very stiff (about 5 minutes).
- Then whisk in the cornflour and vinegar.
- Spoon half the meringue on one of the baking parchment papers in a garland shape.
- Spread the other half in the other parchment paper evenly to cover it completely.
- Sprinkle both with the toasted almond flakes.
- Bake for 2-2.5 hours. Turn off oven and leave the meringues inside to cool for at least 30 minutes (or you may leave it there overnight).
- A few hours before serving, soften the ice cream by transferring it to the fridge for about 30 minutes.
- Once soft, put in a bowl and fold in the marshmallows and chopped chocolates.
- Put back in the freeze for about 30 minutes to firm it up.
- To assemble, place the meringue circle on a large serving plate. Arrange the sliced bananas on top in a single layer. Spoon the ice cream mixture over the bananas. Then place the garland meringue on top. Decorate with chocolate shavings and dust with some icing sugar. Serve.
Note: To freeze ahead: complete the whole recipe without decorating with chocolate shavings and icing sugar; wrap it and freeze. To serve, take from the freezer and unwrap. Place in the fridge for 1-2 hours, then leave at room temperature for 30 minutes. Decorate and serve.


Lasang Pinoy 5