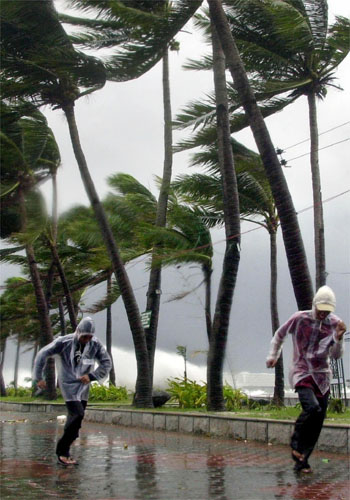
As a backgrounder, Filipinos do not traditionally celebrate the evening of 31st October which is Halloween - that came with the onslaught of the American TV/Hollywood influence only in the latter years. What get us all so busy in preparing for a 'celebration' (if you can call it that) is the paying of respects to our dead family members on the 1st day of November. Everyone treks to the family plots in cemeteries up and down the country, light up candles and offer prayers. But you know us Pinoys, no matter what the occasion we never forget to stuff ourselves silly and generally have a party. So even though it should be a solemn event, people take a lot of food and stereo hi-fis in the cemetery and have a picnic. For more info on this click here and here.
In our family, the few days before Undras is a flurry of activities for everyone. Besides the cleaning of the house and yard, cleaning and repainting of the nitcho (tomb) of our dear departed relatives, my maternal side's family in Cavite always make Suman Sa Lihiya every year without fail. Since I practically grew up there, from a very early age I was sat down on a bangko (stool) and helped in this activity that involved the whole family. Invariably, it was my late Lolo Apeng (maternal grandfather) who orchestrated everything. He was a stickler for details and a perfectionist. Usually, he's the one who's at the end of the assembly line - tying together the suman at the same time acting as a QA - scrutinizing everything in our handiwork. And woe is to anyone who did not measure up, for sure he/she will get a yelling right there and then.
Suman, (in case you don't know) is a Filipino snack usually made of sticky rice or some other root crops such as cassava and tightly wrapped in leaves (usually banana). In fact, the word suman can also mean something or someone encased in something very tight. 'Para kang suman sa suot mo.' 'You look like a suman with what you're wearing.' Meaning the clothes are very tight. ;)
I surely miss those times in Cavite during Undras, besides the food, I miss the trek me and my cousins make to the cemetery to visit our great grandparents' tombs. Unlike other families, we were not allowed to bring along any food though that did not prevent us from having streetfood galore from the numerous vendors around. Nor were we allowed any radio/stereo sets so all we have to pre-occupy ourselves were the candles and we had great time trying to outdo one another in collecting the dripping wax and forming the biggest candlewax ball of all (which my aunts later make into floorwax). Only downside of this was regularly losing almost all of my fringe (bangs) from those pesky candles. ;)
Since I was only little then, I only get to do the darang sa apoy (singeing/scorching) of the banana leaves and its preparations. That was my territory I was the banana leaf queen. My grandmother said that the best banana leaf for making suman is from the butuhan variety. They are thicker, less brittle and more flexible thus less likely to fall apart although I can't say much with its fruit whose name is so appropriate.
To be honest, this is actually the first time I've done this suman from start to finish. Although I watched my relatives so many times doing this, I have yet to actually wrap and tie one until today. As I was struggling to put my gingerly tied sumans in the pot, I suddenly realised the reason for my Lolo Apeng's suman boiler's shape. For decades I wondered how come the big 'pot' (I think he had it made to order) he used was shaped like a big suitcase. It was rectangular and even had a nice fitting lid. Well of course the suman when tied and assembled is rectangular in shape - rather like a brick. So his pot, shaped as it is, perfectly maximizes space in cooking the suman. How ingenious!
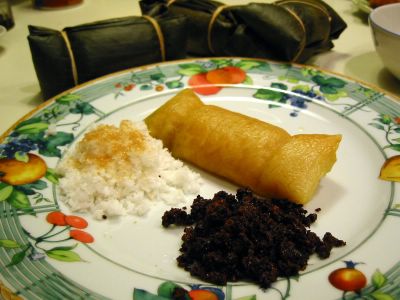
For this dish (snack?), I presented it with the different dips we use in eating it. Since the Suman sa Lihiya is very bland with just a hint taste of lye water and the banana leaves, you have to have at least some sugar to dip it in. For me the best is still the grated coconut with brown sugar. We also use latik and in my eagerness to perfectly capture a picture, I promptly burned the latik (yikes!) though it's still edible (in a dark bitter way). When we get sick and tired of eating it as it is, we pan-fry it for breakfast, slather on some butter and dip in the same suspects. Though in the mornings we're too lazy to get anything else so it would usually be just sugar.
Speaking of pictures, I got a bit trigger happy so apologies if you get bored with too many images of banana leaves and sumans.
I know most of you know this but this one is for my kids - below are pictures showing how the topside and underside of the banana leaf looks like:
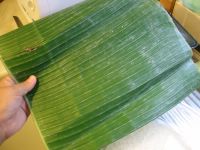
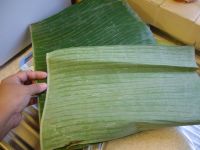 banana leaf topside                           banana leaf underside
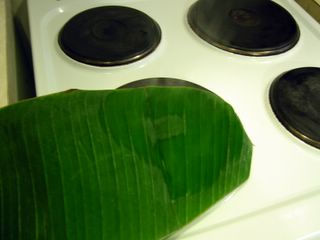
After this when it has cooled down, wipe down both sides of the leaf with a clean cloth. Cut off the central ribs of the leaves.
Suman Sa Lihiya
1 kg malagkit na bigas (glutinous rice)
2 tsp lihiya (lye water)
prepared banana leaves
thin cotton strings
*Condiments:
grated coconut
brown sugar
Latik
- Cut or separate banana leaves into two sizes (all approximates) - one 9 x 11-inch size and the other 5 x 5-inches.
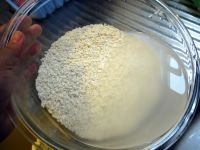 Soak the glutinous rice in water for about 1-2 hours.
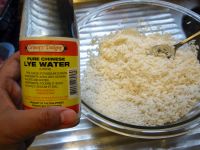 Drain and mix in the lye water. It should turn yellowish (this would depend on the strength of the lye water), if not add more lye water a little at a time until it turns yellowish. Mix well.
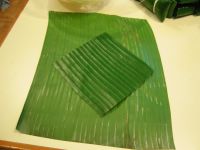 Put the big sized leaf lengthwise on a working surface - topside down. Then put the smaller one on top of it - topside up and aligned either same as the bigger piece OR positioned with the one of the corners pointing to the narrow side of the bigger piece.
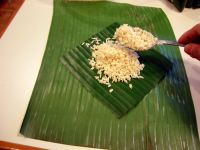 Place about 3 tablespoonfuls of the glutinous rice mixture on the smaller piece of leaf.
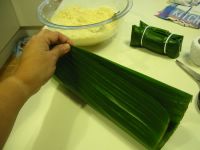 Grab the 2 long sides of the bigger piece and bring them together. Fold or roll that side to enclose the rice (about 3 half-inch folds). It is now long and narrow shaped.
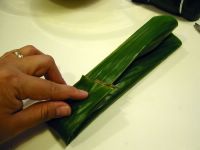 Fold about the lower 1/4 of the parcel towards the center.
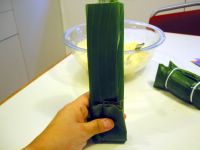 While firmly holding the folded end of the parcel, put it upright and tap it on the table to pack in the rice and if need be add more rice through the open end.
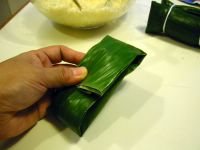 Fold the top end towards the center. You should have a parcel about 5 x 2-inches in size.
 Make another suman parcel of roughly the same size.
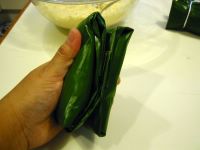 Pair these two parcels with the folded sides facing together.
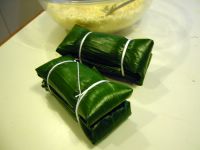 Using thin cotton strings, tie the two ends together tightly.
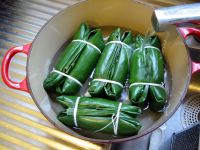 Place the assembled pieces in a big pot and add enough water to cover the suman.
- Bring to boil and bring down heat to low and simmer for about 1 1/2 hours.
- Serve warm or cold with grated coconut and sugar.
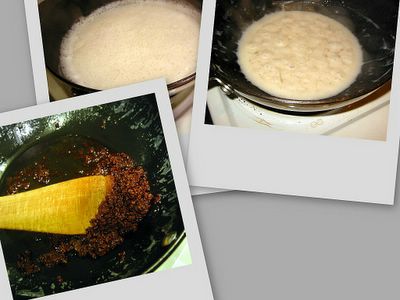
* For the Latik:
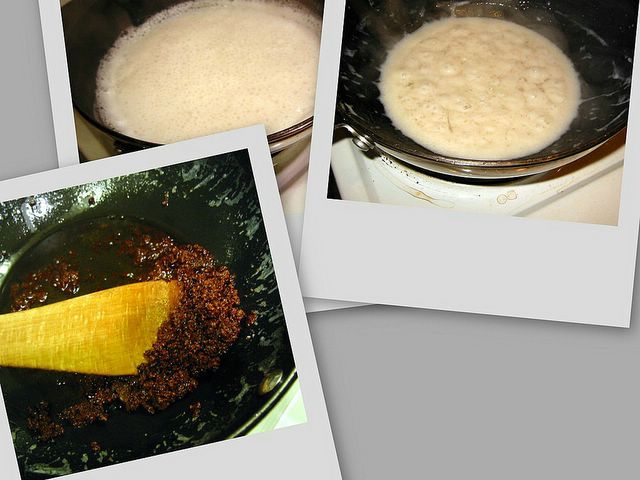
- Add 2 Tbsp sugar and pinch of salt to a 400 ml can of coconut milk in a wok or pan (preferably non-stick). Stir until sugar and salt is dissolved.
- Bring to boil then lower heat and simmer until it renders oil and sediments (the latik) start to stick to the bottom.
- At this point watch it very closely and stir it frequently (it burns easily) and fry the sediments until golden brown.
- Remove from oil with slotted spoon. Serve with the suman.
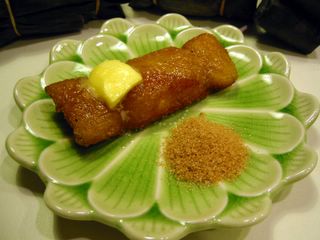
Sometimes when we get tired of eating it the usual way, we pan-fry it for breakfast and have it with butter and then dipped it in grated coconut with sugar or just plain sugar.
Lasang Pinoy 4
A current important find by the Derbyshire Record Office is a cookbook dating from 1742. The date makes it one of the oldest known comprehensive cookbook in Britain. It was previously thought that Mrs. Beeton's Book of Household Management from the mid 1800s was the oldest. This one beat it by a hundred years. Though the recipes in the former is confounding historians for the obscureness of its recipes and ingredients. For the full article head to BBC News.
P.S. There is an interesting discussion on the veracity of the above article in the comments section of this post. Please click and read on what Vanessa has to say.
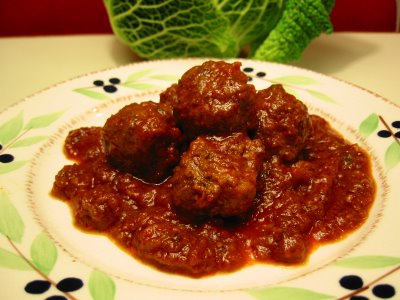 Not to be confused with my earlier recipe of Almondigas, this is one of your regular tapas bar staple. Albondigas means meatballs lightly fried in oil then simmered in tomato sauce, wine, and spices. I made this specifically for the wine tasting meet I had with several charming London food bloggers which the lovely Jeanne and Nick generously hosted in their East London house. Stupidly, I forgot to bring my camera so you'll just have to head over to the other participant's blogs for the pictures. Gosh, I missed taking pictures of all the wonderful food and wine we had.
As for this, the original recipe (adapted from Easy Tapas by Julz Beresford) called for lots of ground cloves which I discovered I wasn't particularly fond of. So I adjusted it to have that as optional afterall the sauce was marvellous what with that wine, paprika and lots of garlic and onions infused in the tomato sauce. This is usually serve warm in tapas bars and it reheats very well. Distribute around forks or toothpicks for a little pica-pica and have a red Rioja with it. Fab!
Albondigas
(Meat Balls in Tomato Sauce)
150 g minced veal or beef
150 g minced pork
1/2 small onion - finely chopped
2 garlic cloves - finely minced
1 tsp lemon juice
2 Tbsp chopped flat leaf parsley
1/2 tsp ground nutmeg
pinch of ground cloves (optional)
30 g dried breadcrumbs
1 egg - beaten
1 Tbsp single cream (light cream)
1/2 tsp ground sea salt
freshly ground pepper
plain flour for dusting (optional)
2 Tbsp olive oil
*Sauce:
1 x 400 g can chopped tomatoes
1/2 cup white wine
2 garlic cloves - finely minced
1/2 small onion - finely chopped
1/2 tsp smoked sweet Spanish paprika
1 bay leaf
ground sea salt
- Combine the breadcrumbs, cream, and beaten egg in a bowl. Leave for about 10-15 minutes until the breadcrumbs has softened and absorbed the liquid.
Add in the meats, lemon, onion, garlic, parsley, nutmeg, cloves, salt and pepper. Mix well.
- Form into 1-inch sized balls, roll in the flour (if using), and pan fry in batches in a pot with hot olive oil. Brown the meatballs on all sides.
- When you've fried them all, you may have to clean/wash the pot if you used flour for dusting most of which would most likely to be a little burned by now and you don't really want a burnt taste in your sauce. Otherwise, just carry on - adding more oil if needed.
- *For the sauce: briefly saute the onion and garlic in the same pot where you fried the meatballs. Add the rest of the ingredients including the fried meatballs.
- Bring to boil then lower heat and simmer for 1 hour, stirring from time to time to prevent scorching at the bottom. The sauce should be quite liquid so add more water a little at a time if needed. Serve warm.
I know, I know, this post has been way overdue. I should have immediately blogged about the wonderful Saturday back in October that I spent with a fellow food blogger Sha and her sister Tara. We walked across the Golden Jubilee footbridge from the Embankment side to cross the river Thames and then leisurely strolled along the Southbank culminating in a cafe in the National Theatre where we had pastries and hot cocoa. The sisters were such a good company to be with, in fact we were yakking so much we didn't realise it was already late afternoon and we have to go and fetch my daughter from Euston.
Later in the evening we had dinner at Gerrard's Corner restaurant in Chinatown. Well the food was okayish, nothing really outstanding so I guess I won't be back there for quite sometime.
Sha was so generous to have lugged gifts for me from her French sojourn. Here they are in the picture below from left: Herbes de Provence, Chestnut cream/puree (bottom), olive tapenade (top), anchovies, and organic sweets. Thank you very much Sha and Tara for the wonderful company and these delicious treats!
My kids at first ignored the sweets when I gave it to them probably because the colours were not as vivid as the more commercial-chemical laden ones. But once they tasted it, it was gone in a minute! Hehehe. That's why I keep telling them, don't judge a food by its appearance, taste it first that's what I say.
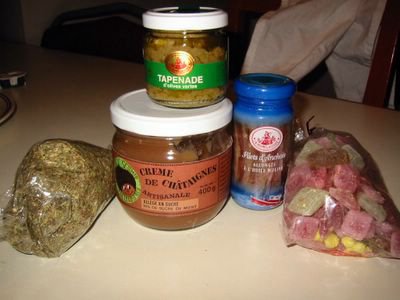
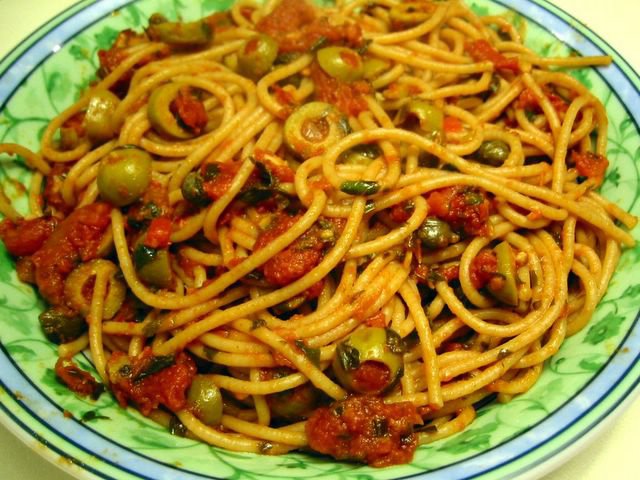
I thought of doing something with the chestnut cream or the anchovies. Since we were hankering for pasta last night, I thought of doing something quick and flavourful - Puttanesca sauce. I'm sure you've heard of the stories that the name of this sauce has some disreputable origin. Whatever it came from, this certainly is one very tasty sauce. My husband would definitely agree with that. Almost any type of pasta can be used here. For my picture below I used wholewheat spaghetti thus the slightly brownish tint.
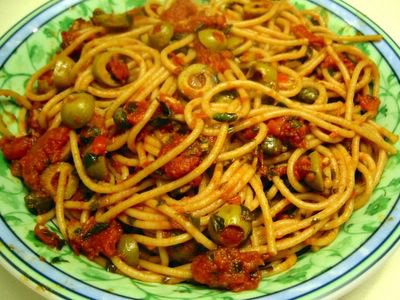 Pasta Puttanesca
4 pieces anchovy fillets - chopped
1 tsp minced garlic
1 fresh red chilli - deseeded and finely chopped (optional)
1 x 400 g can chopped tomatoes
1 Tbsp capers
1/2 cup sliced pitted olives
1/4 cup chopped fresh flat-leaf parsley
1 Tbsp chopped fresh basil
1 1/2 Tbsp olive oil
salt and pepper
250 g spaghetti
- Cook spaghetti according to the package instructions until al dente. Drain and set aside.
- Heat the oil in a pot or large pan.
- Saute garlic, anchovies, and chilli in the hot oil for about 1 minute.
- Add in the tomatoes and bring to boil. Lower heat and simmer for 2 minutes.
- Stir in olives, parsley, basil, capers, salt and pepper.
- Simmer for a further 4-5 minutes.
- Add the pasta in the pot and mix well with the sauce. If it's too dry drizzle with a little more olive oil.
- Serve immediately.
*Note: It would be better if you could time the cooking of the spaghetti so that it will finish just a few minutes before the sauce so that it is piping hot when you add it in the sauce.
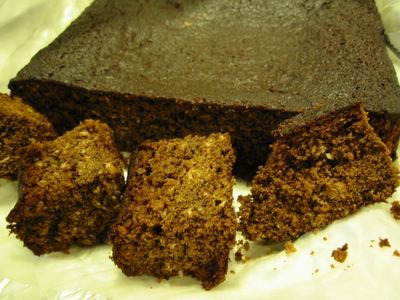 I haven't been blogging in the same frequency as I normally did. The past 2-3 weeks I've down with flus, dizziness, and myriad infections plus the triple dose of birthday parties that kept everyone (especially me) very busy with the preparations. So this cake which I should have blogged last week got entangled with all the palaver.
Anyhow, Yorkshire Parkin (or simply Parkin) is traditionally served on Guy Fawkes day. That's the day that everyone lights up fireworks and drink copious amount of beer. ;) Well actually the guy named Guy tried to blow up the Parliament (with the King of England and the rest of the MPs) about 400 hundred years ago. Unfortunately, he and his cohorts were caught out and ever since then the whole country celebrates his capture with fireworks. Sounds to me like an excuse to have a party!
This is a no sweat cake (adapted from BBC Good Food's 101 Cakes & Bakes), mix 'em up, pour on a cake pan, bang it in the oven and out comes this dark molassesy ginger cake. It is best to wrap it up tightly and stored (maybe in another bread tin can) to mature for at least 3 days to let the flavour develop and keep it moist.
Yorkshire Parkin
250 g [2 cups] plain flour
100 g [1 heaping cup] medium oatmeal
2 tsp ground ginger
2 tsp bicarbonate of soda (baking soda)
225 g butter
85 g [1/2 cup packed] light muscovado sugar
100 g [5 Tbsp] black treacle or molasses
175 g [1/4 cup + 2 Tbsp] golden syrup or corn syrup
1 egg
3 Tbsp milk
- Butter and line a 23cm (9-inch) square baking pan with greaseproof paper.
- Preheat oven to 325°F/160°C/fan 140°C.
- In a bowl, mix and combine well the flour, oatmeal, ginger, and bicarbonate of soda. Set aside.
- In another small bowl, beat the egg and add in the milk. Set aside.
- Heat the butter, syrup, treacle, and sugar in a saucepan over gentle heat until butter has melted and the sugar dissolved.
- Add in the flour mixture into the saucepan.
- Then stir in the egg mixture, combine well.
- Pour into the prepared pan and bake for 50-60 minutes until the cake feels firm has a crusty top.
- Leave to cool then turn out from the pan and remove the greaseproof paper.
- Wrap the cake in clean greaseproof paper then aluminum foil.
- Store for at least 3 days, this will allow it to become softer and more moist.
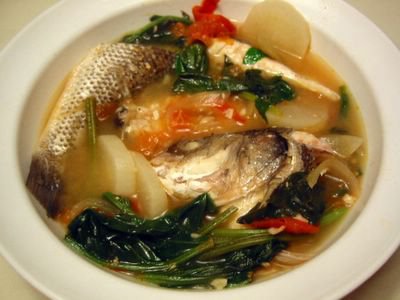 I spied some miso in our local Chinese grocery last week and decided to make this dish which we haven't had for a long time. I don't know how far back this Sinigang sa Miso goes in terms of cooking history but I wouldn't be surprised if it was created only around World War II - with miso being from the Japanese. Though I'm not sure if the Chinese use miso as well, if yes, then the origin of this would go much further back.
We often have this whenever the banks of Laguna de Bay overflow (we lived near when we were in the Phils.) which makes the bangus (milkfish) escape from the numerous fishpens in the lake. This is usually right after a typhoon. It's just one of the several dishes to make the most out of the cheap bangus flooding the market.
The miso lends some salty fermented taste and aroma which blends well with the souring agent and the vegetables of which it's recommended to have white radish and mustard leaves if not use any leafy veggies like kangkong (tung choi) or even spinach.
Sinigang sa Miso
500 - 700 g fish steaks (sea bass, salmon, etc.)
1 Tbsp oil
1 tsp minced garlic
1 medium onion - sliced
3 - 4 medium tomatoes - sliced
3 Tbsp miso paste
1 tsp salt
4 - 5 cups rice water* or water
souring agent (tamarind, lemon and lime, etc.)
1 white radish - peeled and sliced
1 green or red long chili (siling haba) - washed and pointed end cut
bunch of leafy vegetables (kangkong, mustard leaves, spinach, etc.) - washed
- In a medium sized pot, heat oil and gently saute garlic then add onions and cook until onions are translucent.
- Add in tomatoes, cook for 3 minutes or until soft. Mash the tomatoes a little bit.
- Stir in the miso and salt, saute for a minute.
- Pour in the rice water and bring to boil.
- Add in the fish, white radish and chili. Cook on medium heat for 5 minutes.
- Add the leafy vegetables and souring agent. Simmer for 2 minutes.
- Taste soup and adjust seasonings if need be.
*Note: Rice water is the water used in washing rice for plain cooked rice.
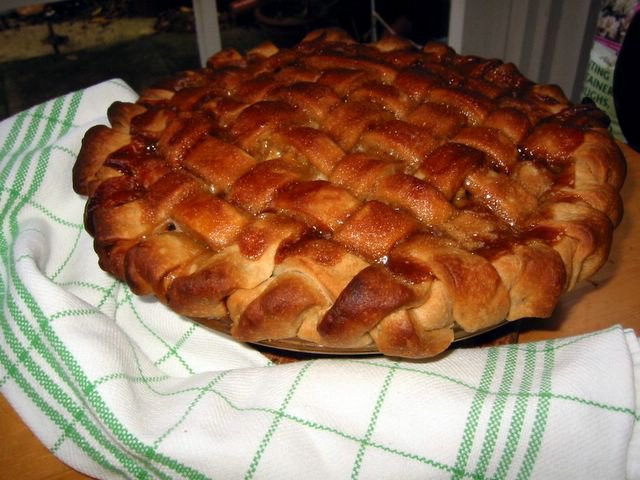
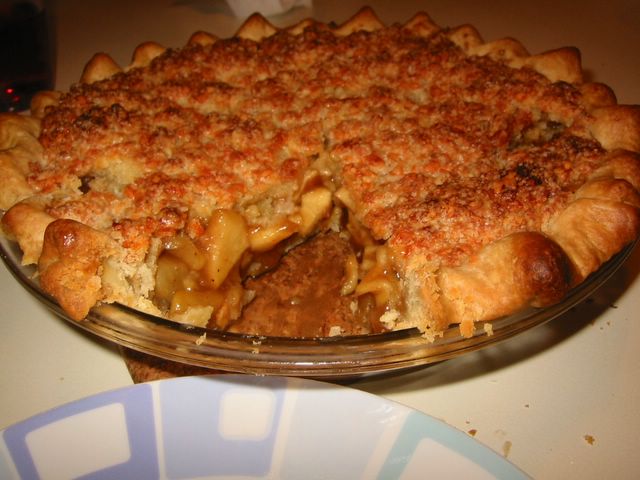
 In our previous house all I had for an oven is a small table top one because the built-in convection oven was not working properly. Since the working one is small, all I could hope to bake in it is based on the size of the pan I could squeeze in. So tube pans and baking sheets are out; brownies, cookies, and mercifully pies are in, since I was able to find a pie pan small enough to fit in. At that time, I was still 'actively' lurking (what an oxymoron) in a Usenet discussion group - rec.food.cooking (RFC) and drooled over the recipes and food the members so lusciously describe. There was this one guy who touted his apple pie recipe as the 'best ever'. Hmmm, should I believe him? Only one way to find out - bake it. And guess what, he wasn't lying! It was and still is my favourite apple pie of all. Very caramelly and with a salty-sweet flavour (courtesy of the syrup).
Over the years of moving house and not having much time to bake, I lost the recipe and I was recently surfing the net trying to find the exact recipe. Good thing I managed to find the exact same one in the excellent website of the Dinner Co-op group. They credit their friend Fritz Knabe and the Southern Sideboards cookbook for the recipe.
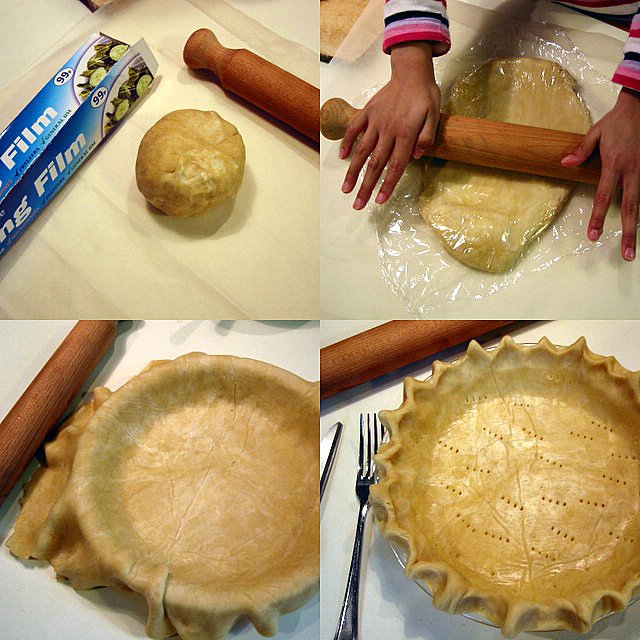
You may use any of your favourite two-crust recipe for this. I think the only tricky thing is the latticed top crust which might be a challenge for some. But it's not really that hard to do. More like doing a basket weave which I'm sure most of you have done in your home economics class in school. For a pictorial guide on how to do it click here, go to the section for woven lattice. If lattice is not your thing, you can always put a normal rolled crust just make sure to put holes on it (decorative holes would be nice). I toned down the sugar a lot in the filling (maybe because I use Golden Delicious which is not so tart), so it's up to you if you want to increase it a bit by adding sugar. While the topping syrup is likewise reduced by a third because usually I end up with quite a bit leftover. Enjoy!
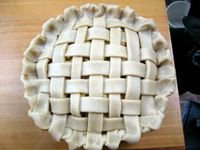

The Best Ever Apple Pie
*Crust
2 1/2 cups flour
3/4 cup cold unsalted butter
1/2 tsp salt
4-5 Tbsp cold water
*Filling
6 Golden Delicious or Granny Smith apples - peeled, cored, and chopped
1 Tbsp cornstarch
1/4 tsp fine salt
3 Tbsp butter melted
1 tsp ground cinnamon
1/3 cup golden syrup or corn syrup
*Topping
1/3 cup firmly packed brown sugar
2 Tbsp corn syrup
1 1/2 Tbsp flour
1 1/2 Tbsp softened butter
- For the crust:
- Combine the flour and salt in a bowl.
- Cut the cold butter into the dry ingredients with a pastry cutter or two butter knives until the mixture is crumbly.
- Sprinkle enough water and knead it just enough to hold it together and form a dough ball. *Do not* over work/knead it or it will become quite stiff.
- Wrap in plastic and chill in the fridge for at least 30 minutes.
- For the filling:
- Mix the cornstarch, salt, butter, cinnamon, and syrup until well combined.
- Toss the chopped apples in this mixture.
- For the topping:
- Combine all ingredients in a bowl until well combined. Set aside.
- To assemble:
- Preheat oven to 425°F/220°C/fan 200°C.
- Take the dough from the fridge and divide into two.
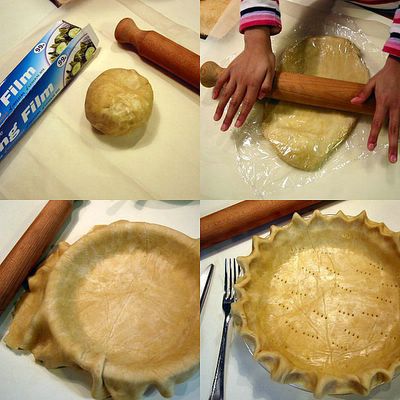
- On a clean, floured surface or between greaseproof paper and cling film, roll flat half of the dough evenly with a rolling pin into a circle shape with a diameter of about 11 inches.
- Turn out dough on a 9-inch pie plate. Trim edge until you have about 1 inch overhanging all around.
- Pour the apple filling on the pastry-lined pie plate.
- Again on a clean floured surface, roll out flat the remaining half of the dough and cut into long strips about 3/4 - 1 inch wide. Weave these strips on top of the apple filling into a lattice pattern. Trim edge until you have about 1-inch overhanging all around (same as the bottom crust).
- Tuck the overhang under and flute the sides decoratively with a fork or with fingers.
- Bake in oven for 10-15 minutes.
- Lower oven temperature to 350°F/180°C/fan 160°C and bake for 30-35 minutes.
- Open the oven and spread the topping on top of the lattice crust.
- Bake for a further 10 minutes or until the top becomes golden brown.
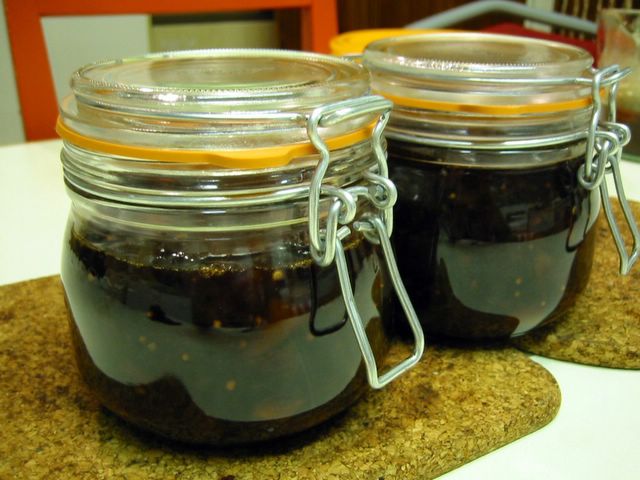
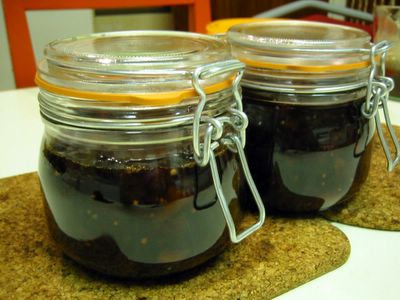 Now that I'm sure that my EBBP2 partner, Farid, has received my box I guess I can blog about the chutney I made. I was scrambling to find something to make to for Farid since Andrew said the theme was 'something fruity'. I didn't want to make another cookie, fortunately I found this recipe from the September 2004 issue of the BBC Good Food Magazine. This chutney was great and so appropriate since it uses mostly in-season autumn fruits. I was naturally apprehensive since I've never made chutney before nor sterilise jars. I was meant to leave it to simmer for a long period but I couldn't help peeking and stirring it afraid that my very first chutney will burn. After more than an hour, finally the mixture started to really thicken and jell and I'm ready to load it in sterilised jars. Mind you, I tasted the chutney and it was so soury-sweet-slightly spicy good! Actually the taste reminds me of my favourite champoy (Chinese fruit preserve). Hehehe.
Days before I went out looking for preserving jars in cookshops. The smallest I can find are these half-a-liter capacity ones. I was thinking they're kinda big but since I didn't have any other alternative I bought them. So with that done, time to find out how to sterilise. I didn't know there were several ways of doing these and decided to follow Delia Smith's How to Cook that says to put the jars in a 350F/180C preheated oven for *at least* 10 minutes. The rubber seal was not included of course otherwise it will cook in the heat. So I washed and cleaned and dried the jars then baked them and separately scalded the rubber seals with very hot water. As soon as I took out the jars from the oven I poured in the chutney. It was actually sizzling as I did it, then quickly put a waxed paper disc on top (the book said this is to prevent mold from forming). The hardest part for me is fitting the not-so-elastic hot rubber seal onto the very hot glass lid. This is necessary coz it has to be sealed while everything is still hot. So there - I've got my very first chutney preserve. Time will tell if my sterilising and sealing were any good. Both Delia and the magazine recommended that chutneys be consumed at least 3 months from the time it was made to allow the flavours to mature. Well, it's already 1 month and I'm definitely counting 'til I can slather it on cheese, roasts or cold cuts.
Fruity Chutney
900 g plums - washed, stoned, and chopped
2 Bramley apples (about 550 g) - peeled, cored, and chopped
450 g pears - peeled, cored, and chopped
1 large mango - peeled, stoned, and chopped
900 g light or dark muscovado sugar
500 ml [2 cups] cider vinegar
2 medium onions - chopped
85 g chopped stem ginger (from a jar of ginger in syrup, or crystallised)
3 garlic cloves - finely chopped
1 Tbsp mustard seeds
1 tsp ground coriander
1 tsp crushed dried chillies
1 tsp salt
1 cinnamon stick
- Put all the fruits in a wide-mouthed pan.
- Add in sugar, vinegar, onions, ginger, garlic, mustard seeds, coriander, crushed chillies and salt, then drop the cinnamon stick on top.
- Heat the pan slowly for about 20 mins, while occasionally stirring, until the sugar has dissolved.
- Let it simmer at a steady pace without the cover. Stir occasionally until reduced and thickened but still with a nice balance of syrupy juice. This will take about 1 hour and 30 mins. Don't cook it until all the liquid has gone, as it will thicken once it cools.
- Discard the cinnamon stick.
- Using a heatproof jug or funnel, pour the chutney while still hot into sterilised jars. It will keep for about a year in a cool, dry place.
Filipinos has got this great snacking culture. Our foodcentric way of life can be gleaned from the numerous times we eat in a day. In between main meals we have the proper snacks or merienda then besides these, we constantly munch on little snacks such peanuts, watermelon seeds, crispy fried corn kernels, etc. It's no wonder that there is a great proliferation of street sides snacks up and down the country. And I loved a great deal of them. From the bualaw (binatog), adobong mani, kornik, inihaw na mais, sago gulaman, to the heavier kakanin of puto, kutchinta, suman, etc. or even goto, and pancit.
I was often dissuaded by my mother from buying street side snacks because of unsanitary conditions of some vendors. Often, I sneakily buy bola-bola or fishballs dipped in that spicy semi-thick sauce. Yum! It's alright with them if I buy banana cues or valencia (turons). I think their main concern with the bola-bola is that all the customers dip in the same sauce. It can be unhealty but so far (touch wood) I haven't gone down with anything with all the copious amount I've eaten.
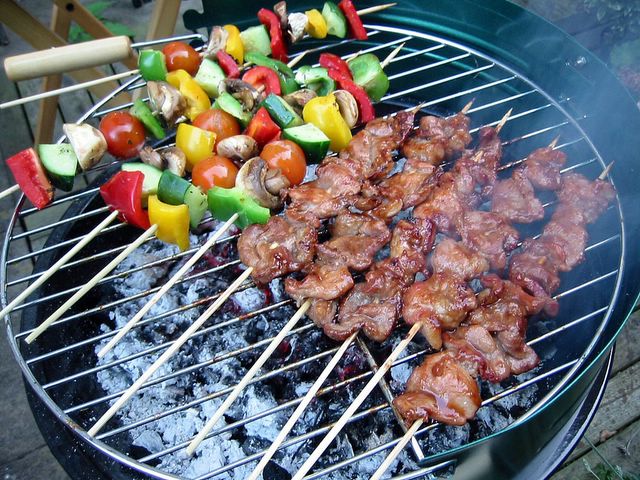
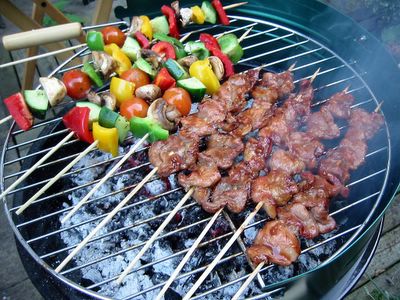
 But the one thing I simply cannot resist at the first whiff of the smoky grilling meat is pork barbecue. The thought of sinking my teeth in those slightly charred but juicy tangy-salty-sweet slivers of pork skewered in bamboo sticks with its smoky smell makes my mouth water. Ahhh, how I wish I could have one right now.
Mind you, this recipe of mine is still being tweaked. I have not found the right taste equilibrium yet that I am seeking for. So just play around with the proportions according to your taste. Actually, no matter how 'right' my recipe is, it would still not taste the same as the street side ones because you need the dust and fumes from the passing jeepneys and buses, the dirt from the street or even maybe a little sweat from the vendor (yikes) to have that authentic taste. ;) Nyahahaha!
A tip in barbecueing is to get a meat cut with some fat in it and arrange the meat a bit packed together in the skewer. These will keep it moist and juicy in the grilling. Do not grill it too well done or it will turn hard and tough. I assume you know how to start a charcoal barbecue, but just in case here it goes - wait until the charcoals have a grey ash coating (about 20-25 minutes after you start the fire) before you begin grilling. Then if your grill have graduated levels, start at a fairly high level at the beginning then lowering it as the heat dissipates or cools down.
The current host of this interesting theme of the 3rd Lasang Pinoy is Kai of Bucaio. The said blogging event were originally started by Karen and Stef as a way of showcasing the Philippine's varied food beyond the ubiquitous adobo, pancit, and lumpia plus to generally have fun in cooking and blogging about Pinoy food.
 Pork Barbecue
1 kg pork meat - sliced thinly into about 1.5 square inch pieces
1/2 cup soy sauce
1/3 cup lemon juice
1/4 cup ketchup
1/4 cup honey or brown sugar
salt and pepper (to taste)
3/4 cup 7-Up
1/2 Tbsp garlic - pounded
- Mix soy sauce and lemon juice; taste it. If need be add more lemon juice or soy sauce to get the right salty-sour balance according to your taste.
- Add all the other ingredients except the pork. Taste again and adjust seasonings if desired.
- Marinate pork in this mixture overnight.
- Soak bamboo sticks in water for about 30 minutes.
- Skewer pork meat close together in the bamboo sticks.
- Bring to boil the remainder of the marinade in a saucepan. Set aside as a basting sauce.
- Grill pork barbecues over hot coals while basting with the reserved sauce.
Lasang Pinoy 3
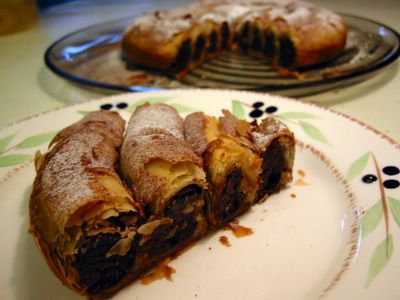 The current SHF hosted by Kelli at Lovescool is all about dark chocolates. We have to do and blog about a dessert or anything sweetish with it as an ingredient. Chocolate? No sweat. But, and a big but, she emphasised that it should be something different from what you normally do. Okay that got me thinking. Since chocolate is probably the most favourite dessert ingredient of anyone in the planet - I've done cakes, cookies, bars, countless brownies, muffins, etc. that I couldn't think of anything else to do with it. Hmmm, this is a job for a library visit. And away I went ...
Christine France's recipe in her book Chocolate Dreams caught my eye because it just is different, besides the fact that I haven't made anything like it, and also because I have all the ingredients at home. That made me doubly happy 'coz I don't have to spend anything extra. Well, to tell the truth I was semi-desperate to find a recipe for my filo pastry that's been sitting in my freezer for months. I hate waste and was afraid that it would expire before it can grace our table and stomachs.
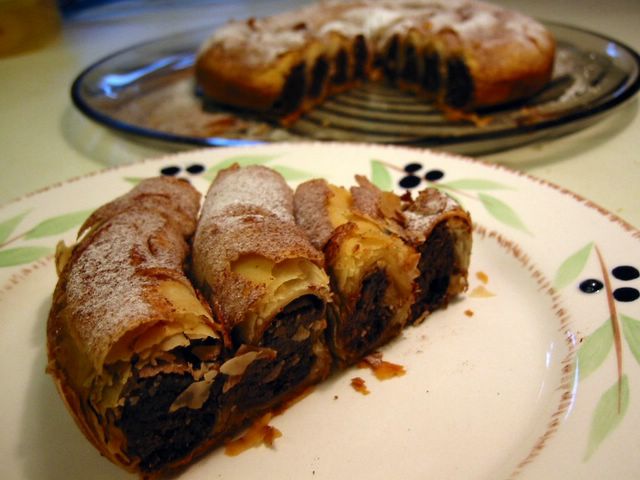
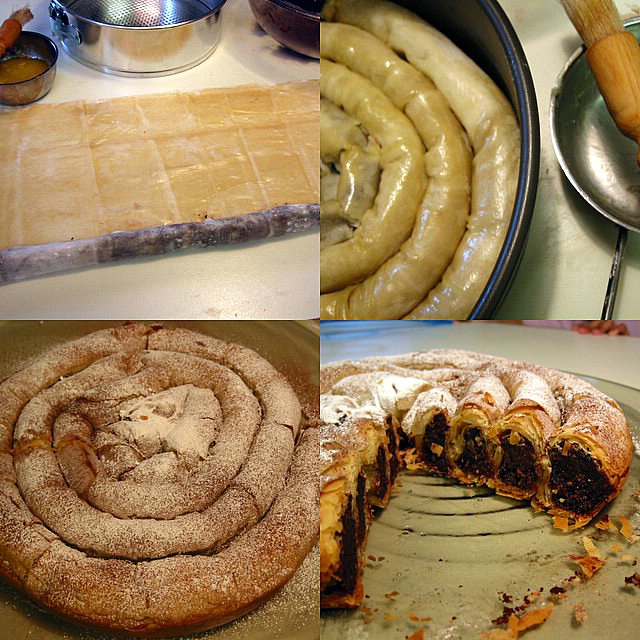
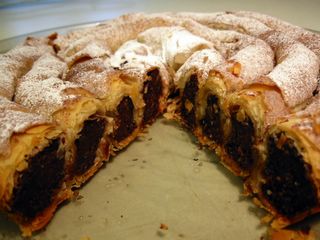 The size of the baking pan had to be changed to a smaller one since the pastry when rolled and coiled did not fill it up completely. I don't think it was meant to be donut-looking. Or maybe it's because about a quarter of the filo pastry was already soggy hence I couldn't include it. Anyways, it was quite easy to make, rolling the filling in the pastry a doddle, with only the coiling part in the pan making me work carefully 'coz I was afraid the pastry would break.
Taste wise it was good at least for me since I love nuts. The texture and pastry reminded me of baklava that got me thinking this must be a variation of that type. But I do love it in a very chocolatey-nutty way.
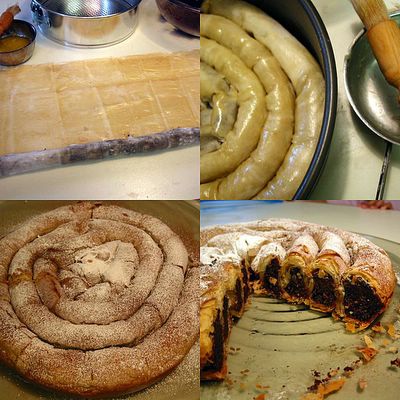 Chocolate Almond and Date Filo Coil
*Filling:
115 g dark chocolate (about 70% chocolate content) - broken into pieces
75 g unsalted butter
100 g [1 cup] ground almond
115 g [3/4 cup] chopped dates
75 g [1/2 cup] icing sugar (confectioner's)
1/2 tsp cinnamon
*Wrapper:
275 g filo pastry (about 6 sheets)
50 g unsalted butter - melted
*Garnish:
cocoa powder
cinnamon
icing sugar (confectioner's)
- Preheat oven to 180°C/fan 160°C/350°F/gas mark 4.
- Grease a 20cm (8-inch) round baking pan (springform or loose-bottomed would be better).
- Mix icing sugar and cinnamon in a bowl. Set aside.
- Toss the chopped dates in the ground almond making sure to separate the date pieces while doing so. Set aside.
- Melt chocolate and butter in a heatproof bowl over a pan of simmering water. Stir until well combined.
- Remove from heat and stir in the icing sugar mixture.
- Add the ground almond and dates. Mix until well combined. Cool.
- On a clean surface, layout one of the filo pastry sheets. Brush lightly with melted butter.
Put another sheet on top, repeat brushing of melted butter.
- Divide the chocolate mixture into three.
- Form one portion into a sausage-like log near the edge of the lower part of the long side of the pastry sheets. Roll up sheet to cover the chocolate, making sure to keep it even, all the way to the end.
- Coil this inside the round baking pan. Repeat with the other sheets until you have filled it all up.
- Finally, brush top of coiled pastry with melted butter. Bake in oven for about 30-35 minutes.
- Remove from heat, cool a little then remove from pan. Cool completely.
- Before serving, sift or sprinkle a little cocoa, cinnamon, and icing sugar on top.
Got a lovely surprise last week when I received Cindy's box from Montpellier, France as part of the EBBP2 blogging event. The lady is an avid cook and baker as can be seen in her blog called Cindy's Kitchen. It's just a shame coz I can't read nor speak French so like other non-English blogs I visit, I'll have to make do with admiring her pictures.
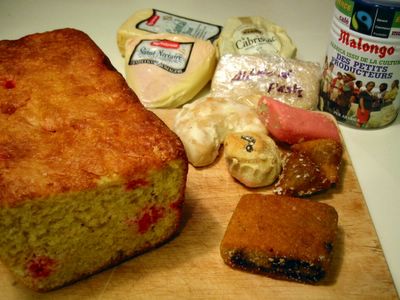 As for the box, lovely lovely things were in it. Unfortunately, the piece de resistance - a brioche dotted with yummy looking praline roses - did not survive the posting. So it was smelling a bit sour already. Reluctantly, I had to throw it away. :( Other things in the box were three different types of cheeses (of which I had a great time trying out), assortment of pastries, a can of very nice coffee, and for her cupboard ingredient - almond paste. Thank you Cindy, it's always a great pleasure to receive a mystery package from someone knowing that there are foodie treats inside. :)
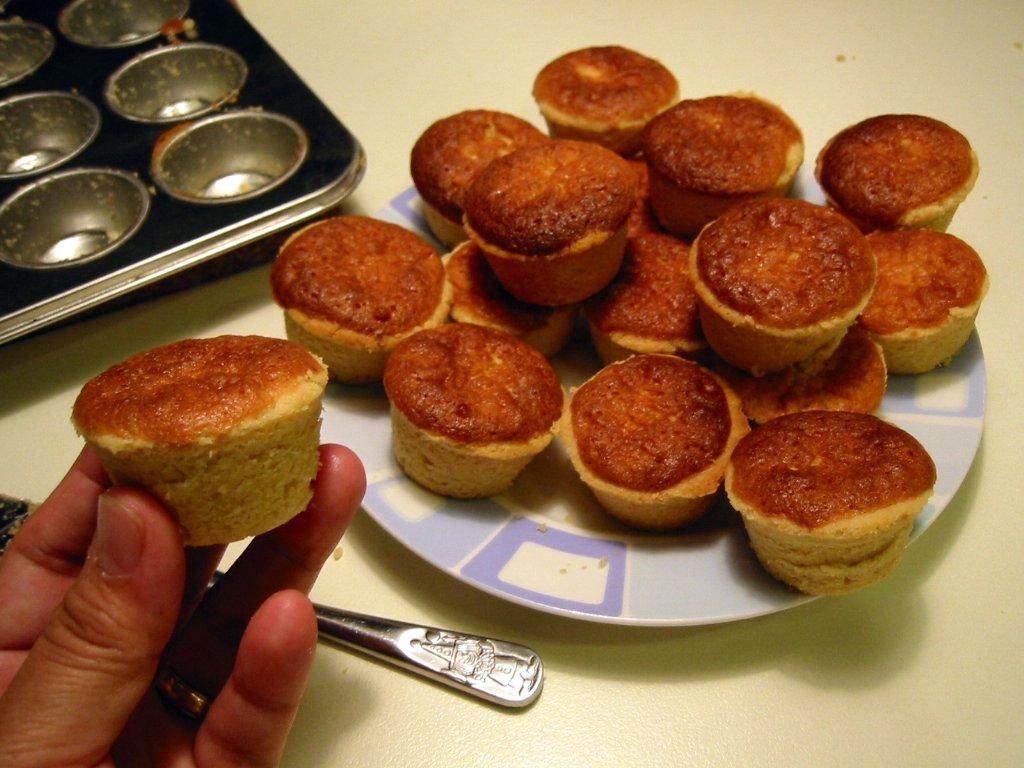
Now for the almond paste, I was so delighted to finally have some because I've been wanting to make Babyrambutan's Mazarin Cups since she posted it late last year. I can't find any almond paste in my regular food haunts around my area. All they have is marzipan which on the average only have 30% almond in it. I found one (brand name Anthon Berg) that has 60% almond but you could still taste and see the big difference when compared to the piece that Cindy sent me. Anyhow, for this recipe thanks is in order to Stel of Babyrambutan for sharing her recipe. It certainly is very yummy that even my almond-hating son loved it. Shhhhh! I didn't tell him there is almond paste in it. ;)
 Mazarin Cups
*Pastry:
1/2 cup butter - softened
1/3 cup granulated sugar
1 egg yolk
1 1/3 cups flour
*Filling:
1/2 cup butter - softened
1/4 cup granulated sugar
250 g almond paste - grated or crumbled
3 large eggs
1/4 cup flour
- Preheat oven to 350F/180C/fan 160C/gas mark 4.
- Grease generously 24-cup mini muffin pan (I used one with 1 3/4-inch diameter hole).
- For the pastry:
- Cream butter and sugar for about 3 minutes using an electric mixer.
- Add in egg yolk, mixing well.
- Stir in the flour (with wooden spoon if preferred) until smooth and well combined.
- Form into a log of about 14-inches in length. Wrap in plastic and chill in the fridge for about 30-40 minutes.
- For the filling:
- Cream butter and sugar using an electric mixer for about 3 minutes or until light and fluffy.
- Mix in the grated almond paste (a stick blender is good to use at this point).
- Beat in the eggs one at a time, mixing well after each addition.
- Stir in the flour, combine well.
- To assemble:
- Cut the dough into 24 each sized discs and divide among the mini muffin pans.
- Fit the dough evenly in the muffin holes by using the end of a dowel rolling pin or by using your thumb.
- Spoon the filling into the pastry-lined muffin pans up to almost the brim.
- Bake in the oven for 20 minutes until golden brown.
- Remove from oven and cool in the pan for 5 minutes then using a pointy knife, pry each pastry loose and turn out into a wire rack to cool completely.
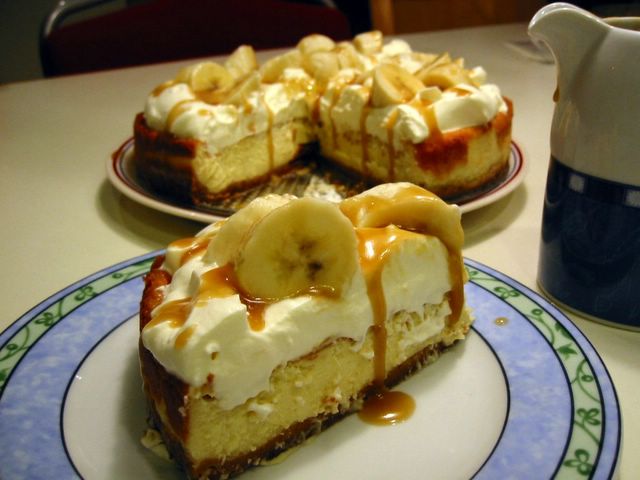
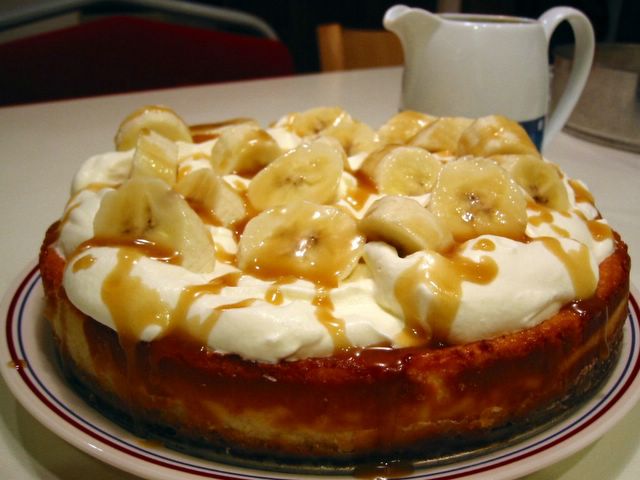
 Long were the weeks and months that I lusted after this recipe when I first saw its picture in a food magazine. It looked so pretty and I could just imagine how luscious it would taste. A week ago when I was able to finally make it, I was proven right.
Though there are several layers, it's not hard to make. I do have an issue with the baking time which I increased by 5 minutes because the middle is a bit undercooked (not that I mind). The cheesecake layer itself has just the right amount of sweetness and not sour at all. While the biscuit layer gives it a nice crunch. Actually, I think the cliche - the whole is more than the sum of the parts - applies well here. Each layer is good but eaten as a whole, they blend and complement each other so well that I could only rave and rave about it. Even my husband who's not really a dessert fan loved this. I also liked the fact that the toffee sauce is on the side so you can put as little or as much as you like.
Thanks to Silvana di Franco for this little piece of heaven in a cake tin which I got from the BBC Good Food magazine. By the way, I though 'Banoffee' was the name of some exotic town in a far flung place like Canada. It turned out it was from banana + toffee = banoffee ! I was laughing so hard when I realised my stupidity. LOL indeed! And it did not come from abroad, it was thought up by a chef in The Hungry Monk pub in Sussex. It is English after all!
 Banoffee Cheesecake
*Crust:
85 g [1/3 cup] butter - melted
200 g gingernut biscuits - crushed
*Filling:
750 g mascarpone (or cream cheese)
3 large eggs
2 Tbsp cornflour
140 g [heaping 2/3 cup] golden caster sugar
finely grated zest of lemon
1 tsp vanilla
*Toffee Sauce:
50 g butter
100 g [1/2 cup + 1 Tbsp] light muscovado sugar
142 ml [1/3 cup + 1/4 cup] double/heavy cream
*Toppings:
2 medium bananas - sliced thickly
fresh lemon juice
284 ml [1 cup + 2 Tbsp] whipping or double cream
- Preheat oven to 180°C/fan 160°C/350°F/gas mark 4.
- For the crust:
- Mix melted butter with the biscuit crumbs and press the mixture evenly into the bottom of a 23cm (9-inch) springform pan (preferably non-stick).
- Chill in the fridge for 10 minutes.
- For the filling:
- Beat all the ingredients in a bowl with an electric mixer until well combined.
- Pour into the cake pan set on a baking sheet making sure to level off the top.
- Bake for 50 minutes until golden brown.
- The top will be a little wobbly but it will set as it cools. Turn the oven off and leave the oven door open leaving the cheesecake to cool completely inside.
- For the toffee sauce:
- Melt the butter gently with the double cream and sugar in a saucepan while continously stirring until the sugar dissolves. Let it gently boil briefly. Cool completely.
- For the topping:
- Whip the whipping cream to soft peaks.
- Squeeze some lemon juice onto the sliced bananas.
- To assemble:
- Put the whipped cream on the cooled cheesecake in a swirling fashion.
- Wedge the banana slices in the cream.
- Drizzle a little toffee sauce on top and also serve on the side.
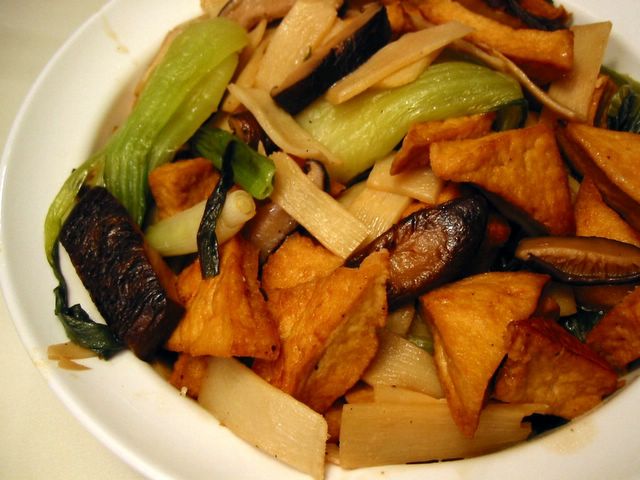
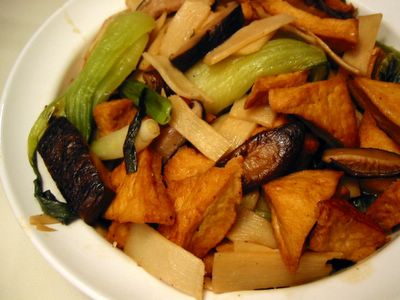 This was meant to be for the last IMBB 19 - all about vegan food. As usual, something got in the way and I was not able to post on time. But anyway, this is quite good and not far off from your usual stir fry. The only thing I don't like in it is the bamboo shoots. I've never been fond of its stinky nature so I ladled it mostly to my husband while I picked most of the bok choi and mushrooms. ;) It looks a bit dry 'coz all the sauces are at the bottom of the bowl. I should have used a shallower and wider plate just to show the sauce in all its glory. Hehe!
Oh yeah, this is adapted from the cookbook Chinese Cuisine by Huang Su-Huei.
Braised Chinese Mushrooms and Tofu
500 g firm tofu - drained and cut into bite sized pieces
2 green onions - cut into 1-inch lengths
1-inch square of fresh ginger - sliced
5 Chinese black mushrooms (shiitake)
1/2 cup sliced bamboo shoots
3 precooked bok choi (or pechay/pak choi) - sliced in quarters lengthwise
1 cup stock
2 1/2 Tbsp soy sauce
dash of ground black pepper
dash of sesame oil
1/2 Tbsp cornstarch
1 Tbsp water
oil for frying
- If using dried mushrooms, soak the mushrooms in hot water for about 30 minutes until soft. Drain and squeeze out water from them. Cut off the stems and discard. Slice into bite-sized pieces. Set aside.
- Pat tofu pieces dry and deep fry or pan fry until golden brown. Remove and drain, set aside.
- Mix stock, soy sauce, black pepper, and sesame oil in a bowl. Set aside.
- Mix cornstarch and water in a separate container. Set aside.
- Heat a wok with about 2 Tbsp oil. Saute ginger and green onion until fragrant.
- Add mushrooms and bamboo shoots. Stir to mix.
- Add stock mixture and bean curd. Bring to boil and cook for 3 minutes.
- Stir in bok choi and cook for 2 more minutes or until the liquid is reduced to half.
- Mix in the cornstarch mixture to thicken sauce. Dish up and serve.
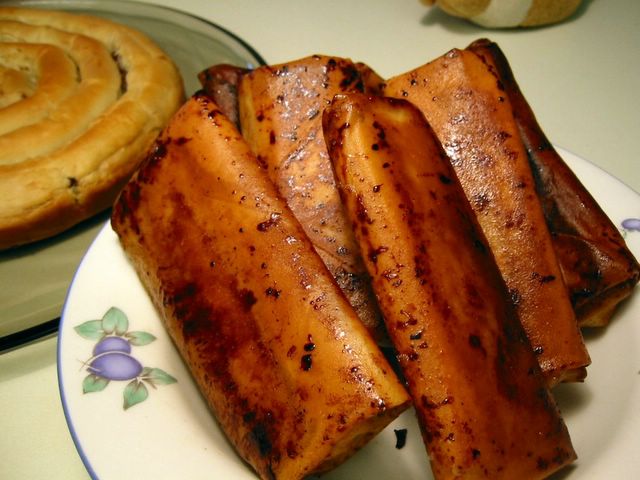
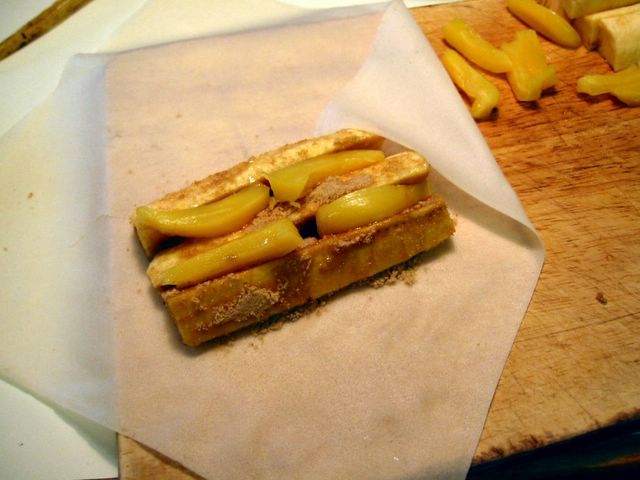
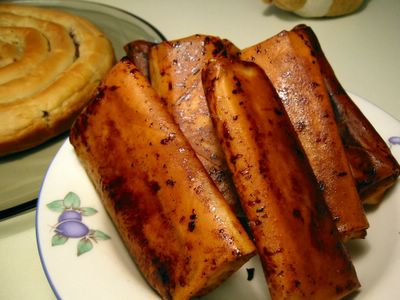 The streetside snack food of bananas sprinkled with sugar enveloped in springroll wrappers is commonly known in the Tagalog region as 'turon'. However, in our corner of Cavite this is always called as 'valencia' or 'balensia'.
Biiii-li na kayong balensia !! shouts the girl in a sing-song manner with a bilao full of these wonderful snacks on top of her head. Like anything else, I've got no idea why it's called that. But it may have something to do with the way the contents are rolled and wrapped in something because I know of a sewing stitch or seam wherein the frayed/raw edge is enclosed by inverting the sewed edge itself then sewing over it again. My mother always called that a 'valenciana'. So I think the term pertains to a manner of enclosing something resulting in a 'rolled' appearance.
Anyway, this is very easy peasy to do and as usual I nearly burned it. :( You know how they say cooking is all about timing. It seems whenever I cook this I always forget that this is not a very forgiving frying piece. Since it's got sugar it burns easily. So please remember (more for my kids this one) when you cook this do not put the heat too high or neglect it. Turn it often (if pan frying) or keep a close eye on it.
There are lots of variations you can do, some even put in chocolates! I used muscovado sugar on this since it is the closest to our panucha. I love the caramelly glaze it imparts to the valencia. Also I added slivers of langka (jackfruit) because it gives that fruity aroma and adds sweetness to the package. As for the banana, I still haven't found any other cooking variety of banana closest to the saba other then plantain. In my opinion, saba is still the best in terms of flavour and texture but for now plantain will do.
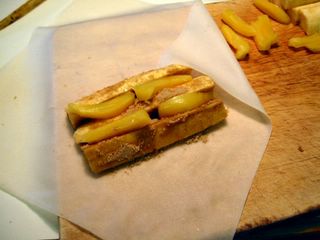 The way I wrap it is like in a parcel, similar to the way springrolls are done. But you may just roll it like a log and leave the ends open. This way the wrapper becomes extra crispy with more drips of sugar glaze.Valencia
(Turon)
cooking banana (saba or plantain)
langka (jackfruit) - sliced into slivers
muscovado or brown sugar
springroll wrappers
oil for frying
- Peel and cut bananas into about 3-4 inch lengths then into quarters lengthwise.
- Roll bananas in the sugar.
- Arrange bananas and langka in springroll wrappers and wrap as in a parcel (or wrap like a log with both ends open).
- Deep fry or pan fry in oil keeping close watch as this burns easily.
- Drain on a wire mesh strainer (not on paper towels because they will stick to the valencia).
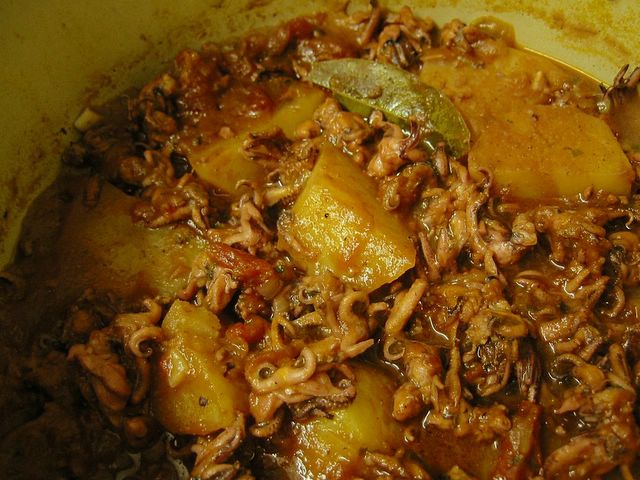
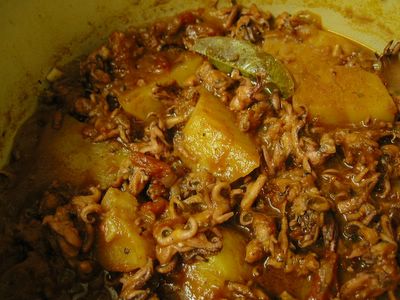 When I saw the picture of this in Gordon Ramsay's Kitchen Heaven, I thought - 'I definitely gotta do this'. Well, mine did not exactly look like the picture in the book :lol: but it was good nonetheless - in an unsophisticated way. As far as I know, the 'daube' is a rustic Provencale stew made of very slowly braised beef with wine, vegetables and spices. Ramsay's use of squids plainly piqued my interest besides the fact that I love squids (also called 'choko' in my hometown).
I saw a bag of squid tentacles at our local Chinese grocery (I prefer them from the body) and proceeded to make this dish. As I was cooking, I saw the close similarity with our mechado. Except for the wine, it had almost the same ingredients and preparations.
Daube of Squid
1 1/2 kg squids - cleaned and cut into 1-inch pieces
2 Tbsp olive oil
1 red onion - chopped
500 g plum tomatoes - chopped
500 g small new potatoes - washed and halved
2 small lemons - sliced
3/4 cup white wine
1 tsp minced garlic
2 bay leaves
2 Tbsp chopped fresh flat-leaf parsley
sea salt and freshly milled black pepper
- Put the squid in a bowl with the wine, lemon slices (squeeze a little), bay leaves, parsley, garlic, and season well with salt and pepper. Leave to marinate for 2 hours.
- In a pot, saute the onion in hot olive oil until soft. Drain the squid (reserve the marinade) and add to the onion. Cook for about 2 minutes.
- Add tomatoes and cook for another 5 minutes.
- Discard the lemons and add the marinade to the squid. Cover the pot and simmer gently for 2 hours.
- Add in the potatoes and cook for a further 15 minutes or until potatoes are cooked.
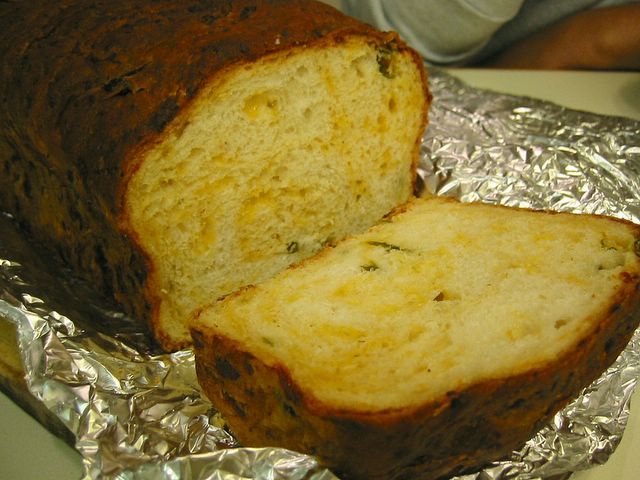
 Last week, I had the great privilege of meeting a Filipina food blogger based in the US. Purplegirl was on a flying to visit to London on her way to the Middleast for a holiday. We grabbed the chance to meet up, chat, and of course eat! What else would food bloggers do? ;) She was so kind and generous to give me a Jalapeno bread which she recently raved about in her blog so naturally I was very curious. I opened it first thing when I got home and the great aroma that hit me was that buttery-cheesy smell spiked with the spiciness of jalapeno chunks dotting each slice. Me and my husband had a great time eating it with our soup. We toasted it and mmmmmm! it was even more aromatic and tasty. Love that bread - I gotta hunt down a copycat recipe in the hope that maybe I could recreate even a fraction of it.
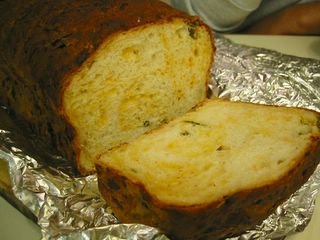 Getting back to my meeting with Purplegirl, we walked a few yards from Victoria station to a traditional Thai restaurant recommended by Lady Charlie, called Mango Tree. Now, I'm not a restaurant reviewer so I'll just try the best way I can to describe the experience.
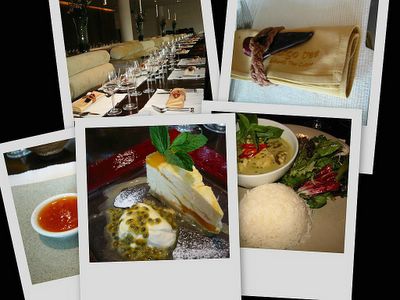
The place looks smart, neat and well appointed, good high ceilings with recessed lightings, modern furnishings all in the earthy color scheme of different shades of brown. I liked it immediately since I prefer an uncluttered, neat and airy ambiance in a restaurant. Loved the little Thai touches like the big dried chilli tucked in the napkin holder, small mango trees in pots, etc.
We ordered largely from the lunch set menu since it has what we wanted. I had Fish Cakes for starters while Purplegirl had the Papaya Salad. Mine was good although I find it had a tad bit more flour (making it more chewy) than I wanted. All I can hear from Purplegirl was 'Mmmm, mmmm' with her head nodding positively approving of her Papaya salad.
For mains I had Green Curry Chicken and she had the Prawn Curry. They served it with plain boiled rice and a side salad. I don't know which one we liked better - the side salad or the mains. LOL! The salad was your usual mix of greens but their dressing was so nice. The taste had a very mild taste of patis, lime, and sugar. It was mild and sort of 'unobtrusive' that I feel like it's teasing me to eat more. Maybe next time I'll have a full order of the salad instead of just on the side. About my green curry - it was great with the sauce suitably thick and mildly spiced. Not too spicy not too bland - just right. Purplegirl noted that her Prawn Curry was nicely balanced as well, spiced enough and not too salty unlike what she often gets in other restaurants.
Desserts were served with Purplegirl having the Strawberry Pandan Cheesecake(?) and me with Cheesecake Malakor. The latter had papaya and passion fruit mixed in it on a peanut crumble base. It was good although I find it a bit too sour for me. I prefer sweet creamy cheesecake that's why I'm not too keen on most American cheesecakes. As for hers, she said it was good as well albeit the taste of the pandan was not so forthcoming. She was expecting a stronger taste and so was I.
As a whole, we thoroughly enjoyed our meals and at least I myself would come back to explore more of their menu. We were fortunate to be there just before 12 noon so we practically had the place to ourselves and able to order before the kitchen got busy. Believe me the place was packed by the time we left at past 1 PM. That's no great wonder with the kind of service and good food on offer.
Thanks Purplegirl for the delish loaf of Jalapeno bread and that great lunch we had. :) 'Hope to see you again so we can raid another restaurant!
Mango Tree
46 Grosvenor Place
London SW1X 7EQ
Tel. No.: 020 7823 1888
Sorry folks if this is late in coming, my flu got in the way. :(
Anyhow, let's get started with the business of blogging. As you know the Lasang Pinoy food blogging event was started by Karen and Stef, mainly to promote Filipino cuisine but also as an excuse to blog about Pinoy food we love. ;)
The entries we have in this edition are all wonderful recollections (usually) of the things we had as children during storm-lashed days. Some are used the time-honored food from the can or simple cooked food using the limited range available during typhoons. Without much ado, here is the weather report on the delightful entries to Lasang Pinoy second edition:
- Over at the 'eye of the storm' in Asia, swirling clouds gathering are bringing several inches of rain and great gusts of wind. This is enough to wreak havoc in the vicinity and made bloggers cook up some ...
- ChicaJo of 80 Breakfasts gave us her very well presented Binakol. She also regaled us with memories of her beloved lola who loves that tinola with a twist.
- Annabanana in the same named blog, revealed her uncontested position as a her family's burping champion in their sopas ang guinataan foodfest during storms. Though I doubt if she still does the same in Korea where she currently resides which made her contribute the storm comfort food of that land with the spicy looking dishes of Nokdu Bindaeteok, Buchimgae, Pajeon.
- Kai of Bucaio have Fried Tuyo and Sardines Omelette, besides extolling the vitues of tuyong dilis and fried eggs in the yearly flooding of Pangasinan.
- Father RV, Kai's Jesuit priest friend (now in Mobile, Lousiana) who did not let the twin disasters of hurricanes Katrina and Rita deter him to blog about being comforted by Champorado, Ginatan, and Palitaw during his boyhood experiences of typhoons in the Phillipines.
- Lou of Chickpeace adores Ginisang Munggo whether housebound by typhoons in Hong Kong or in the floods of her native Malolos, Bulacan.
- Iska's Pritong Tilapia and Talong con Kamatis and Bagoong over at Iska's Recipes (based in Beijing) is great eaten with your bare hands during a windy and chilly stormy day.
- Mike of LaFang in Brunei, made up for lost time in not making it to Lasang Pinoy 1 by giving us two entries - Ginisang Monggo and Spicy Sardinas Guisado. His pictures and reminiscing of storms in his native Santiago, Isabela really sent me down memory lane.
- MarketMan of Market Manila, recalled the aftermath of one of the most destructive typhoons to hit the Philippines - Typhoon Yoling, and in the course, re-learned how to make the delicious Sinigang sa Bayabas.
- One of our first time contributors, Mira of Mirsbin, shared with us her recipe of one of her 'cold bed' comfort food, Shanghai Fried Rice.
- The Panda at Pan de Panda, have Daing na Bangus to do the trick of comforting her during wind-howlingly stormy days.
- Sassy of Pinoy Cook, recalled her superstitious lola and how she introduced her to the virtues of Salabat. Her grandma, their house, and the storms also made her remember Egg Pie, which was regularly bought by her aunt as an afternoon treat.
- Karen of Pilgrim's Pots and Pans shared not only her childhood food memories during storms but also the recipe of the meticulously spiced (undoubtedly delectable) Albus Itu.
- Manny, Karen's blogging guest, has an example of turning his childhood typhoon food memories to a business potential. He shared with us his recipe for the yummy gnocci-looking Gulgoria.
- Lani of Worthless Anik-Anik loves one abundant food during rainy season - Talangka. As a serious talangka connoiseur, she also have a tip on what to have as afters.
- Scattered rains and increasing strong winds are currently buffeting North America. The inclement weather did not deter our bloggers ...
- Organa Monster of Ang Sarap loves her aunt's Goto so much that several disastrous attempts did not discourage her from trying again and again 'til finally perfecting it.
- Stel aka Babyrambutan recalled how Typhoon Yoling pried open their roof like a sardine can and soaked them all wet. Fittingly, her entry of Crab and Corn Soup, is all to do with memories of eating canned food during that big bad storm.
- Stef blogging at Beyond Adobo drew our attention to an aptly named Typhoon restaurant in Santa Monica, California, serving what else but Pinoy food!
- Ladygoat over at Foodgoat, took out her canned vienna sausages mixed up with mayo, pickles, and spices to make some Vienna Sausage Sandwich Spread. I definitely am gonna try that though I have to find them sausages first here in UK. ;)
- Jmom residing In Our Kitchen, is one of our participants who can't help but cook more than one for our theme. I say give me Meat Ball Soup and Ligo Sardines Sauteed with Bok Choy anytime.
- Phisch over at In That Number, was one of the earliest contributors in this blogging event. She toasted some rice, ground it, mixed with some water, some sugar and voila you have Rice Coffee!
- Stef again in her main blog Stefoodie, relived songs and memories when she was still living in the Philippines and trying to brave the rains. Like most of us, her canned food supply during storms put her in good stead to give us Ginisang Sardinas at Misua.
- Ting food blogging World Class Cuisine, recalled her growing up years in her beloved Baguio and how her mother's smart thinking of using what's in season inspired her to do Daing na Bangus and Tuyo.
- And finally, in the vicinity of Europe, a brewing storm over in the Atlantic is bringing rain, hail, and fierce winds. People are bracing for the coming bad weather and what better inspiration on what to partake at the dinner table than to head over to ...
- Celia [das me! ehem ;)] of English Patis, as an alternative to boiling root crops, decided to grate and steam cassava just like her grandma does to do Kalangkang.
- Thess across the channel blogging at Eetsmakelijk, shared her unfortunate story of nearly drowning in flood waters! Luckily she's still with us to make my favourite Nilupak.
And that folks, concludes our Lasang Pinoy 2 weather report. Please visit the blogs mentioned above and take inspiration from the food they're offering.
If you think I missed any entry please do bring it to my attention.
Here is my entry for the second Lasang Pinoy food blogging event which was started by Karen and Stef and currently hosted by moi. ;)
The start of the rainy season in the Philippines (around June) usually coincide with the start of school. So the beginning of each bring back jaunted memories of smell of new pencils and erasers (rubber), smell of the plasticky-rubbery new umbrellas, bags and shoes, wet grass, newly wet earth, cool humid afternoons.
In a way, the rains are welcome respite from the intense heat and humidity of the preceding March-April. Though at the back of the mind is that wariness of the typhoons that are sure to come anytime to wreak havoc on people's lives and properties. For kids, typhoons are greeted with joy - school's closed, no classes! They bathe in the rain, some even in flood waters (not safe). But for me it comes with that snug feeling of warmth with all the family forced by the weather to be inside the house. My grandparent's house in Cavite where I grew up had those sliding capiz windows. They’re not water or windproof so come typhoons, we grandkids with our aunts race around the house stuffing edges and joints of windows with rags to prevent the rainwater from coming in. While my lolo (grandpa) goes out with these big abaca ropes to tie down the haligi (pillars) of the house and other trees around their yard.
After all the chores are done, since there was usually no electricity (so no TV to watch), my aunts would take out playing cards, sungka, checker boards, chess boards, etc. to keep us occupied. It was great fun really with us learning solitaires, pekwa, pares-pares, 21, and other card games. When it gets a bit dark, someone will regale us with ghost stories or listen to some scary drama shows on the radio. This will cause us kids to all stick together no matter where one goes - even in the toilet! Hahaha. ;)
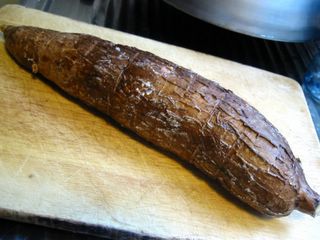
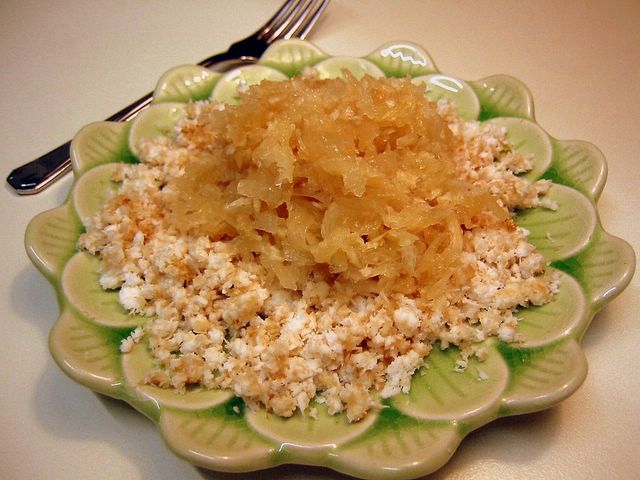
As for the food, since there was no market, all our food are simple and lots of times comes from the 'victims' of the typhoon. So we often had the crops of those uprooted and damaged by the wind - kamote (sweet potatoes), saba banana, butuhan banana, balinghoy (kamoteng kahoy, cassava), kangkong (tung choi), talbos ng kamote (sweet potato tops), etc. These are cooked simply - meaning boiled or steamed - then eaten hot. Sometimes when the storm lasts for several days and we've had enough of boiled this and boiled that. My grandma would grate some balinghoy and steam it then serve with freshly grated coconut sprinkled with sugar. We call this 'kalangkang'. The combination of the soft, slightly gelatinous cassava and sweet grated coconut is simply divine! Sometimes the simple things in life are the best.
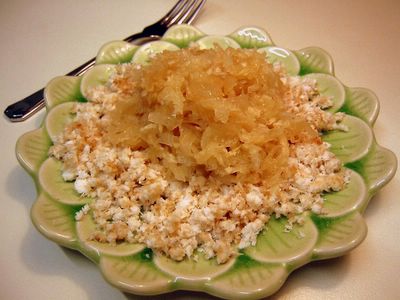 Kalangkang
finely grated cassava
freshly grated coconut
sugar (brown or white)
- (It's best to grate the cassava finely to have shorter cooking time.) Put the grated cassava on a very lightly greased bowl or plate.
- Place bowl in a steamer and cook on high steam for about 30 minutes or until cassava is translucent and soft.
- Serve hot or warm with grated coconut sprinkled with sugar.
Lasang Pinoy 2
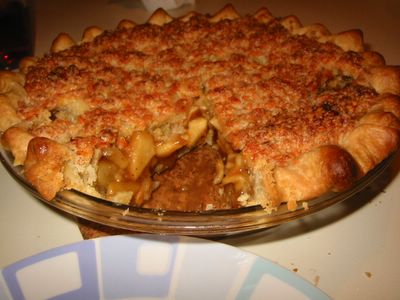 The glut of apples in autumn time is very much welcome to my son, J1, who adores apples in baked products. May it be pies, pastry, bread, or cakes. For sometime, the two of us have been trying out different versions of classic apple pies (of course with me slaving away while he does the tasting) to see which ones will have the honor of staying in our family recipe list.
One of them is this pie with a streusel topping. 'Streusel' according to the Joy of Baking glossary, is a type of cake or pastry topping, German in origin, and has a base of flour, butter, and sugar in which spices, nuts, and other ingredients are added. I adapted this from my beloved battered Let's Cook with Nora by Nora Daza.
I remember well the second time I baked this, I was so distracted with the things going on in the kitchen that I forgot to add flour to the sugar mixture used to toss the apples with. It turned out like an apple pie soup! Crusts at top and bottom were fine but the middle was so wet I was ladling it out when serving. :LOL: Then another time, I forgot to put milk with the topping ingredients. Whatever it was, seems this pie always get shortchanged. ;) So this time I banished all the kids from the kitchen and had a run down of the ingredients to make sure everything is in there. The only thing that I think I have to tweak is the cooking time since even after 40 minutes some of the apple pieces were not fully cooked (not that we mind ...) hence I put in 55 minutes in the recipe below.
About our taste preference, we don't like our apple pies too tart and not too sweet as well with just a tad bit of saltiness in it. This one has that kinda savoury-sweet tang in the topping courtesy of the cheese. The sugar in the filling was reduced a lot and the bottom crust is oh so flaky and buttery. Nice.
Apple Streusel Pie
*Crust:
85 g [1/3 cup] butter - chilled
1 1/4 cup flour
1/4 tsp fine salt
2-3 Tbsp cold water
* Filling:
4 cups roughly chopped baking apples (Golden Delicious, Jonagold, Cox, etc.) - cored and peeled first
1/3 cup firmly packed brown sugar
1/4 tsp nutmeg
3/4 tsp cinnamon
1/8 tsp salt
2 Tbsp flour
*Topping:
1/2 cup flour
1/3 cup golden granulated sugar
2 Tbsp butter
1 cup coarsely grated cheese
2 Tbsp milk
- Preheat oven to 180°C/fan 160°C/350°F/gas mark 4.
- For the crust:
- Put the flour and butter in a bowl.
- Cut the butter into the flour with a pastry cutter or two butter knives until mixture is into a crumbly state.
- Sprinkle enough water and toss until you can gather the dough into a ball. Press, turn and gently knead to just about bring it together until the doughball is smooth and the texture uniform. Caution: do not over knead of it will become inelastic and stiff.
- Wrap or put in a plastic bag and chill in the fridge for 30 minutes.
- On a clean, floured surface or between greaseproof paper and cling film, roll flat evenly with a rolling pin into a circle shape with a diameter of about 11 inches.
- Turn out dough on a 9-inch pie plate. Trim edge until you have about 1 inch overhanging all around.
- Tuck the overhang under and flute the sides decoratively with a fork or with fingers.
- Prick crust all over with fork.
- For the filling:
- Combine all ingredients except the apple in a container and mix well.
- Toss the chopped apple in the spice mixture.
- Put and arrange into the unbaked pie crust.
- For the topping:
- Combine sugar and flour in a bowl.
- Cut in butter with a pastry cutter or two butter knives until crumbly.
- Add in cheese and toss to combine.
- Sprinkle milk and mix well.
- Spread to cover top of apple mixture.
- Bake in oven for about 55 minutes. If the crust and topping is browning too much, coverly loosely with aluminum foil.
- Remove from oven and cool. Serve warm or cold.
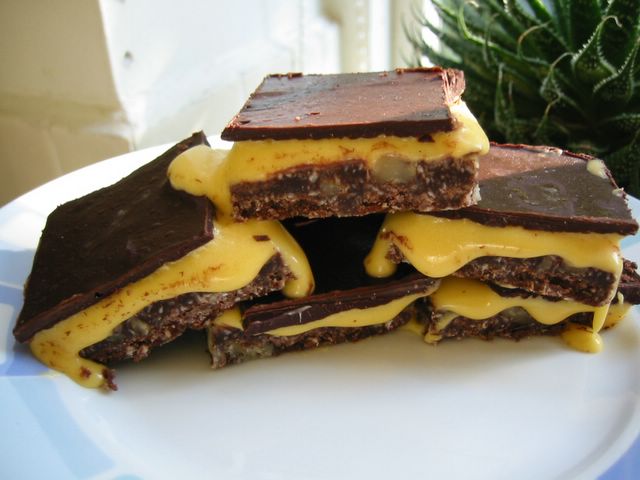
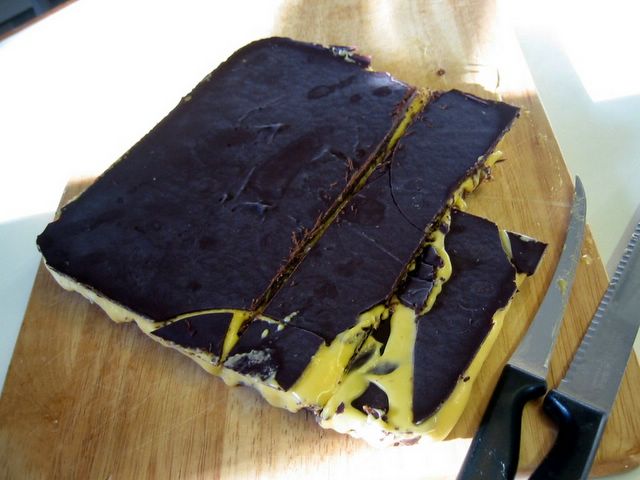
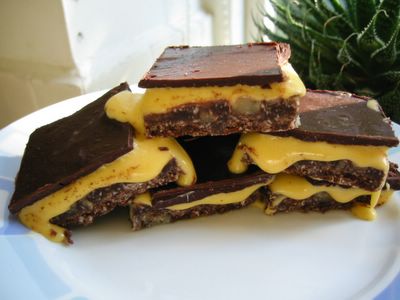 Disaster anyone? This was meant for the SHF 12 with a theme of custard but as you can see these Nanaimo Bars were not exactly a paragon of beauty. I don't know if I did anything wrong or there's something inherently flawed in the recipe itself. Mind you, it was only the middle custard part that didn't work. The base and topping were great but as you can see the middle layer is sooo gooey, it just collapses during cutting so I had to freeze it first *overnight*. Come morning, it was still gooey while the bottom and top were rock hard.
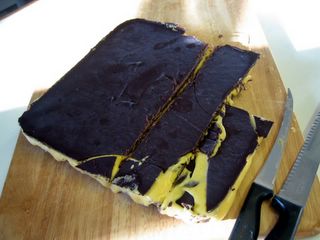
I tried hack it off with a variety of implements - bread knife, carving knife, chef's knife, etc. Could I have tried an axe? ;-p I tried warming the knives first but to no avail most of them still broke up though there were some little success but it's that darn custard that won't set !! Maybe I should have just served it on the side because the rest of it is absolutely delicious.
A little background on these rich delectable bar cookies (which I will not make again unless I come across a better technique or recipe for the custard), which were said to have originated in the town of Nanaimo in Vancouver, Canada. No one is certain on who originally came up with this recipe. But the same cannot be said of its deliciousness as it's certainly moreish minus the custard ;). The other thing going for this is the fact that it's a no-bake cookie bar. Sue Lawrence's cookbook Book of Baking is from where I adapted this mini disaster. :LOL:
In case you want to make yourself miserable ;) here's the recipe:
Nanaimo Bars
*Base:
100 g unsalted butter
55 g [heaping 1/4 cup] golden caster sugar (superfine)
5 Tbsp cocoa - sifted
1 large egg
1 tsp vanilla extract
140 g digestive biscuit (or graham crackers) - crushed
70 g [1 cup] dessicated coconut
70 g [1/2 cup] chopped walnuts
*Filling:
100 g unsalted butter - softened
5 Tbsp custard powder*
200 g [1 1/2 cup] golden icing sugar (confectioner's)- sifted
1 large egg
1 tsp vanilla extract
*Topping:
140 g dark chocolate
25 g unsalted butter
1 Tbsp golden caster sugar (superfine)
- Grease and line a 9-inch square baking pan.
- For the base:
- Put the butter, sugar, cocoa, egg, and vanilla in a heatproof bowl and set over a saucepan of simmering water.
- Melt the mixture while stirring constantly.
- When it becomes smooth and slightly thick, remove from heat.
- Add in the biscuits and walnuts. Combine well.
- Press onto the prepared baking pan making sure to level it out. Chill in the fridge for at least 30 minutes.
- For the filling:
- In a heatproof bowl, beat together the softened butter and custard powder.
- Beat in the icing sugar, egg and vanilla.
- Place carefully on a larger bowl filled with hot (not boiling) water. Continue beating for about 1-2 minutes.
- Leave for 5-10 minutes in the bowl of hot water then beat again for another 1-2 minutes.
- Tip this over the chilled base. Chill in the fridge again for at least 30 minutes.
- For the topping:
- Put the butter, chocolate, and sugar in a heatproof bowl. Melt by putting the bowl over saucepan with simmering water. Stir until well combined and smooth.
- Tip on top of the chilled filling and base. Cool completely, then chill in the fridge for at least 30 minutes, then freeze for about 3 hours.
- Cut into squares while still cold and hard otherwise they will breakup.
Note: You can substitute vanilla pudding powder for the custard powder.
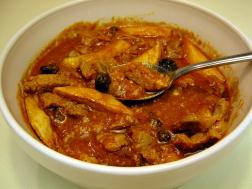
I was hoping to include this recipe of my maternal grandfather - Lolo Apeng - when I 'introduce' him in this blog. But circumstances in the other place where I blog caused me to post this to give an example of a Filipino dish that needs a boost in the presentation department. Anyhow, it tastes better than it looks - that I can assure you. The dish is something that my late grandfather came up with by combining the virtues of bistek, menudo, and afritada. Since he passed away already, nobody in my family knows why he named it Gisok. A mainstay in all of our family buffet table in Cavite, this is often requested by guests and relatives who have had it before. Our neighbors there even used to ask my lolo to prepare it for them. I hope you like this, too.
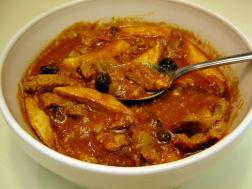 Gisok
Gisok
1 kg pork shoulder - cut into thick julienne
1 1/2 Tbsp oil
1/4 cup soy sauce
2 Tbsp lemon juice
1 Tbsp garlic - minced
1/2 cup chopped onion
1 cup chopped tomatoes
1/2 cup chopped chorizo (optional)
500 g passata (tomato sauce)
1 Tbsp soy sauce (optional)
1 Tbsp double concentrated tomato puree (tomato paste)
1/2 cup water
250 g pork or chicken liver - cut into thick julienne
salt to taste
1/2 cup grated cheddar cheese
2/3 cup raisins
500 g potatoes - julienned like French fries
- Cut the pork and liver separately into long and thin pieces about 1-2 inches long and about 1/4 - 1/2 inches wide.
- Combine the 1/4 cup soy sauce and lemon juice in a bowl. Taste and add more lemon or soy sauce according to preference. Marinate the pork in this mixture for at least 2-3 hours.
- In a large pot, heat the oil and saute the garlic, onion, then tomatoes. Add some salt.
- Add the pork including the marinade. Cook for a minute then cover the pot and simmer for about 5 minutes.
- Add the chorizo, passata, tomato puree, soy sauce (if using) and water. Bring to boil then simmer until meat is tender.
- While it's cooking, deep fry the potatoes. Set aside.
- Add the liver to the pot, cook for about 5 minutes.
- Add the raisins, cook for 3 minutes.
- Add the grated cheese and half of the potatoes. Cook for a further 2-3 minutes or until cheese is melted and well incorporated in the sauce.
- Remove from heat. Ladle into serving bowls and scatter some of the remaining potatoes on top.
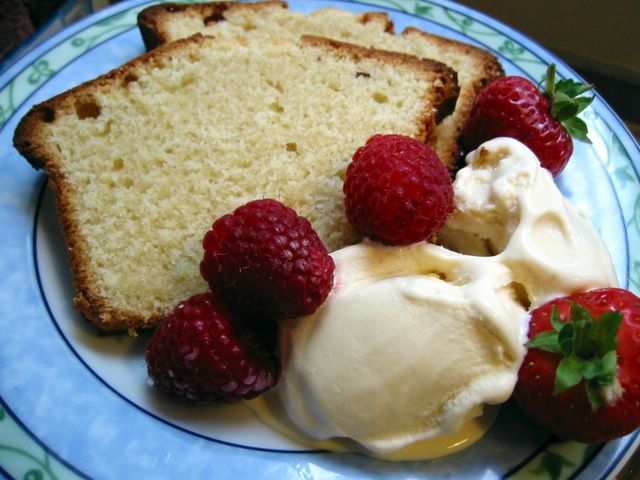
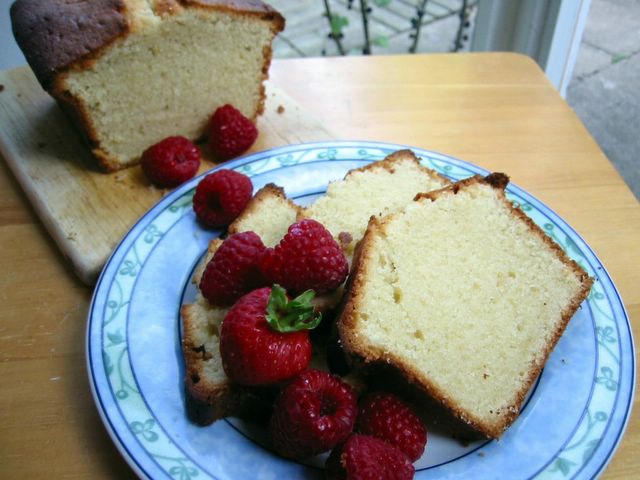
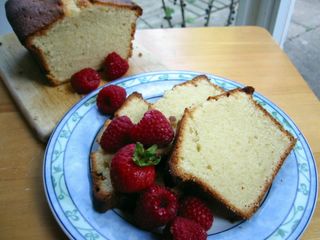
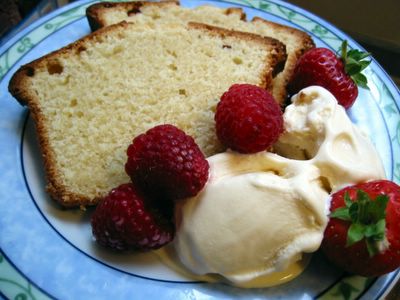 Originally popular in Victorian times, the Madeira cake was named after the wine that traditionally accompanied it. Nowadays, tea is the usual companion of this very buttery cake. This is very similar to the pound cake, with the main difference having to do with the addition of lemon zest and/or lemon juice for the former.
Surprisingly, it was not hard to do - no not at all. I think the key here (which I believe is the same with a lot of cakes) is to beat the butter and sugar very well until they're fluffy. The resulting aroma and taste of this moreish cake is really great. For me it is best serving it with fresh fruits and whipped cream or with vanilla ice cream. Again, I adapted the recipe in my current favourite Book of Baking by Sue Lawrence. I am sure I'm gonna make this again and again if only to indulge my kids. ;)
 Madeira Cake
200 g unsalted butter - softened at room temperature
200 g [1 cup] golden caster sugar
3 large eggs
200 g [1 1/2 cup] self-raising flour - sifted
1/8 tsp fine salt
grated zest of 1 unwaxed lemon
juice of 1 lemon
- Preheat oven to 160°C/fan 140°C/325°F/gas mark 3. Grease and line bottom of a 2 lb (9 x 5-inch) loaf tin.
- Cream (beat) softened butter and sugar for about 5 minutes or until light and fluffy. Add in the lemon zest.
- Stir in 1 egg - mix, then a third of the flour and all of the salt - mix well until well combined. Repeat the procedure adding the egg one at a time followed by the flour always mixing well after each addition.
- Finally, add the lemon juice, combine well.
- Pour into the prepared baking pan making sure to level the top. Bake in oven for 45 minutes then lightly cover the top with foil and continue to bake for another 15 minutes or until a skewer poked in the middle comes out clean.
- Take out of the oven and cool in the baking pan for about 20 minutes then remove from the pan and cool completely on a wire rack. Best served sliced with some whipped cream or ice cream.
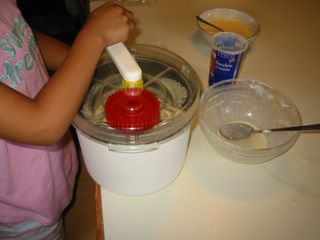 The last time we made this from scratch was more than 6 years ago. So long ago that when I took out our manual ice cream maker some white bits of it was slightly yellowing already! But I froze the base, made my youngest daughter J3 do the churning and it was still fine. This is great to make with the kids since they find it fun turning the crank at the same time making rich vanilla-y ice cream. It was yummy!
As for the cooking, the only thing I found hard - actually tricky - is the making of the custard. You have to set the heat to low and have to really constantly stir or you will have big lumps. I momentarily left the custard on the stove (just a few seconds) to attend to something urgent in the sink and believe me I got tiny lumpings in it. So I stirred like mad but it never went away. But when I combined it with the cream and churned it, not a sight of the even the tiniest lumps was seen. :sigh of relief: All well and good. :)
Vanilla Ice Cream
4 egg yolks
250 ml [1 cup] milk
250 ml [1 cup] double cream (heavy cream)
100 g [1/2 cup] golden caster sugar (superfine sugar)
1 1/2 tsp vanilla extract
- Combine the egg yolks with the sugar in a bowl, set aside.
- In a heavy bottomed saucepan, bring to boil the milk slowly. Once bubbles start to appear along the edges, pour about 1/4 cup of the hot milk in the egg mixture while stirring.
- Then pour the mixture slowly back in the saucepan with the rest of the milk while *constantly* stirring. Cook on low heat until it thickens (a film of the sauce will form at the back of the spoon). *Do not let it boil* or it will curdle. Remove from heat and cool completely. (This is the custard base that you can use with any flavouring you like for ice creams.)
- Once cool, fold in the cream and vanilla. Churn in your ice cream maker following manufacturer's instructions.
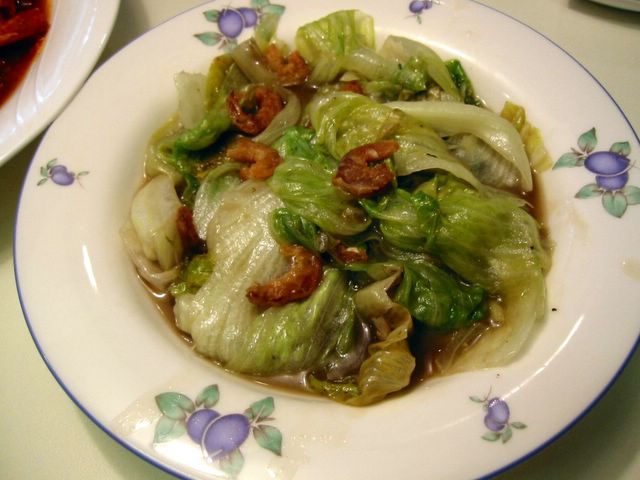
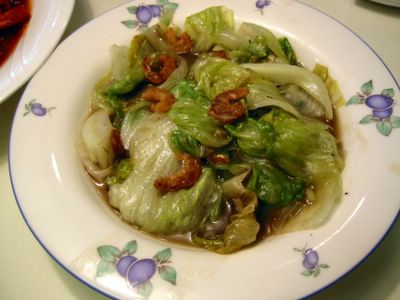 I wanted some gulay (vegetables) to go with the meat dish we have that night. But at the time our fridge was not exactly heaving with veggies in fact all we got was some leftover iceberg lettuce. I didn't want to munch on cold salad *again* so stir frying seems to be the way to go. Huang Su-Huei's Chinese Cuisine cookbook gave me the base recipe to adapt for this dish.
Stir Fried Iceberg Lettuce
I wanted some gulay (vegetables) to go with the meat dish we have that night. But at the time our fridge was not exactly heaving with veggies in fact all we got was some leftover iceberg lettuce. I didn't want to munch on cold salad *again* so stir frying seems to be the way to go. Huang Su-Huei's Chinese Cuisine cookbook gave me the base recipe to adapt for this dish.
Stir Fried Iceberg Lettuce
2 Tbsp oil
2 Tbsp dried shrimps (hibe)
1/2 tsp salt
freshly milled black pepper
1 cup stock
1 Tbsp cornstarch
1 green onion - cut into 1-inch pieces
500 g iceberg lettuce - wash and torn into large pieces
- Mix stock, salt, black pepper, cornstarch in a bowl. Set aside.
- Soak dried shrimps for 30 minutes or until soft. Drain and set aside.
- Heat oil in a wok until smoking hot. Stir fry green onions until aromatic.
- Add shrimps, cook for about half a minute; then add lettuce and cook in high heat until limp.
- Add stock mixture and cook until thick. Serve.
It never dawned on me when we decided 2 weeks ago on this month's theme of Lasang Pinoy that not only food bloggers would participate but even mother nature would seemingly display her power to set the scene. As you may know by now, several southern states in America - most especially the city of New Orleans - have been devastated by hurricane Katrina. As horrifying the news images can be, we'd like to take this opportunity to appeal for your generosity to please donate cash, blood, or otherwise to the victims of this disaster. No need to play the blame game and finger pointing right now. Let's try to help the victims of this disaster as much as we can. The Guardian has a newsblog that lists a number of charities that accepts donations. Other trusted agencies where you can make a donation are as follows:
American Red Cross or via Yahoo
British Red Cross
Catholic Relief Services
Or better yet donate in your local charities.
Now, let's get on with blogging ... this month's Lasang Pinoy theme is food you associate with typhoons, hurricanes, or storms.
 The Philippines' wet season (June-October) is synonymous with typhoons. Average of 19 of these severe storms hit the country usually originating in the vicinity of Caroline Islands in the Pacific Ocean. So many typhoons in fact, that it has been an indelible part of most Filipino's way of life. I say 'most' because not all of the whole archipelago experience the same weather at the same time. The southern region of Mindanao, for example, do not have as much typhoons as compared to the Eastern Visayas and Luzon region. A good backgrounder on the Philippines' climate and seasons can be found in Pagasa and Food and Agriculture Organization websites.
Because of the yearly deluge, Filipinos are used to adversity brought on by it so coping with natural disasters is nothing new as it gets exercised every year. The general mood after one too many in this disaster prone country is that - yes it's a tragedy, yes it's a shame on what we have lost, but life must go on and Pinoys pick up the pieces right after and try to rebuild each and everytime. No wonder one of the Pinoy's characteristics is the ability to cope with pain and hardship. And be pliant like a bamboo swaying and bending with the whatever the winds of fate brings.
 Typhoons and storms may mean high winds, deluge of rain, floods, and consequently devastation. However, it can also conjure up memories of feeling of closeness and warmth from the being cooped up inside the house, of silly games played to pass the time, of boys and girls sharing an umbrella, even of kids playing in the rain or worse(?) in the floods. And what food we had during those times! Body warming soups, hot boiled root crops, canned food, etc.
So you homework ;) now is to blog about Filipino food that you associate with typhoons, hurricanes, or storms. Try to remember what you served or have been served during a wind and rain-lashed night. Is it hot and soupy? Is it coming straight out of the can? Is it cold because there was no electricity/gas for the stove? Or maybe blog about food you have to eat to survive. Do indulge us with your 'typhoon specialties' and regale us with your stories.
Please send an email to lasang.pinoy@gmail.com with your:
Name
Blog Name & URL
Location
Blog post Permalink
on or before the 29th of September. I will be doing a round-up a few days later. If by chance you do not have a blog but wishes to participate, please email me you piece and photo (if you have one) and I will post it here. 'Hope you all will join us. :)
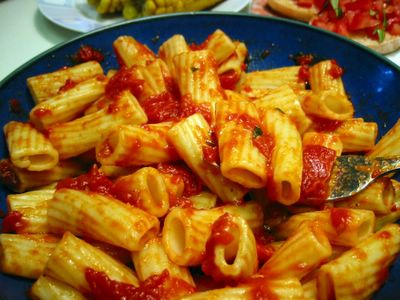 The name conjures up the meaning 'angry sauce' because of the hot chilli in it. Good way to use up tomatoes with just a little chilli - whether you use dried or fresh is alright. It's very easy, in fact, I'm discovering now a lot of these Italian pasta sauces are quite easy and fast to do. You'll just have to use fresh ingredients as much as possible to get the best flavour. Vegetarians or even vegans will like it as well with nary a sight of meat in it. A lot of Italian cookbooks advise not to serve with Parmesan cheese. I wonder why, because of the spiciness? Certainly when I had it I prefer it as it is, mopping up the sauce with some butter smeared warm crusty bread and a glass of red wine. Mmmm...
The Food of Italy cookbook provided the original material which I adapted.
Pasta Arrabbiata
1 1/2 Tbsp olive oil
1/2 Tbsp minced garlic
1 fresh birds eye chilli or 1/4 tsp dried chilli flakes (or to taste)
800 g canned chopped tomatoes or fresh tomatoes*
sea salt
2 Tbsp chopped fresh basil
500 g penne or rigatoni dried pasta
- Heat the olive oil in a saucepan or pot in low heat.
- Saute garlic and chillies until garlic is light golden brown. Keep the heat low to prevent the garlic from burning.
- Add the tomatoes and season with salt to taste.
- Simmer gently for about 30 minutes or until sauce is thick and rich.
- Meanwhile, cook the pasta according to package instructions until al dente. Drain and drizzle a little olive oil to prevent it from sticking to each other.
- Add the basil to the sauce and season again just before serving. Toss the pasta with the sauce and serve.
*Note: If using fresh tomatoes peel it first - lightly score the bottom of each tomatoes with two lines crossing each other. Blanch the tomatoes in hot water for about 30 seconds. Drain. By this time the tomatoes should be easier to peel, simply pull off skin from the bottom and all around.
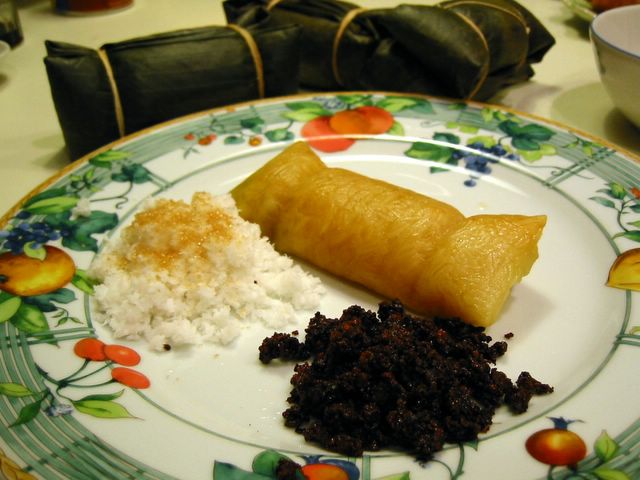
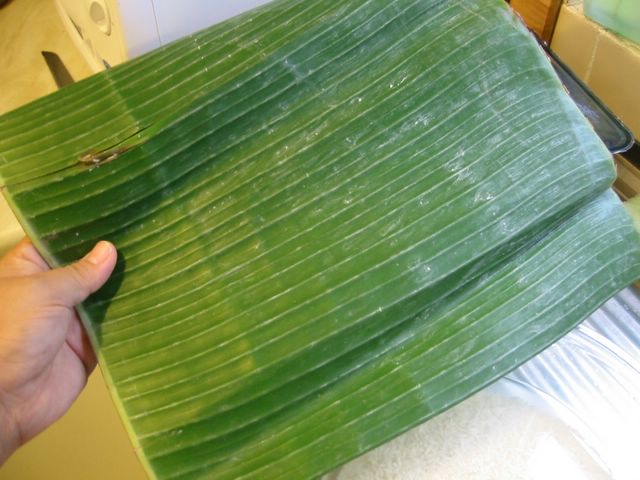
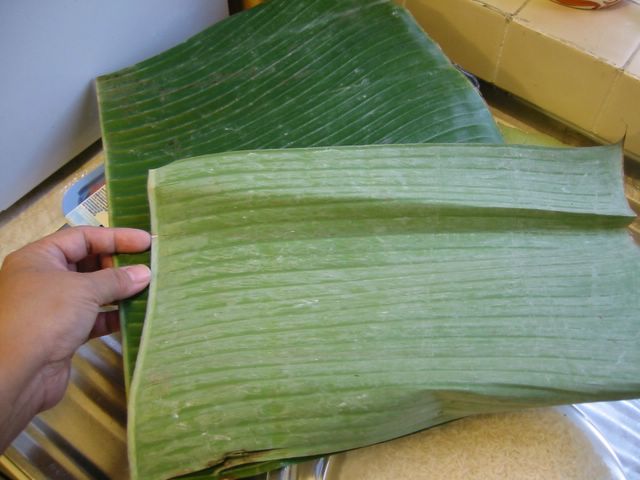
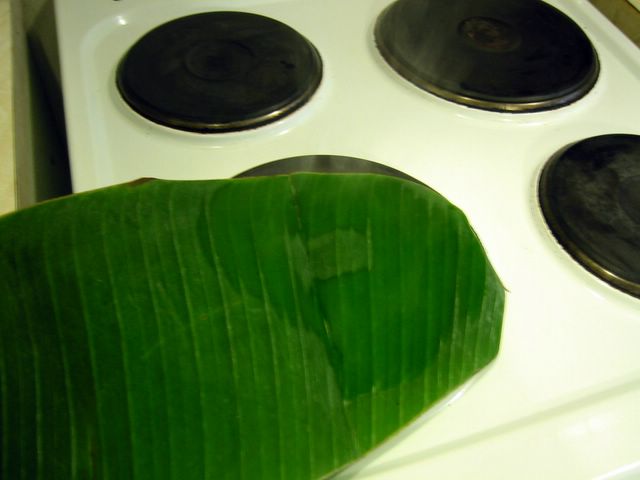
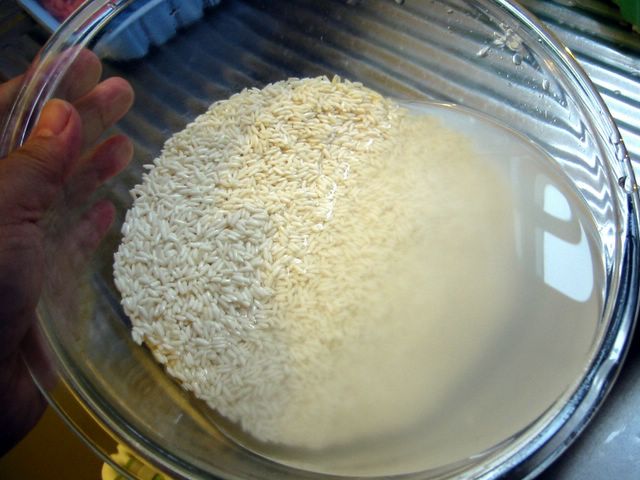 Soak the glutinous rice in water for about 1-2 hours.
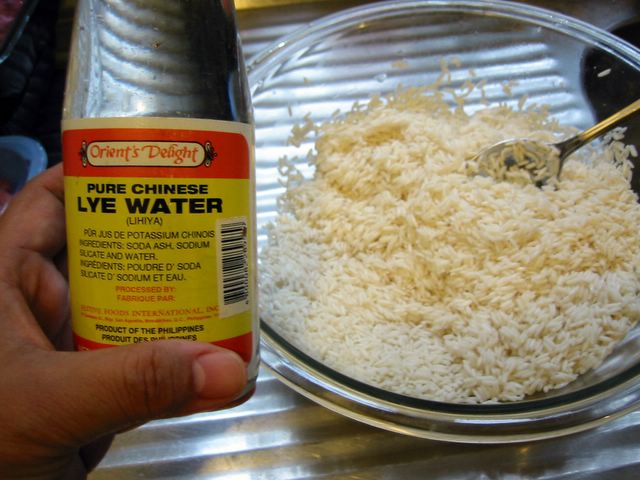 Drain and mix in the lye water. It should turn yellowish (this would depend on the strength of the lye water), if not add more lye water a little at a time until it turns yellowish. Mix well.
 Put the big sized leaf lengthwise on a working surface - topside down. Then put the smaller one on top of it - topside up and aligned either same as the bigger piece OR positioned with the one of the corners pointing to the narrow side of the bigger piece.
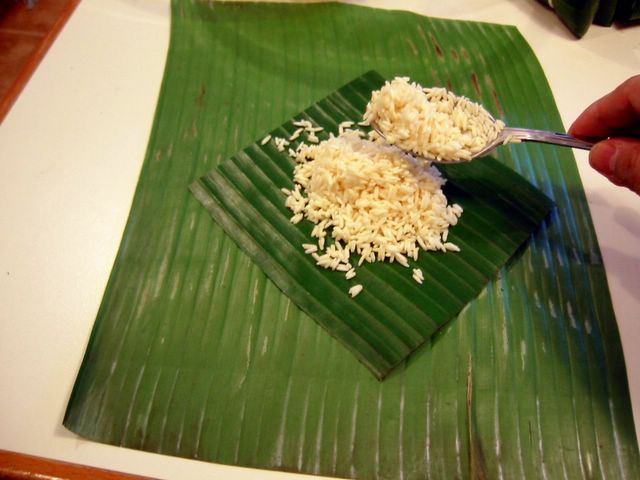 Place about 3 tablespoonfuls of the glutinous rice mixture on the smaller piece of leaf.
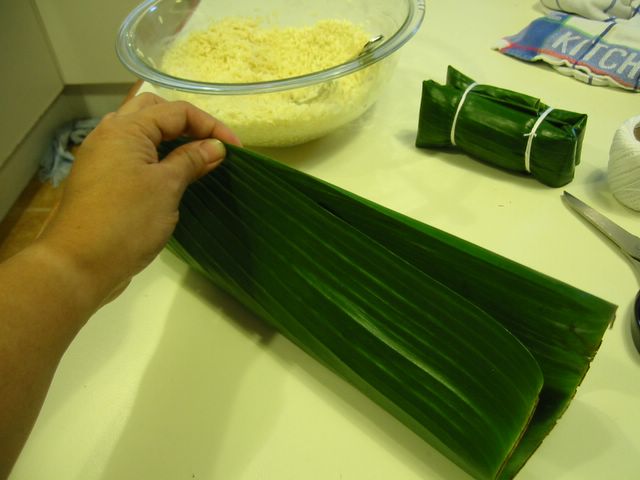 Grab the 2 long sides of the bigger piece and bring them together. Fold or roll that side to enclose the rice (about 3 half-inch folds). It is now long and narrow shaped.
 Fold about the lower 1/4 of the parcel towards the center.
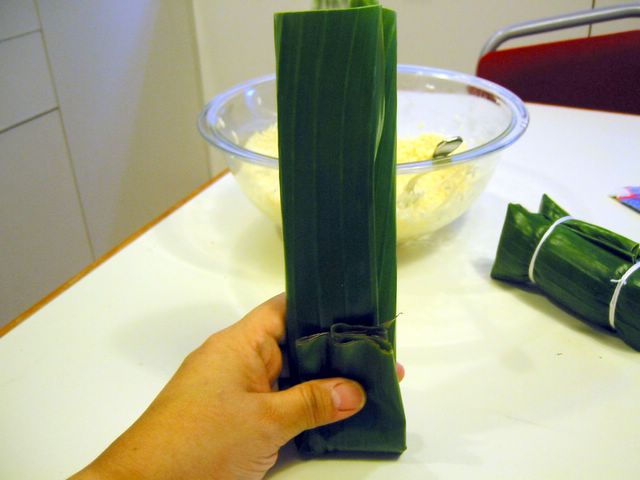 While firmly holding the folded end of the parcel, put it upright and tap it on the table to pack in the rice and if need be add more rice through the open end.
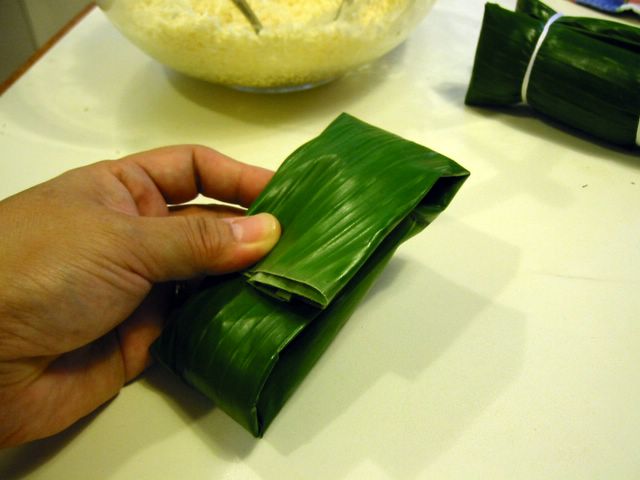 Fold the top end towards the center. You should have a parcel about 5 x 2-inches in size.
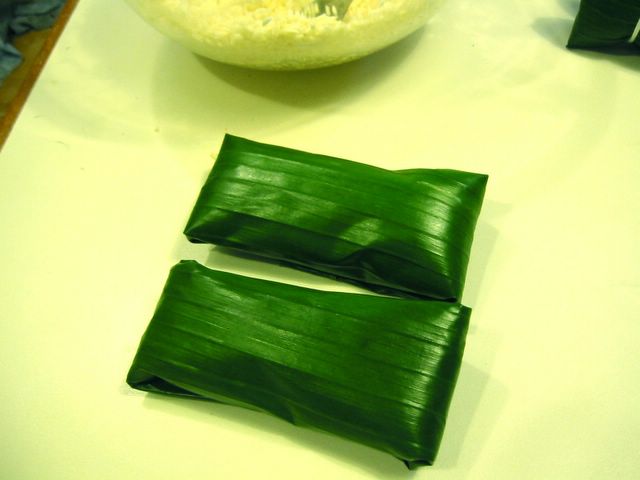 Make another suman parcel of roughly the same size.
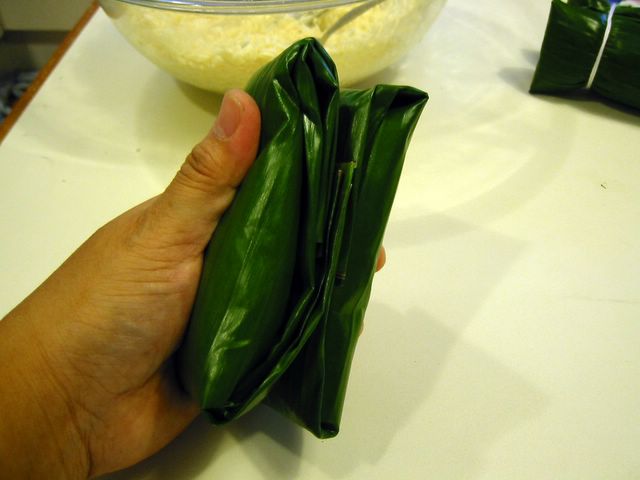 Pair these two parcels with the folded sides facing together.
 Using thin cotton strings, tie the two ends together tightly.
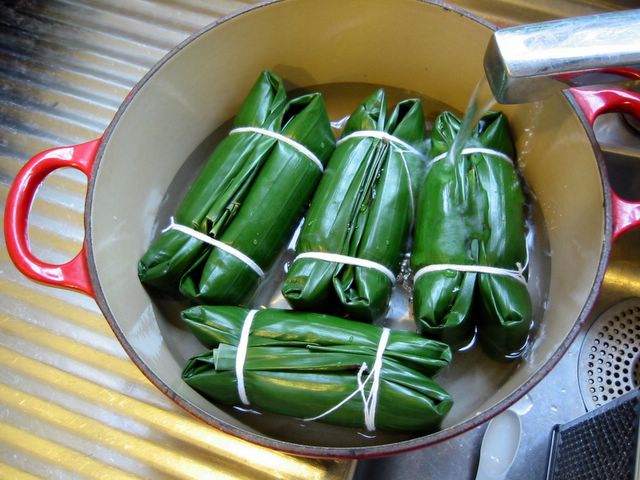 Place the assembled pieces in a big pot and add enough water to cover the suman.