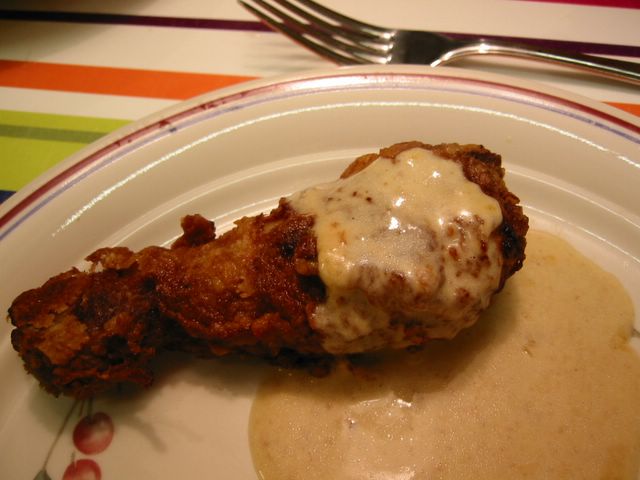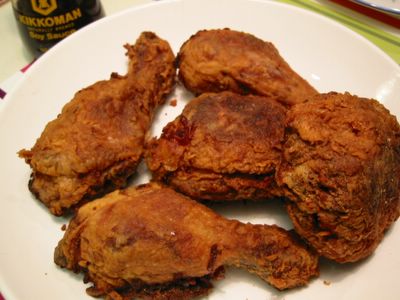
All descriptions I have heard or read about authentic Southern Fried Chicken were always in the superlatives. I emphasise 'authentic' there because we have these plethora of so called southern fried fast food pieces that they say do not bear much resemblance to the real thing. One of the list of my must do things in my foodie life is to have the real mccoy in the deep south of the US. I think Jmom can help me if ever I am there. ;) I gotta have a taste of the real thing and other southern specialties like grits, gumbo, corn fritters, etc. Meanwhile, I found a nifty recipe from Lesley Allin's Great American Food. She says that despite the variations to this dish, there a few rules that southern cooks adhere to. Among them is the use of a cast iron skillet and that the chicken is fried not deep fried. Curious to know that she also recommends using brown paper bags for draining to retain the crispiness instead of using paper towels. Now that I haven't tried before.
I followed her recipe and procedures (making some adjustments of course) for at least 3 times and I could say that it undeniably produced fried chicken with a very crispy outside but juicy inside. I also tried both lard and vegetable oils. Lard wins hands down in terms of taste. It was really yummy especially the gravy. But my golly, when I saw how it solidified in the pan after just a short time of cooling off I could almost feel my arteries constricting! Reluctantly, I have to let go of the lard to save my arteries from clogging. Maybe I'll have it like ... mmm ... once every year. ;)
Getting back to the crispiness, maybe it's to do with the buttermilk and the flour. There certainly wasn't any fancy ingredients in there. Maybe the cast iron skillet has something to do with it lending its even heating properties to the frying. The resulting fried chicken when eaten on its own is actually a bit bland because we only put 1 tsp salt for every cup of flour. However, when you have it with the gravy - pow wow brown cow! Super deeeelicious! Another peculiar thing I noticed here is the addition of the lemon juice in the gravy. I seriously thought it would ruin it or curdle it, but oh no it even brought out the creaminess of the gravy and gave a nice sour-salty taste. Yum! Oh drat, I drooled on my keyboard !! yaaah ...


Southern Fried Chicken
1 - 1.5 kg chicken - cut into serving pieces
250 - 500 ml (1-2 cups) buttermilk*
120 g (1 cup) plain flour
1 tsp fine salt
1/2 tsp freshly ground pepper
1/8 tsp cayenne pepper
Lard or vegetable oil for frying
4 smoked streaky bacon - chopped thinly
375 ml (1 1/2 cups) chicken stock
125 ml (1/2 cup) double cream (heavy cream)
1-2 Tbsp lemon juice
- Marinate the chicken pieces in the buttermilk for at least 2 hours or better if overnight. Let it come to room temperature before cooking.
- Mix flour, salt, pepper, and cayenne pepper in a plastic bag. Take the chicken, one at a time, from the buttermilk and put in the plastic bag with flour mixture. Twist the end of the bag to close and shake well to coat the chicken evenly. Repeat with all the chicken pieces. Set aside 2 Tbsp of the used seasoned flour.
- Heat 1/2-inch layer of lard or vegetable oil in a cast iron skillet/frying pan. Add in the bacon. Fry until crispy. Remove bacon and drain on paper towels; set aside.
- Add the flour-coated chicken in the hot fat putting the serving or presentation side down first. Do not crowd the chicken in the pan. Cover and cook in medium heat for 15 minutes.
- Remove cover and turn chicken with tongs. Do not use fork because it will pierce the meat and thereby lose its juiciness. Fry uncovered for a further 10-15 minutes. Take out the chicken from the pan and drain in a brown paper bag or on paper towels just make sure not to let them linger on the towels too long or it will go soggy.
- Drain all but 2 Tbsp of the oil from the frying pan leaving behind all the brown bits at the bottom. Add in the reserved 2 Tbsp seasoned flour. Cook until lightly browned. Add the stock, cream, and lemon juice and bring to boil while whisking constantly until sauce is smooth and thick. Taste and add more seasonings it necessary.
- You may add the crisp fried bacon to the gravy or sprinkle them over as a garnish if you wish. Serve with some mashed potatoes.
*Note: If you don't have any buttermilk, you can substitute with the following: for every cup of buttermilk, put in scant 1 cup of milk in a non-metal container then add 1 Tbsp vinegar or lemon juice to make 1 cup; do not stir, let stand and curdle for about 5-10 minutes.
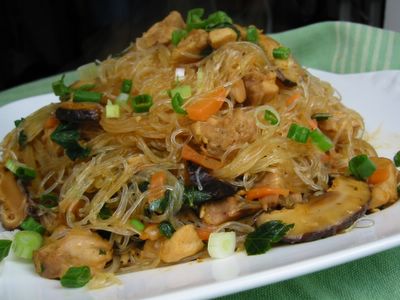
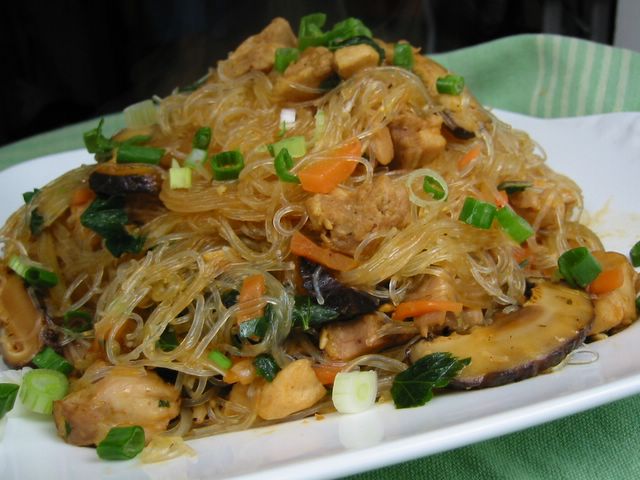
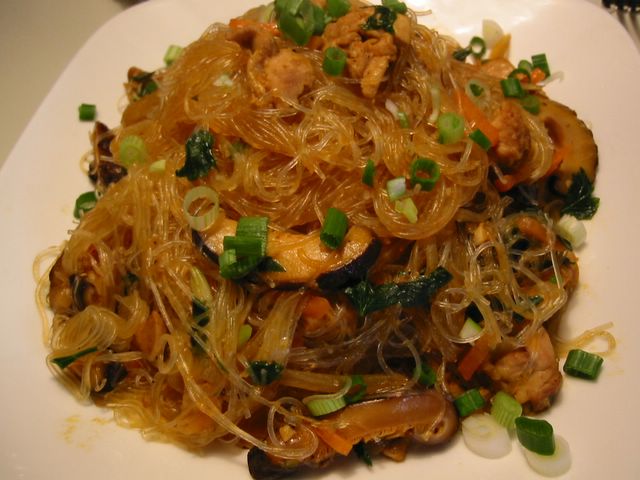
I swear this looks orange-coloured in person. I made sure to add enough colouring to make it passable for this month's IMBB. The orange-reddish tint in the noodles is courtesy of the natural food colouring from the annato seed. Also called achiote or achuete, it is a native of South America and has been used for centuries as source of red colouring for food, cosmetics, and body paints. The PinoyCook has a some more info and pictures of this essential cooking ingredient.
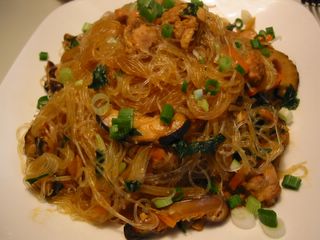
Okay just to be sure here's another picture of the dish to highlight its orange hue. ;) Why do I sound so insecure?
I've always enjoyed the monthly IMBB food blogging event. It always gets me on my toes and have me scouring the deep recesses of my brain (and my stomach) of what to cook up. Like this edition, which incidentally is currently hosted by Foodgoat, demands food of the orange hue. It got me thinking a whole host of food ranging from Ginisang Carrot to Ginisang Kalabasa (squash). Hehehe. Is that all I can think of - ginisa (sauteed)?? Seriously, I was planning on making orange-glazed sweet potato (kamote!) or pancit palabok. But decided on doing this since it's not often that my family have this for lunch.
Sotanghon is the Filipino name for glass noodle (also bean thread noodles). While 'gisado' mean sauteed. Some people call this dish just Sotanghon but then they also call another soupy dish with this type of noodles of the same name. So I decided to append the 'Gisado' to indicate that it's cooked similar to that popular Pancit Bihon Gisado. Of paramount importance here is the quality of your chicken stock because the noodles will absorb it all and will therefore reflect its quality. If you can't or don't have time to make your own stock, local supermarkets usually have fresh meat or vegetable stocks in the chilled shelves. Otherwise, I recommend the Kallo brand of stock cubes - they do both organic and non-organic varieties.
Sotanghon Gisado
500 g boneless chicken meat - sliced into 1/2-inch pieces
200 g sotanghon (beanthread or glass noodles)
2 Tbsp oil
1 Tbsp minced garlic
1 medium onion - sliced
1 Tbsp patis (fish sauce)
2 1/2 cups chicken stock + 1/4 cup extra
4 dried shiitake mushrooms (or woodears/black fungus)
1/2 cup julienned carrots
1/4 cup chopped Chinese parsley or kinchay (or flatleaf parsley)
1 Tbsp annatto seeds or 1/2 tsp annatto powder (also called achuete or achiote)
1/3 cup hot water
2 green onions - chopped
salt and pepper to taste
- Soak sotanghon in water until soft (about 20 minutes). Drain and cut into desired lengths.
- Mix annatto seeds with the 1/3 cup hot water. Let stand for about 20 minutes. Mix and mash with fingers to extract red dye from the annatto and mix in with the water. Strain and discard annatto seeds. (If using annatto powder, just mix it with the water.)
- Pour enough hot water on the dried shiitake mushrooms enough to cover it. Soak for 20 minutes or until soft. Drain and squeeze excess water from mushrooms. Cut off stems and discard. Slice mushrooms thinly.
- Heat oil in a wok. Saute garlic and onion.
- Add chicken meat and patis; saute for awhile.
- Add 1/4 cup chicken stock and simmer in medium heat until chicken is just cooked (about 10-15 minutes). Let it dry out a little.
- Add chicken stock and annatto water; bring to boil. Stir in carrots, mushrooms and parsley. Simmer for 3-4 minutes.
- Add in sotanghon noodles, mix well and cook for another 2-3 minutes or until noodles is soft and cooked through. Put in salt and pepper according to your taste. Garnish with chopped green onions. Dish up and serve. (There will be some sauce left at this end stage. Don't worry, it will all be absorbed by the noodles as it cools down.)
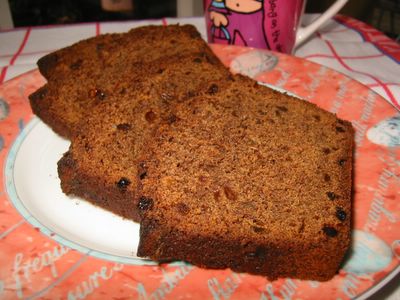
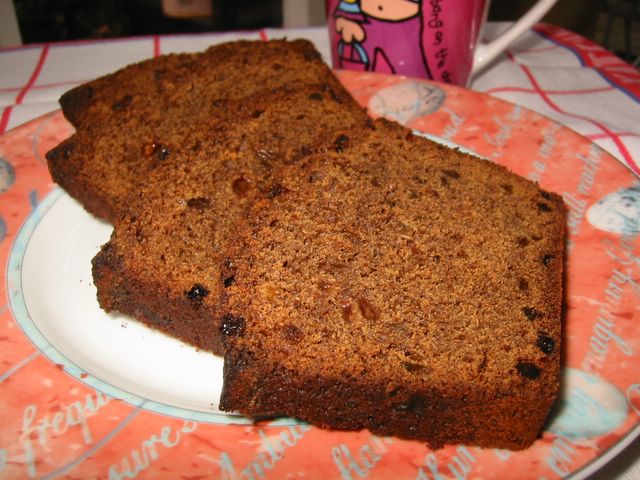
My 4-year-old daughter was jumping with joy when I told her I was making gingerbread. She thought people-shaped cookies would come out of the oven. I had to explain that it's gonna be as name implied - a bread. Good thing she 'helped' me in the baking nonetheless. First time for me to create this dark, smoky, rich bread. I actually was not very hopeful of a good outcome but other than the slightly burnt crust it was great. Admittedly the taste's not for everyone though my friends loved it. It's not very sweet and the tiny morsels of sultanas and ginger provides islands of pleasing jelly-like sugary nuggets. Brian Turner's Favourite British Recipes cookbook (where I adapted this recipe) suggested that it's very good served with vanilla ice cream or whipped cream and indeed it is!
Oh by the way, before I forget this is my entry to the Sugar High Friday #7 - the food blogging event currently hosted by Derrick of Obesssion with Food. Theme for this edition is molasses. Derrick said we could substitute treacle and thank god for that 'coz molasses is not very common in the supermarkets of this island. The ones I often come across is black treacle which I thought was just the British name for molasses. But I found out that technically there is a difference. See, molasses is created from the drainings of raw sugar during refining while treacle is obtained from syrup made from the sugar (whatever that means). A good website explaining this is in here.
Gingerbread
115 g unsalted butter - softened (scant 1/2 cup)
225 g plain flour (1 2/3 cup)
115 g golden caster sugar (1/2 cup)
2 eggs - beaten
225 g black treacle, lightly warmed (1/2 cup + 2 Tbsp)
55 g sultanas - finely chopped (1/3 cup)
85 g preserved ginger - finely chopped (1/3 cup)
2 tsp ground ginger
2 Tbsp double cream (heavy cream)
1/2 tsp bicarbonate of soda (baking soda)
- Butter and flour well a 2 lb (9 x 5-inch) loaf pan. Preheat oven to 160°C/fan 140°C/325°F/Gas Mark 3.
- Cream (beat) butter and sugar in a bowl.
- Mix in eggs, black treacle, sultanas, and preserved ginger.
- Stir in the flour and ground ginger.
- Warm the cream slightly then add in the bicarbonate of soda and mix into the flour mixture.
- Pour into the loaf pan and bake in the oven for 1 1/2 hours. Cover top with foil halfway through if it is browning too much.
- Remove from oven and leave to cool in the pan. Turn out into a serving plate. Serve slices with ice cream or whipped cream.
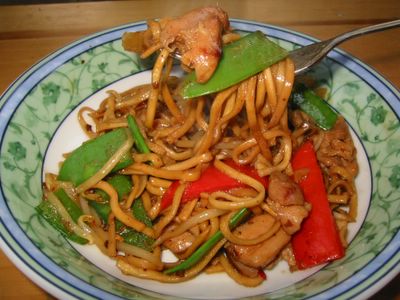
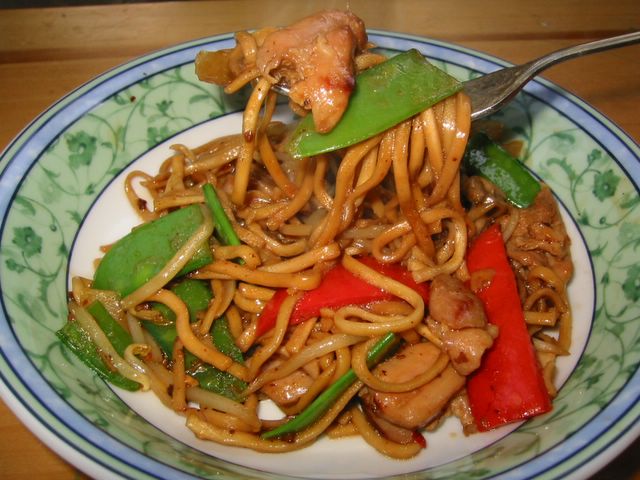
Here's a chicken chow mein with a twist. I find marinating the meat in satay sauce gives it a bit of a bite and a nice rich taste. I've been doing this for years but always forget to write down my adjustment to the recipe in the Australian Women's Weekly Chinese Cooking Class cookbook. Finally nailed it down this week when my kids requested some 'noodle thingie'. The originally recipe is too salty to our taste so I have to tone it down considerably plus we wanted more noodles than meat so that one was reduced as well. Easy to make and I'm sure would go down well with the family.
Chicken Satay Chow Mein
350 g boneless chicken meat - cut into about 3/4-inch pieces
2 Tbsp oil
*Marinade:
1 Tbsp soy sauce
1 tsp chilli sauce [optional]
1 Tbsp cooking wine
1 1/2 Tbsp bottled satay sauce
*Noodles:
250 g egg noodles
1 Tbsp oil [optional]
*Vegetables:
1 Tbsp oil
1 medium onion - sliced
1/2 Tbsp minced garlic
125 g small mushrooms - sliced
1/2 red bell pepper - sliced
125 g mangetout (sitcharo) - topped and tailed
125 g bean sprouts (togue)
*Sauce:
1 tsp sugar
2 tsp cornstarch
1/2 cup chicken stock
1 Tbsp cooking wine
1 1/2 Tbsp oyster sauce
1 Tbsp soy sauce
- Mix sliced chicken and all marinade ingredients in a container. Marinate in the fridge for at least 1 hour.
- Cook egg noodles in boiling water according to the package instructions. Stir fry noodles briefly in 1 Tbsp of oil and dish up in a serving plate OR just toss the noodles with 1 Tbsp oil and put in a serving plate.
- In another bowl combine all ingredients for the sauce. Set aside.
- Heat 2 Tbsp oil in a wok. Fry chicken with the marinade until thoroughly cooked (about 10 minutes). Push to one side of the wok.
- Saute garlic and onion in the wok until aromatic.
- Add in mushrooms, mangetout, and bell pepper. Stir fry for a few seconds.
- Mix in the chicken and stir fry for about 2-3 minutes.
- Add bean sprouts, stir fry for about 1 minute.
- Stir in the sauce and bring to boil until thick. Give it a stir for a few seconds. Dish up and pour on top of the cooked noodles.
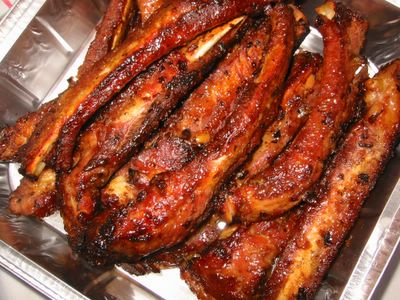
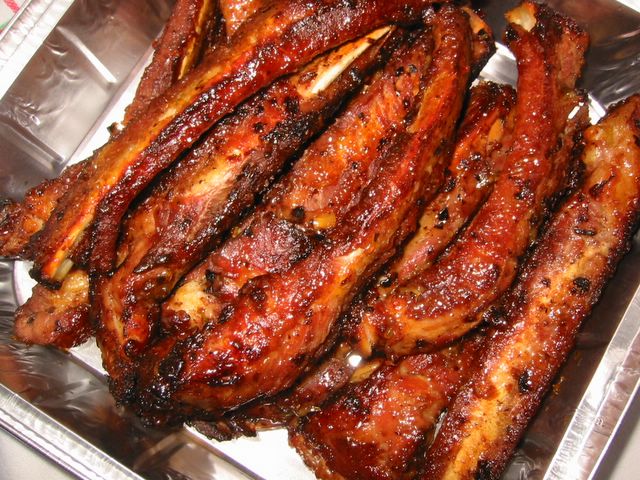
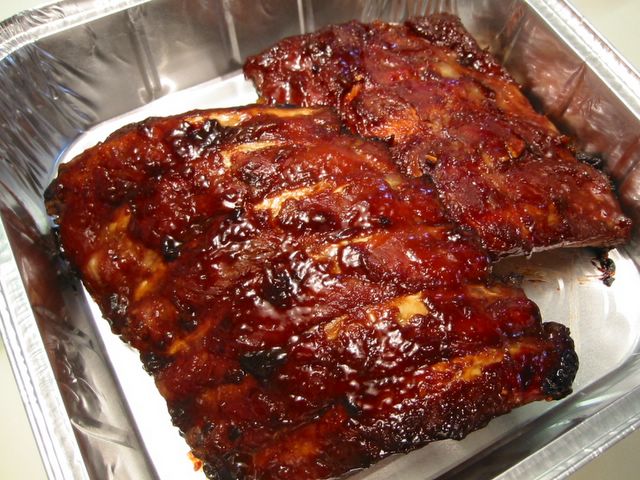
Until I can take a better picture of a better cut of ribs for this post, we'll have to bear the pathetic looking ribs above. Though mind you, it sold out very fast when I took it to a friend's party. The meat cut most suitable for this is meaty pork ribs preferably with the skin still on. The day I made this I was in a panic because I can't find the right cut so I had to make do with these spare ribs from the supermarket.
I love the tangy-sweetish taste the plum sauce imparts and the hint of spiciness from the chilli sauce. The recipe is good also for barbecues or oven grills. You just have to oven bake it first to tenderise and thoroughly cook the meat then brown it in the barbecue or grill. That's now my standard cooking method for ribs ever since I read it from an American cookbook. This one, however, is adapted from the Australian Women's Weekly's Chinese Cooking Class cookbook.
Pork Ribs with Chilli Plum Sauce
750 g meaty pork ribs
1 Tbsp oyster sauce
2 Tbsp cooking wine (dry sherry or rice wine)
1 Tbsp soy sauce
1 Tbsp fermented black beans
1 1/2 tsp five spice powder
1/4 tsp ground black pepper
1/4 tsp salt
*Chilli Plum Sauce:
3/4 cup bottled plum sauce
1/2 tsp chilli sauce
2 tsp oil
1 clove garlic - minced
1/2 tsp grated ginger
2 shallots (sibuyas tagalog) - chopped
1/3 cup stock
2 tsp soy sauce
2 tsp cornflour
*For the Chilli Plum Sauce:
- In a saucepan, heat oil and saute garlic, ginger, and shallots. Cook over gentle heat for 1 minute.
- Remove from heat. Add plum sauce and chilli sauce. Mix until combined.
- Add combined water, crumbled stock cube, soy sauce, and cornflour.
- Return saucepan to heat. Stir until sauce boils and thickens. Remove from heat and set aside.
*For the pork ribs:
- Preheat oven to 200°C/fan 180°C/400°F. Cover black beans with water and soak for 15 minutes. Drain, mash with fork.
- In a bowl combine oyster sauce, cooking wine, soy sauce, mashed black beans, five spice powder, salt and pepper.
- Coat (or dip) each rib with black bean mixture. Put in a large baking pan, cover tightly with foil and bake for 1 hour or until fork tender. Turn ribs halfway through the baking.
- Remove foil and brush ribs with plum sauce. Return to oven and bake for another 25-30 minutes; turning the ribs halfway through. Or instead of baking further, grill in a barbecue until golden brown. Serve with remaining sauce.
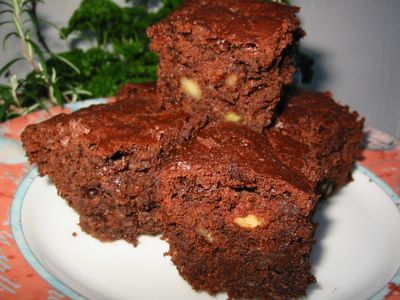
Another brownie recipe. Blame the bananas. My abhorrence to throwing away overripe bananas from our fruit basket has led me to look for alternative uses to it all the time. Any new recipes are welcome. If the family loves it, it will become a classic to come back to over and over again. Otherwise, it's been nice trying them. This one is something of a delightful surprise whose taste, texture, and smell I truly truly love. The banana gives a wonderful aroma blended with the characteristic wonderful whiff of the chocolate while the muscovado sugar lends a treacle-like flavour. My kids though, find the flavours a bit too strong. For their benefit (maybe just maybe), next time I bake this I have to reduce the chocs and probably the sugar. But if you like your brownies very chocolatey, a little fudgy, crumbly, and quite moist then this is for you.
Adapted from BBC GoodFood Magazine's 101 Cakes & Bakes.
Banana Nut Brownies
175 g butter - cut into pieces
300 g [1 2/3 cups firmly packed] light muscovado sugar
150 g dark chocolate - broken into pieces
100 g [3/4 cup] nuts - chopped
3 eggs - beaten
1 cup mashed bananas (about 2-3 bananas)
100 g [3/4 cup] self-raising flour
1 Tbsp cocoa powder [optional]
1/2 tsp baking powder
- Preheat the oven to 180C/fan 160C/350F/gas mark 4. Butter and line a 7 x 11-inch baking pan with greaseproof paper.
- Melt butter, chocolate, and sugar in a heatproof bowl over a saucepan of simmering water. Remove from heat.
- Sift flour, cocoa [optional], and baking powder in a separate bowl. Mix well.
- Add in nuts, mashed banana, and eggs to the chocolate mixture.
- Fold in the flour mixture to the chocolate-banana mixture.
- Pour batter into the lined baking pan and bake for 40 minutes or until firm in the centre.
- Cool in the pan; turn out and cut into squares.
*Update 26/05/07: Reduced chocolate from 175 gm to 150 gm. Reduced baking powder from 1 tsp to 1/2 tsp. Increased baking time from 35 mins. to 40 mins.
Have you seen a Spotted Dick? How about eating a Faggot?
Before you say - "Eeewwww!!" - take a look first what I'm talking about ... click here.

I picked this in that magazine for the main reason that it has few ingredients and does not involve the oven. Whenever I bring this dish to parties, it's always sold out especially among kids. The decoration always brings oohs and ahhhs, never fails to impress. It's very easy to do and assemble so don't be intimidated by how good it looks. I have to thank Susan Aliano of Glen Rock, NJ, the reader who contributed this recipe to the Good Housekeeping magazine, for thinking of this marvellous combination of flavours. Enjoy!
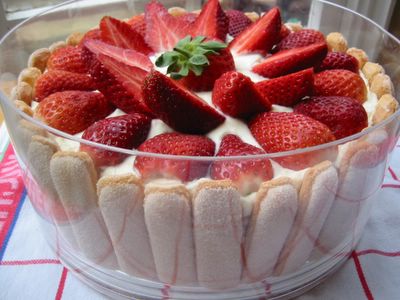
Citrus Trifle
2 large lemons
1 large orange
500 g [2 cups] cream cheese - room temperature
2 cups icing sugar (confectioner's)
2 tsp orange or lemon extract
875 ml [3 1/2 cups] whipping or double cream
1.5 x 175g packages sponge finger biscuits (ladyfingers or savoiardi)
about 3 1/2 cups fresh strawberries
- Squeeze lemon juice and strain into a bowl. Grate orange peel and (optional) squeeze juice; set aside in a separate bowl.
- In a large bowl, with mixer at low speed, beat cream cheese, icing sugar, orange extract, lemon juice and grated orange peel until blended.
- In another bowl, with mixer at medium speed, beat whipping cream until stiff peaks form. Fold whipped cream into the cream cheese mixture with a rubber spatula.
- [Optional] Brush flat side of the sponge fingers with orange juice.
- Line bottom and side of a glass souffle dish or trifle bowl with half the sponge fingers so that the rounded sides are against the side of the bowl.
- Spoon the cream cheese filling into it. Level the top flat.
- To garnish the top of trifle, put 1 unsliced stawberry on the center of trifle. Remove stems and slice remaining strawberries lengthwise in half. Arrange half the strawberries cut-side down around the edge of the the bowl. Arrange the remaining strawberries cut-side up. Refrigerate trifle at least 2 hours to blend flavours.
- Serve with large spoon and scoop serving portions onto dessert plates.
Note: The flavour improves when the filling is allowed to blend overnight. So after step 3 you can put it in the fridge overnight and assemble the trifle the next day.
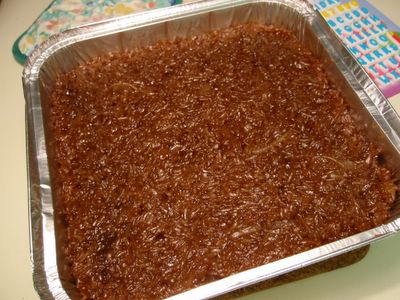
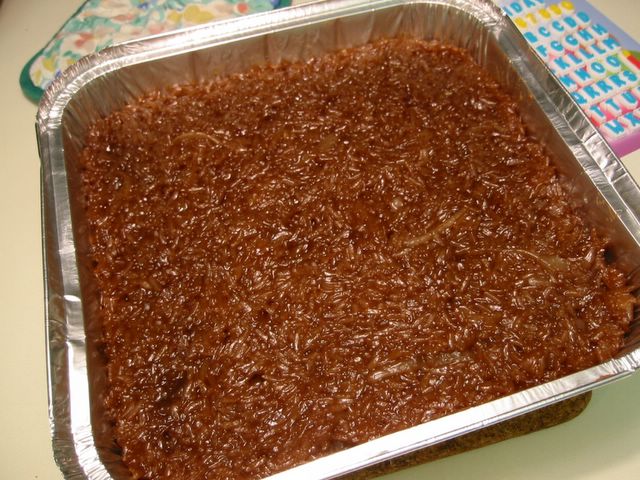
Traditional biko in the Philippines consists of malagkit (glutinous) rice, coconut milk, sugar, and usually mashed cooked ube (purple yam). Whenever cooking the biko is suggested you could always hear the collective sighs of cooks nearby. For it is quite hard to do with the constant mixing and stirring involved to prevent the bottom from scorching until the malagkit is thoroughly cooked. It was a major undertaking each time biko is cooked. However, I heard that my aunt - Ate Letty - pre-cooks the malagkit to cut down the cooking time drastically and to have a more even consistency of the malagkit. Great idea, I thought and promptly forgot about it for years until I started making this.
In our gatherings among friends in North London, we would always watch out for Gemma G's biko. It is almost always sold out at the end of the party and people would include it in their take home bags everytime. I love the treacly-molasses like taste with just enough sweetness blended in. Gemma was gracious enough to give me the recipe though my first attempts were utter disasters. This is one of those things with very few ingredients but is quite tricky to make. If you're like me and your timing is off you either have a mushy, soft, overcooked biko or a hard, gritty one. Both not nice to have. The grains has to be whole and firm but cooked through something like an al dente pasta or a properly made Italian risotto or Spanish Paella. That is the goal of the whole exercise. So it is important that the malagkit is cooked or rather half-cooked, if not it will become mushy once you are done mixing it up with the sauce. Like most dishes I have in this blog, the ingredients here are borne out of what is available in the UK supermarkets. Therefore mashed ube is out and muscovado sugar is in. I must stress that you should use the latter to achieve that scrumptious taste. If not available, use grated panucha or if absolutely desperate use dark brown sugar. Good luck!
Biko Macapuno
6 rice cooker cups malagkit (glutinous rice)
5 rice cooker cups water
3 x 400 g cans coconut milk
500 g muscovado sugar
1 x 340 g [12oz] bottle of sweetened macapuno (mutant coconut)
- Half-cook 6 cups of malagkit in a rice cooker using only 5 cups of water. As soon as the rice cooker switches from 'Cook' to 'Keep Warm' unplug it to prevent the malagkit from further cooking.
- Pre-heat oven to 190C/fan 170C/375F/Gas Mark 5.
- In a wok or big frying pan, boil the coconut milk. Add the muscovado sugar, stir to dissolve and bring to boil. Add in the sweetened macapuno (including the syrup). Bring to boil again and lower heat. Simmer until thick - about 5-10 minutes.
- Add all the half-cooked malagkit to the wok and stir to mix well.
- Cook on medium-low heat while stirring from time to time until the malagkit is fully cooked (but not mushy and too soft) and the sauce has thickened and covers/clings to the malagkit grains well - about 10-15 minutes.
- Transfer to a baking dish; pat level. Put in the oven for about 5 minutes or just enough to dry out the top a little. Cut into squares and serve warm or cold.
[Optional] Although in my opinion this does not need any more garnishings, you may add the traditional topping for biko - the latik.
*To make latik: Boil a can or two of coconut milk in a heavy-bottomed pan. Add a pinch of salt and (optional) a tablespoon of sugar. Lower heat and simmer until the coconut renders fat and sediment sticks to the bottom of the pan. Once the oil renders and separates from the sediment, stir it frequently to keep it from burning. When the sediment becomes dark brown, remove from heat, drain the oil and scrape off the sediment. This sediment is now your "latik". Put about a 1/2 tsp mound of the latik on top of each of the biko squares. The coconut oil can be used for other dishes or as a natural body and hair moisturiser - but that's a whole different topic.
Variation: Add slices of sweetened langka (jackfruit) to the sauce together with the macapuno. This will make the biko more aromatic.
Note: A rice cooker cup is equivalent to about 2/3 cups.
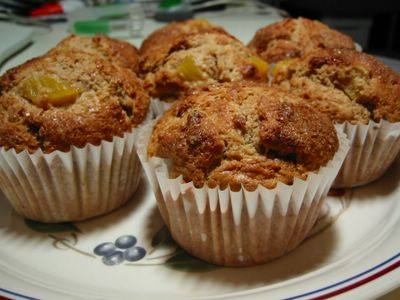
There are times when you encounter a recipe that looks innocuous, plain, and relatively bland. However, you get surprised with the result's amazing aroma, moist consistency, and scrumptious taste. I was in baking bliss when I took these muffins out of the oven. Quite unpredictably, it exceeded all my expectations. I love the slightly burnt/toasted smell of the sugar sprinkled on top, the aroma of the whole wheat flour baking, the nice tang of morsels of peaches inside. It is also here in this recipe that I learned about keeping the muffins moist by half filling one or two of the muffin cups with water. I love it so much that I gave most of it away otherwise I would be scoffing down every single one of them. :sigh: Baking highs and dieting blues.
This is from the The Genuine American Cookie & Muffin Book by Peter Shaffer.
Peachy Yoghurt Muffin
225 g [8 oz] plain flour
115 g [4 oz] wholemeal plain flour
1 Tbsp baking powder
1/2 tsp bicarbonate of soda (baking soda)
1/2 tsp fine salt
1/2 tsp ground cinnamon
2 large eggs - beaten
240 ml plain natural yoghurt or sour cream
85 g butter - melted
3 Tbsp honey
85 g dark brown sugar
1 tsp vanilla
175 g fresh or canned ripe peaches - peeled (or drained) and chopped
- Preheat oven to 200°C/fan 180°C/400°F/Gas Mark 6. Prepare a 12 cup muffin pan (2 1/2-inch holes) by lining 10 or 11 of the cups with paper liners.
- Mix all dry ingredients in a bowl (flour, wholemeal flour, baking powder, bicarbonate of soda, salt, and ground cinnamon).
- In another bowl mix eggs, yoghurt, butter, honey, brown sugar, and vanilla. Add in the peaches and mix.
- Gradually fold wet ingredients into the dry ingredients. Fold in with a large wooden spoon or rubber spatula until combined. Do not over mix.
- Spoon batter into 10 (or 11) of the 12 prepared muffin cups up. Fill each cup up to 3/4 full. Fill remaining empty cups half full with water to avoid burning the muffin pan and give moisture while baking.
- Sprinkle tops with granulated sugar and bake for 18 to 20 minutes or until tops spring back when gently touched. Do not overbake. Allow to stand for 2 minutes, turn out on wire rack or plate to cool.
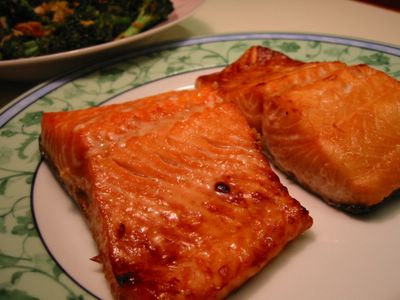
Boredom is the mother of variation - that's according to me. ;) We love grilled salmon but so far we only do it one way. And I'm ready to give a go on some other flavours. Years ago I did a grilled salmon recipe that involves putting some kind of gremolata on top with lots of garlic, pesto, and I think sun-dried tomatoes. It was fab! Unfortunately I've lost my copy so my search is on for that award-winning recipe. Meanwhile, last night I have to prepare my meal in a hurry. Here comes Delia Smith's recipe of Teriyaki Salmon to the rescue though I have to change the measurement of practically every ingredient. But it's very simple and easy to make with the salmon coming out very nice golden brown. Yum!
Teriyaki Grilled Salmon
500 g salmon fillets
1/2 Tbsp minced garlic
1 Tbsp grated ginger
1/4 cup soy sauce
1/4 cup rice wine
2 tsp sugar
- Mix all ingredients, except the salmon, in a shallow dish. Marinate salmon in this concoction for 1-2 hours in the fridge turning it once in a while.
- Preheat oven grill to the highest setting for 10 minutes.
- Spread a little oil on the grilling pan to be used and put under the grill until hot.
- Place salmon fillets skin side down on the pan and position about 3 inches under the grill. Cook for about 7-8 minutes. Dish up and serve.
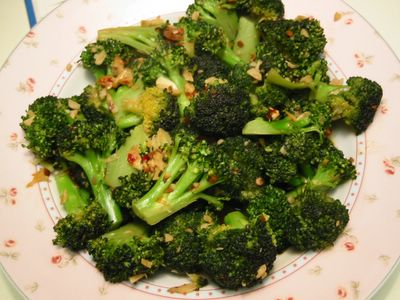
After all the sweet things I blogged earlier, it's about time I post here what I 'normally' eat. Vegetables for example. Usually I just steam them and have it with some meat - fish, pork, chicken, or beef. Other occasions when I have the time, I cook it a different way to relieve boredom or just for the heck of it, like this one. I adapted it from Ken Hom's Hot Wok cookbook. Very few ingredients, easy to make and not salty so I didn't have to reduce Ken Hom's salt ;) though I have to with the sesame oil.
It's important to blanch or steam the broccoli first to retain its firmness while stir frying and also to make sure that it gets cooked through. The plunging into cold water right after blanching/steaming is to stop the broccoli from cooking further preventing it from getting mushy later and to preserve its vibrant green colour.
Spicy Broccoli
450 g [1 lb] fresh broccoli - florets separated and stem peeled
1 Tbsp cooking oil
2 Tbsp minced garlic
1 tsp sea salt
1 tsp sugar
freshly ground black pepper
2 Tbsp cooking wine (rice wine or dry sherry)
1 Tbsp chilli bean sauce
2-3 Tbsp hot water
1 tsp sesame oil
- Mix cooking wine, sea salt, sugar, pepper in a small bowl. Set aside.
- Steam or simmer the broccoli pieces in a saucepan of boiling water for about 2-3 minutes. Drain and then plunge into a bowl of ice cold water for about 30 seconds. Drain again thoroughly.
- Heat a wok over high heat until hot. Add oil and when it is very hot and smoking, stir fry garlic and chilli bean sauce briefly.
- Add in the cooking wine mixture and broccoli. If it is getting a bit dry, add in a few tablespoon of hot water at a time. Stir fry for about 4 minutes or until broccoli is cooked through or fork tender.
- Add the sesame oil and continue to stir fry for 30 seconds. Dish up and serve.

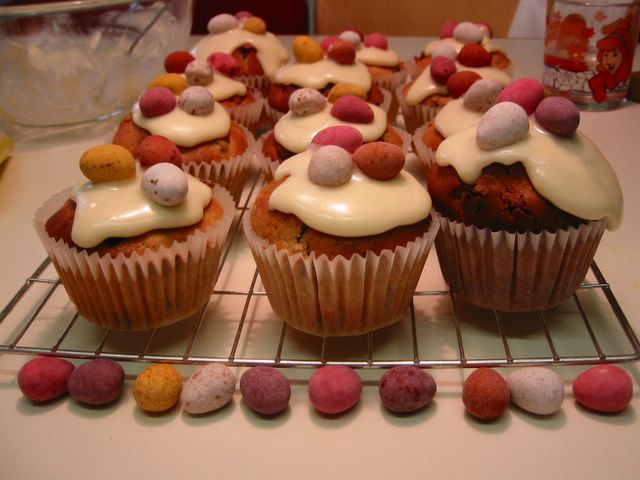
Savoury muffins were my intended entry to the 13th edition of Is My Blog Burning? food blogging event which this time is hosted by Makiko of Just Hungry. However, when I saw this in the book 101 Cakes & Bakes by BBC's Good Food magazine, I thought I just have to make these remembering that Easter is almost upon us and they would make good substitutes for those chocolate eggs kids get *every* year. My youngest (J3) and I had a blast making these especially when it came to putting the finishing touches - icings and mini eggs on top. This was one of the most enjoyable IMBB I had, not only were our creations sold out (kids were arguing on who gets to give to his/her friends) but the muffins were really good and scrumptious plus attractive, too.
One of the recent things I discovered, if you half fill one of the cups in the muffin pan with hot water, it will keep the inside of the muffins moist. The water keeps the air in the oven humid and prevents the pan from getting too hot.
The muffins are miniature simnel cakes. You know that rich, traditional (in the West) Easter cake made up of dried fruits and a layer of marzipan in the middle. The miniature versions have got that layer, too. J3 very much enjoyed rolling and flattening those marzipans probably as much as the excitement of waiting for the lot to come out of the oven. Try these they're really very good with a delectable taste of orange, raisins, currants, mixed spice, nutmeg, and almonds with a topping of mini chocolate eggs of course!
Simnel Muffins
250 g dried mixed fruits
grated zest and juice of 1 medium orange
175 g butter - softened
175 g [3/4 cup + 2 Tbsp] golden caster sugar
3 eggs - beaten
300 g [2 1/4 cup] self-raising flour*
1 tsp mixed spice
1/2 tsp nutmeg
5 Tbsp milk
175 g marzipan
*For Decorating:
200 g [1 3/4 cup] icing sugar
2 Tbsp orange juice
sugar eggs or sugar coated mini chocolate eggs
- Put the mixed dried fruits in a bowl with the orange zest and juice. Leave to soak for 1 hour.
- Preheat the oven to 180°C/fan 160°C/350°F/Gas Mark 4. Line 12 deep muffin pans with paper muffin cases.
- Beat together butter, sugar, eggs, and milk in a bowl. In another bowl mix the flour, nutmeg, and mixed spices. Add the flour mixture to the butter mixture and beat for about 3-4 minutes until light and fluffy. Stir in the fruits well.
- Half fill the muffin cases with the mixture.
- Divide the marzipan into 12 equal pieces, roll into balls, then flatten with your thumb. Put one in each muffin case and top with the rest of the mixture.
- Bake for 25-30 minutes, until risen, golden and firm to the touch. Remove and cool in racks completely.
- For the decoration: beat together the icing sugar and orange juice. Drizzle over the cooled muffins and top with a cluster of mini chocolate eggs.
Notes: *1 cup self-rasing flour = 1 cup plain flour + 1 1/2 tsp baking powder + 1/2 tsp salt.
For more moist muffins: line and put batter in only 11 of 12 muffin cups leave one of the cups in the middle empty. Half fill the 12th muffin cup with hot water.
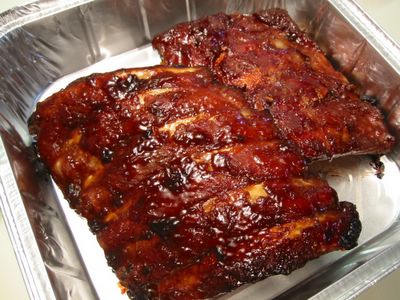
I've discovered a method of baking pork ribs in the Great American Food by Lesley Allin which I got from our local library. It just involves baking the ribs in a covered pan until tender then browning it further either in the oven or in an outdoor barbecue. A tender baked BBQ back ribs could be had, I thought, with any type of marinade or barbecue sauce as long as the procedure is the same. This was put to the test when I adapted Ainsley Harriott's marinade from his Big Cookout cookbook. Marinade from one cookbook was wedded with cooking method from another and luckily it resulted in a marriage from cooking heaven. ;)
Chinese Roast Ribs
1 sheet pork ribs (about 700 g/1.5 lbs)
*Marinade:
2 garlic cloves - minced
1/2 tsp fine sea salt
2 Tbsp caster sugar
1 Tbsp hoisin sauce
1 Tbsp yellow bean sauce
2 Tbsp soy sauce
1 Tbsp rice wine or dry sherry
- Mix together all ingredients for the marinade.
- Put ribs in a roasting pan and pour over the marinade to cover evenly. Cover pan with foil and refrigerate for at least an hour (better yet overnight), turning occasionally.
- Preheat oven to 200°C/fan 180°C/400°F/Gas Mark 6.
- Bake ribs with the marinade (in pan still covered with foil) for at least 1 hour or until fork tender, turning over once midway during cooking.
- After this, remove foil and the cooking of the ribs can be finished outdoors in a barbecue or in the oven.
- To finish cooking in the oven, lay ribs meat side down and baste with the pan juices. Return to oven and bake uncovered for 25 minutes.
- Turn the ribs over and again baste well with pan juices and bake for a further 25 minutes or until fall-apart tender. Dish up and serve.
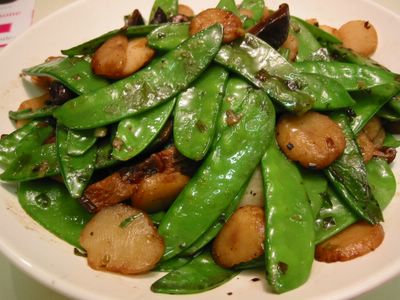
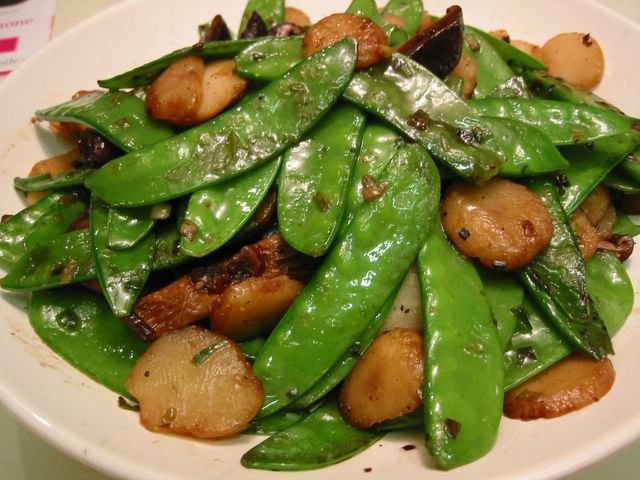
Ken Hom's combination of vegetables in his stir fries is something I've always loved. Though I do have problems with the saltiness of his dishes. More often than not I have to reduce (sometimes considerably) either the salt or soy sauce or the fish sauce to give my kidneys some respite. Other than that, his inventiveness and ability to adapt traditional Chinese recipes to contemporary ingredients and Western kitchens is never in doubt. I've often consulted his cookbooks whenever I need to have some 'imaginative' Asian dish. This one is adapted from his Hot Wok cookbook.
Stir Fried Mangetout and Water Chestnuts
(Ginisang Sitcharo at Apulid)
225 g drained canned water chestnuts (apulid)
30 g dried Chinese black mushrooms
1 Tbsp groundnut oil
3 Tbsp finely chopped green onions
225 g mangetout (snow peas/sitcharo) - trimmed
1 Tbsp rice wine or dry sherry
2 Tbsp dark soy sauce
1/2 tsp sea salt
1/4 tsp freshly ground black pepper
1 tsp sugar
3 Tbsp water
1 tsp sesame oil
- Soak the mushrooms in hot water for about 20 minutes. Drain and squeeze out the excess liquid. Cut and discard the stems and finely shred the caps into thin strips.
- Combine the soy sauce, sea salt, rice wine, pepper, sugar, and water in a bowl. Set aside.
- Heat a wok over high heat until hot. Add the oil, when it is smoking hot add the green onions and stir fry for 10 seconds.
- Add the mangetout and mushrooms. Stir fry for 1 minute.
- Add the soy sauce mixture and continue to stir fry for another 3 minutes.
- Add the water chestnuts and cook for a final 2 minutes.
- Stir in the sesame oil, dish up and serve at once.
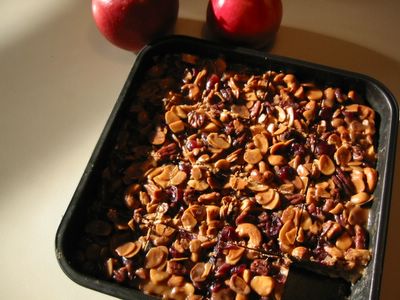
This is my entry to the monthly food blogging event Sugar High Friday (SHF). Initiated by the baking diva Domestic Goddess, this edition (which the 6th, BTW) is hosted by Debbie of Words To Eat By. SHF is a community effort of food bloggers from all over the world wherein the post in their blog at a certain date is of the theme set by the host. This 6th edition has the theme of caramel. Also, SHF is a spin-off from the highly successful and original food blogging event Is My Blog Burning? (IMBB), started by Alberto of Il Forno.
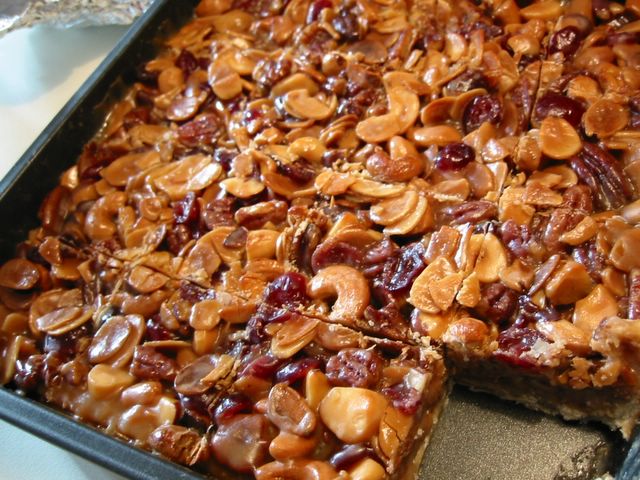
Okay on with the recipe, I found this recipe from the 101 Cakes & Bakes cookbook published by the BBC GoodFood Magazine. It was originally named Margaret's Caramel Nut Squares in honour of the chef who created it - Margaret Fineran. However, I decided to change it to Honey Caramel since the flavour of the honey is very dominant.
Probably because the cookbook is quite small (around 5x5 inches), the instructions were not very detailed. I now see several modifications I'd like to do to it. Like the pastry, instructions said to 'line' the pan. It didn't say to line just the bottom or including the sides. From the results, I think I will just line the bottom next time. Also the pastry came out dense. I don't know if it's supposed to be like this but I was half expecting it since you're supposed to pour the hot boiling caramel/nut mixture onto the pastry in the pan. And it was *bloody* hard to cut through it - maybe because it was still frozen. The caramel and nut filling was a bit soft when thawed after coming out of the freezer. Again I don't know if it's supposed to be like this. Despite all that I love the looks of it and the flavours are very nice with the honey flavour dominating the sweetness plus all those lovely combination of nuts and cranberries. All that coming from a nutter ... oh I mean a nut lover. ;)
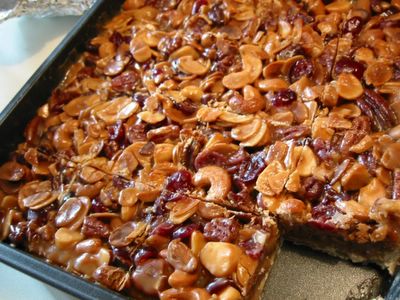
Honey Caramel Nut Squares
* Pastry:
175 g plain flour
50 g icing sugar
85 g cold butter
1/4 tsp vanilla
1 small egg - beaten
*Filling:
85 g granulated sugar
175 g clear honey
50 g butter
284 ml tub of double cream (heavy cream)
100 g pecan nuts - toasted
100 g flaked almonds - toasted
100 g whole hazelnuts - toasted
100 g pistacios, unsalted - toasted
50 g dried cranberries
whipped cream, to serve
- Preheat oven to 180°C/fan 160°C/350°F.
*For the pastry:
- Mix flour and icing sugar in a bowl. Cut the cold butter
into the flour mixture with a pastry cutter until crumbly.
- Mix the vanilla and beaten egg; add to the flour mixture. Stir until the mixture comes off the side of the bowl. Form the dough into a ball and knead a little. Wrap in cling film and chill for 30 minutes.
- Roll out pastry dough on a lightly floured surface or floured greaseproof paper and use to line a 23cm/9-inch square pan. Bake for 7 minutes.
*For the filling:
- Heat the butter and double cream in a saucepan until hot.
- In another saucepan, put the sugar and honey and bring to boil without stirring. When the sugar mixture is boiling, pour the hot cream mixture in it and simmer while stirring for 2-3 minutes.
- Mix in the nuts and cranberries to the saucepan.
- Spoon the whole lot into the hot pastry case. Return to the oven for 7 minutes.
- Remove, cool, then cover and freeze for 3-4 hours.
- Cut into squares, thaw for 30 minutes, and serve with the whipped cream.
Note: You may use any combination of nuts as long as they weigh 400 g in total.
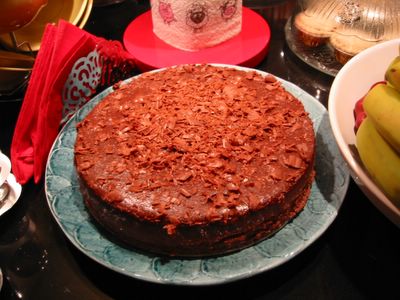
I made this for a friend having a party. Two times I've made this in the past and everytime it came out a disaster. The reasons were the same - water leaked inside the cake pan. This type of cheesecake baking needs a water bath wherein the cake pan is immersed in a larger pan filled with hot water. Of course to prevent the water from seeping in the cake pan you have to wrap it well with foil. First time I attempted this, the foil I had was too small/short so when I filled up the bigger pan with water I didn't realise it trickled in resulting in soggy oozing cake mess. Yuk! Three years later I tried it again, I made sure I bought a big roll of foil the one used for turkeys. No problem with that. But then after wrapping it, I was moving the wrapped cake pan on the kitchen table. I didn't realise (again!) that it created a small hole in the foil. Hence, I ended up with the same sorry soggy cake.
This time around not only I made sure I carefully wrapped and handled the cake pan, I even doubled the foil just to be sure. And thank goodness I am finally rewarded with a nice evenly baked chocolate cheesecake.
The only thing is when I had it, I forgot how strong the properly home baked cheesecake would taste. Unlike the store bought ones whose cheesy taste is very very mild. So for this you would need just a small portion coupled with whipped cream or ice cream.
Adapted from the US edition of Ladies' Home Journal issue of November 1993 (yes that old!).
Chocolate Cheesecake
225 g (8 oz) semisweet or dark cooking chocolate
1/4 cup brewed coffee or water
1 cup chocolate wafer crumbs
1/4 cup butter - melted
3 x 225 g (8 oz) cream cheese
1 cup sugar
2 large eggs
1 cup sour cream
1 tsp vanilla
Boiling water
Icing sugar and chocolate curls
- Melt chocolates with coffee in a heat proof bowl (or double boiler) over gently simmering water.
- Preheat oven to 180°C/fan 160°C/350°F. Combine wafer crumbs and butter in a bowl. Press crumbs into the bottom of a 9-inch springform pan.
- Beat cream cheese in a large mixer bowl until smooth. Beat in sugar until light and fluffy. Add eggs one at a time. At low speed, beat in chocolate.
- Add sour cream and vanilla, beating just until blended. Pour batter into prepared pan.
- Wrap outside of the pan with double sheets of thick aluminum foil. Take care that there are no holes in the foil.
- Place in a roasting pan in oven and pour boiling water in the roasting pan to come halfway up sides of springform pan.
- Bake 55 minutes or until sides of cheesecake are puffed and center is just set.
- Remove from water bath and cool completely on wire rack. (Can be made ahead. Cover and refrigerate up to 2 days).
- Remove sides of the pan. Garnish top with confectioner's sugar and chocolate curls.
Note: You may substitute chocolate biscuits/cookies (such as Oreo) for the chocolate wafers.

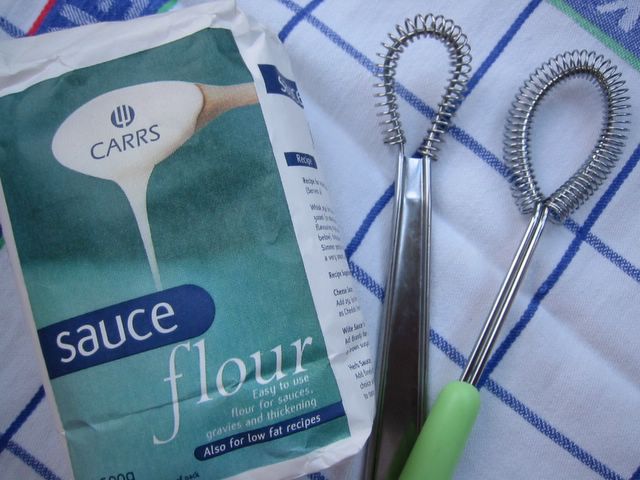
A common problem with cooking flour based sauces is the tendency of flour to form into lumps which can be quite hard to eliminate. I used to do all sort of things to get rid of them - from straining, stirring with 2 wooden spoons, to mixing it with water first before putting in the pan, etc. But nothing worked consistently or perfectly. Until I read several years before Delia Smith extolling the virtues of this sauce flour (above left) which I think she helped develop. Apparently this sauce flour has much less gluten in it than your average everyday flour thus reducing lumping significantly. I was skeptical at first but I did try it the next time I made a sauce needing flour. At it really worked as they claimed - very minimal lumps in my sauce. Previously, I slaved away stirring furiously like a maniac to try to get rid of the darn lumps. However, this flour really saved me a lot in terms of elbow grease and it tasted and thickened marvellously like any other all purpose flour.
Another tool that helped me achieve lumpless sauce heaven are these whisks (above right) first touted as "Wonder Whisks" by Lakeland Ltd. - my favourite kitchen shop. As with the flour sauce, I was doubtful it will do as it claims. So I put it to test when I made my first cassava cake using normal plain flour and it worked brilliantly. It really reduced the lumps and when used coupled with the sauce flour I always have lump-free sauces! I am a definite convert of these products. Do try them if they are available in your area they are quite inexpensive. In the UK, they are available in almost all shops selling kitchen items and the sauce flour is in all supermarkets already. Actually I got the green handled whisk above free from a cooking magazine. Happy saucing ...
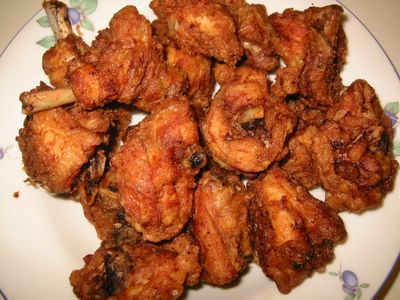
I asked a family friend for the yummy recipe of her fried chicken. I like it a lot because even when cold it still was very tasty. Like most seasoned cooks all her measurements are approximate plus from what she told me I have to put a large amount of chicken stock powder/cube in it. Now, I do use chicken stock cubes but I try to reduce as much as possible any pre-prepared ingredients in cooking to reduce the 'E' numbered things in it and make the dishes as natural as possible. Somehow learning that I have to put a lot of it made it less appetising. Until I remembered this fried chicken recipe from my favourite Huang Su-Huei's Chinese Cooking for Beginners. I haven't cooked this for quite sometime due to general aversion to things deep fried. But it's nice to have this once in awhile. It's as tasty as my friend's with the added bonus that it doesn't have any need for chicken powder. The word 'Chinese' is added in the name to make it more descriptive and to distinguish it from any others I would have here later. Apologies to Chinese chefs out there 'coz I'm not sure if this is authentic though I did find this in a Chinese cookbook. Do try this simple and easy recipe.
Chinese Fried Chicken
1 kg chicken - cut up into serving sizes
1 Tbsp cooking wine
1 tsp sea salt
1 tsp sugar
4 tsp soy sauce
4 green onions - cut into 1-inch pieces
4 slices ginger root
2 small egg yolks
1/4 cup cornstarch
oil for frying
- Mix the cooking wine, salt, sugar, soy sauce, green onions, and ginger in a bowl. Add in the chicken, mix well and marinate for at least 1 hour.
- Before frying, you may remove the ginger and green onions if preferred. Add the egg yolks and mix. Add the cornstarch, mix well.
- Deep fry in oil (medium heat) for about 6-7 minutes (depending on the size of the chicken pieces) or until cooked and the outside is crispy. Serve.
I was so delighted when I discovered that my local library are stocking a lot of my coveted cookbooks. My youngest had their nursery class that day at the children's section. So to while away my next 2 hours, I wandered off in the cookery section. You could just imagine how wide-eyed I was seeing rows and rows of bookshelves filled with my beloved cookbooks. The sight of the latest of these really excited me. Woo hoo! Even the Twelve: A Tuscan Cookbook by Tessa Kiros and the latest of the celeb chefs were there! I don't have to buy them - fantastic! Sorry if I sound pathetic but I'm the type of person who has cookbooks for bedside reading.
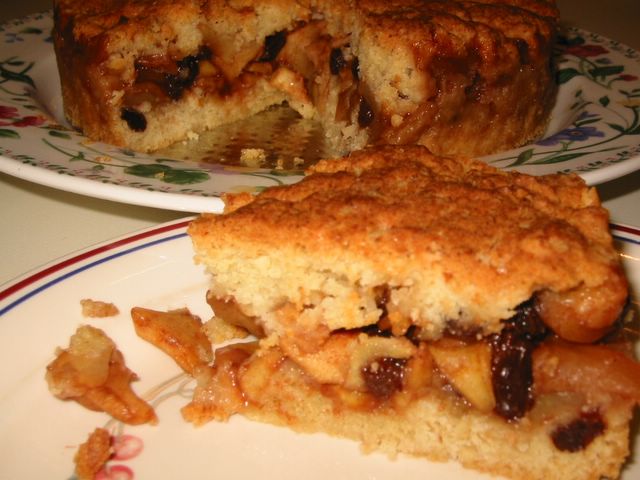
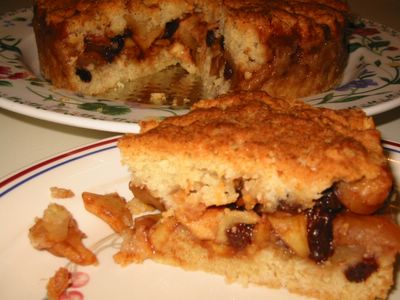
Among my finds is this recipe from Sue Lawrence's Book of Baking. My son was nagging me on making something out of our batch of apples sitting on the kitchen counter. I already made an apple pie and apple cake. Baking something new would be most welcome what with my tiredness of baking the same thing over and over. Anyway, this is quite easy to do. I'm not sure why it's called 'German' but it's basically cake layers sandwiching chopped apples and raisins tossed in sugar and cinnamon. Easy peasy. No alteration was required since the dough and the apple filling was spiced and sugared just right. Of course it met the approval of my son, the baked apple product critic, so it must be good. Nice to have warm slices of this with your afternoon tea of Earl Grey.
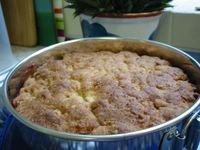
German Apple Cake
100 g unsalted butter - melted
100 g (1/2 cup) golden granulated sugar
200 g (1 3/4 cup) self raising flour - sifted
1 large egg
500 g (3-4) cooking apples - peeled, cored, and sliced/chopped
55 g (1/3 cup) raisins
1 tsp ground cinnamon
55 g (1/4 cup) demerara sugar
- Preheat oven at 375°F/190°C/fan 170°C. Butter 18cm/7-inch springform pan.
- Add sugar, flour, egg, and pinch of salt to the melted butter. Mix well.
- Place 2/3 of the dough in the base of the greased pan. Press lightly.
- Mix apple, raisins, cinnamon, and demerara sugar in a bowl. Put in the pan, pressing lightly making sure that it's level.
- Shape the remaining dough into a ball and press flat roughly in a circular shape on a greaseproof paper or cling film. Place the flattened dough on top of the apple mixture in the pan. Very lightly press down making sure that the dough more or less covers the whole of the pan.
- Bake in oven for 1 hour; cover lightly with foil in the last 10 minutes.
- Cool in pan for 20 minutes. Serve warm or cold.