Thursday, 9 February 2006

Meme: Three tips to losing weight

Now I need these tips badly. I am supposed to be on a diet but as often I find myself slipping into snack attacks - of the most yummy and weight-busting kind! Help! Mel of Hecticium tagged me for this almost a month ago. It's always at the back of my mind ever since but I couldn't find the time to sit down and type away things I found useful in my perpetual quest for the perfect body weight. Here they are and I hope you find them benficial to you:
  1. Drink lots of water. Even when not on a diet, we don't often take the recommended amount of water everyday. We need it much more when we're demanding a change in our body during diets. The recommended daily amount is between 6-8 glasses. Believe me when we drink it that much and that often you'll feel so much refreshed and our skin will look nicer afterall it washes away toxins from our body and gives us a very necessary ingredient to our bodily functions. Drink up!

  2. Exercise regularly. I should tell this to myself. *sigh* It's becoming a habit now of me forgetting to exercise to help in the shedding of the pounds. As you well know, just dieting will not make your weight loss stick. With a regular regime of exercise, not only will your weight loss accelerate but it will most likely help keep it off. Besides exercise makes your body secrete endorphines which makes us happy bunnies.

  3. Right frame of mind. For me this is one of the most crucial thing before I set off to do something. I have to visualise it and create it in my mind first before physically acting on it. Otherwise the venture would be just half-hearted and many times won't work. So it's important for me to start a diet with a firm resolve and will power to carry it through.

Well I hope I can follow my own advise. ;) I actually don't know who to tag next so if you're interested please tag yourself. Now, I think I was tagged for another meme ... what was that one? Hmmm ... thimk think thimk.

Sunday, 5 February 2006

Chicken Curry

Chicken Curry
I can still smell the pungent rich aroma of this nice curry. Lots of spicy tang from the tanglad (lemon grass), belachan (shrimp paste), lots of ginger, and of course the curry powder. Then enriched with the addition of coconut milk. Yum! This is more of a Southeast Asian type of curry rather than the Indian type which is noticeable with the lemon grass and belachan.

I've been hankering for a nice hot curry probably prodded on by the cold weather permeating Southern England right now. Instead of buying or borrowing another cookbook, I rummaged through all of mine scattered throughout the house where I found this gem of a recipe from one of my oldest cookbooks that hails all the way from Hong Kong (circa 1991), Cecilia Au-Yeung's Chopsticks Recipes: Introduction. And I just love love love the resulting aroma in this fabulous keeper of a dish. The only thing I had a problem with was the ginger juice. I didn't have enough of the root crop to squeeze that much besides I thought it's too much work for moi. So I just julienned about 2-square inch of it for the marinade and removed them before adding in the chicken. Other than that, it would help if you have an electric chopper so you could just whiz all the spices and wouldn't have to pound away with a heavy mortar and pestle. So if you find yourself in an Oriental store one time, pick up a few of the more exotic ingredients (the rest are common in kitchens everywhere) then do try this one - I highly recommend it!


Chicken Curry

1 1/2 kg  chicken - cut into serving pieces
2 onions - mashed or pureed
3 Tbsp curry powder
1 tsp turmeric
2 Tbsp ginger juice*
2 Tbsp cooking wine
2 slices ginger
1 lemon grass
5 Tbsp oil
3 garlic cloves
2-3 chillies - seeded and chopped
2 tsp belachan (shrimp paste)
500 g  waxy potatoes - peeled and quartered
1/2 cup water
2 cups coconut milk
2 tsp sea salt
1 Tbsp sugar
1/2 tsp chicken powder
  1. Mix the ginger juice, 1 Tbsp of the curry powder, and wine with the chicken. Marinate for at least 1 hour. Set aside.
  2. Remove outer skin of the lemon grass. Lightly mash then chop into smallish pieces.
  3. Using a mortar and pestle (or an electric blender/chopper) mash the lemon grass, garlic, ginger, belachan, and chillies into a smooth paste. Set aside.
  4. Combine 1 Tbsp of the oil with the turmeric powder and 2 Tbsp of the curry powder to make a thick paste.
  5. Heat a pan with 1 Tbsp oil and saute the pureed onions until aromatic.
  6. Add in the curry mixture and fry for about 30 seconds. Remove from heat.
  7. Mix in the lemon grass mixture and stir to combine well.
  8. In a medium sized pot, heat 3 Tbsp oil and saute the curry-lemon grass mixture over low heat until pungent.
  9. Stir in the chicken with the marinade and cook for about 2-3 minutes.
  10. Add in the water, salt, sugar and chicken powder. Simmer for 20 minutes.
  11. Tip in the potatoes and simmer for about 10 minutes or until potatoes are cooked.
  12. Stir in the coconut milk and bring to boil again.
  13. Remove from heat and dish up.
*Note: If you don't have the equipment nor the inclination to make ginger juice, peel and julienne a 2-inch square piece of ginger and use this instead.

Friday, 3 February 2006

Almond Apricot Torte

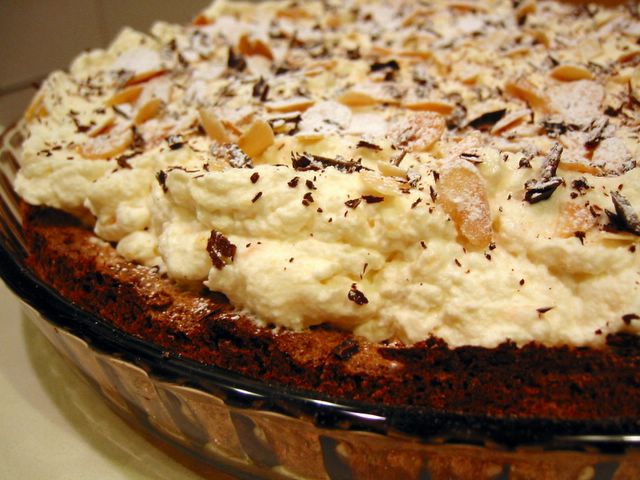
Almond Apricot Torte
If you recall a month ago, I made leche flan several times. After that, I was like a woman possessed and obsessed with trying to use up all the resulting left-over egg whites. Thus all this flurry of recipes of meringue-based desserts that makes use of the egg whites so effectively. I think I should make another recipe category here - 'Egg Whites Repository' or something like that.

This cake was described by a friend as having a very delicate lovely flavour. What I like most about it is the contrast of the softness of the cake with the crunch of the almonds and chocolate chunks then topped with the sublime cloud of apricot-flavoured whipped cream. This is definitely a keeper. Adapted from my favourite 101 Cakes and Bakes of the BBC GoodFood Magazine.


Almond Apricot Torte

5 egg whites
200 g  [1 cup] caster sugar
100 g  [1 cup] ground almonds
50 g  [1/2 cup] flaked almonds - toasted
50 g  dark chocolate - chopped

*For the apricot cream:
300 g  apricot compote or preserve
425 ml [scant 1 1/3 cup] double cream

*For the decoration:
3 Tbsp flaked almonds - toasted
25 g  dark chocolate - shaved
icing sugar for dusting (confectioner's sugar)
  • For the torte:
    1. Preheat oven to 180°C/fan 160°C/350°F/gas mark 4. Butter and line the base of a 25 cm (10-inch) springform pan.
    2. Beat the egg whites until stiff. Then gradually whisk in the caster sugar, a tablespoon at a time.
    3. Using a metal spoon, lightly fold in the ground almonds, toasted flaked almonds, and the chopped chocolates.
    4. Pour the mixture into the pan and bake for 40-45 minutes until crisp at the top and light golden.
    5. Remove from oven and allow to cool in the pan for about 5 minutes. Turn out and leave to cool on a wire rack.

  • For the apricot cream:
    1. Beat the cream until soft peaks.
    2. Fold in the apricot compote gently to give you swirls of apricot. Spread this mixture over the torte.

  • For the decoration:
    1. Scatter the shaved chocolate and toasted flaked almonds on top of the apricot cream.
    2. Dust lightly with icing sugar.

Tuesday, 31 January 2006

LP 6: Bagis

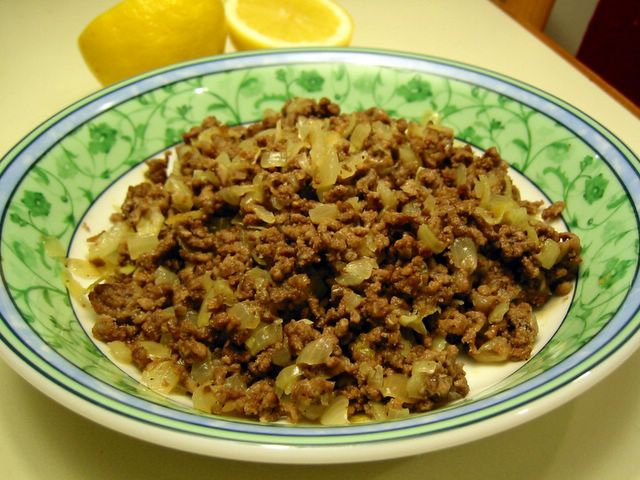
This month's edition of Lasang Pinoy is hosted by the lovely Ting of Worldclass Cuiscene with a theme of 'pulutan'. When you hear 'pulutan' you should think along the same vein as the Spanish tapas. It's usually a dish that is specifically eaten with alcoholic drinks. Because of the close similarity, the concept might have come from the Spanish. (Please don't hold me hostage with that last statement, I'm just speculating from the obvious.) Due to the nature of its purpose, it's usually very spicy or at least very tasty to encourage you to drink more.

When the theme was announced it stupefied me since I haven't cooked pulutan to anyone. The one dish I wanted to try was sisig but pork cheek and/or ears are not normally what you see lying around the supermarket shelves here. The only other one I know is spicy adobong mani (garlic fried peanuts) which I think is so simplistic. Well Lasang Pinoy, in my opinion, deserves better than that. So what other recourse I had than call for help from the mga manginginom (drunken masters) I know. Good thing they came up trumps with this Kapampangan (Ilokano?) dish of bagis which was sooo tasty and so easy to do even a half-inebriated guy can whip this up in no time at all. A big thanks is in order to my BIL Derek and his friend Al Dayao (who gave the original recipe) for sharing this with us. Tagay na !


Bagis

Bagis

500 g  minced beef
2-3 Tbsp lemon juice (from about 1 whole lemon)
1 1/2 cups chopped onions (about 2 medium)
1 tsp Tabasco sauce (or to taste)*
1 1/2 tsp sea salt
freshly milled black pepper
  1. Marinate the minced beef in lemon juice for 24 hours or overnight.
  2. Combine the marinated beef (including the marinade) and the rest of the ingredients in a pan and cook in medium heat. As it cooks, the beef will render its juice and fat so you do not need to put any water or oil.
  3. Once the mixture starts bubbling away, turn down heat and simmer until all the liquid has evaporated and the beef starts sizzling from its own fat. Dish up and serve with some stiff drinks. :p
*Note: You may use fresh chopped chillis or dried chilli flakes in place of the Tabasco.

Monday, 30 January 2006

Chorizo and Pork Belly with Haricot Beans

Chorizo and Pork Belly with Haricot Beans
I found this in the October 2005 issue of Olive magazine. With a lot of leftover chorizo that was going to expire soon, this fitted perfectly well with what I required. Besides using up all my chorizos, this stew is quite appropriate in the current near-freezing weather sending in comfort with its rich, slightly spicy, if somewhat salty taste. You know what, this has shades of Fabada except instead of morcilla you have the chorizo. I bet this would be great as well if indeed you use morcilla. It's easy enough to cook which after you've banged up all the ingredients you just stick it in the oven and wait. Make sure to hold the seasonings first until you've tasted it since the amalgam of bacon and chorizo can be salty at times.


Chorizo and Pork Belly with Haricot Beans

750 g  pork belly - skin removed, cut into large chunks
130 g  pancetta or streaky bacon - diced
1 large onion - chopped
1/2 Tbsp minced garlic
1 tsp hot smoked paprika
200 g  chorizo - chopped
1 x 400 g  can of chopped tomatoes
2/3 cup red wine
1 x 400 g  can of haricot or cannellini beans - drained and rinsed
about 1/3 cup chopped fresh coriander
olive oil
salt and pepper
  1. Preheat oven to 160°C/fan 140°C/300°F/gas mark 3.
  2. Heat about 1 Tbsp olive oil in an oven proof casserole pot. Brown the pork in it at high heat. Do this in batches. Set aside.
  3. Reduce the heat to medium and add 1 Tbsp more olive oil in the pot and then add the pancetta. Cook for about 2-3 minutes until golden brown.
  4. Add in the onion and garlic and cook until softened.
  5. Stir in the chorizo and paprika. Cook for a minute or so.
  6. Put back the pork in the pot and tip in the chopped tomatoes.
  7. Pour in the red wine and enough water just to cover it.
  8. Season with pepper and cook in the oven for 2 hours.
  9. Remove the cover and stir in the haricot beans and return to the oven. Cook uncovered for 20-30 minutes.
  10. Remove from the oven and taste the sauce. If need be, season with salt.
  11. Stir in the coriander and serve with crusty breads or hot plain rice.

Wednesday, 25 January 2006

SHF 15: Squidgy Chocolate Cakes with Prunes

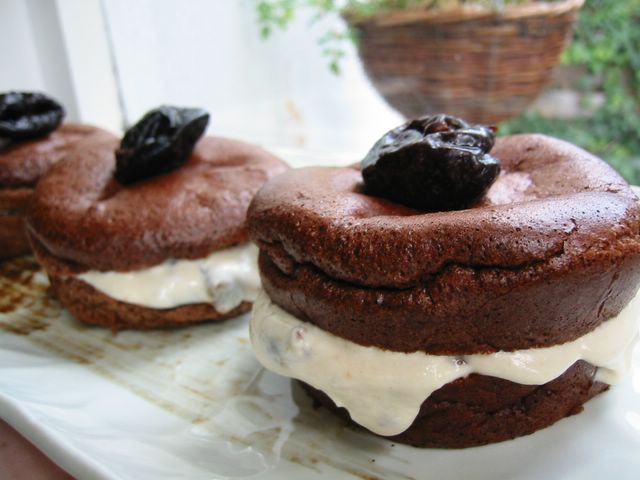
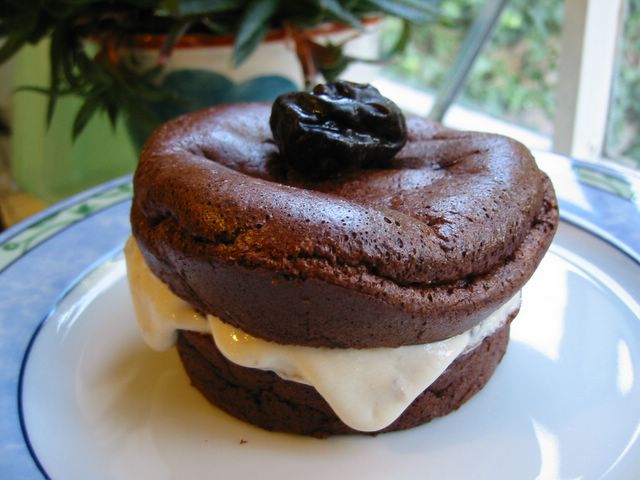
Squidgy Chocolate Cakes with Prunes
What a great idea to have a 'Sugar Low Friday' for the 15th edition of SHF. This time it's hosted by that lovely food blogger Sam in SFO whom I met a few months ago. As she said, after all the excesses most of us had during the Christmas holidays it's about time to balance off some of these rich food with something low in fat, low in sugar.

Actually my first attempt in this genre was with some cinnamon apple sauce mixed with yoghurt and whipped egg whites. It was really very low fat with no sugar and so healthy but ... bleccchh! It was so sour and had that strong taste of the egg whites that I didn't bother to let my other family members taste it. Down it went to the rubbish bin.

As the deadline came looming, I turned to my trusty Delia Smith cookbook (How To Cook Book 3) to give me one dessert that I know will surely work. For me, she is that reliable ... and she sure was! A bonus in this recipe is that it doesn't have any flour, perfect for people with wheat allergies. I used Fruisana in place of the 'granulated sweetener'. It's actualy fructose which is an all-natural fruit sugar extracted sweetener that's at least 30% sweeter than ordinary sugar. So it doesn't have that unpleasant aftertaste like that in artificial sweeteners.

The cakes itself don't taste much really 'coz there's not much sugar in it. But combined with the creaminess of the creme fraiche filling and the natural sweetness of the rum-soaked prunes, it was gorgeous. Very very nice indeed! Definite thumbs up for this one. :)


Squidgy Chocolate Cakes with Prunes

Squidgy Chocolate Cakes with Prunes

10 g  [2 Tbsp + 1 tsp] cocoa powder
3 large eggs - separated
1 1/2 Tbsp granulated sweetener
oil for greasing

*For the filling:
12 ready-to-eat prunes
3 Tbsp marsala or rum or brandy
3 Tbsp low fat fromage frais or creme fraiche
2 tsp granulated sweetener (or to taste)
1 tsp chocolate or vanilla extract
  1. Put the marsala and prunes in a small saucepan. Heat the sauce pan and bring it up just to simmering point. Remove from heat and leave to cool. You may put this in a covered glass or plastic container and leave to soak for a few hours or overnight in the fridge.
  2. Preheat oven to 180°C/fan 160°C/350°F/gas mark 4. Lightly grease 4 ramekins - about 1.5 inches deep with a base of 3 inches.
  3. Beat the egg yolks in a bowl with the sweetener for about 1 minute.
  4. Sift the cocoa on the egg yolk mixture and mix well to blend.
  5. Beat the egg whites in another bowl until soft peak stage.
  6. Using a metal spoon, mix in about 1 Tbsp of the beaten egg whites to the cocoa batter to lighten it. Then gently fold in the rest of the egg whites.
  7. Pour and divide into the 4 ramekins.
  8. Bake for 13-15 minutes or until the top is crusty but still wobbly.
  9. Remove from oven and leave to cool. As soon as it's cool enough to handle, turn out from the ramekins by running a knife along the edges then prying it loose. Leave it to further cool on a wire rack.
  10. While the cake is cooling, mix the creme fraiche, sweetener, chocolate extract, and about 1-2 tsp of the rum marinade of the prunes (careful not to add too much or it will become runny).
  11. Reserve 4 of the prunes, chop the rest of it, then mix these to the creme fraiche mixture.
  12. Split the 4 cakes horizontally like a bun. Divide the creme fraiche filling among the lower half of the 4 cakes. Cover with the top half and then top with the reserved a prune in each.


Tagged with: +

Monday, 23 January 2006

Ragu alla Bolognese

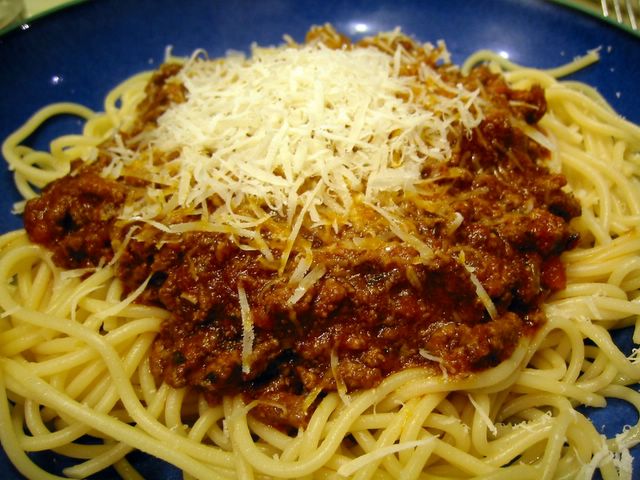
Spaghetti Bolognese
For several years now I've been trying to 'perfect' this popular Italian pasta sauce. Also called 'Spag Bol' or Spaghetti Bolognese (when served with that shape of pasta), I read in several books that Italians themselves wouldn't dream of serving this with spaghetti. They apparently use tagliatelle and after tasting this with a fresh version of that pasta, I could say I share their sentiment completely. This sauce can also be found in between lasagne sheets. Well, I've already got the Pinoy version of this plus even my son can come up with a bottled version (just brown some minced beef and pour in the bottled spaghetti sauce). But I fervently wanted to recreate the great taste of the meat sauce that we often get from Italian restaurants. This led me to looking it up in almost all the cookbooks and food magazines I come across. When I chanced upon the great collection of cookbooks in our local library, I was able to research on the authentic versions and derive a lot from it.

The word 'ragu' refers to slow cooked meat with little sauce. As with most traditional dishes there are a lot of variations even in Italy, not just from town to town but even probably from household to household. Some have all beef, have combinations of beef and pork, some use veal. Most use finely minced meat while others have diced ones. Versions also vary on whether or not to put vegetables, tomatoes, and milk or cream. The one thing that's universal in the more authentic recipes I found is the very slow and long cooking time, the use of wine (red or white), and spices. This version, which eventually met with the approval of my family, is one I culled from several cookbooks and the last one in particular from Anthony Worrall-Thompson who suggested Worcestershire sauce and anchovy sauce. It did the trick of adding a certain top note of yumminess to it. For one, my family loves its sauce very tomatoey therefore the chopped tomatoes and tomato puree are in. I also followed Delia Smith's and AWT's suggestion of browning the beef separately - it resulted in a more flavourful meat than if I did the browning right there in the stewing pot. I opted to use veggies in it because it imparts a slight sweetness, while the wine gives it body. Anyway, enough of my ramblings do try this and believe me just the aroma filling your kitchen would entice your housemates in.


Ragu alla Bolognese

1 kg  minced beef (or half beef, half pork)
1 1/2 Tbsp olive oil
1 Tbsp minced garlic
2 medium onions - finely chopped
125 g  pancetta or streaky bacon - finely diced
1/2 cup finely chopped carrots
1/2 cup finely chopped celery
1 Tbsp chopped fresh or 1 tsp dried thyme*
1 tsp dried oregano*
1 1/2 Tbsp chopped fresh or 1 tsp dried basil*
1/4 tsp nutmeg
1 1/2 Tbsp Worcestershire sauce
1 Tbsp anchovy sauce [optional]
1 bay leaf
1 cup white wine
2 x 400 g  can of chopped tomatoes*
1/4 cup double concentrate tomato puree (tomato paste)
2 tsp sea salt (or to taste)
freshly milled black pepper
1/2 cup beef stock or water
butter or olive oil
125 g  chicken liver - trimmed, washed and cut into 3/4-inch pieces
3 Tbsp single cream (light cream) [optional]
  1. In a pan (preferably non-stick), drizzle some olive oil and heat it up. Brown the minced beef in batches. Set aside.
  2. Wipe the pan and heat up some more olive oil or butter. Cook the chicken liver until well cooked and crumbly - about 5 minutes. Transfer to a bowl, then using a fork mash it up. If need be, finely chop some of the bits of liver that refuse to get mashed.
  3. In a big stewing pot, heat the 1 1/2 Tbsp olive oil and gently fry the bacon until it changes colour.
  4. Turn heat to low and add the garlic. Cook for 1 minute.
  5. Stir in the onion and cook gently for about 4-5 minutes or until translucent.
  6. Turn up the heat to medium and add the carrots and celery. Cook for about 3 minutes or until soft while stirring occassionally.
  7. Add the spices - basil, thyme, oregano. Stir and cook for about 1 minute or until aromatic.
  8. Tip in the browned minced beef and wine. Simmer until almost all the liquid has evaporated. Stir occassionally.
  9. Add the chopped tomatoes, concentrated tomato puree, bay leaf, nutmeg, Worcestershire sauce, anchovy sauce, chicken liver, salt, pepper, and stock.
  10. Bring to boil then bring down heat to lowest setting and simmer for *at least* 2-3 hours.
  11. If you have more fresh basil lying around, chop about 2 Tbsp of it and stir in the sauce.
  12. Add the cream and stir. Cook for another 1-2 minutes. Serve with freshly cooked al dente pasta such as spaghetti or tagliatelli.
*Notes:
  • In place of the basil, thyme, and oregano, you may use 1 Tbsp of Italian mixed herb.
  • You may use 500 g  passata in place of the chopped tomatoes and reduce the tomato paste to 1 Tbsp only.

Saturday, 21 January 2006

VRC 2: Morning Glory Muffins

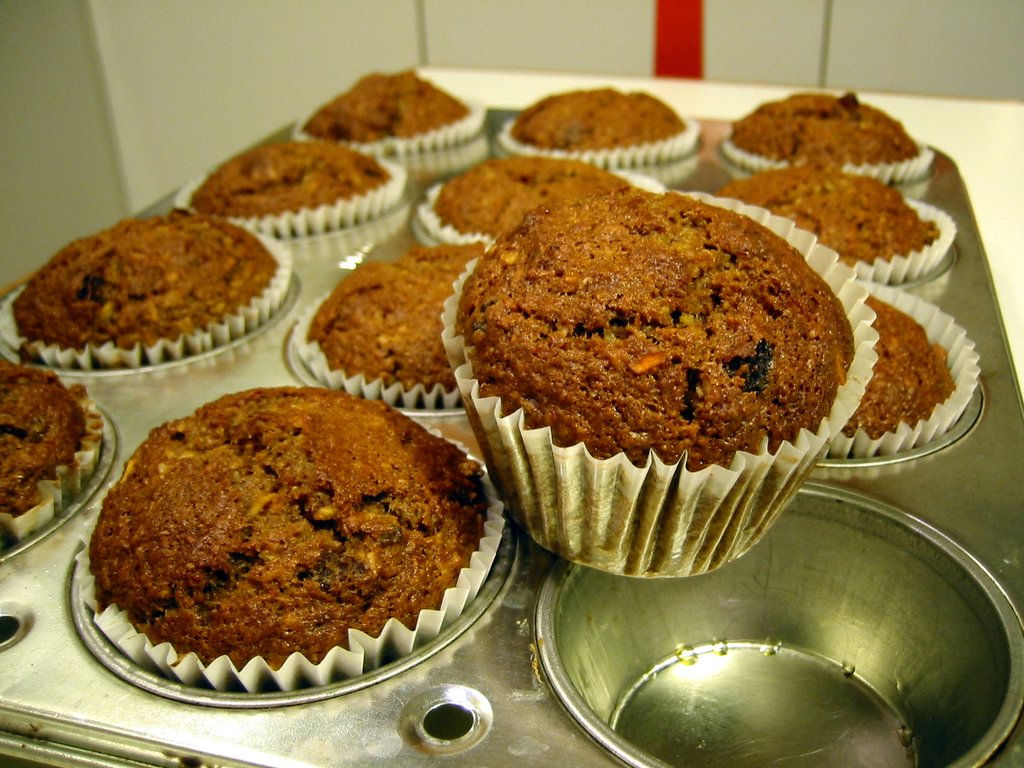
Morning Glory Muffins
I chanced upon an entry in the IMBB portal of a monthly virtual recipe club (VRC) initiated and hosted by Alysha of The Savory Notebook. The current theme is wholegrain quick breads and muffins. And I thought - wa-hey! I've got one already! I got this from the Great American Food cookbook by Leslie Allen which in turn was adapted from a recipe from the Morning Glory Cafe on Nantucket Island, USA. Well I don't know if this classifies as whole grain but it sure got lots of fiber in it and it's not sweet - perfect for breakfast. If you want this as a dessert or sweet snack type of muffin, you'll have to increase the sugars or crown it with some icing such as a cream cheese one.

Now why did I dream of making this? As you know, my cupboards were inventoried early this year for soon-to-expire items then I had lots of surplus carrots in the fridge which convinced me to try this. I didn't regret that decision. It's healthy enough to be hated by my kids ;). So I'm hogging them all for my lonesome self every morning (husband not fond of cakes or muffins).

I'm delighted with this post because besides that this is more on the healthy side in relation to my regular baking recipes, I'm actually submitting this almost a week from the deadline. Mrs. Always Late is way ahead on time at this instance. :)


Morning Glory Muffins

75 g  [1/2 cup] raisins or sultanas
2 Tbsp rum
250 g  carrots - peeled
1 apple - peeled and cored
110 g  [1/2 cup] firmly packed dark brown sugar
55 g  [1/4 cup] caster sugar (superfine)
140 g  [1 cup] self-raising wholemeal flour
150 g  [1 cup] self-raising flour
2 tsp ground cinnamon
2 tsp bicarbonate of soda (baking soda)
1/2 tsp salt
40 g  [1/2 cup] sweetened dessicated coconut
55 g  [1/2 cup] chopped pecans
3 large eggs - beaten
3/4 cup vegetable oil
1 tsp vanilla extract
  1. Preheat oven to 375°F/190°C/fan 170°C/gas mark 5.
  2. Grease or line with paper cases 3-inch diameter muffin pans.
  3. Boil the sultanas in the rum in a small saucepan. Once it boils, remove from heat and let cool.
  4. Shred the carrots and apple in a food processor or grate in a hand grater.
  5. Combine the eggs, vanilla, and oil in a small bowl. Whisk lightly. Set aside.
  6. Mix the sugars, flour, bicarbonate of soda, cinnamon, and salt in a large bowl.
  7. Add the raisins (with the rum) and toss.
  8. Stir in the carrots, apple, coconut and pecans.
  9. Add in the egg mixture to the flour mixture and stir until just combined.
  10. Spoon the mixture into the prepared muffin pan and bake for 20 minutes.
  11. Let it cool briefly then serve warm. These actually taste better the next day.

Friday, 20 January 2006

Stir-fried Beansprouts with Chicken

Stir-fried Beansprouts with Chicken
Here's a recipe where you can use up your extra toge or beansprouts. I seem to always buy too much of it whenever I need some for stir fries and noodle dishes. So this is handy if you don't want to just throw them in the bin. The chicken gives it the protein you need to balance out the veggie plus if you've been cooking a lot of leche flans or creme caramel, this is one way to use up the egg whites though at just half a piece it probably won't dent your surplus that much. The recipe is adapted from Huang Su-Huei's Chinese Cuisine cookbook.


Stir-fried Beansprouts with Chicken

250 g  boneless chicken meat - shredded or jullienned
250 g  bean sprouts
1/4 cup oil

*Marinade:
1/4 tsp salt
1/2 Tbsp cooking wine
1/2 egg white - slightly beaten
3/4 Tbsp cornstarch

*Sauce:
1 tsp cornstarch
1 tsp cooking wine
3/4 tsp salt
3/4 tsp sugar
1 1/2 Tbsp water
black pepper
dash of sesame oil
  1. In a bowl, mix the marinade: stir the salt in the cooking wine until dissolved.
  2. Add in the chicken, mix well. Mix in the egg white, mix well. Then add the cornstarch, mix well again. Set aside for about 20-30 minutes.
  3. Mix all the ingredients for the sauce in another bowl. Set aside.
    Heat the wok and pour in the oil.
  4. Mix additional 1 Tbsp oil into the marinated chicken to make them separate easily during cooking.
  5. Once the oil in the wok is smoking, tip in the chicken and stir fry for about 3-4 minutes or until cooked. Remove from the wok and drain on paper towels.
  6. Remove the oil from the wok but retain about 2 Tbsp in it. Reheat wok.
  7. Stir fry the bean sprouts for a few minutes until slightly wilted.
  8. Add in the chicken and stir fry for 30 seconds.
  9. Turn up heat to high and mix in the sauce. Stir for a few seconds or until the sauce has thickened. Dish up and serve.

Wednesday, 18 January 2006

Pesto & Cheese Crusted Salmon

Pesto & Cheese Crusted Salmon
This is another attempt at finding variety in cooking our beloved salmon. We can only eat so much Sinigang na Salmon or Grilled Salmons that I had to find an alternative way of serving it. Besides that salmon is one of our favourite fish, it's in season right now and abundant this time of the year therefore quite reasonable in price. I found this recipe, which I adapted from Delia Smith's How To Cook Book Two, very nice and quite tasty. I've tried it with both Pecorino and Parmesan cheese and they both did well in the medley. Cooked it also with and without the breadcrumbs. I favoured it with breadcrumbs because it made the crust very crunchy. But my husband preferred it without since he often mistake the some of the crunchy crust as fish bones and ended up not eating it. So whether you put breadcrumbs or not it's still very well recommended.


Pesto & Cheese Crusted Salmon

350 g  salmon fillets
2 Tbsp pesto sauce
1 1/2 Tbsp grated pecorino or parmesan cheese
2 Tbsp fresh breadcrumbs (optional)
squeeze of lemon juice
salt and freshly milled black pepper
  1. Preheat oven to 230°C/fan 210°C/450°F/gas mark 8. Line a shallow baking tray with foil and lightly grease with oil.
  2. Place the salmon fillets on the baking tray, skin side down.
  3. Squeeze some lemon juice in each one of them and season with salt and black pepper.
  4. Combine the pesto sauce and one-third of the breadcrumbs to form a paste and spread over the fillets.
  5. Mix half of the cheese and the rest of the breadcrumbs. Spread this over the pesto.
  6. Then sprinkle the rest of the cheese on top.
  7. Bake in the middle shelf of the oven for 10 minutes. Dish up and serve.

Saturday, 14 January 2006

EBBP3: Comfort Food from Dagmar's Kitchen

Dagmar's Comfort Food
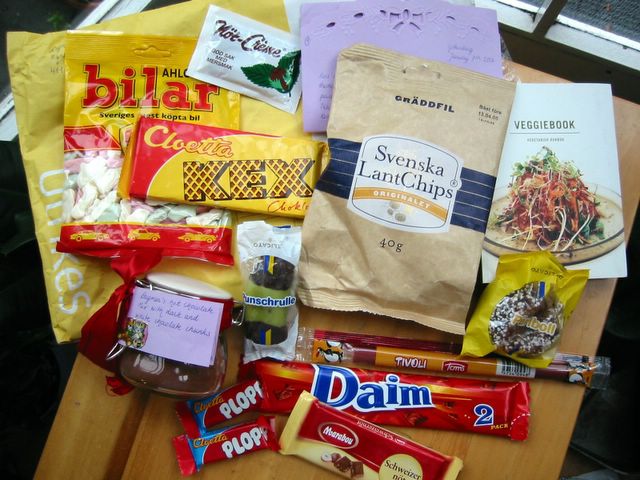
Ahhh, I finally received my long awaited comfort food coming straight from Sweden! The moment the postman handed my husband the package I dropped everything I was doing and gave it my undivided attention, gingerly, excitedly taking each one of the contents. Christmas came again that Wednesday morning! :) My generous benefactor is Dagmar of A Cat In The Kitchen who not only gave me lots of chocolates and snacks but included a Veggie cookbook which right now intrigues me a lot. I will definitely give at least a few of the recipes there a try.

The current theme of the 3rd edition of the European Blogging By Post (EBBP) is 'comfort' as well explained by the our host Johanna of the Passionate Cook (who BTW already have a round up). I love this blogging event very much. It gives us a way to have a cultural exchange through food. You not only learn of different types of food from other places, you also get to know a new food blogger plus you get that wonderful surprise of a package.

Dagmar's package has the following:
  • Plopp - milk chocolate with toffee filling
  • Kexchoklad - milk chocolate covered wafers
  • Schweizernot - milk chocolate with hazelnuts
  • Daim - milk chocolate with crunchy caramel and almonds
  • Parlboll - chocolate ball **my favourite**
  • Punschrulle - marzipan and chocolate
  • Not-Creme - chocolate nut spread
  • Ahlgrens Bilar - car-shaped marshmallows
  • Tivoli - rhubard-flavoured candy bar
  • Svenska Lantchips - sourcream flavoured crisps
  • Veggie cookbook
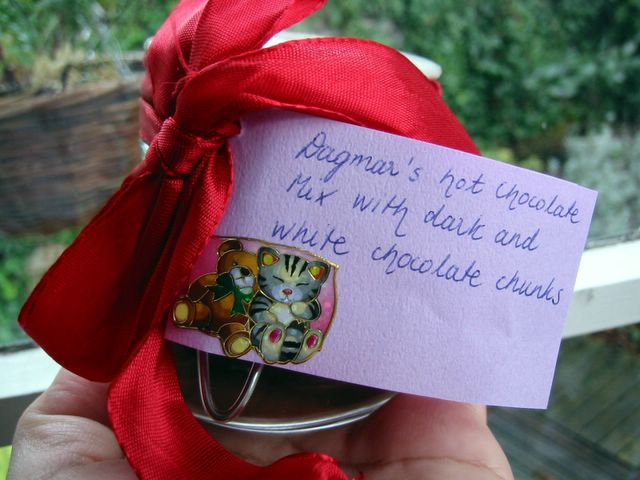
  • Dagmar's Chocolate Drink
Spiced Chocolate Drink
I gotta tell you, her chocolate drink got me hooked. I just loved the subtle spices spiking this rich chocolate drink. First time I tried it I was supposed to have a small cup but ended up drinking 2 big mugs. It's that nice, as nice as its maker who was kind enough to share the recipe. As she said - a good thing about it is that most people would have the ingredients in their cupboard so it's not that hard to do. Thanks very very much Dagmar, here's a chocolatey cheers to you. Cheers!

Spiced Drinking Chocolate


Spiced Chocolate Drink

75 g  [2/3 cup + 2 tsp] cocoa
70 g  [2/3 cup + 2 tsp] caster sugar (superfine)
2 tsp vanilla sugar
1/2 tsp ground cinnamon
1/4 tsp ground cardamon
2-3 pinches of cayenne pepper
about 25 g  chunks of dark chocolates
about 25 g  chunks of white chocolates
  1. Combine all ingredients. Heat some milk and add some of the mix according to your taste, try it out and add more of the spices if wanted/needed.
  2. Put in decorative jars. This makes a nice gift to give to friends.

Thursday, 12 January 2006

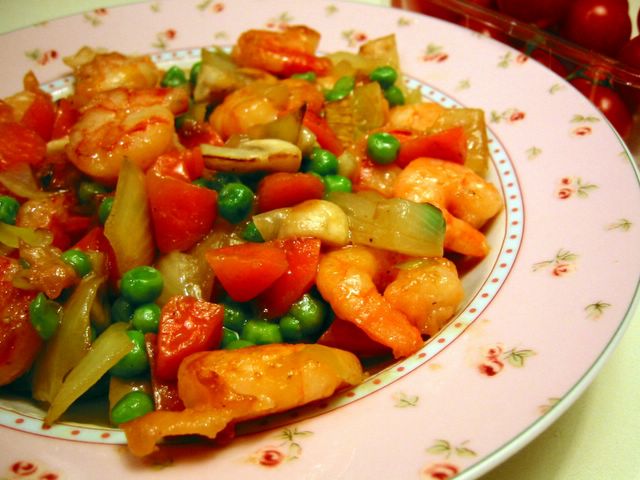
Stir-fried Shrimps With Vegetables

Stir Fried Shrimps with Vegetables
Time to come back to one of my favourite food - seafood! I especially love them cooked simply. There's a toss up between grilled, steamed or stir fried on my preferred cooking method for it. But since the prawns I have are frozen, I thought grilling and steaming would not be appropriate so out came this recipe which I adapted from Huang Su-Huei's Chinese Cuisine cookbook. It was very yummy that I was able to finish it all by myself!


Stir-fried Shrimps With Vegetables

250 g  raw shrimps or prawns - peeled and deveined
1/4 tsp salt
1 tsp cooking wine
1/2 egg white - slightly beaten
3/4 Tbsp cornstarch
1/3 cup oil
2 Tbsp water
1/2 cup diced carrots
1/2 cup onion - roughly chopped
1/4 cup diced button mushrooms
1/4 cup green peas

*Sauce:
2 Tbsp water
1/3 tsp salt
1 tsp cornstarch
dash of sesame oil
freshly ground black pepper
  1. Mix the sauce first - in a bowl, combine all the sauce ingredients, stirring to dissolve the salt and cornstarch. Set aside.
  2. In another bowl, dissolve the salt in the cooking wine. Mix this with the shrimps.
  3. Add in the egg whites, mix well.
  4. Then the cornstarch, mix well again. Set aside and marinate for about 15 minutes.
  5. Add 1 Tbsp oil to the shrimp mixture and mix well (to make it separate easily).
  6. Heat wok and the oil in medium heat.
  7. Fry the shrimps in the wok until just cooked and changes colour (about 3 minutes). Remove and drain on absorbent paper towels.
  8. Remove the oil from wok but retain 2 Tbsp in it. Heat the wok again.
  9. Stir fry the onion until fragrant.
  10. Mix in the carrots, mushrooms, and green peas. Stir fry for a few seconds.
  11. Add the water and cook in medium heat until the liquid has completely evaporated and the vegetables are cooked. If it dries up too easily, add more water but only a little at a time.
  12. Turn up heat to high and add the fried shrimps. Stir fry for a few seconds.
  13. Add the sauce mixture and stir fry quickly to mix. Remove from wok onto a platter and serve.

Monday, 9 January 2006

Apricot Raisin Pecan Cookies

Apricot Raisin Pecan Cookie
This is part of my kitchen cupboard clean-up recipes. I had some chopped apricots and pecans expiring soon so it was good that I found this in one of our favourite cookbooks - The Genuine American Cookie and Muffin Book by Peter Shaffer. It's quite good with the cookie being more cakey if a little bit undercooked.


Apricot Raisin Pecan Cookies

200 g  [scant 1 1/4 cups] dried apricots - chopped
140 g  [1 cup] raisins or sultanas
1 cup water

490 g  [scant 3 2/3 cups] plain flour
1 tsp bicarbonate of soda
1 tsp baking powder
1/2 tsp ground cinnamon
1/2 tsp ground nutmeg
1 tsp salt
100 g  [3/4 cup] pecans - chopped

250 g  [scant 1 1/3 cups] soft demerara sugar
225 g  [scant 1 cup] butter - softened
2 large eggs
1 tsp vanilla extract
  1. Preheat oven to 180°C/fan 160°C/350°F/gas mark 4.
  2. Put apricots, raisins, and water in a saucepan. Cover and bring to boil. Bring down heat to low and simmer for 3-4 minutes. Remove from heat and cool. Do not drain.
  3. Combine the flour, bicarbonate of soda, baking powder, cinnamon, nutmeg, salt, and pecans in a bowl. Mix well.
  4. In a large bowl, beat the butter, sugar, and vanilla until light and fluffy.
  5. Add eggs one at a time and continue beating until well blended.
  6. Using a wooden spoon, stir in the raisin and apricot mixture. Mix well.
  7. Gradually fold in the dry ingredients into the butter mixture. Stir just enough to combine. Do not overmix.
  8. Using a tablespoon, drop dough by rounded portions (about 1.5 - 2 inches in size) onto baking sheets about 2 inches apart.
  9. Bake for 12 to 15 minutes for a soft centre.
  10. Allow cookies to stand for 1 to 2 minutes before removing from baking sheet and transferring to a wire rack to cool completely.

Apricot Raisin Pecan Cookie

Sunday, 8 January 2006

LP5: Pinoy Christmas Around The World

London Christmas 2005
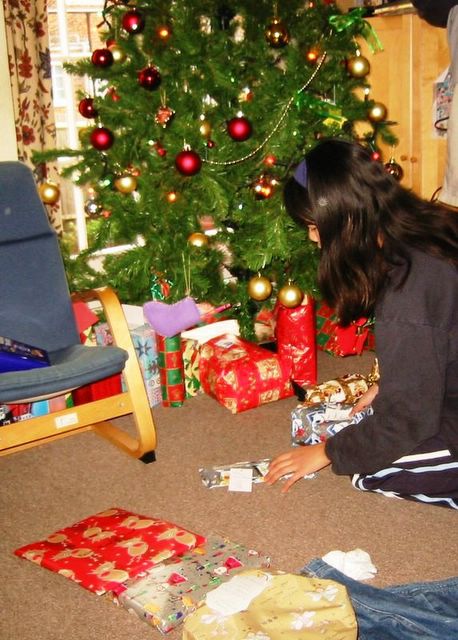
The Christmas season 2005 for me was like a whirlwind that grew into a tornado, swept me off and deposited me helplessly at the state I'm in now. I should have clicked my heels before to regain my sanity but then I needed red shoes for that. ;) What I wanted to say was it so busy and hectic for me what with the numerous Christmas parties at work, with friends, and with relatives. Add more of the usual shopping madness and Christmas card postings plus the added worry of being made redundant - but that's another story.

I'm beating around the bush! Just trying to excuse myself for being late with my entry and for completely forgetting to take pictures of our decors. And have you heard? My supposed traditional rellenong manok (stuffed chicken) morphed into a beef roast. Of all the years I've been living here in UK, the ones that run out everytime before Christmas are the turkeys. Why oh why could I not find any whole chicken two days before C-day? I searched high and low in all butchers that abound and the supermarkets littering our high street but no freakin' chicken!! In my exasperation, I picked up the last remaining slab of prime rib of beef on the counter and proceeded to harass Stel on the phone on how to roast the darn thing. Kind and ever helpful, she put me thru the paces even though she was frantically preparing for their own Christmas family do. Despite my initial bad impression with our main course, it turned out beautifully - delicious actually! So simply cooked with all the traditional sides and a great gravy that my family wanted me to do it again at the earliest possible time. The lovely Stel of Babyrambutan provided the easy peasy recipe. Thanks dear!

This 5th edition of Lasang Pinoy is hosted by Mike of Lafang. Oh yeah, I forgot to tell you how we spend our Christmas - in the days before we usually go round some friends' houses to give out our gifts. We try to attend a Christmas eve mass but there are years like this one that was just so so busy. Usually we have either a sumptous Christmas lunch or dinner but this year, ostensibly to let me have a relaxing Christmas day, we had our celebratory meal on Christmas eve dinner. Morning after that were spent ripping out gift boxes and saying our thank yous to everyone and phoning all the friends and relatives to wish them a happy Christmas. I wish my children can experience the magic of Christmas right in the Philippines but since they can't I'm sure we captured the spirit by being together and cherishing our company with our little meals and whatever gifts we can come up with. :)


Roast Ribs of Beef

Roast Ribs of Beef

one whole slab of prime ribs or forerib of beef (on the bone)
sea salt
  1. Preheat oven to 240°C/fan 220°C/475°F.
  2. Place beef on a roast pan and rub all over with the sea salt. If meat has some fat on one side/edge, try to position it so that the fat is at the top so that the fat rendered will drip down on the meat and keep it moist.
  3. Bake in oven for about 15 minutes.
  4. Lower heat to 180°C/fan 160°C/350°F and bake with the additional cooking time depending on the weight of the beef. The general rule of thumb would be 20 minutes per pound of meat for rare, 25 minutes for medium rare, and 30 minutes for well done. You may baste the meat from time to time with its own dripping.
  5. Remove from pan (do not discard drippings) and transfer to a serving platter cover with foil and let rest for up to 30 minutes before slicing and serving.

Beef Gravy

beef fat and drippings
2 heaping Tbsp flour
2-3 cups stock (approximate)
salt and freshly milled black pepper
  1. Remove the beef fat from the roasting pan but retain about 2 Tbsp.
  2. Put the roasting tin on the cooker hob and heat up the fat.
  3. Once moderately hot, sprinkle the flour on it. Blend in the flour well (preferably with a wire whisk)with the fat.
  4. Add the stock gradually while continually stirring making sure to scrape the bottom for all the roasting bits left in the pan.
  5. Bring to boil. Add more stock or water if it's too thick.
  6. Taste the gravy; add salt and/or pepper if necessary. Serve hot.


Now this one, I was quite amazed how homemade roast potatoes would taste so invariably superior to store bought ones - frozen or otherwise. It was simply superb my kids were raving about it. I adapted this from the November 2005 edition of the BBC Good Food magazine which they dubbed as 'The Ultimate Roast Potatoes'.

Roast Potatoes

Roast Potatoes

1.5 kg  floury potatoes (preferably Maris Piper) - peeled and evenly quartered
2 tsp flour or cornflour (cornstarch)
1/3 cup oil (goose fat, olive oil, vegetable oil, etc.)
sea salt
  1. Preheat oven to 200°C/fan 180°C/400°F.
  2. Put potatoes in a saucepan. Add salt (about 1 tsp) and enough water to cover it. Bring to boil. Once it boils, lower heat to medium-low and start timing it for 2 minutes.
  3. Pour oil in a clean roasting pan and place it in the oven.
  4. Drain water completely from the saucepan. Put the cover on then shake the pan back and forth. This is to rough up the outside of the potatoes to give it that crispy outer covering.
  5. Sprinkle the flour on the potatoes and shake it some more.
  6. Carefully put the potatoes in the hot fat in the roasting pan. Spread in a single layer making sure they have plenty of room. Turn or baste them to make sure they are coated with oil all over.
  7. Roast for 20 minutes then take them out of the oven and turn the potatoes over.
  8. Return to the oven for another 15 minutes and turn them over again.
  9. Roast a further 10-20 minutes or however it takes to make them golden and crisp.
  10. Sprinkle sea salt over, put in serving platter and serve right away.

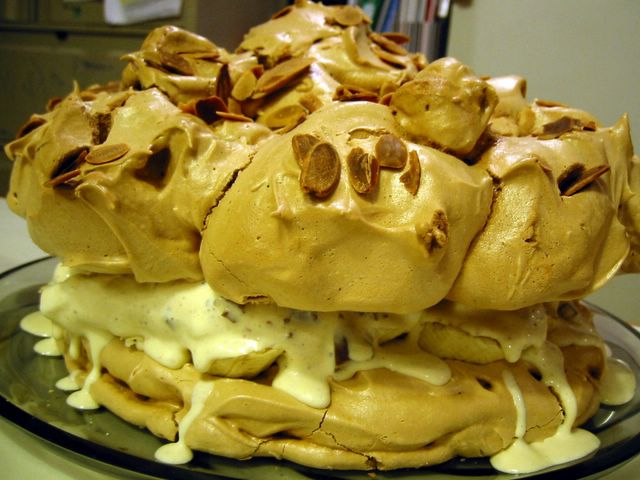
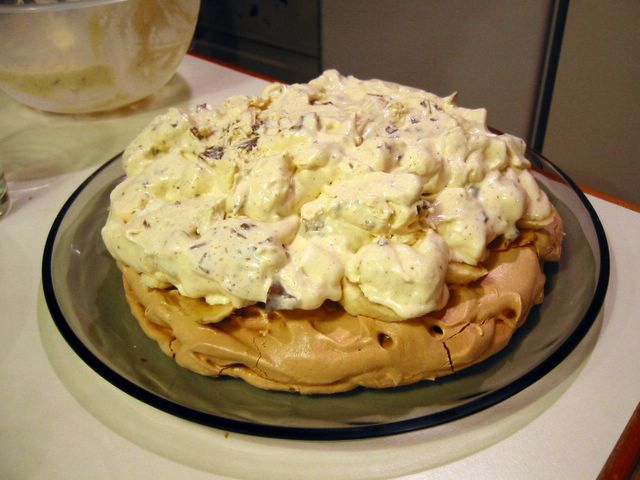
Okay are you ready to see a monster? I made a leche flan a few days before and I thought I would use up the extra egg whites by making this longed for dessert that I saw in the Good Housekeeping magazine eons ago. I didn't bargain for it to be this humongous. Even when I was beating it up, my puny little handheld mixer was drowning from too much meringue that I thought it was gonna die on me. But still I plodded on and out came this huge ... thing ... which would be perfect as a some 'shock and awe' type of dessert in dinner parties. Not for small family dinners because no matter how delectable it is (which this certainly was) there's just too much of it to be consumed in 1, 2, even 3 sittings. Though I did love the nuggets of marshmallows and chocolates in the ice cream (shades of rocky road!) then combined with the freshness of the banana then the crunch of the meringue with almonds. Hmmmm ...


Marshmallow Meringue Cake

225 g  [scant 1 cup] caster sugar (superfine)
125 g  light brown sugar
6 large egg whites
1 tsp cornflour
1/2 tsp vinegar
50 g  flaked almonds - toasted (optional)
150 g  small white marshmallows
1 liter good quality vanilla ice cream
150 g  dark chocolate - chopped
4 bananas - sliced
chocolate savings and icing sugar to dust
  1. The meringue must be done at least a day before serving. Trace two 23cm (9 inch) circles on two baking parchment paper set on two baking sheets.
  2. Sift the caster sugar and brown sugars together in a bowl. Set aside.
  3. Preheat oven at 120°C/fan 100°C/250°F.
  4. In a large bowl, whisk the egg whites until they're stiff and dry.
  5. Whisk in the sugars, one tablespoon at a time, until mixture is glossy and very stiff (about 5 minutes).
  6. Then whisk in the cornflour and vinegar.
  7. Spoon half the meringue on one of the baking parchment papers in a garland shape.
  8. Spread the other half in the other parchment paper evenly to cover it completely.
  9. Sprinkle both with the toasted almond flakes.
  10. Bake for 2-2.5 hours. Turn off oven and leave the meringues inside to cool for at least 30 minutes (or you may leave it there overnight).
  11. A few hours before serving, soften the ice cream by transferring it to the fridge for about 30 minutes.
  12. Once soft, put in a bowl and fold in the marshmallows and chopped chocolates.
  13. Put back in the freeze for about 30 minutes to firm it up.
  14. To assemble, place the meringue circle on a large serving plate. Arrange the sliced bananas on top in a single layer. Spoon the ice cream mixture over the bananas. Then place the garland meringue on top. Decorate with chocolate shavings and dust with some icing sugar. Serve.
Note: To freeze ahead: complete the whole recipe without decorating with chocolate shavings and icing sugar; wrap it and freeze. To serve, take from the freezer and unwrap. Place in the fridge for 1-2 hours, then leave at room temperature for 30 minutes. Decorate and serve.


Lasang Pinoy 5

Monday, 2 January 2006

Chocolate Prune Cake

Chocolate Prune Cake
As a direct consequence of my making leche flan, I made this rich alcohol-laced cake to use up the egg whites. It's a real treat for chocolate lovers what with its full-bodied chocolate flavour spiked by the brandy and made moist in the middle by the prunes (plus to help you with your recommended daily allowance of fiber). I found this recipe from my favourite - BBC Good Food Magazine's 101 Cakes & Bakes of which I intend to bake every recipe there. Just give me an excuse and I'll do it. ;)


Chocolate Prune Cake

1/4 cup brandy
250 g  no-soak prunes - halved
25 g  [3 1/2 Tbsp] cocoa powder
100 g  dark chocolate (at least 70% cocoa solids)
175 g  [3/4 cup + 2 Tbsp] golden caster sugar
50 g  butter
100 ml [1/3 cup + 4 tsp] hot water
4 large egg whites
85 g  [heaping 2/3 cup] plain flour
1 tsp ground cinnamon
lightly whipped cream or vanilla ice cream or creme fraiche to serve (optional)
  1. Soak prunes in brandy for 30 minutes.
  2. Preheat oven to 190°C/fan 170°C/375°F/gas mark 5.
  3. Butter a 23 cm/9 inch loose-bottomed round cake pan.
  4. Mix well the flour and cinnamon in a small bowl.
  5. In a heavy-bottomed saucepan, put the hot water, butter, cocoa, chocolate, and 1/2 cup of the sugar. heat gently until smooth. Remove from heat and cool slightly.
  6. Whisk the egg whites until soft peaks then gradually whisk in the remaining sugar.
  7. Sift the flour mixture over the beaten egg whites and gently fold in with a metal spoon until almost combined.
  8. Add the chocolate mixture and fold in until well combined.
  9. Pour the mixture into the prepared pan and arrange prunes on top.
  10. Bake for about 30 minutes or until just firm.
  11. Serve with whipped cream, ice cream, or creme fraiche.

Sunday, 1 January 2006

Sweet Spicy Pecans

Sweet Spicy Pecans
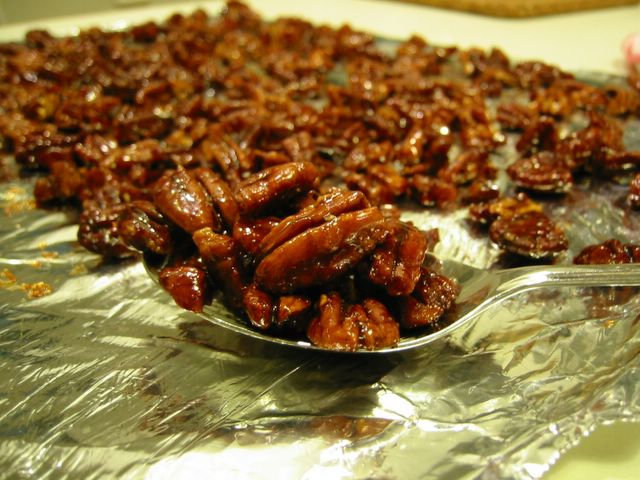
It's that time again when I'm cleaning up my kitchen cupboards and found packets of half-used ingredients about to expire in the coming days or weeks. So the current mode is find recipes for these ingredients instead of the other way around. As expected from a nut lover like me, there are several unopened bags of pecans expiring this month. And first thing I thought of is this great recipe that I found from Epicurious, which I discovered by way of a waldorf salad recipe in the same website. I ended up keeping the moreish 'budbud' or garnish instead of the salad.

This is great munched with cold alcoholic drinks or whichever drink you fancy. I have to warn you hide it where no other member of the family can find it or there won't be anything left to serve. :) Now where is my cold beer? Hand me over that Corona will 'ya?

Happy New Year !!


Sweet Spicy Pecans

vegetable oil
3 Tbsp golden syrup or light corn syrup
1 1/2 Tbsp sugar
3/4 tsp ground sea salt
1/4 tsp freshly ground black pepper
1/8 tsp cayenne pepper
1 1/2 cups pecan pieces
  1. Preheat oven to 325°F/160°C/fan 140°C/gas mark 3.
  2. Lightly oil a baking sheet.
  3. Mix syrup, sugar, and spices in a bowl.
  4. Add pecans into it and stir to combine well.
  5. Transfer to the prepared baking sheet.
  6. Place large piece of foil on work surface. Lightly oil it.
  7. Bake pecans in oven for 5 minutes. Stir pecans to coat with melted spice mixture.
  8. Continue baking pecans until golden and bubbling for about 8 - 10 minutes.
  9. Remove from oven and transfer to prepared foil on the work surface.
  10. Using 2 forks, immediately separate nuts while hot. It will be hard to do this once it starts to cool down so make sure to work quickly while doing so.
  11. Cool completely.

Friday, 30 December 2005

Leche Flan

Leche Flan
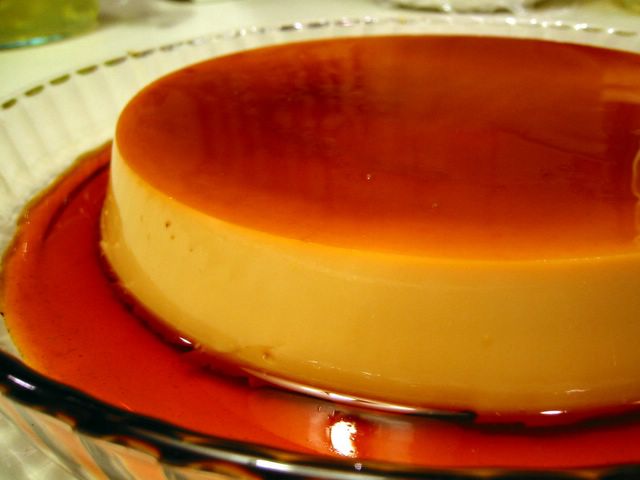
I should have posted this a few days back but I couldn't find the other pictures I've taken a month ago. Anyhow, I'll have to make do with this sliver of Leche Flan to illustrate the point.

Leche Flan is a Spanish legacy to the Philippines. It's very similar to the Creme Caramel except that we generally use canned milk rather than fresh. I say 'generally' since there are lucky people who has access to cow's or carabao's (water buffallo) milk and use that which results in a very creamy distinctly flavoured confection. Unlike us, who still have to find a farmer-relative whose carabao is currently lactating. :( As such, the rest of the Filipino household is relegated to evaporated and condensed milk. Though I think they're not entirely inferior, they in fact impart a nutty taste to dishes. And of course they're a more practical choice due to the high incidence of dairy spoilage because of the heat in the Phils.

We usually make this every annual fiesta in our barrio. Whenever I see and/or eat leche flan, the memory that comes to mind is 'fiesta'. We'd make dozens of these and serve them with sweetened macapuno and ube. Sometimes I'd help my aunt to caramelise the sugar which we do directly in the 'llanera' (molds) by heating the sugar right in there. So the llanera has to be metal and usually oval in shape. I know it's probably easier to do it by melting/cooking the sugar caramel all in one batch then pouring it onto each mold. But my aunt, who's either masochistic or just following tradition, still do it in each and every llanera. My challenge when I wanted to make this here is to search for metal molds. Solid baking pans should be alright but they additionally has to withstand direct heat, i.e., heated up on the cooking hob.

As for the custard itself, it can be of any permutation of the ratio of egg, milk, and sugar. Some use the whole egg, while we always use just the egg yolks. I've also never tried to bake this in a bain marie (water bath) which will work perfectly. Steaming is our preferred traditional method for this, making sure the llaneras are sealed well with foil or paper (my aunt just use plain bond paper) on top and tied with a string or rubber band on the side. If moisture from the steam comes in, it will make the caramel a bit watery. It's still okay but not as appetising as a well sealed one.


Leche Flan


Leche Flan

10-12 egg yolks*
1 x 400 g  cans evaporated milk
1 x 400 g  can condensed milk
1 tsp vanilla extract or lemon zest (optional)
granulated sugar
  1. Put about 2-3 Tbsp sugar in each of the metal molds (this will depend on how big they are). Place the molds one at a time on a cooker hob and melt the sugar gently. Let it caramelise and melt to a golden brown - DO NOT BURN IT. Swirl it around the mold so that there is just a thin film covering the bottom. Remove from heat and cool completely. (Caramelised sugar will harden and may crack.)
  2. Mix the egg yolks, milks, and flavouring gently. Do not whisk, you do not want bubbles in it so it will result in a smooth set custard.
  3. Strain the mixture while pouring it into the metal molds with caramelised sugar.
  4. Cover tightly with foil, parchment paper, or plain paper. Secure by tying a string or rubber band in its circumference.
  5. Steam in medium-low heat for 1 hour.
  6. Remove from steamer and cool completely.
  7. To serve, run a knife around the edge and invert into a serving plate.
*Note: I have done this with 10 egg yolks only and it is as good as one with 12 egg yolks.

Monday, 26 December 2005

Christmas in the Post


I received the above gifts a few days before Christmas and what a treat these were as only a fellow cooking and baking enthusiast can think of sending. Among the goodies were almond paste (which I couldn't find anywhere here), fishmaw (same thing), satay paste, shrimp paste, white tea (my first time to have this), a scarf and a nice potholder with matching tea towel. A very big thank you to Stel of Babyrambutan all of the above including a wonderful Christmas card photo of her kids. :)

Saturday, 24 December 2005

Lemon Squares

Lemon Squares
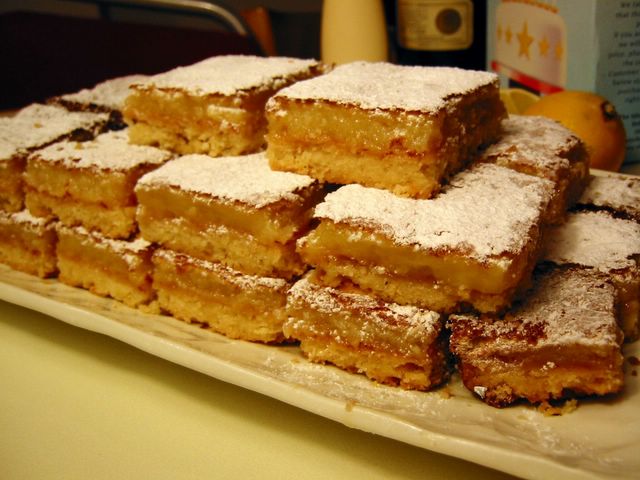
I don't know about you, but this icing sugar-dusted lemon squares sure makes me hear Bing Crosby's White Christmas in the background. I've been wanting to make these bars ever since I saw it in Moira's blog early in the year though it's only now that I found an excuse due to a glut of lemons that I really don't want to throw in the bin.

If we dissect these delectable little things, we find that it's essentially lemon curd on top of shortbread. Lovely contrast of sour-sweet topping with the crumbly bottom crust. Very very nice. Hmmm...

The original recipe from Moira can be found here, though I've changed just two things in it - the baking time (30 minutes) and the cutting of the butter in the flour (I forgot to freeze it).

Let me take this opportunity to give a very big thank you to Moira for sharing her heirloom family recipe.


Lemon Squares

*Crust:
2 cups flour
1/2 cup sifted icing sugar (confectioner's)
250 g  [1 cup] butter - frozen

* Filling:
4 eggs - beaten
2 cups sugar
1/3 cup lemon juice
2 tsp lemon zest
1/4 cup flour
1/2 tsp baking powder

extra icing sugar for dusting
  • Preheat oven to 350°F/180°C/fan 160°C/gas mark 4.
  • Lightly butter a 9 x 13-inch baking dish and line with parchment paper.
  • For the crust:
    1. Combine the dry ingredients together in a large bowl.
    2. Grate the frozen butter (using the large holes of a box grater) into the dry mixture. Or if you forgot to freeze the butter, cut it in the flour mixture with a pastry mixer or two butter knives.
    3. Toss the butter pieces to coat, then rub between your fingers until the flour turns into a coarse breadcrumb-like texture.
    4. Put the mixture into the lined pan and press firmly with your fingers to form an even crust.
    5. Bake for 20-25 minutes, or until golden brown.
  • For the filling:
    1. Mix the eggs, sugar, flour and baking powder together in a medium bowl.
    2. Add the lemon juice and zest and combine well.
    3. Pour mixture into the pan on top of the warm crust.
  • Bake for 25-30 minutes, or until the filling feels firm when touched lightly.
  • Transfer the pan to a wire rack and cool for 30 minutes.
  • Grasp the parchment and carefully lift the bars onto a cutting board.
  • Cut into serving size squares or bars, wiping your knife clean between cuts if necessary. Remove the parchment paper after cutting.
  • Sift icing sugar over bars and serve.

Thursday, 22 December 2005

London Food Bloggers' Christmas Party

London Food Bloggers' Xmas Party
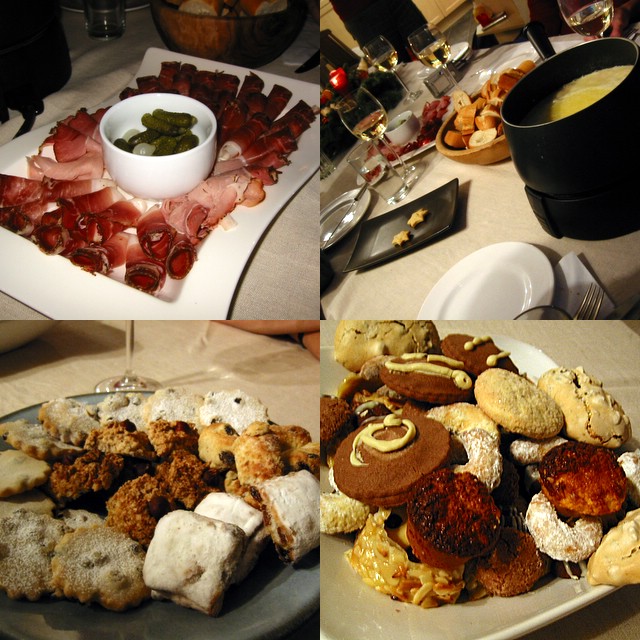
Last Saturday a group of food bloggers from across England gathered in Johanna's lovely house in Twickenham to have a Christmas do and swap delectable cookies. It was an all-girls' affair which included (besides Johanna) Zabeena, Joanna, Jenni, Melissa and her friend Wompe, Jeanne, Martina (Johanna's caterer friend) and me of course.

We first had delicious bratwurst with sauerkraut (which I forgot to take a picture of). The sauerkraut is probably the first I tasted that I liked. Often, the ones I had before were either too sour or too spicy for me. But this one that Johanna said she got from Waitrose was just right. Then she got out platters of sliced Austrian ham which we had in a cheese fondue with chunks of crusty bread. Very nice!

The assembled array of cookies brought by everyone were then scrutinized and heartily eaten with mulled wine or spiced tea. Predictably, they were all yummy! My cookies were not worth mentioning since I am not satisfied with the first two. Well actually, I had a mini disaster when I tried making pilipit (a traditional Filipino twisted crunchy cookie) when it came out of the deep fryer as doughy (like a donut but tougher) and not crunchy or brittle at all. Could it be the baking powder in the recipe? So I had to chuck that in the bin. *sigh*

Okay so on to my next disaster ... err ... I mean next cookie. I attempted to make Sanikulas and got a recipe thru the kindness of Karen. The dough looked okay, so I made them into small balls and since I don’t have a cookie mould, I pressed it flat with the tines of a fork. It was easier said than done because the dough became quite rubbery. But I pressed on and when I tasted the first batch it was distinctly bland. I didn't think there was enough sugar in it. So I rolled the next batch in sugar before pressing them. Needless to say, the resulting Sanikulas were bleechh ... edible but not something I would be proud of. I should have named it Sanikulas via Santacelia due to the number of changes I made to the original recipe.

The other one I made was the chocolate marzipan cookie. In the recipe, it had measurements both in weight and volume. I decided to follow the volume which was a mistake since there appeared to be too much butter so the dough was too sticky. To correct it, I had to add more and more flour which in turn diluted the chocolate flavour. Then the topping should have been drizzled white chocolate but the one I used was more for eating rather than for cooking/baking so it was not runny enough causing a lumpy looking topping. With these disasters, it's a good thing I made some coconut macaroons whose recipe I am absolutely confident about. I guess the lesson here is not to prepare recipes for the first time when serving it to other people, just stick to tried and tested ones to avoid unnecessary stress.

Going back to the EB, we also had fun swapping cookies just before we left. And Johanna gave us a taste of her homemade choco-mocha liquor - it was scrumptious! I gotta have Johanna's recipe even if I have to beg. ;) Admittedly, I had a nice time that day not only were the food and drinks wonderful but the company and conversation were lively. A very big thank you to Johanna and her family for their generosity and graciousness in hosting this event.

Merry Christmas to one and all !!

Sunday, 18 December 2005

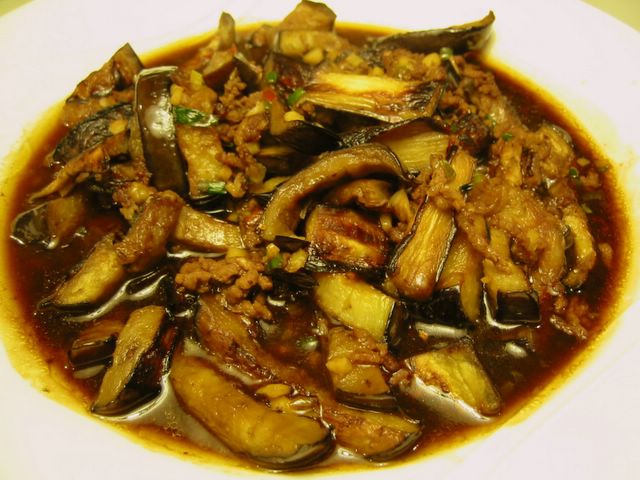
Fish-flavoured Aubergine

Fish-flavoured Aubergine
In all the cookbooks I consulted for this dish, I never found one that had fish or even fish sauce in its ingredients. So it's a mystery to me why this is described as 'fish flavoured'. Maybe someone out there knows the history? I think I read something in Deh Ta-Shiung's book on the explanation but I couldn't remember what it was.

The original recipe I adapted from the Chinese Cuisine by Huang Su-Huei requires deep frying the aubergines (eggplants). Since I know aubergines are notorious suckers of oil (they're like sponge), I decided to pan fry it in a teflon pan and drizzled with a little oil. You get the same flavour but with less oil.


Fish-flavoured Aubergine

500 g  aubergine (eggplant) - sliced into 1/2-inch strips about 2-inches long
oil for frying
100 g  ground pork or beef
1 tsp hot bean paste
2 Tbsp chopped green onion
1 Tbsp minced ginger root
1 Tbsp minced garlic
1 1/2 Tbsp soy sauce
3/4 cup stock
1/2 Tbsp sugar
1/2 Tbsp vinegar
1/2 tsp cooking wine
1/2 Tbsp cornstarch
1 Tbsp water
  1. Combine the cornstarch and water, mix well. Set aside.
  2. Mix the soy sauce, stock, sugar, vinegar, and cooking wine in another container. Set aside.
  3. Put the aubergines in a non-stick pan and drizzle a little to pan-fry until soft and cooked. Do this in batches. Set aside.
  4. In a wok, heat about 1 Tbsp oil until smoking hot. Stir fry the minced pork until it changes colour (about 3 minutes).
  5. Add in the hot bean paste, stir to mix.
  6. Then add the chopped green onion, garlic, and ginger. Stir fry until aromatic.
  7. Stir in the fried aubergines.
  8. Add the soy sauce mixture and cook for 1 minute.
  9. Thicken sauce by adding in the cornstarch mixture. Bring to boil and stir. Dish up and serve.

Thursday, 15 December 2005

Blog Party 5: Smoked Salmon-Cucumber Skewers

I was aimlessly wandering around among my bookmarked food blogs when I came to Johanna's lovely post about some noodle nibbles she made as an entry to the Stephanie's blog party. Why haven't I known this before?! Anyway that's how I came upon this blogging event which I think is a great excuse to party every month. ;)

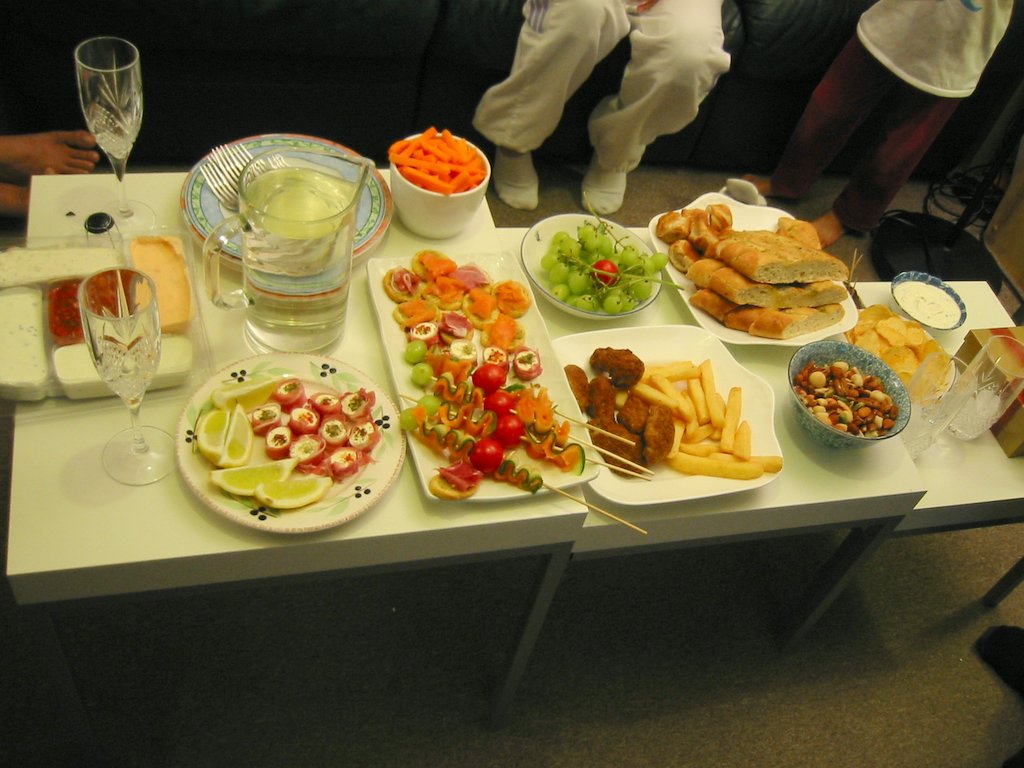
Thursday last week was the 15th anniversary of our church wedding so I thought why not have just nibbles and drinks for a change and totally indulge ourselves while we all sat in our sofa watching Madagascar. The two things that entered my mind when Stephanie mentioned 'indulgence' are smoked salmon and parma ham. Loved them a lot but as you can imagine because of the steep prices of these premium delicacies that I possibly cannot have it every week or even every month. But since it's our anniversary so ... la-di-dah.

Party Spread
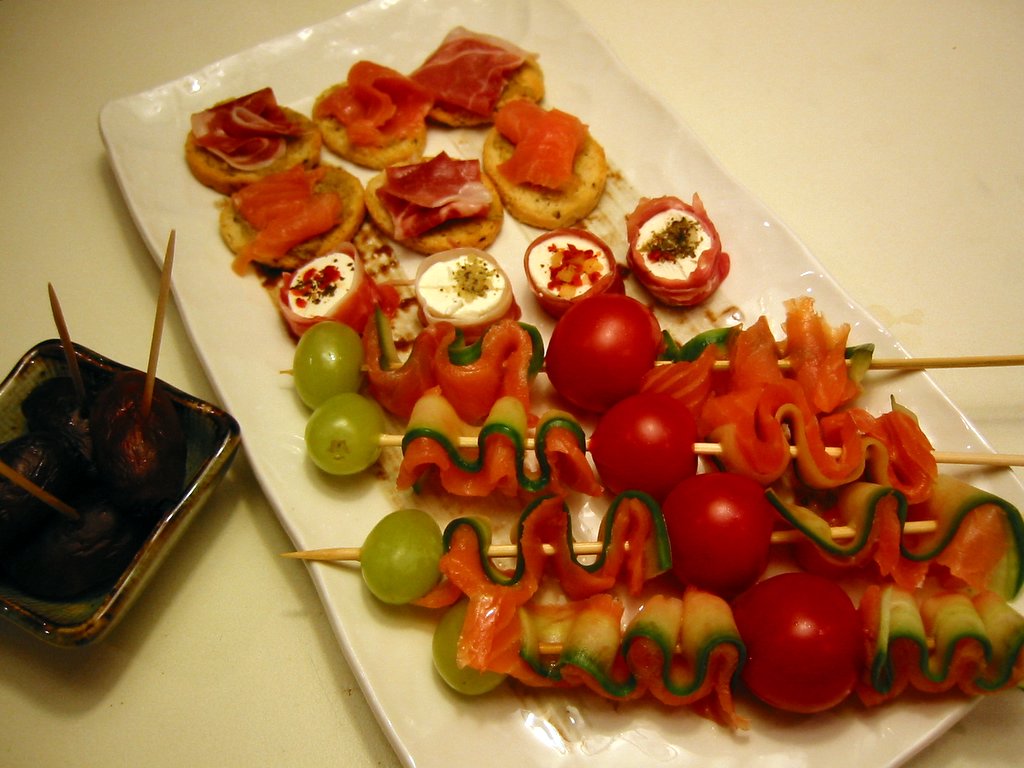
I found this great looking hors d'oeuvre (I can never get the spelling of that right - horse divers? horror dervs?) on sticks in the latest Olive magazine issue. The green grapes were added to put some sweetness in it. I simply love the way the cucumber refreshingly cuts through the saltiness of the smoked salmon. Then to save time I just bought some ready made cream cheese appetizers with some herbs on top which I wrapped in slivers of parma ham. Plus I bought some ready made crostinis in which I spread some olive tapenade (gift from the lovely Sha) and topped with slices of parma ham or smoked salmon. Leftover bite-sized chorizos from Brindisa was also made to good use. I had ready made dips, some crisps (potato chips), carrot batons, and mixed nuts. For the kids I made extra finger foods - sausage rolls, chips, some chicken wings, garlic bread, green grapes and we were ready to go. Oh yeah, for dessert I've got Belgian chocolates and option of ice cream.

sparkling Cava
Since it's a celebratory do, I bought a bottle of Cava for me and the hubster while the kids have fruit juices. My kids loved the change from our usual dinner and we toasted enthusiastically for more years of family bliss.


Smoked Salmon-Cucumber Skewers

Smoked Salmon-Cucumber Skewers

smoked salmon - cut into strips
cucumber
cherry tomatoes
green grapes
  1. Wash and dry the cucumber, cherry tomatoes, and grapes.
  2. Using a potato peeler, cut cucumber into strips. Cut the strips into about 6-inches in length.
  3. Lay a smoked salmon strip on top of a cucumber strip. Thread this in a short bamboo stick in a zigzag manner.
  4. Next pierce a cherry tomatoes through then repeat smoked salmon and cucumbers. Top with a green grapes.
  5. Serve with slices of lemon and dip.

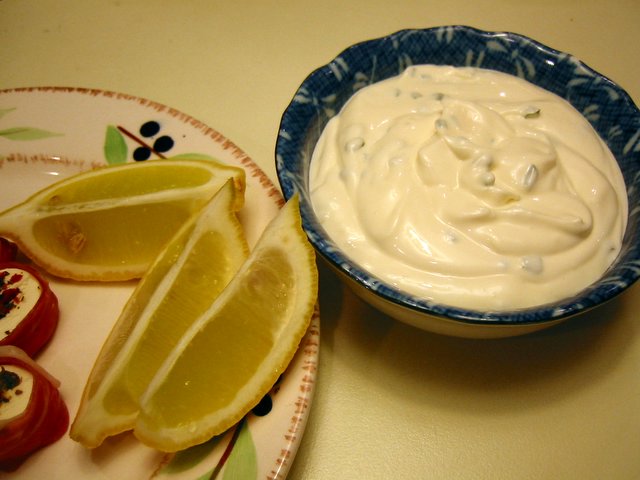
Mayo-Creme Fraiche Dip

1/2 cup mayonnaise
1/4 cup creme fraiche or Greek-style yoghurt
2 Tbsp chopped fresh chives, dill, or parsley
  • Combine and mix all the ingredients in a bowl. Taste and adjust seasonings if needed.
Smoked Salmon Dip Blog Party

Wednesday, 14 December 2005

Sticky BBQ Wings

Sticky BBQ Wings
Judging from the number of my recipes under the 'chicken' category, you can easily tell that my favourite part is the wings. Here's another rendition of the standard barbecue sauce for wings. I liked the little sharp tinge of spiciness from the Tabasco and the paprika although you can entirely omit these two and it can still stand on its own. I adapted this from one of those free recipe leaflet in Morrison's (a local supermarket). Quite tasty and would not go amiss in the barbecue come summer time.


Sticky BBQ Wings

1 kg  chicken wings
2 Tbsp soy sauce
4 tsp Worcestershire sauce
5 Tbsp ketchup
2 tsp Dijon mustard
1 tsp Tabasco sauce or to taste (optional)
2 tsp paprika
2 Tbsp honey
1 tsp minced garlic
cooking oil
  1. Combine together all the ingredients in a bowl (except the chicken and oil). Marinate chicken for at least 2 hours or overnight.
  2. Preheat oven to 200°C/fan 180°C/400°F.
  3. Remove the chicken wings from the marinade. Arrange on a baking tray. Brush lightly with oil.
  4. Bake for about 35-40 minutes or until the meat is no longer pink in the bone and turning the wings from time to time.
  5. You may also cook this in a barbecue in which case it has to be grilled for 6-8 minutes on one side. Then turn and cook for another 10-12 minutes. Before removing check first if the meat is thoroughly cooked.
  6. Serve warm.

Tuesday, 13 December 2005

Apple Crumble

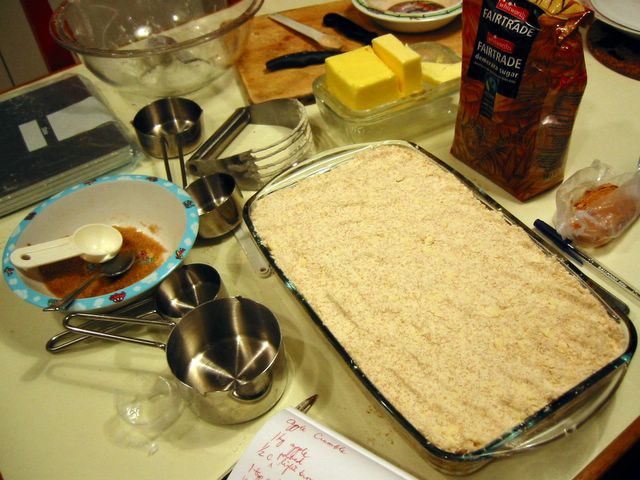
Unbaked Apple Crumble
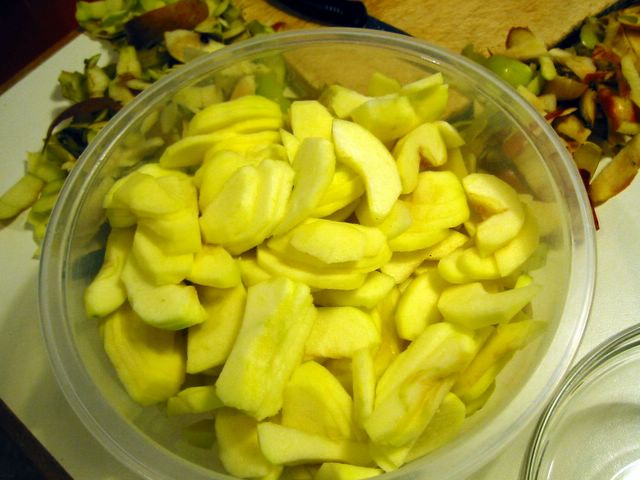
This is one of the basic recipes that my eldest (the apple monster) have been requesting me to make for the longest time. Very easy to do therefore very little chances of having a disaster. Probably the only thing that slowed me down is the peeling and coring of the small Cox apples I got from the supermarket. When I see that apple peeler/corer again in a shop I gotta remind me to buy it to save myself from the peeling chores.

Anyway, back to the dessert, it's like an apple pie without the crust. You just mix the apple slices with the sugar and spices, tip everything in a baking pan then top with the 'crumble' which is a mixture of flour, butter, sugar, and more spices. You can imagine the infinite number of variations you can do with this basic recipe like have different combination of fruits, cheese or ground nuts in the toppings, etc.

I used the recipes of Brian Turner from his Favourite British Recipes and Delia Smith's How to Cook as guidelines to come up with something according to our tastes. I seriously thought that there were too much toppings but as when we were eating it we kinda liked the fact that there's a lot of it to have with the apples. I used Cox apples exclusively and it came out a bit watery underneath which I didn't mind but was noted by the apple monster. So maybe next time I'll mix in a few tablespoon of flour. Undeniably, this is still on a tweaking stage but it's quite good as it is now. Ice cream or warm custard can be usually found married to it but we didn't bother with that. Being single can be nice. :)


Apple Crumble


Apple Crumble

1 kg  baking apples - peeled, cored, and sliced
100 g  [1/2 cup] packed light brown sugar
1 tsp cinnamon
1/8 tsp nutmeg

Crumble:
225 g  [scant 1 1/2 cups] self-raising or plain flour
115 g  [scant 1/2 cup] unsalted butter
115 g  [1/2 cup + 1 Tbsp] demerara sugar
1/2 tsp cinnamon
  • Preheat oven to 190°C/fan 170°C/375°F/gas mark 5.
  • For the crumble:
    1. Put the flour in a bowl. Cut the butter in with pastry blender or two butter knives then rub in by hand until it resembles coarse breadcrumbs.
    2. Mix the sugar and cinnamon then add in this mixture to the flour. Combine well. Set aside.
  • For the apple base:
    1. Combine the brown sugar, cinnamon, and nutmeg in a bowl.
    2. Toss the sliced apples in this mixture.
  • Tip the apples in a 7 x 11-inch baking pan (or any size of baking pan as long as everything fits in).
  • Pour the flour mixture on top and pat it down well.
  • Bake for 40 minutes or until top is golden brown and apples are bubbling. Serve warm.

Wednesday, 7 December 2005

Flapjacks

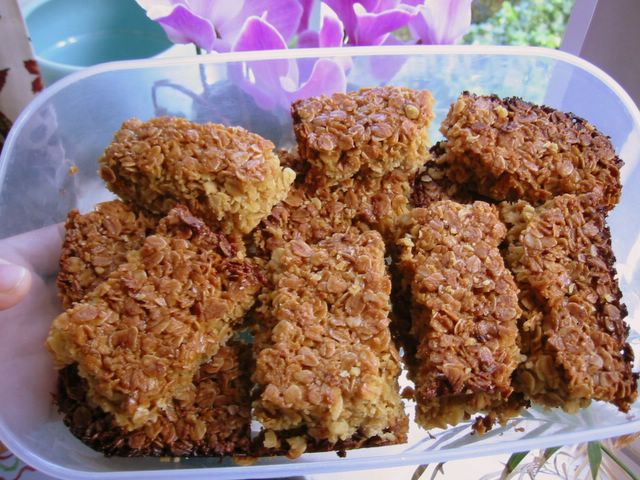
Flapjacks
You might have noticed that a lot of the recipes I do here are quite 'basic'. To be frank, I only started cooking and baking in earnest in the last few years although I've been a lifelong enthusiastic eater and food lover. It's only when I lived on my own in Hong Kong and got married a year later that I was forced to cook everyday. However, the lack of kitchen implements, more importantly a decent oven, hindered my development as a cook. So now that I am sort of delving deeper into cooking and food appreciation that I began to educate myself of the basics in cooking. That is the reason why I have a lot of traditional or unsophisticated dishes here besides the fact that I love uncomplicated food. One advantage of this is you get to have new insights on the different variations you can do or perform the same techniques to a different dish.

When I was doing these classic flapjacks, I suddenly remember a coconut sweet snack that my mother made when we were young. And I realised that I could do it in a flapjack way, i.e. press in a baking pan and bake a little to make it come together and then cut into bars. Great! Now I have to call long distance to confirm the recipe with my Nanay.

As for this lovely snack, it is so moreish that I couldn't keep myself from eating them. It must be the nice combination of golden syrup and muscovado sugar plus the wholesome goodness of the oats. I suggest that the oats you use should have as much whole ones as much as possible, having porridge grade oats will make it quite crumbly. The BBC Good Food magazine's 101 Cakes and Bakes provided the recipe that I adapted.


Flapjacks

250 g  [heaping 2 2/3 cups] porridge oats or rolled oats
140 g  [scant 1/2 cup] golden syrup or light corn syrup
50 g  [scant 1/3 cup] light muscovado sugar
175 g  [scant 3/4 cup] butter - cut into pieces
  1. Preheat oven to 180°C/fan 160°C/350°F/gas mark 4. Line a 9-inch baking pan with grease-proof paper (if it's not non-stick).
  2. Put butter, syrup, and sugar in a saucepan and heat gently until sugar is dissolved.
  3. Remove from heat and add in the oats. Mix well.
  4. Press into the prepared baking pan and bake for 20-25 minutes or until top is golden brown.
  5. Cool in baking pan for 5 minutes and cut into squares or bars.
  6. Cool completely in the pan then remove carefully. This is to prevent it from falling apart.

Monday, 5 December 2005

Beef, Ale and Mushroom Pie

Beef, Ale & Mushroom Pie
We had a box of mushrooms one time that needed to be used up fast. It was expiring a day later. Since I have a handy ready made puff pastry and some beef in the fridge, I thought I'd adapt this recipe I found from the BBC Food website. It suggested ale (a type of beer) in which the Guinness sitting in my pantry came in handy. Btw, Guinness beer is actually a 'stout' which is a class of ale beers. Whether you use an ale or stout or porter, it will do well in this dish.

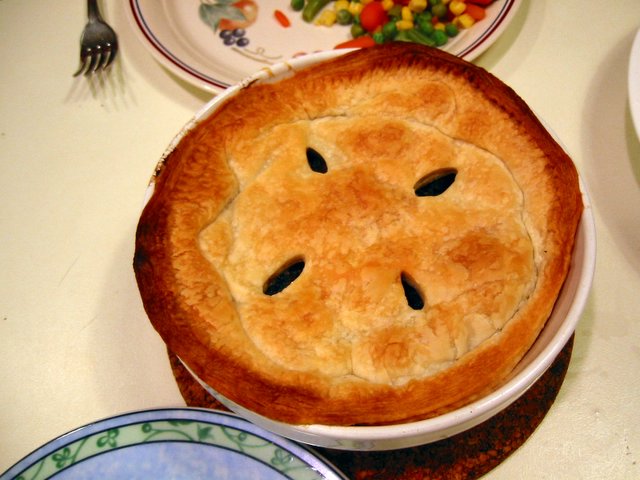
As for the pastry, I didn't have any pie funnel or pie vent so I just cut some holes on the top to let the steam rising from the meat filling out so as not to make the pastry soggy. It wasn't in the instructions I just thought of it as common sense. And it worked! :)


Beef, Ale & Mushroom Pie


Beef, Ale and Mushroom Pie

1 kg  stewing beef - cut into roughly 1-inch squares
1 Tbsp vegetable oil
1 medium onion - diced
1 Tbsp flour
1 Tbsp mushroom ketchup (optional)
1 Tbsp Worcestershire sauce
1 Tbsp chopped fresh thyme or 1 tsp dried thyme
2 Tbsp chopped parsley or 1 tsp dried parsley
1 tsp English mustard
1 bayleaf
1 tsp sea salt
freshly milled black pepper
2/3 cup beef stock
1/2 cup ale (or Guinness)
250 g  mushrooms - sliced
450 g  puff pastry
  1. Heat oil in a heavy bottomed pot and saute onion gently until translucent (about 5 minutes).
  2. Stir in beef and cook until browned.
  3. Add in the flour, cook until dark brown (about 1 minute).
  4. Mix in the mushroom ketchup, Wostershire sauce, thyme, parsley, bay leaf, salt and pepper.
  5. Slowly add beef stock and ale, bring to boil.
  6. Add mushrooms and lower heat to simmer gently until beef is tender (about 1 1/2 hours). If it is drying out too much add hot water or beef stock a little at a time.
  7. Preheat oven to 400°F/200°C/fan 180°C/gas mark 6.
  8. Remove beef from heat, skim off any fat, adjust seasonings and add more fresh chopped parsley if available.
  9. Roll out puff pastry and invert the pie dish(es) to be used onto it. Cut out a cover for the dish using the shape of the pie dish as outline. If you do not have a pie funnel, cut out holes in the pastry cover to let the steam from the filling to escape and not make the pastry soggy.
  10. Put in the whole lot (beef + sauce) in a medium sized pie dish or individual pie dishes. Cover pie dish with the prepared pastry and trim edge by hand or with tines of a fork.
  11. Bake for 20-25 minutes or until the pastry is well risen and golden brown.

Sunday, 4 December 2005

LP 4.5: Chestnut Squares

The Lasang Pinoy group decided to have a 'special edition' of the monthly food blogging event that showcases Filipino cuisine. Since it's in between the regular events, they christened it Lasang Pinoy 4.5 to underscore the issue of plagiarism in the blog world and in the internet as a whole. To be specific, this came about when pictures of Karen's and Market Man's yemas was printed in a Philippine broadsheet without their permission. Most bloggers are generous with their resources all one has to do is ask for their consent to use their pictures. There have been numerous cases of copying images (and contents) in blogs then published in some other websites or forums. But this is the first time (AFAIK) that images from food blogs ended up in print! It may be easy deleting webpages but having them in a published newspaper is a very strong and undeniable evidence of the dastardly deed. The issue, it seems, has not been resolved entirely. It might be better if you follow the whole controversy by visiting here and here.

As for me, as a protest I borrowed Stel of Baby Rambutan's recipe and pictures with her permission - that is in bold letters. A few posts back, another food blogging friend gave me some yummy ingredients from her sojourn in France. That's why I ended up with chestnut puree/cream in my cupboard. I so love this confection and Stel's previous baking posts saved me from digging up recipes for it. You have to understand why I was so ecstatic with the results of my baking - it's the first time in about 15+ years that I baked a meringue-based cake! The last time it came out so hard even our dog won't eat it. :) But this time, hah! it was oh so springy and soft and well risen - and no raising agents at that - only the beaten egg whites. Wheee! I was so happy I did the dance of joy ... 'One for the money and the free rides. It's two for the lie that you denied. All rise (all rise)'. LOL!

According to Stel this recipe of hers, which I adapted, was in fact adapted also (2x times adapted will that make it original? Asa pa ako!) from The French Cookie Book by Bruce Healy with Paul Bugat. I did not use cream of tartar, it was already too late when I realised my pot was already expired. But even without it the egg whites peaked marvellously. Then I used half milk and half dark chocolates because I could imagine my kids not touching this with a ten-foot pole if they know it's plain dark chocolate. Lastly, I spread the choc topping while the cake is still in the baking pan. Why? So as not to waste the chocolate dripping needlessly by its sides. Well yes, I would surely scrape the drippings and eat them but it's nice to know they all ended up in the cake.
picture courtesy of Baby Rambutan


Chestnut Squares

[heaping 1/3 cup + 2 tsp] caster sugar (superfine)
2 large eggs - separated and at room temperature
1 tsp vanilla extract
250 g  [heaping 3/4 cup] chestnut cream (creme de marrons)
1/4 cup unsalted butter - melted
1/8 tsp cream of tartar (optional)
45 g  [1/3 cup + 2 tsp] plain flour

*Glaze:
200 g  dark cooking chocolate (70% chocolate content) OR combination of dark and milk chocolates
1 tsp almond oil or neutral vegetable oil (optional)
  1. Pre-heat oven to 425°F/220°C/fan 200°C.
  2. Butter and flour well a 9-inch square baking pan.
  3. Set aside 2 1/2 tsp of the sugar.
  4. In a bowl, beat the egg yolks with the rest of the sugar and vanilla with an electric mixer until light, thick and smooth.
  5. Add in the chestnut cream, followed by the butter. Mix well.
  6. Get another bowl and whip the egg whites with an electric mixer (make sure the beaters and bowl are clean and dry) on low speed until frothy. Add the cream of tartar at this point if you're using it.
  7. Increase the speed to medium-high until whites are stiff but not dry.
  8. Add the reserved sugar and continue beating at high speed for a few seconds to incorporate the sugar.
  9. Sift the flour over the chestnut-egg yolk mixture and mix with a wooden spatula.
  10. Add about 1/3 of the whipped egg whites into it and fold quickly.
  11. Then gently fold in the remaining egg whites. Do not overmix.
  12. Pour the batter in the prepared pan, spread evenly and smooth the surface.
  13. Bake for about 16-20 minutes or until lightly browned and springs back to the touch.
  14. Remove from pan and cool on a wire rack.
  15. Melt the chocolates by placing in a heatproof glass bowl over simmering saucepan of water.
  16. Pour melted chocolate on the cake, spreading it evenly, letting the excess flow down the sides. You can do this while the cake is still on the rack OR put back the cooled cake in the baking pan then pour the chocolate in the pan. The latter is to avoid wastage of chocolate.
  17. Cool and let the glaze set.
  18. Cut into squares and serve.


LasangPinoy 4.5

Friday, 2 December 2005

It's All Greek To Me


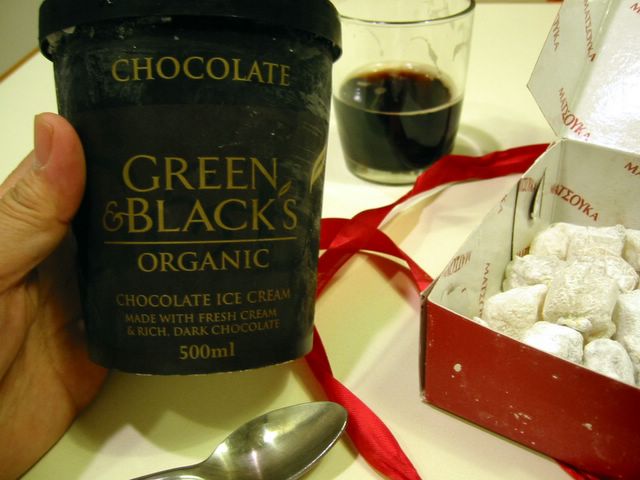
Last week I had a wonderful package from Greece sent by my dear blogging friend Sha who's residing in Athens. And what a very nice package it was - a postcard, a Greek cookbook (gotta try the recipes there), and my favourite Turkish delight! It was one of the best I've ever tasted. I know my Turkish delight 'coz my husband used to take these home regularly from his work stint in Istanbul a few years back. But talking about the sweets, it was not too sticky, not too sweet - just right, no rose flavour (which some of them have in abundance), and it's got nuggets of pistacios embedded in them. Yummylicious!


I lost no time in devouring them, well actually I attempted to eat only a few and save them for another day but couldn't keep my hands off the box. *sigh* Later in the evening, finally decided to sit down and do the whole hog and eat it with a glass of Guinness plus a tub of Green & Black's Chocolate ice cream - good combination eh? ;) The G&B ice cream (which I got as a birthday gift from Sainsbury's) was a revelation, after a teaspoon each, me and my kids were fighting over the little tub. It was sooo creamy and not overly sweet with a somewhat dark-ish real chocolate flavour though not bitter at all. Hey, what can I say ... 'twas a nice sugar-high evening. Thanks ever to you Sha!