My current stash of this wonderful bread was about to expire and I was left with a choice between having indigestion in eating it all up or be less greedy and make some panettone bread and butter pudding. Bread and butter pudding, I now realised, is simply custard-soaked pieces of bread. It's a wonderful ending for my beloved panettone because the recipe I adapted from the BBC Goodfood magazine was easy to do and utterly divine. The original recipe is here if you're interested.
Panettone Pudding
250 g panettone (about 5 medium slices)
1/2 cup double cream
1 cup milk
2 eggs
1 tsp vanilla extract
2 Tbsp caster sugar (superfine)
icing sugar (for sprinkling - optional)
softly whipped cream, to serve
- Grease a 850ml/1-1/2 pint (about 3 1/2 cups - a 9inch x 9inch deep pan will do) baking dish with a little butter.
- Preheat the oven to 160°C/fan 140°C/gas mark 3.
- Cut the panettone into wedges then in half, leaving the crusts on. Arrange the bread in the baking pan.
- In a bowl, whisk together the eggs, cream, milk, vanilla extract and sugar and pour evenly over the panettone. Let it soak for a few minutes.
- Put the dish in a deep roasting pan and pour hot water around it to a depth of about 2.5 cm/1 inch
- Bake for 35 minutes until the pudding is just set.
- (Optional) Dust top with icing sugar and serve with whipped cream or ice cream.

Then an email exchange with the Karen, our Kapampangan-cuisine expert food blogger, cleared the haze of mystery - it had something to do with fermentation! She said that in the old days when most people make their own tocinos they keep the salt and sugar cured pork in glass jars and let it ferment for a few days. Crucially, according to Karen, the rule of thumb in curing tocino is 5 days in the fridge or 3 days without refrigeration. Care should be taken here since as you well know there is a fine line or a short period between being fermented and getting rotten! I played around with the curing/storing time in the fridge and my current standard is 5 days minimum and 7 days max. After that the meat really goes off and you don't really want to eat stinking tocino, would you?
It's only now that I realised why people would get shop-bought tocino instead of making one themselves. In this age of TV, fast food, and instant gratification, imagine waiting for almost a week to get your homemade tocino fix! I think I'll make several batches and try to freeze it next time.
See that picture of tocino below? It is naturally reddish after the fermentation so red food colouring prevalent in commercial version is not needed. You would also avoid any artificial ingredients by avoiding the said food colouring. My proportion for the salt and sugar here is still at the tweaking stage so please adjust it to your liking as you see fit. Plus I'll be also experimenting in adding honey or pineapple juice or golden syrup or brown/muscovado sugar. I will surely keep this post updated whenever I make any progress.

1 kg pork (preferably well marbled with fat like the shoulder part)
1 Tbsp fine salt
5 Tbsp granulated sugar
- Slice the meat into about 1/4-inch thick and into serving sizes.
- Mix salt and sugar well in a bowl.
- Add the pork and mix in, making sure that it is well coated.
- Put in a covered glass container and store in the fridge for about 5 days.
- To cook:
- Put tocino in a non-stick pan and add just enough water to cover it.
- Bring to boil then bring heat down and simmer for about 30 minutes or until tender. Add hot water a little at a time if it is drying up too much.
- When the water has nearly evaporated (this should be near the end of 30 minutes), drizzle some oil on it, turn heat to very low and let it fry gently. Stir occasionally and let the meat scrape the sticky residue in the pan. Cook until golden brown.
Look how blessed I am, receiving another parcel out of the blue just 1 month from the one from Hawaii. This time it came from Boston sent by a long-time blogging friend who was generous enough to send me uncommon Pinoy ingredients, my favourite 'quamoy' dried plums, and a great cookbook by Mario Batali. I was flicking through the pages and quickly marked out a lot of pages that I want to try out. She also sent a steam plate tongs that I've been searching for in all the Oriental groceries I happen to visit here in UK. I distinctly remember having several when I was in Hong Kong but it disappeared when we moved here. And I've been tong-less ever since. ;)
Thanks very very much, Stel, for the wonderful gifts you sent my way. It is greatly and hugely appreciated, my friend. I've been wanting to send some to you and other blogging friends but my current killer work schedule just makes it so so hard. I hope I can make it up to you soon. :)

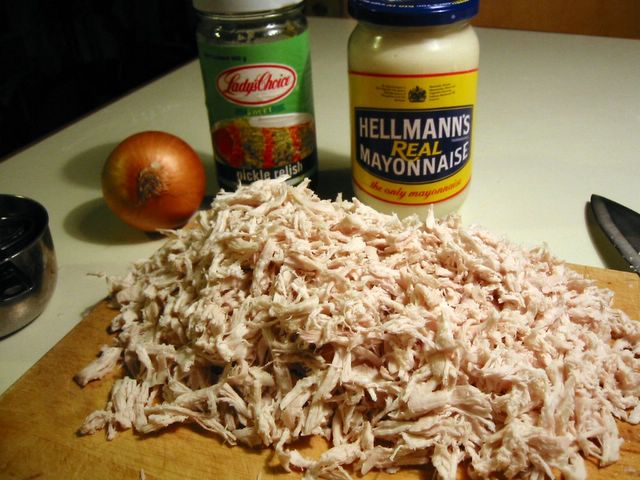
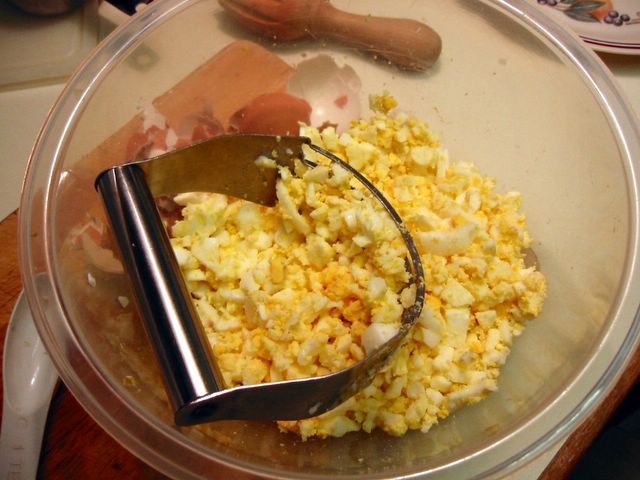
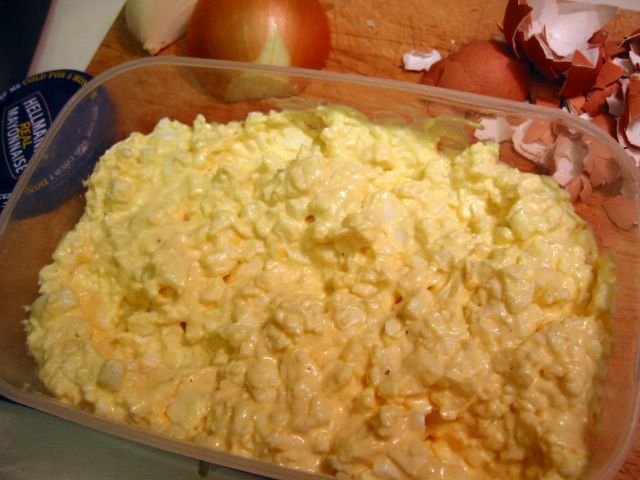
A reader recently asked on how to make tuna sandwich. I told her I will posting something about sandwich fillers. Little did I realise that the pictures and my post saved on draft for the past year do not have the tuna one she needs. I had to quickly do some this morning so I could post the pictures here. It would have been complete if I had something for cheese pimiento. Maybe I can do that some other time.
These are very simple sandwich spreads which I am posting mainly for my kids. You must have noticed "sarnie" at the title. Like a lot of things here in Britain, that is the nickname for sandwich. As for the name itself, it was bestowed on two slices of bread with a meat (usually) in the middle after the Earl of Sandwich. The medieval earl apparently loved to eat these a lot.
Chicken Sandwich Spread
3 cups cooked chicken meat - chopped or flaked
1 1/3 cup mayonnaise
3 1/2 Tbsp chopped sweet pickle relish
2 Tbsp finely chopped onion
freshly ground salt and pepper
- Combine all ingredients in a bowl. Taste and season with salt and pepper if needed.

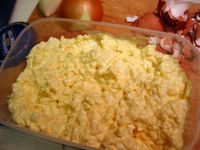
Egg Mayo
5 hard boiled eggs - chopped
2/3 cup mayonnaise
freshly ground pepper
- Combine all ingredients in a bowl. Taste and season with salt and pepper if needed. If you use Hellmann's mayonnaise, usually no additional salt is necessary.
Tuna-Mayo-Sweetcorn
2 x 185 g cans of tuna in oil
1/2 cup cooked sweetcorn (or sweetcorn from cans)
1/3 cup mayonnaise
salt and pepper to taste
- Drain tuna from oil then flake it in a bowl. Add all other ingredients. Taste and add salt and/or pepper if needed.
Tuna Mayonnaise
2 x 185 g cans of tuna in oil
2 Tbsp chopped onion or green onion
1 Tbsp chopped sweet pickle relish
salt and pepper to taste
- Drain tuna from oil then flake it in a container. Add in all other ingredients. Taste and add salt and/or pepper if necessary.
Here's what you can do when you've got that odd small quantity of beef left. Too little to freeze, too fiddly to stir-fry with vegetables, and especially too much of a waste to throw away. I adapted this from my old reliable Chinese Cooking For Beginners by Huang Su-huei. It originally had 1 tsp sugar in it but I completely omitted it since I really don't want a sweet fried rice. This is very adaptable such that you can add in other veggies or left over meat in it.
Beef Fried Rice
150 g [about 1/2 cup] minced beef
1 cup chopped onions
2 1/2 cup steamed rice (chilled left-over rice is best)
3 Tbsp ketchup
1/2 tsp fine salt
1 tsp Worcestershire sauce
2-3 Tbsp oil
- Mix ketchup and salt in a small bowl. Set aside.
- Heat a wok and add the oil. Fry the onion until translucent (about 3-5 minutes).
- Add the ground beef and cook in medium heat until cooked (about 5-6 minutes). Make sure to separate the tiny beef pieces with your spatula or cooking spoon.
*OR*
To make it more tender, add about 1/4 cup hot water and simmer for 30 minutes or until beef is tender and all the water has evaporated.
- Sprinkle the Worcestershire sauce on the beef and cook for a few minutes more.
- Add the ketchup mixture, mix well. Then add in the rice and stir fry until rice is heated through and mixed well.
I overspent on carrots last week so I had this big bunch sitting in my fridge's vegetable box waiting to be used. I've never done a carrot soup before so I guess that was the natural direction it was taking. Luckily, there was this reader recipe in the current edition of the BBC Good Food magazine (is it obvious I like that magazine?!) that was precisely what I was looking for. Jenny Martin was gracious enough to share her recipe to all readers and here I am tweaking it a little bit here and there according to my taste. For one thing, I found the pureed carrots on the sweet side. Well, unless I wanted a dessert, a few twist of the salt mill did the job of making it more savoury.
Carrot Soup
1 medium red onion - chopped
1 tsp minced garlic cloves
2 Tbsp olive oil
1 small sprig of fresh thyme or rosemary - use the leaves only
6 large carrots (about 800 g) - peeled and chopped
1 Tbsp sherry or rice wine (optional)
725 ml [2 1/2 cups] stock
fresh chives - snipped (optional)
cheese - grated or crumbled (optional)
salt and pepper to taste
- Gently cook the onion, garlic, and thyme in oil in a pot until the onion is soft and translucent (around 10 minutes). Stir occasionally.
- Add the carrots, cook for about 3 minutes.
- Increase heat and add the wine (if using). Let simmer until almost all of the wine has evaporated.
- Pour in the stock and bring to boil. Lower heat and simmer until carrots are soft - about 30-40 minutes. Add more water or stock if it's becoming too dry.
- Using a blender, food processor or hand-held blender, whizz the soup until completely smooth.
- Return to the pot and heat through. Taste and season with salt and/or pepper.
- Serve in bowls with grated cheese and sprinkled chives on top.
 I will not let the month of February to go by without me posting about a wonderful parcel from our close friend Ernie who lives in Hawaii. Boy was it filled with unusual food of the likes of taro pancakes and papaya seed salad dressing. I can't wait to try them out. No parcel from Hawaii would be complete without the usual wonderfully yummy macadamia. Ernie emailed us a day after we received it to warn us to go easy on the nuts because they're quite fatty. Well, it was too late! We've eaten them all! :) Thanks very much Ernie. We hope we can visit you there to enjoy the great beaches and learn the hula.
'Chocolate by Brand' is the current theme of one of the longest running event in the blogging world. David Lebovitz hosts this 27th edition of Sugar High Friday. He encourages us to make a dessert out of our chocolate bars and write about them.
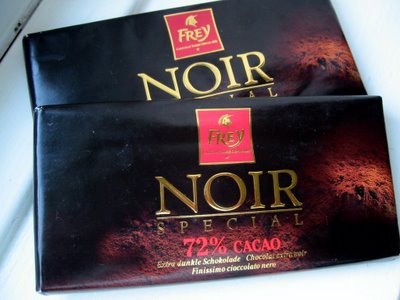
The chocolate bars I nabbed is by Frey - dark variety with 72% cocoa content. Wow, that's the highest I've used for cooking. Why I got it? It was on sale at the local Migros grocery near my sister's place when I visited her in Geneva a few months ago. You know me, I love value for money that means anything on sale!
Unlike some 70% chocolate I had before, this one is very deeply dark brown almost black actually. I savoured a small bite of it that showed it had smoothness, just the right amount of sugar and creaminess, a hint of coffee, with a little bitterness in the finish. Although I couldn't really tell how it would compare to one of those single-estate-organic-super-high-end types that your get from uber cool chocolate boutiques. All I can say is I like its smell, colour, and taste. Now let's see how it would fare when cooked.
I wanted to make something uncomplicated that would show the real qualities of chocolate. First thing that came to mind was chocolate truffles which I thought was perfect but then I've already posted one and for SHF, too! So out came this recipe from my burgeoning clippings from the BBC GoodFood magazine. It looks simple enough until I read closely about 'finely chopped' and 'crushed'. Turned out it requires more elbow grease. Oh well, things I have to do to have my sugar fix. :) The recipe originally asked for dried apricots but I bet any dried or candied fruit would be lovely in it. Things like cherries, pineapples, cranberries, even crystallised ginger! I did not include any chopped nuts because I thought there's too many things in it already. Maybe next time I'll lose the ground almond and put in the nuts. The chocolate itself had to be sufficiently chilled after melting to make it easy enough to mold into a log. Once you've done that the rolling on the crushed biscuits is easy peasy.
How did it taste? Well, the honey had a definite influence on it so other honey flavours would give it a different slant (even golden syrup would be interesting). Despite the number of distractions on this log (did I say I'm making something uncomplicated?), the chocolate still shone through. Dark, very slightly bitter, at the same time meltingly smooth in the mouth. Such a nice change from the gritty chocolates my husband brought home last Christmas.
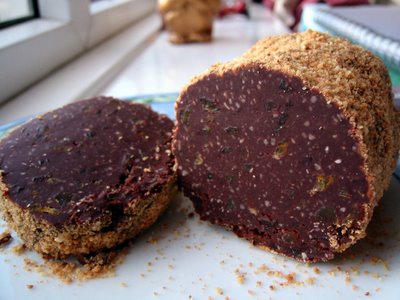 Chocolate Salami
250 g dark chocolate or combination of milk and dark chocolates
100 g butter
3 Tbsp clear honey
100 g ground almonds
100 g dried or candied fruits (apricots, cherries, etc.) - finely chopped
50 g toasted nuts (optional) - finely chopped
100 g amaretti biscuits - crushed
- Melt chocolate, butter and honey in a heatproof bowl over simmering water in a saucepan.
- Remove from heat and add almonds, toasted nuts (if using), and dried fruits.
- Cool completely and chill in fridge for about 1-2 hours until it is of dough-like consistency.
- Shape into a log (about 2 inches thick) and roll on crushed amaretti biscuits.
- Wrap in greaseproof paper and again tightly in foil.
Chill overnight in fridge.
- Before serving slice into rounds with sharp knife.
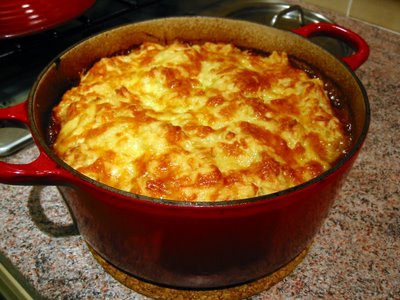 Andrew's call for stews as a new blogging event got me excited. Ever since the IMBB event stopped I was hoping someone would come up with a similar widely encompassing blog meme. It's nice to have one that would gather bloggers all over the world from all manners of persuation and basically have a big blogworld foodfest.
As per usual habit, I wanted to submit something Filipino but my husband emphatically said he doesn't want any stew that has tomatoes in it. I think the recent spate of pastas on our dinner table has done him in. That ruled out the Pinoy angle since all the stews without that offending ingredient I have already blogged before. So I've decided to do a simple beef stew but with its dumplings twisted into a muffin-like topping.
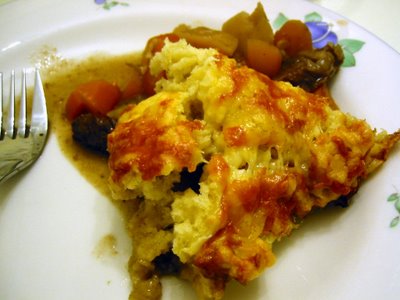
I had to do some adjustment to the recipe by Lesley Waters in the GoodFood magazine. For one, I thought it had too much sauce but the topping dough sucked up a lot of it so that was alright. Still the sauce was on the thin side so I noted in the recipe to add a little of the flour coating. Plus I had to add some Worcestershire sauce to correct its blandness and add mushrooms and reduce the carrots. There were too many changes that I think the beef stew was from my own recipe and I just kept the topping which was fab, by the way, and extremely yummy. It was looking particularly attractive with the cheese on top baked to a crisp golden colour.
Muffin-topped Beef Stew
500 g stewing steak - cut into chunks
2 Tbsp flour - seasoned with salt and pepper
2 Tbsp olive oil
1 large onion - chopped
2 medium carrots - peeled and chopped
2 large parsnips - peeled and chopped
200 g mushrooms - sliced
1 bay leaf
2 Tbsp tomato paste (optional)
1 Tbsp Worcestershire sauce
1 cup red wine
2 cups stock
*Topping:
225 g flour (about 1 1/2 cups)
1 Tbsp baking powder
140 g cheddar cheese - grated (about 1 1/2 cups)
2 Tbsp olive oil
2/3 cups milk
- Preheat oven to 150°C/fan 130°C/300°F.
- Toss beef in seasoned flour. Reserve 1/2 Tbsp of excess flour mixture.
- Heat the olive oil in a pot. Brown the flour-coated beef in high heat. If need be, do it in batches. Remove from pot once colour changes. Set aside.
- Lower heat and fry onions until soft and translucent - about 5 minutes.
- Add the carrots, parsnips, mushrooms. Cook 2 minutes.
- Stir in the reserved flour mixture and cook for a few seconds.
- Bring back beef in the pot. Stir and cook for 1 minute.
- Add bay leaf, tomato paste (if using), Worcestershire sauce, red wine, and stock.
- Bring to boil then put in oven. Bake for 1 3/4 - 2 hours of until the beef is tender.
- While the stew is in the oven, make the topping: Mix flour, baking powder, and half of the cheese.
- Combine milk and olive oil.
- Stir in milk mixture to the flour mixture to form a soft dough. If need be, add milk a little more at a time.
- Once the stew is done, remove the pot from the oven and raise the temperature to 190°C/fan 170°C/375°F.
- Spread (you may have to use your hand) on top of the stew and sprinkle the rest of the cheese on top.
- Bake for 15 minutes or until golden brown.
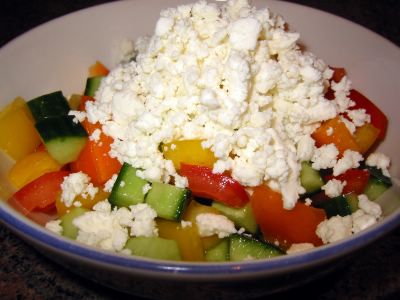 Last time I stayed with my sister in Geneva she served me this salad. We really don't know its name. She got the idea when she was served this at a friend's party who also don't have a name for it. So I just named it after the dominant veg.
I'm not a big fan of raw bell peppers but this veg combination and the cheese complementing it had me sold on the idea. It had definite echoes from a traditional Greek salad but is much simpler and, in my opinion, healthier without the olive oil.
This is perfect paired with meat dishes giving a refreshing respite from the richness and oil of the meat with its crunch and tang. Slight saltiness comes from the feta cheese to save it from being on the edge of being bland. You can easily replace the feta with any crumbly cheese like the Filipino kesong puti (white cheese) or cottage cheese. Of course you have to adjust the seasonings according to the cheese of your choice.
Bell Pepper Salad
1 yellow bell pepper* - deseeded and diced
1 orange bell pepper* - deseeded and diced
1 cucumber
3 medium tomatoes
100 g feta cheese (or any crumbly cheese)
salt and pepper to taste
- Cut the ends of the cucumber. Cut in half lengthwise. Scrape the center of the cucumber and discard. Slice the cucumber into small cubes.
- Slice the tomatoes crosswise and remove the seeds. Cut into small cubes.
- Mix all the vegetables in a serving bowl. Season to taste with salt and/or pepper*.
- Crumble the feta cheese on top. Chill.
- Before serving toss the vegetables with the cheese.
*Note: If you can't find these colours in bell peppers, just choose two of different colours - red and green for example.
Put less salt for salty cheese like feta and more salt for blander cheeses like kesong puti or cottage cheese.
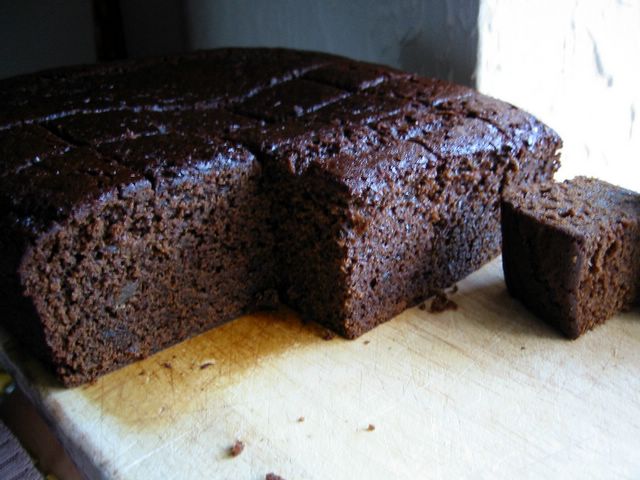
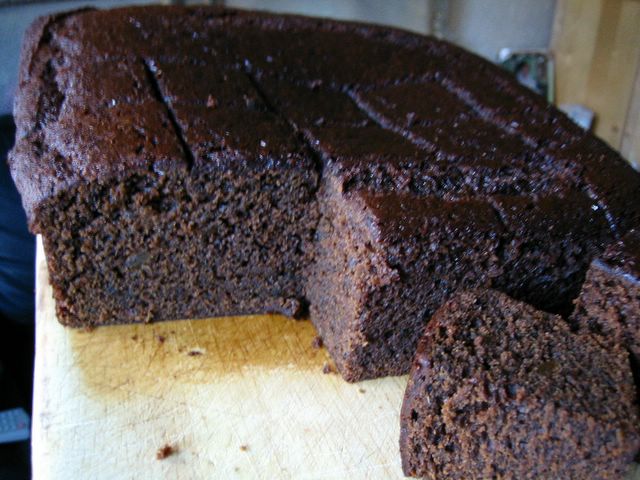
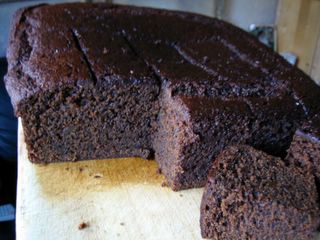
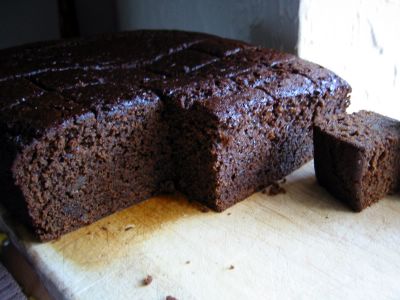 My ginger-fiend friend described it as one of the best ginger cake he ever had. Well you can't get a better encouragement than that! It was moist, soft, dark - I'm talking about the cake here okay? ;) with that slightly smoky bittery edge from the treacle and spiked by the spices that adorned it. Since I'm not too fond of icings so I did not bother putting any like I usually do. It was even better after a few days stored in an airtight container when it became moister and the rich dark taste developed and sort of 'matured' giving it a fuller-bodied deeper taste. Am I describing a cake or a wine??
So it was this 'naked' ginger cake that captured my colleagues' tastebuds which I adapted from my favourite BBC GoodFood magazine of October 2006 edition. They're getting better by the way (the magazine I mean). There was a year that I stopped buying because I was getting bored with the same recipes rehashed over and over again. But in the past 2 years they've become more innovative and bolder in introducing new sections such as the produce in season and their ultimate recipe series. They even launched the spin-off magazine Olive which concentrates on the dining out or travelling foodies. Giving info and tips and where and when to get the latest in restaurant food or delis for example.
Ginger & Spice Cake
250 g [1 cup] butter
250 g [3/4 cup] black treacle (molasses)
250 g [heaping 1 cup] dark muscovado sugar
2 eggs - slightly beaten
300 ml [scant 1 1/4 cups] milk
100 g finely chopped stem ginger (glace ginger from a jar)
375 g plain flour
2 tsp bicarbonate of soda (baking soda)
2 tsp ground ginger
1 tsp allspice
*Icing (optional):
3 Tbsp ginger syrup from the stem ginger jar
5 Tbsp icing sugar (confectioner's)
- Butter and line a 9-inch/23-cm square deep baking pan. Preheat oven to 160°C/fan 140°C/325°F.
- Combine the butter, treacle, and muscovado sugar in a saucepan. Heat gently for about 5 minutes or until the butter melted. Stir to mix.
- Stir in the milk. Remove from heat and stir in the eggs until well combined. Set aside.
- Mix all the dry ingredients including the chopped ginger in a bowl.
- Stir in the butter/milk mixture with a wooden spoon until smooth and well combined.
- Pour the batter into the prepared baking pan and bake for 1 hour or until a skewer poked in the centre comes out clean.
- Take out of the oven and leave to cool completely in the pan. At this point you can wrap it well in cling film or in an airtight container and store for up to a week.
- (Optional) On the day you're going to serve it, mix all the icing ingredients. Drizzle the icing prettily on the cake. Cut into squares.
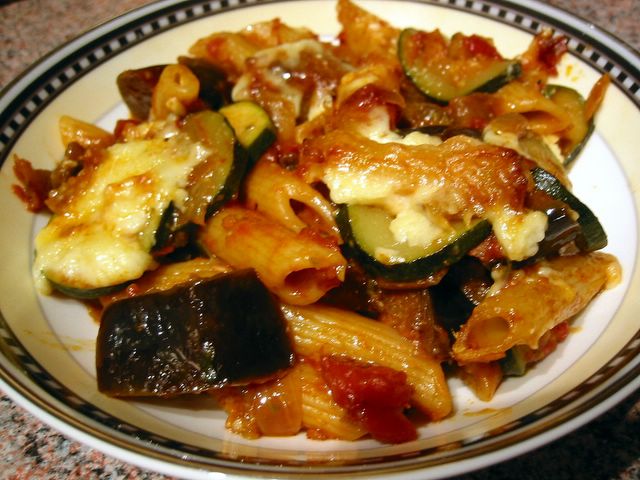
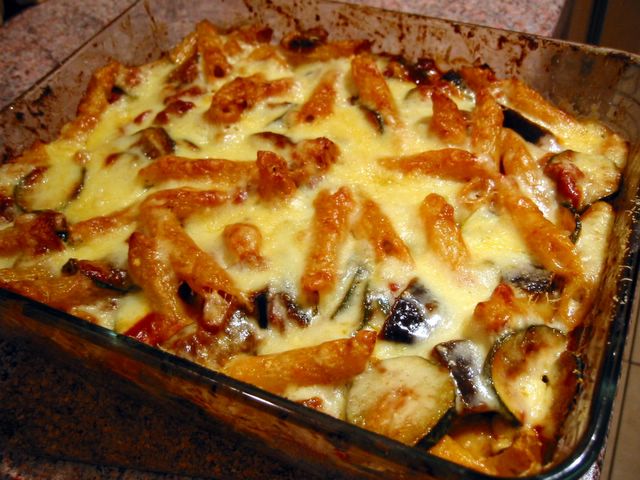
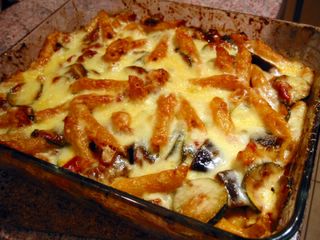
Now that the new year is here, I think a spot of non-meat all-veggie dish is all we need after 2 weeks of non-stop rich meaty food. *sigh* I wish I could wave a magic a wand to sweep away all the extra pounds I put on. So this simple pasta dish - I personally call it ratatouille with pasta - is very much welcome and a good deviation from meat dishes we've been having in the past holiday season. The veggies and the pasta can be prepared in advanced and then mixed and put together just before putting in the oven. This was adapted from the Good Housekeeping magazine of August 1995.
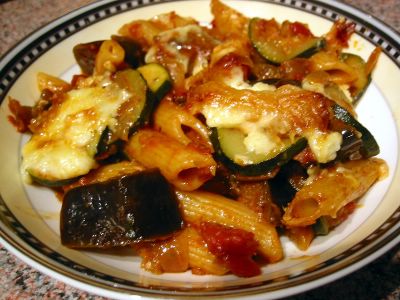 Pasta & Vegetable Gratin
350 g aubergine - roughly chopped
2 small courgettes - sliced thinly
1 onion - chopped
1 garlic clove - minced
2 Tbsp olive oil
2 tsp paprika
2 tsp tomato paste
400 g can chopped tomatoes
1/4 cup water
1 tsp sugar
salt and pepper to taste
250 g rigatoni or penne pasta
1 Tbsp pesto
150 g [1 1/2 cups] mature cheddar or Gruyere cheese
2-3 Tbsp freshly grated parmesan cheese
- Heat the olive oil in a saucepan. Fry the onion and garlic until soft.
- Add paprika and tomato paste, stir and cook for 1 minute.
- Add the aubergine and cook for 2 minutes.
- Add the tomatoes, sugar and water. Bring to boil then lower heat and simmer under cover for about 15 mins.
- Add the sliced courgette and cook for about 5 mins or until vegetables are done. Season with salt and pepper.
- Cook pasta according to packet instructions, drain and toss with the pesto sauce.
- Toss pasta in the vegetable sauce and transfer to a baking dish.
- Sprinkle cheeses on top.
- Bake at 200°C/fan 180°C/400°F for 20 minutes or until cheese on top in melted and golden brown.
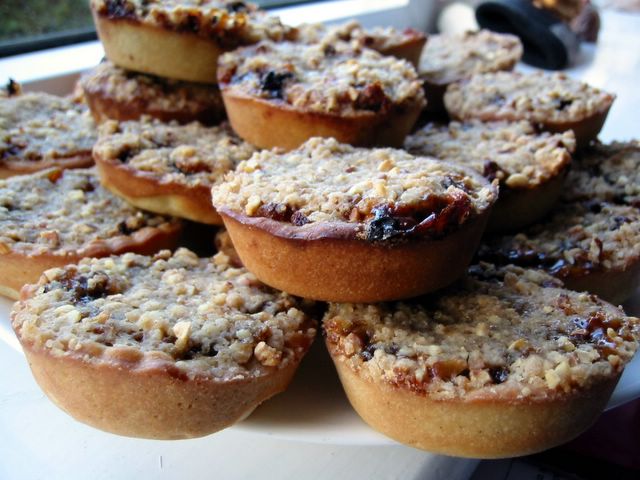
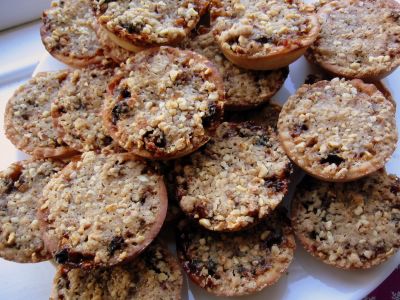
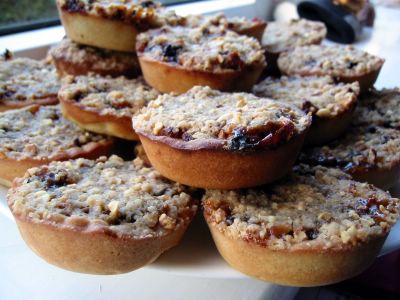 I used to dread the omnipresence of mince pies in these foggy isles every Christmas. They have definitely grown on me (means I can tolerate the shop-bought variety) these past few years though I'm still not fond of them. So I was always on the lookout for recipes that is less sweet, less boozy, and with much better pastry. I spied Gordon Ramsay's mince pie recipe from a Sunday newspaper a few weeks ago which I promptly clipped and stowed away. Last weekend I decided to give it a go. Although I found the pastry making a bit on the fiddly side, the rest was quite straight forward and not too complicated. One significant adjustment I made was that I have to reduce the liquid in the pastry by half because it made it very soft so I consequently had problems doing the cutter routine that in the end I just pressed them all in the muffin pans.
The product of my labour only satisfied my tastebud a day after baking. Imagine, I was ready to chuck it down the bin after I've baked it since I found it a bit too sweet but a day or two later it cooled off completely and the flavours mellowed - it tasted fab! It still had that strong punch from the mince meat (no meats in it really), the nuts giving it some interesting texture and nutty background (duh!) and just enough sugariness to qualify it to the level of dessert. Well, here's another item in my Christmas bake-off that I'll be pressing in my long-suffering friends' hands. :)
 Mince Pies
*For the mincemeat:
1 crisp dessert apple - grated
100 g [scant 1/2 cup] butter - melted and cooled
110 g [3/4 cup] finely chopped dried apricots
250 g [1 1/2 cups] sultanas or raisins
175 g [packed 1/2 cup + 1/3 cup] soft dark brown sugar
zest and juice of 1 small orange
zest and juice of 1 unwaxed lemon
50 g chopped toasted almonds
1/4 tsp ground nutmeg
1/2 tsp ground allspice
1/2 tsp ground cinnamon
2 Tbsp dark rum
2 Tbsp brandy
*For the pastry:
125 g [1/2 cup] cold unsalted butter - diced
250 g [heaping 2 cups] plain flour
125 g [3/4 cup + 2 Tbsp] icing sugar (confectioner's)
pinch of sea salt
1 vanilla pod
1 large egg - lightly beaten
*For the crumble topping:
75 g [1/2 cup] plain flour
1/2 tsp ground cinnamon
50 g unsalted butter
3 Tbsp chopped roasted hazelnuts
50 g [1/3 cup] demerara sugar
- For the mincemeat:
- Mix all ingredients in a bowl until well combined.
- Cover with clingfilm and let marinate overnight in the fridge.
- For the pastry:
- Split the vanilla pod lengthwise and scrape the seeds in the beaten egg, mix well.
- Tip in the flour, salt, icing sugar, and diced butter in a food processor and blitz until mixture resembles breadcrumbs.
*OR*
- In a bowl, combine the flour, salt, and icing sugar.
- Cut in the diced butter in the flour mixture with a pastry cutter or 2 butter knives until mixture resembles breadcrumbs.
- Add in the egg and vanilla mixture and pulse/mix until it comes together into a dough.
- On a lightly floured surface, knead the dough lightly for a few seconds just long enough to make it smooth.
- Wrap in clingfilm and chill in fridge for about 30 minutes.
- For the topping:
- Sift flour and cinnamon in a bowl.
- Cut in the diced butter in the flour mixture and rub in until it resembles coarse breadcrumbs.
- Add in the sugar and hazelnuts. Set aside.
- To assemble:
- Roll out the pastry to a thickness of about 1/8 inch.
- Cut out 3-inch/8-cm rounds and press into muffin or minced pie pans.*
- Put about 1 heaping tablespoon of the minced meat in the pastry shell.
- Sprinkle enough topping to cover the minced meat.
- Bake in a preheated oven of 190°C/fan 170°C/375°F for 15 minutes.
- Let cool in the pan for about 2 minutes then pry off and cool completely on a wire rack. This is best eaten 1 or more days later.
*Note: You can also roll the pastry into 1-inch balls and press it in the bottom and sides of the muffin pan.
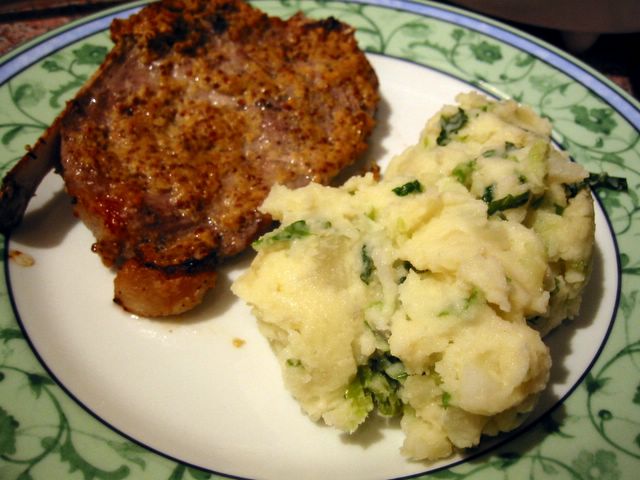
I'm not too proud of my picture here. I'm afraid my camera's about to die on me soon. There's something about rushing to serve dinner while its still warm that intrudes in the frantic trying to capture a stick-it-in-the-plate image. Somehow it doesn't jell.
That night we were hankering for something not adobo, or with tomato sauce or with noodles. Something not Asian or Oriental. What to do? A rummage thru my magazine clippings yielded this simple recipe from the 2005 calendar of Delicious magazine.
Colcannon sounds rustic at the same time complicated. When everything's revealed - tada! It's simply mashed potatoes with veggies in it! Quite a good departure from your average mash. The veggies gives it more texture, colour and health-cred. While the pork chops were simply seasoned with salt and mustard then grilled until fully cooked. Lovely!
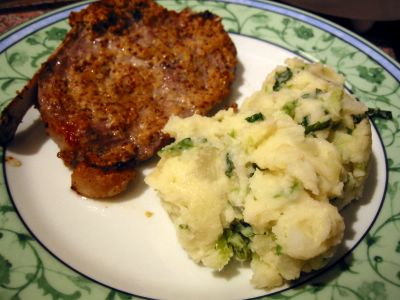 Colcannon
700 g floury potatoes (Maris Piper or King Edward)
1/4 cup butter
1/4 cup milk
1 small onion - chopped
2 springs fresh thyme - leaves picked
1/2 small savoy cabbage - shredded
- Peel and chop potatoes to even chunks. Boil in a large pan of water (or you can steam it) until tender - about 20 minutes.
- Drain and return to the pan and return to the heat for 1 minute, shaking occassionally to dry off excess moisture. If you're steaming you don't have to do this.
- Mash potatoes with half the butter and all of the milk. Season and stir until smooth and creamy.
- Meanwhile, melt the remaining butter in a saucepan and fry the onion and thyme until onion is translucent (about 5-6 minutes).
- Add the cabbage and about 1-2 Tbsp of water. Cover and cook in medium heat for about 8-10 minutes or until soft.
- Mix in cooked cabbage with the mashed potatoes. Stir until well combined.
- Keep warm until ready to serve.
Mustard Pork Chop
4 x 225 g pork loin chops
2 Tbsp wholegrain mustard
salt to taste
- Season pork chops on both sides with salt.
- Divide the mustard between the chops and spread evenly.
- Grill for 4-5 minutes each side until golden and cooked through.
- Serve pork chops with the colcannon.
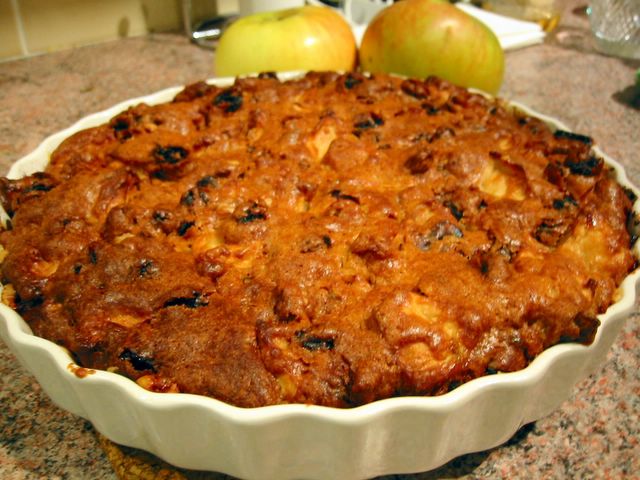
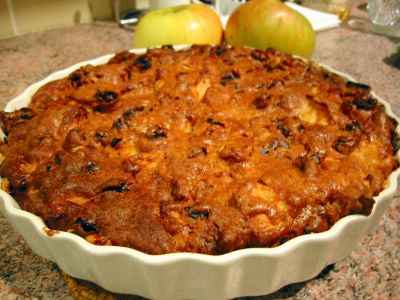 I can't tell you how many times I have longingly looked at the picture of this cake from the pages of the November 1996 edition of the Good Housekeeping magazine. Now that I've finally made it I realised that I have to do some adjustment next time around. I couldn't quite place this cake whether to categorise on the sweet or savoury side. Could it be that I used cheddar instead of caerphilly? It certainly was not very sweet and the generous amount of cheese in it made it a bit salty. I did enjoy it more as a snack rather than as a dessert. Strong coffee or tea certainly goes well with this.
Apple & Cheese Cake
550 g dessert apples - chopped [about 3 cups]
50 g Brazil nuts or walnuts - chopped [1/2 cup]
1/3 cup sunflower oil
175 g [1 1/3 cups] self-raising flour
1 tsp baking powder
75 g [1/3 cup + 1 Tbsp] light muscovado sugar
100 g [2/3 cups] raisins or sultanas or combination of both
2 eggs
200 g cheddar or Caerphilly or Wensleydale cheese - grated or crumbled
icing sugar for dusting (optional)
- Grease a 9-inch (23 cm) deep tart pan. Preheat oven to 180°C/fan 160°C/350°F.
- Combine the flour and baking powder in a bowl.
- Stir in sugar, raisins and sultanas (if using), nuts and apples.
- Beat eggs and oil in another bowl.
- Stir in the egg mixture to the flour mixture.
- Put half of batter in the tart pan.
- Sprinkle cheese on top.
- Spoon the rest of the batter on top of the cheese.
- Bake for 50 mins - 1 hour or until firm in the centre.
- Cool completely then sprinkle with icing sugar.
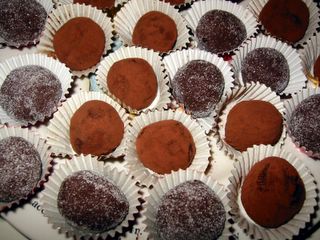
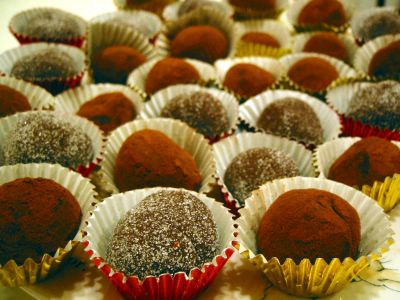 Johanna of the Passionate Cook was very enthusiastically encouraging us to create one of the more lusciously delicious concoctions man has ever created - chocolate truffles. I've always wanted to make one of these little pieces of delight. The sheer sensation of creamy melting chocolate in my mouth sealed my decision to participate in this 25th edition of the SHF.
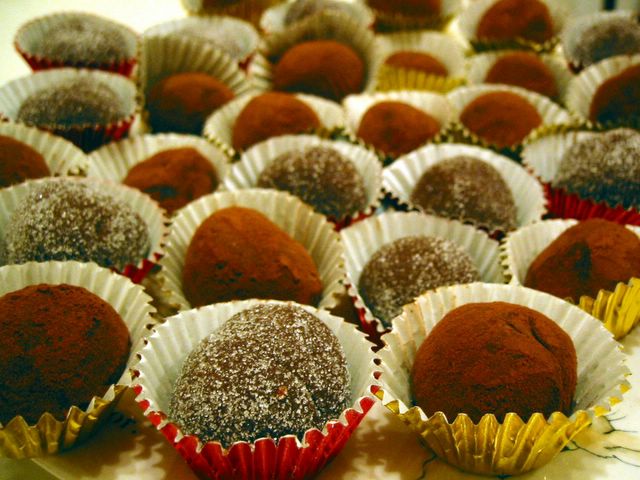
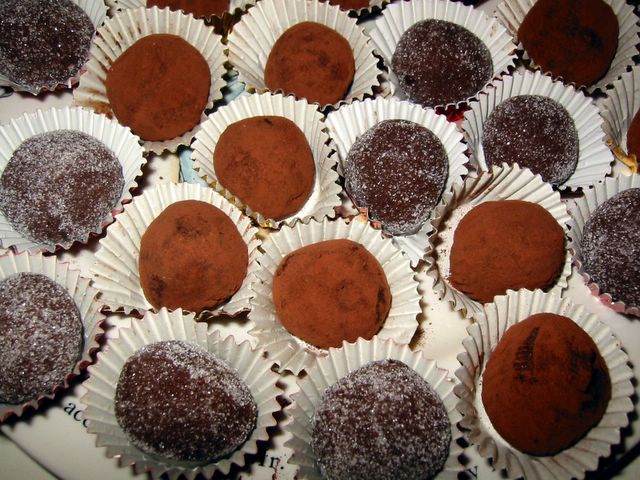
I wanted to create truffles that my kids would want to eat. So bitter chocolate is out while a little bit of sugar is in. This recipe I adapted from Phil Vickery's A Passion for Puddings cookbook was a little bit unusual since it uses condensed milk. I was a bit skeptical if it will be as meltingly luscious as ones made with double creams but it did convincingly deliver. The orange liquor had to be replaced with just normal orange extract for my kids' sake and although I didn't have any orange zest it was orangy enough to our taste. The ultimate taste was whether my kids will eat it. Well, as of this time they have eaten one each and reached for more. They naturally gravitated for ones rolled in vanilla sugar so I'll definitely remember that next time I make more of these moreish cloud of chocolate heaven.
Chocolate & Orange Truffle
200 g dark chocolate (70% cocoa solids)
300 g condensed milk
3 Tbsp double cream (heavy cream)
2 Tbsp orange liqueur or 1 tsp orange extract
finely grated zest of one orange (optional)
cocoa powder or icing sugar or vanilla sugar
- Melt chocolate, double cream, and condensed milk in a heatproof bowl over simmering water in a saucepan.
- Mix in the orange liqueur or orange extract and zest (if using).
- Remove from heat and cool completely to room temperature.
- Cover and chill in the fridge for about 4 hours or overnight.
- Spread cocoa powder or sugar on a wide plate.
- Have a bowl of iced water in your working area.
- Using a teaspoon, scoop a teaspoonful of the chocolate mixture and shape into balls using your hands then roll on the cocoa powder or sugar. Repeat until you have used up all the truffle mixture. Dip your hands from time to time in the iced water to cool it down and prevent the melting of the truffles while you're rolling it.
- Chill in the fridge.
I miss the old IMBB food blogging event. I liked the idea of setting a theme and have bloggers submit entries ranging from starter to mains to desserts or even cocktails. Unfortunately it seems to have ceased operation and there seems to be no regeneration in sight. Blogging events challenge me to seek out new recipes or new ingredients which I would not normally cook. For me, that's the main draw other than the excitement of looking at the rest of the entries come roundup time. The range and variety of the entries usually sparks an idea or makes me want to try a few.
I've seen the Weekend Cookbook blogging event quite sometime now (usually hosted and originally conceived by Sara of I Like To Cook). And I've filed away at the back of my mind a reminder to participate when time permits me. Sadly it's only now that I had a chance to write up an entry.
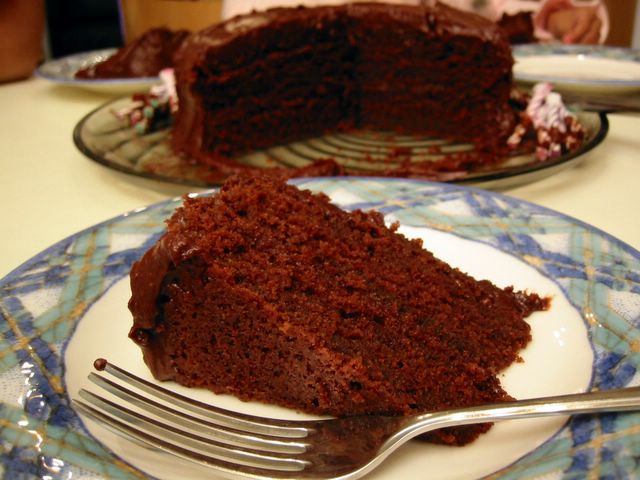
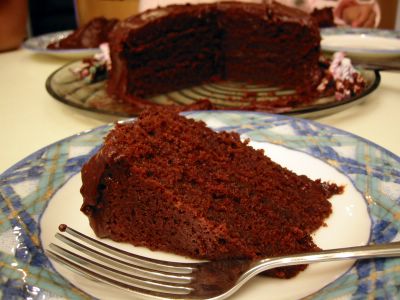
For the 11th edition of the Weekend Cookbook Challenge, which has a theme of party, I'm posting the chocolate birthday cake I made for J2's birthday a few weeks ago. Actually the last week of October and first week of November is a flurry of birthdays in our family. I was completely chocolated-out because of the series of chocolate cakes we consumed within days of each other in which this was the first one. *sigh*
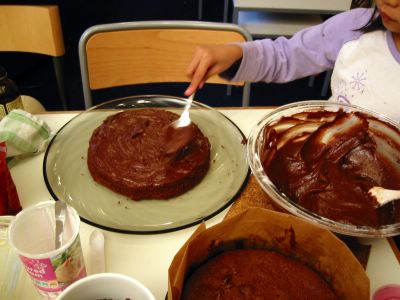
No party is complete without a cake, isn't it? What better way than having a good 'ol chocolate cake - nothing fancy, no exotic ingredient from a far flung land - just your standard reliable yummy birthday cake. In the time honored tradition of my baking sojourns I made a mistake - as usual. The recipe called for 1 1/2 sticks butter but somehow in the confusion and mayhem in the kitchen I put in 1 1/2 cups! That's double the amount! I was quietly fuming why this cookbook had sticks measurements. Then I remembered it was given to me by a blogging friend in America. Duh! Thank goodness it did not ruin the cake. Actually it made it extra moist which made me wonder how it would turn out with half the butter. We all loved the cake but the icing was too sweet for us. So I might hunt for other icing recipes out there or reduce the sugar though my youngest had a great time slathering it on, between, and around the cake layers.
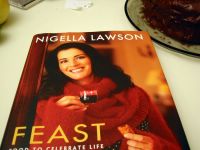
This yummy cake recipe is adapted from the cookbook Feast by Nigella Lawson sent to me by my lovely friend in Boston, Stel of Babyrambutan. I have to remind myself that this is an American edition so I have to be aware of the 'sticks' in there and not substitute 'cups' for it. :)
 Old-Fashioned Chocolate Cake
1 1/2 cup plain flour
1 cup caster sugar (superfine)
1 tsp baking powder
1/2 tsp baking soda
1/3 cup unsweetened cocoa
3/4 cups unsalted butter - softened
2 large eggs
2 tsp vanilla extract
2/3 cup sour cream
* Frosting
1/4 cup + 2 Tbsp unsalted butter - softened
170 g dark chocolate (70% cocoa content)
1 Tbsp golden syrup
1/2 cup sour cream
1 tsp vanilla extract
2 cups icing sugar
- Preheat oven to 350°F/180°C/fan 160°C. Grease and line 2 x 8-inch/20cm round sandwich pans.
- In a bowl, sift flour, cocoa, baking powder, and bicarbonate of soda. Set aside.
- In another bowl, beat the butter and sugar until light and fluffy.
- Add in the eggs one at a time, mix well after each addition.
- Add the sour cream and vanilla, combine well.
- Stir in the flour mixture with a wooden spoon until well combined.
- Divide the batter between the 2 prepared cake pans and bake for 25-30 minutes.
- Remove from oven and cool for about 10 minutes.
- Loosen and take out from the pans. Cool completely.
- For the icing: Melt the chocolate in a heat-proof bowl over simmering water. Cool completely.
- Beat the all the ingredients together until well combined.
- To assemble: Put one of the cakes on a cake plate.
- Evenly spread some of the icing on it and then top with the other cake layer.
- Spread and swirl decoratively the rest of the icing all around the layered cakes.
I have to break my blog's long streak of baked desserts with this wonderful dish which can either be a vegetarian main meal (without the bacon of course) or an appetiser. Adapted from next month's edition (Nov 2006) of the BBC GoodFood magazine, walnuts are in season now so I thought of doing this while these nuts are still relatively cheap. I was already preparing to dislike it when the bacon began to unravel and spill out the contents in 2 of the mushrooms. But I was pleasantly surprised with its yumminess - the bland mushroom going well with the creamy goat's cheese, the crunch of the walnuts and the smoky saltiness of the bacon. Lovely eaten with some leafy salad on the side.
The original recipe called for the bacon to be tied around the mushroom. But either my mushrooms were too big or the bacon rashers were too short that it didn't have much to give to tie it. So I put it in place with toothpicks and just removed them before serving. Another deviation I made is with the mushrooms. It was supposed to be open cup but I can't find any so I got the next best thing - big closed cup ones which I just sliced off the stem and the part around it making it effectively 'open cup'. It worked well if I may say so. :)
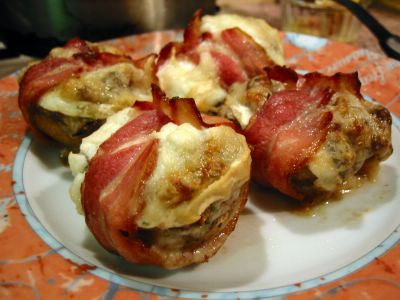 Stuffed Mushrooms with Walnuts & Goat's Cheese
6-8 open cup mushrooms, stalks removed
2 Tbsp oil
2 shallots or 1 small onion - chopped
1 garlic clove - finely minced
80 g [1/2 cups] chopped walnuts
2 tsp chopped fresh sage leaves or 1 tsp dried
2 Tbsp chopped fresh parsley
175 g firm goat's cheese - sliced into 6-8 pieces
6-8 thin rashers streaky bacon
- Preheat oven to 190°C/fan 170°C/375°F/gas mark 5.
- Lightly grease a baking sheet and place mushrooms stem side up on it.
- Fry the onion in oil until soft.
- Add garlic, herbs, chopped walnuts, and seasonings (salt/pepper). Remove from heat.
- Spoon the walnut mixture in the mushrooms. Top with a slice of goat's cheese.
- Tie a rasher of bacon around each mushroom (tied at the top). If the rashers are not long enough for tying, secure on the mushrooms with toothpicks.
- Bake for 15-20 minutes or until mushrooms are tender and the bacon crisp.
- Remove toothpicks (if using) before serving.
They say 'charity begins at home'. I'm exercising that virtue with the shameless plugging of a business venture set-up by relatives.
Several times I've been asked (or emailed) of any online Filipino shops that would deliver within Europe. I, of course, have to answer in the negative because I don't know of any at that time. Well, that changes now with the launch of the Online Pinoy Market. Initially they are offering pharmaceutical products that are well known and popular in the Philippines. Items like vitamins and facial moisturisers. These are now available for distribution (meaning for retailers) and very soon available for retail.
So please visit their temporary website (final one available soon) here and get in touch with the contact person for your orders.
Good luck in OPM's new venture !