Tuesday, 20 June 2006

Lemon Drizzle Cake

Lemon Drizzle Cake
My youngest had their cake-sale day a few weeks ago. Of course she 'demanded' that I bake at least one. I thought this traditional English cake would suit since it's universally liked plus fits the school requirement of 'no nuts' in the cake. The kids and parents in the cake-sale gave their approval by snapping up these squares within a few minutes of being laid on the table. The week after, my daughter was one of the few kids called to come forward by the headmaster in front of the whole school assembly. She was commended for bringing in (in his words) "the delicious lemon drizzle cake and marbled brownies" and was given a round of applause. Ahhhhh ...

As you can see the sugar in the drizzle did not get dissolved well in the lemon juice so I updated the recipe to include a step of heating the juice with the sugar to avoid that sugary crust on top. Actually others like it better that way but for me I'd rather have it right in, drenching the cake making it a bit soggy and moist but oh so yummy with its sweet-sour tang.

This is an easy one-bowl recipe. So easy in fact that even my 13-year-old daughter can make it unaided. The lining and buttering of the pan was the only thing she didn't like. I adapted this from mine (and Sha's) current fav baking book - the BBC GoodFood magazine's 101 Cakes & Bakes.


Lemon Drizzle Cake

100 g  butter - softened
175 g  [1 1/4 cups] self-raising flour
1 tsp baking powder
175 g  [1/2 cup + 1/3 cup] caster sugar (superfine)
2 large eggs
6 Tbsp milk
finely grated rind of 1 lemon

*Icing
5 Tbsp lemon juice
50 g  [6 Tbsp] icing sugar (confectioner's)
2 Tbsp caster sugar (superfine)
  1. Preheat oven to 350°F/fan 160°C/180°C/gas mark 4. Butter and line the base of a 11 x 7 inches cake pan.
  2. Put all ingredients in a bowl. Mix and beat for about 3 minutes.
  3. Pour into the prepared pan and bake for 25-30 minutes or until a skewer poked in the middle comes out clean.
  4. While it's baking, mix the icing - gently heat the lemon juice with the sugars in a small saucepan until the sugars are dissolved.
  5. Once the cake is out of the oven, poke or pierce it all over the top with a long skewer or toothpick. Make sure you pierce all the way through the bottom of the pan.
  6. Pour the icing evenly on top of the cake (now with lots of holes) while still hot. Let cool, slice and serve.

Monday, 12 June 2006

Ginataang Mais

Ginataang Mais
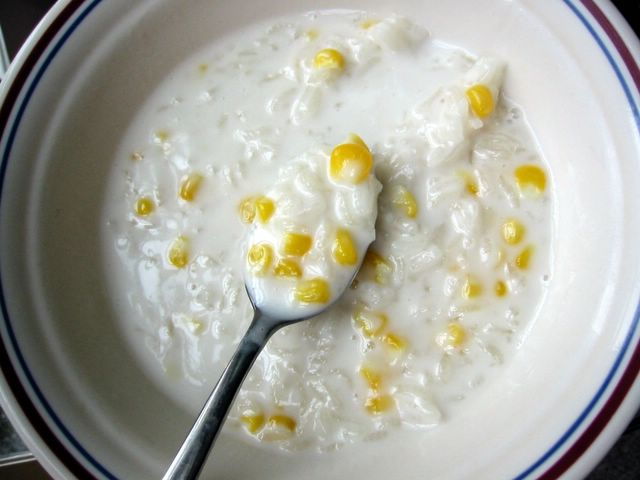
Here is a snack or 'in-between-meals' meal that I often had as a child growing up in Cavite. It's very similar to the previous Ginataang Totong I blogged more than a year ago. The abundance of coconuts in the Philippines means that a lot of its by-products find its way into the local cuisine and snacks are no exceptions. So you can find a lot of variation with sweet coconut soup with glutinous rice then flavoured with some other ingredients such as mais (corn), munggo (mung beans), chocolate, etc. These are often served hot but a lot of people love it chilled cold from the fridge.

If you can get fresh corn on the cob then by all means please use that. The flavour it imparts in the soup is the best. Shred or remove the kernels (yasyasin) by sliding off a knife diagonally across the side of the cob. It may be a bit messy but it just ensures that it will bring out the flavour from the cut kernels as which is much better than having the kernels intact. But if in a bind, you can use thawed frozen sweetcorn though not as packed with flavour as the fresh ones.


Ginataang Mais
(Coconut Soup with Glutinous Rice and Sweetcorn)

1 cup fresh shredded sweetcorn kernels (or thawed frozen ones)
1/2 cup glutinous rice
5 cups coconut milk
1/3 cup sugar
1 tsp sea salt
1/3 cup coconut cream (optional)
  1. In a pot, bring to boil the coconut milk with the sugar and salt. Taste the soup to see if it is sweet enough for you. If not, add more sugar.
  2. Add the glutinous rice, bring back to boil then lower down the heat and simmer until the rice is almost cooked.
  3. Stir in the corn and simmer again until rice is cooked.
  4. Serve hot or cold with some coconut cream on top.

Sunday, 4 June 2006

Sweet and Sour Prawns

Sweet and Sour Prawns
A friend brought a bag of frozen prawns to our door and requested me to turn it into a marmalade ... sorry ... sweet and sour prawns for a birthday party. Sure thing my dear, I said. I gladly did it even if I didn't exactly have a recipe. (Always loved prawns as with most seafood.) I have one for the pork version but not for this crustacean. So I adapted the sauce from the former (from Huang Su Huei's Chinese Cuisine) and whipped the marinade from another shrimp recipe. It turned out quite good and no bottled sweet and sour sauce, too. :)


Sweet and Sour Prawns

500 g  shelled and deveined shrimps or prawns
1 egg white - lightly beaten
1 1/2 Tbsp cooking wine
1/2 tsp sea salt
1 1/2 Tbsp cornstarch
1 Tbsp oil (optional)

*Sauce:
1 tsp minced garlic
1 medium onion - chopped into bite-size pieces
1 bell pepper (red or green) - roughly diced
1 x 227 g  can of pineapple chunks - drained of juice
6 Tbsp sugar
6 Tbsp water
1/4 cup ketchup
1/4 cup white vinegar
1/4 cup pineapple juice
1 tsp sea salt

*Thickener:
2 Tbsp cornstarch
3 Tbsp water
  1. Dissolve 1/2 tsp salt in the cooking wine. Mix well with the prawns in a bowl. Marinate for about 20-30 minutes.
  2. Add in the egg white, mix well, then cornstarch, mix well again. If the mixture is really thick like a batter, mix in the 1 Tbsp oil to separate the prawns.
  3. Drop each piece of prawn in hot oil and deep dry for about 2 minutes. Drain briefly on paper towels. Set aside.
  4. In a separate bowl, combine the ketchup, pineapple juice, sugar, vinegar, and salt. Stir well to dissolve the sugar and 1 tsp salt. Set aside.
  5. In another container, mix the thickener by dissolving the cornstarch in the water. Set aside.
  6. Heat 2 Tbsp cooking oil in a wok. Saute the onion and garlic for about 2 minutes. Make sure not to burn the garlic.
  7. Stir in the bell pepper and cook for about 1 minute.
  8. Add in the pineapple chunks, cook for 30 seconds.
  9. Tip in the ketchup mixture and bring to boil.
  10. Add in the thickener and bring to boil again.
  11. Stir in the deep-fried prawns, toss lightly for a few seconds or until prawns are well coated by the sauce. Dish up and serve.

Monday, 29 May 2006

Mia and Baba

It's been awhile since I've blogged. Please excuse my silence due to my hectic work and family life at this point of time. I'm now working in the West Midlands while my family is still in Surrey. So I stay during weekdays up north then comeback down every weekend. It's stressful yes, that's why plans are afoot to move everybody up near where I'm working. I'm keen to move to a more permanent accommodation there so that our family life would be more stable and of course so I could keep on blogging about food!

Come to think of it, it's a good thing my new work is in still in England otherwise this blog would have to be renamed the Scottish Patis or Irish Patis. LOL!

Never mind my current crisis, I'd like you to see my brother-in-law's blog about my almost 2-year-old niece Mia and their lovable dog Baba. They are his inspiration for his excellent children book Baba the Bear. Do have a look at both the personal blog and the book's website and see the very cute illustrations that only a former Disney animator like him can come up with.


Tuesday, 16 May 2006

Marbled Brownies

Marbled Brownies
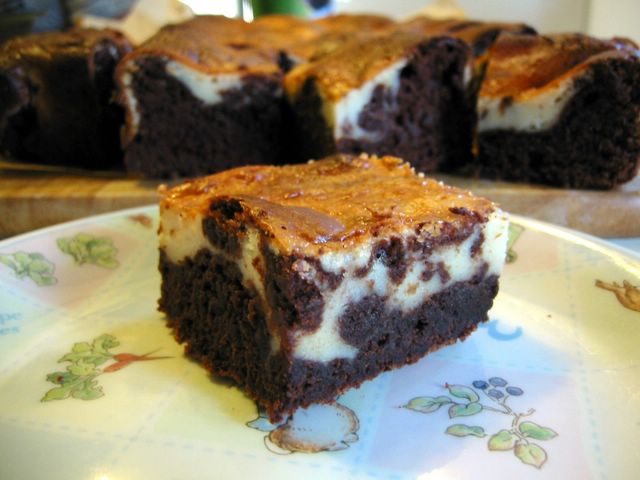
It's not as marbled as I liked it to be but I think this will do for a marbling virgin. ;) My youngest's school was having their cake sale fund-raising day so she wanted me to bake at least one cake. Take note she said - I have to bake - no maybes, no requests, it's compulsary! Well, fortunately her mum is quite up to the challenge. One of the school's requirements was there should be no nuts in any of the cakes to take into consideration some of her nut-allergic schoolmates. I found this in the Cookies cookbook (the name of the author escapes me at the moment). Lovely texture and very nice luscious taste even with the walnuts omitted meaning it's a definite keeper of a recipe.


Marbled Brownies

250 g  dark chocolate (about 70% chocolate) - chopped
125 g  [1/2 cup] butter
350 g  [1 3/4 cup] caster sugar (superfine)
4 eggs
115 g  plain flour
1/4 tsp fine salt
1 tsp baking powder
2 tsp vanilla extract
115 g  [1 cup] chopped walnuts (optional)

*For the plain batter:
50 g  [scant 1/4 cup] butter - softened
175 g  [2/3 cup] cream cheese
115 g  [heaping 1/2 cup] caster sugar
1 egg
2 Tbsp plain flour
1 tsp vanilla extract
  • Preheat oven to 180°C/fan 160°C/350°F/gas mark 4. Grease and line a 13 x 9 inch baking pan, grease the lining paper as well.

  • For the chocolate batter:
    1. Melt the dark chocolate and butter in a heatproof bowl set on a saucepan of simmering water (making sure that the bottom of the bowl does not touch the water).
    2. Once melted, mix to combine, remove from saucepan and cool slightly.
    3. Add the vanilla and stir to mix.
    4. Sift the flour, baking powder, and salt in a small bowl. Set aside.
    5. Beat the eggs with an electric mixer until light and fluffy (about 4-5 minutes). Then gradually add the caster sugar while beating until well combined and smooth.
    6. Gently fold in the flour mixture in batches using a metal spoon until well blended.
    7. Next, gently fold in the melted chocolate mixture and walnuts (if using). Set aside about 1 1/2 cups of this chocolate batter.

  • For the plain batter:
    1. Beat the cream cheese and butter together until well blended.
    2. Add in the caster sugar. Mix well.
    3. Beat in the eggs, vanilla, and flour. Mix well.

  • Spread the chocolate batter in the prepared baking pan. Pour the plain batter on top.
  • Drop spoonful mounds of the reserved chocolate batter on top of the plain batter.
  • Using a metal skewer or butter knife, swirl mixtures to marble making sure not to blend completely.
  • Bake for 35-40 minutes until just set.
    Cool for 5 minutes in pan then unmold and cool completely. Cut into squares or bars for serving.

Thursday, 11 May 2006

Food Destinations: Oriental City, London

Maki's new food blogging event caught my eye the last time I visited the IMBB portal. She asked us to blog about restaurants, shops, markets, or anything foodie or cooking related in our locale that we can recommend to visitors. Thank goodness she extended the deadline because I was caught up with work, moving and all that jazz and didn't have time to do a write up.

I really don't want to blog about places in central London because as expected with popular tourist places, you just have to search in the internet to get reviews even to the most obscure hole-in-the-wall places. There are so many books and magazines with exhaustive listings of the best foodie places. So I thought of sharing with you a place a just a little bit outside in the north of central London that me and my family love to visit once in a while (because it's quite far from our place).

Although I occasionally like fancy shmaltzy restaurants, you know the type where there are so many cutleries and glasses on the table you wouldn't know where to begin, I can confidently say that I am a more of a 'rough and ready' type of eater. Probably more bistro than haute cuisine. Besides the obvious savings in money, I like the informality and unpretentiousness of these simple no-nonsense eateries where the most essential thing - the food - is the core of the experience. Therefore, it's no wonder that I'm quite fond of Oriental City.

I first found it when 2 months after arriving here in UK from Hong Kong, we were missing our usual dose of hot satisfying Asian food. That time there was a dearth of authentic oriental restaurants in our area. In fact, there was none. All of the Chinese restos then were catering to the Western palate. You know, the sweet-and-sour-springroll-chow-mein type of food. I trawled our yellow pages (internet then were at its infancy) and saw this Oriental mecca in north London.


Yaohan Plaza was the name in its first incarnation, touting the phrase "All of Japan in One Roof". Then the Japanese parent company got broke so now the new owners named it Oriental City which I think is quite apt since under its roof it is a meld of all kinds of shops and restaurants from the Orient.


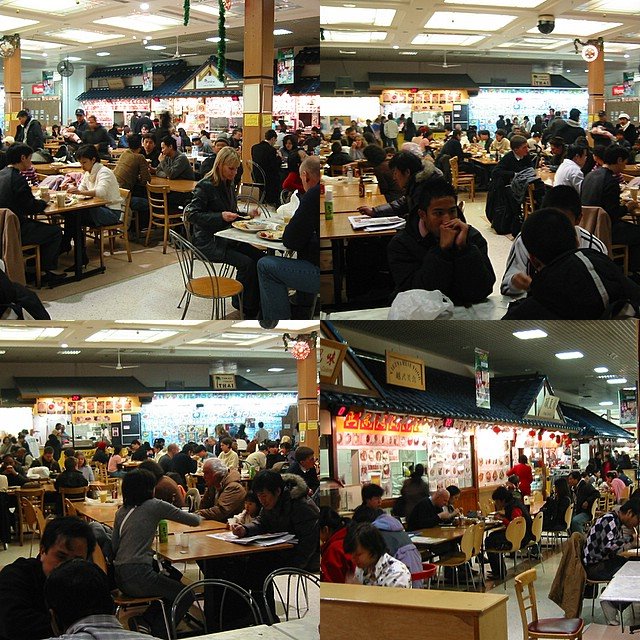
Besides the waft of barbecue (in summer) and the distinctive smell of durian just outside the main door from the car park, you first sense the busy sights, sounds and atmosphere of the food court where there are an abundance (by London standards) of different kinds of oriental cuisines - Chinese, Japanese (love the bentos), Indian (nice thali), Malaysian, Singaporean, Thai, Korean. Thankfully here our family don't have the usual problem when eating in just one resto since we all have different tastes and idea on what to eat. The only thing I am lamenting is the absence of a Filipino stall there. *sigh*

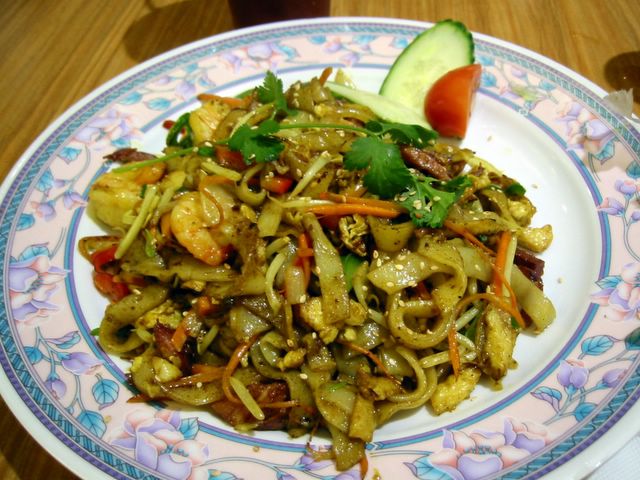
Just to give you a sampling of what we had last time ... [left] paper wrapped Thai chicken with rice and iced lemon tea; [right] Malaysian-style noodles which I am currently addicted to. It's basically the same as the curry flavoured Singapore-style fried noodles but with flat rice noodles.

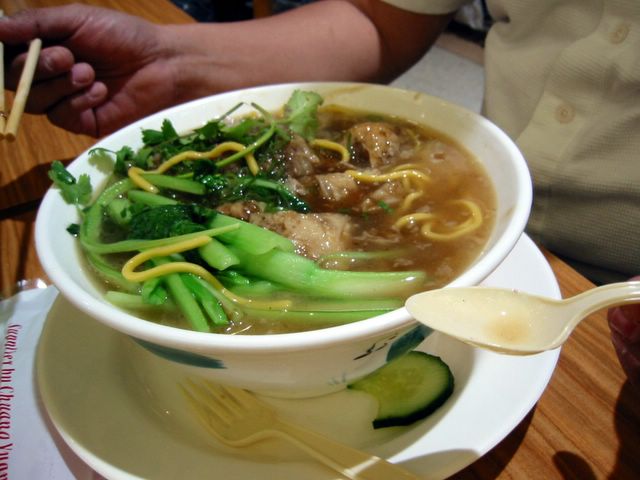
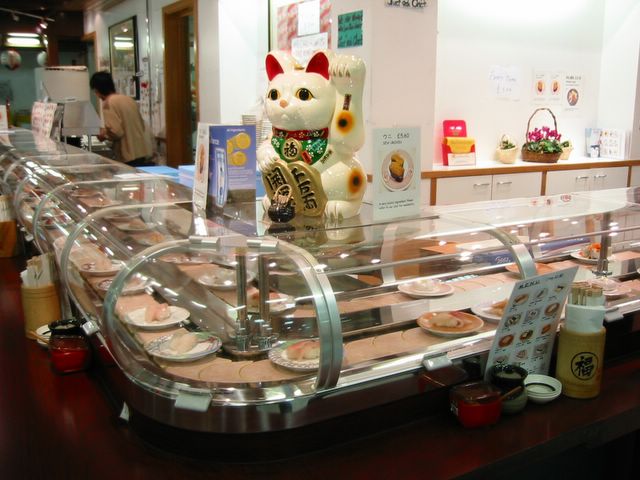
[left] Noodle soup for my husband (I can't remember if it's Chinese or Japanese ramen); [right] They also got your favourite conveyor belt Japanese sushis.

All these at very reasonable prices and often very good quality. The place also have cake shops and a Japanese bakery which made me almost jump for joy when I saw it since I've always been a fan of Japanese breads and cakes when I discovered it in Hong Kong.


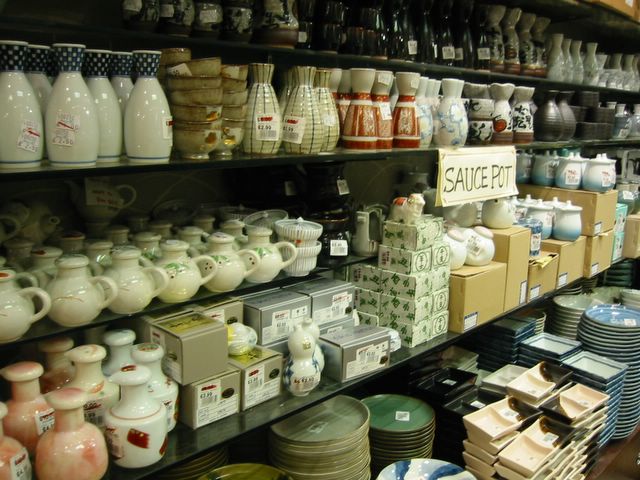
There are several shops that sells Japanese ceramics and other kitchen and bathroom knick-knacks, a jewelry shop, Japanese bookshop, video arcade, 2 other Chinese restaurants, 1 expensive Japanese restaurant, an aquarium and fish shop, and a central hall where events are regularly held.

Oriental City
399 Edgware Road
London   NW9 0JJ

*nearest tube station: Colindale (Northern Line)
Tel. No.: +44 (0)20 8200 0009
Opening hours: Mon-Sat 10am-9pm (food court and supermarket)
                     Sun 10am-8pm (food court)
                     Sun 12nn-6pm (supermarket)


Update [01 Aug 2014]: This beloved centre closed its door for the last time on 1st June 2008. There are still no replacement food centre dedicated to Oriental cuisine in the London area as of this time.


Saturday, 6 May 2006

Paksiw Na Pata

Whenever I see a hippo it always reminds me of paksiw na pata and vice versa. I wonder why? ;) Must be something to do with the folds of fatty skin and bulging roundness in its body.

Pata is the Filipino name for pork legs. Come to think of it, the word is actually Spanish. Paksiw is one of the standard traditional Filipino way of cooking dishes almost at par with the ever popular adobo probably because of its simplicity and ease of preparation. Certainly it's very similar to adobo except that the proportion of vinegar to soy sauce or salt is higher. It also uses dried banana blossoms. Now, I used to think that the ones we actually use is the dried lily buds same as the ones the Chinese use . But a check with a fellow food blogger, with my mother in the Phils, and on inspecting a packet from a Pinoy food store here, confirmed that we indeed use dried banana blossoms. It was not a fairly tale or a misnomer. Though you can definitely substitute the dried lily buds if it's not available - I can attest to that.

Like most Filipino dishes, this is best eaten with piping hot steamed rice and for me a little side dip of patis. Yum!


Paksiw Na Pata
Paksiw Na Pata

1 kg  bone-in pork legs - chopped into 2-inch thick pieces
1/2 cup vinegar
1/4 soy sauce
1 bay leaf
1 tsp peppercorns
1 Tbsp minced garlic
1 cup water
1-2 dried sprigs of oregano (optional)
2 Tbsp brown sugar
1/4 cup dried banana blossoms or dried lily buds
  1. Combine all the ingredients except the brown sugar and dried banana blossoms in a pot. Bring to boil then lower heat and simmer for 1.5 hours or until pork legs are tender. Add more hot water if it is drying out too much.
  2. Stir in the brown sugar and banana blossoms and simmer for a further 5 minutes.
  3. Serve hot with steamed rice.

Sunday, 30 April 2006

IMBB 25: Taramasalata

Don't you notice my last 3 posts were all for food blogging events? Just goes to show how involved I am offline with things such as moving and buying a car, etc.

Well then, let's get down to business. I was gifted immensely by a good friend in Greece with loads, and I mean loads, of food stuffs that she made her sister carry on the latter's way back here in London. Thanks Sha! *mwah* One of the wonderful things she gave me was this big block of fresh salted fish roe called 'tarama' in Greek. As expected, I immediately set out to make some taramasalata - the Greek fish roe dip or salad dressing greatly enjoyed here and one of mine and my husband's favourites.

Derrick's theme in the current IMBB edition says to use stale bread. Mine used nearly new bread but I'm sure using not-so-new ones is okay. I was thoroughly fascinated with the making of this delightful dip which is very much akin to making mayonnaise though sans the eggs. Which also reminds me to grab a food processor in the next sale because holding a handheld mixer on one hand and slowly dripping olive oil in the other is no fun at all. Definitely not. :( What's more fascinating for me is how long this dip stayed unspoiled in the fridge with no loss in taste until nearly a month! The recipe I adapted is from another friend, Stel, who in turn adapted it from Craig Clairborne.


Taramasalata

Taramasalata

1/4 cup fresh salted fish roe
3 crustless white bread
1/2 cup olive oil
2 1/2 Tbsp lemon juice
  1. Soak the bread slices briefly in warm water and then squeeze dry. Set aside the water.
  2. Combine the bread and fish roe in a bowl and with a handheld mixer beat the mixture for a few seconds until completely combined (or use a food processor).
  3. While the mixer is still running, add the olive oil slowly in a thin stream.
  4. When all the olive oil is incorporated, add the lemon juice little by little also.
  5. The resulting consistency should be that of thick mayonnaise. If it is too thick to your liking, add some of the reserved soaking water until you get the viscosity that you want.


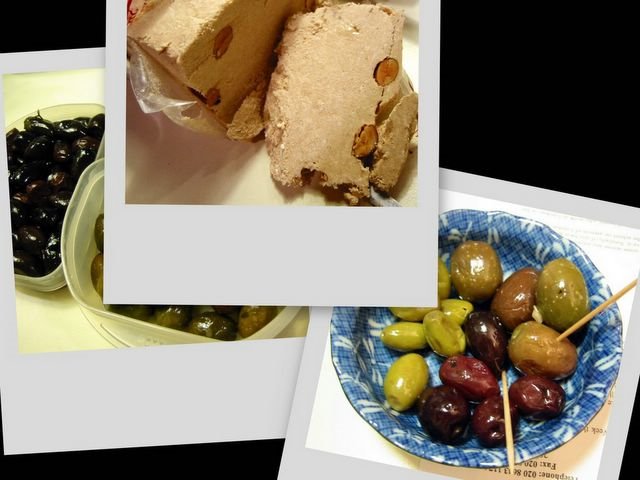
I can't finish this post without shamelessly bragging about what I got from Sha. Just look at that spread above. And to think that I just requested for some halva (see below). You know me, a thorough nut lover. All the labels were Greek to me - figuratively and literally. So I let my smell and taste be my guide. My husband loved all the different olives and both of us enjoying the varied flavours of teas, the sweets they were long gone (I love the gum mastic flavoured ones; now I know what they use to make Turkish delights and the wafers in some reminded me of the communion wafers in church), the other items like mushroom orzo, various canned and bottled goodies, etc. - I will try to make the savouring of them last as long as possible. :) Thanks very very much Sha. :)

Tuesday, 25 April 2006

LP 9: Lengua Estofado

Lengua Estofado
I know Cia encouraged us to make something different out of innards and offal. But I'm pretty helpless on this since I really do not cook offals that often. So you would have to forgive me if I make this thoroughly standard fiesta dish. Cia, as mentioned, of Pabulum is currently hosting the 9th edition of Lasang Pinoy.

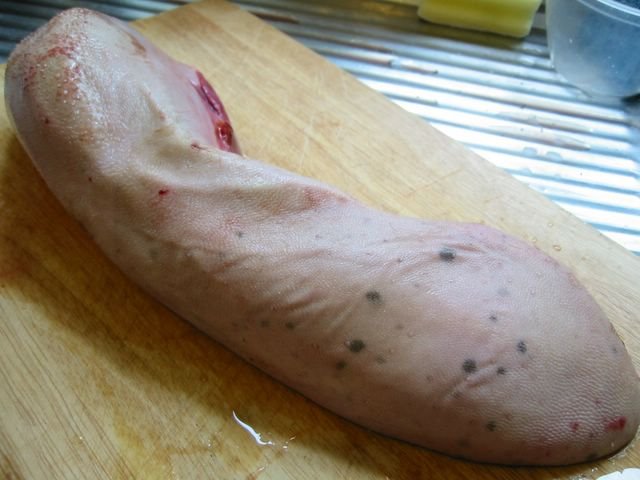
I had a lot of fun making this I must say. Starting with shopping for the tongue. Now I wouldn't find this in any ol' supermarket around here so off I went to Tooting (no kidding!) which has a very lively (and cheap) market. (I must blog about this place soon). Lots of fresh veggies and fruits plus this is where I get my fix on pork legs (properly cut), goat meat, whole baby back ribs, fresh chicken liver galore, and supermarket-rare offals - all in very reasonable prices. I went in a butcher shop and got this big boy of a tongue.

Lengua Estofado

It was more than 14 inches long and ... well ... resembles something like ... oh never mind. Hehehe! Finding a big pot to fit it in was a challenge but I managed to unearth one of my moth-balling-seldom-used stock pots and just about fit it in. The removal of the skin was a joy - not! Reynaldo Alejandro's recipe from The Food of the Philippines (where I adapted this from) said to scrape or peel. Well I scraped and scraped and scraped but most of the white film is still there. So I had to slice it off trying to take off as little and as thinly as possible. After a prolonged struggle with a double dead tongue I finally got it all off! Hurray, on to the cooking!

The marinade was quite good, though, I noticed that you can substitute cooking wine or lemon for the vinegars. I bet it would taste great as well. The only problem I had was in the browning of the meat since the marinade has sugar hence the residue got burned. I had to wash up the pot pronto before continuing with the sauteing. I know I lost some good flavours with all those drippings washed away but it was burned and I don't want that to ruin the sauce. Other than that everything else was surprisingly a breeze. And I originally thought it would be horrific including the taste and texture of the meat. The first time I had this was when I was 12 years old and even then, even though I had a pretty fussy tastebud I loved that properly tenderly cooked lengua from a relative's wedding banquet. Finally, I was able to recreate it.


Lengua Estofado

1.5 kg  beef tongue

*Marinade:
1 tsp peppercorns
1 bay leaf
3 Tbsp cider vinegar or white cooking wine
3 Tbsp soy sauce
3 Tbsp sugar
2 tsp sea salt
1 cup water

3 Tbsp oil
1/4 cup minced garlic
1/2 cup minced onions
1/2 cup finely chopped tomatoes
350 g  potatoes - peeled, quartered and sliced
1 big carrot - peeled and sliced
salt and freshly milled black pepper
1/3 cup pimiento-stuffed olives
1 cup button mushrooms - halved or sliced
  1. Boil the tongue in a large pot of water for 20 minutes. (You may cut the tongue in half if it cannot fit). Drain from water and leave until cool enough to handle.
  2. Peel off the (usually white) outer skin. You may have to use a very sharp carving knife for this. Trim ends and wash.
  3. Combine all marinade ingredients and marinate the tongue for 1 hour or overnight.
  4. In a large pot heat the oil and brown the tongue on all sides. Remove and set aside.
  5. If the residue in the pot is not burned, use it with the same oil, if it is then clean the pot and heat it up again with about 2 Tbsp oil.
  6. Saute garlic for about 2 minutes in gentle heat - *do not* burn it.
  7. Turn up the heat and add in the onion, cook for about 4-5 minutes or until translucent.
  8. Add in the tomatoes and cook until soft.
  9. Put the tongue back in the pot together with the marinade.
  10. Add about 1/2 cup water. Bring back to boil and then simmer for 2.5 hours or until tender. Prick the tongue to let the liquid penetrate. You may add more boiling water a little at a time if it is drying out too much.
  11. Tip in the potatoes and carrots - cook for about 5 minutes.
  12. Add in the mushrooms and cook for another 5 minutes.
  13. Just before serving, remove tongue from sauce and slice crosswise. Arrange in a platter and ladle sauce and vegetables on top. Serve hot.

Sunday, 23 April 2006

What's For Pud? Bakewell Tart !

Bakewell Tart
St. George's Day is celebrated every 23rd of April in England where Georgie boy is the patron saint. Why he was made one? A legend had it that he skewered a large lizard. I don't know if he barbecued it with sauce on the side. Obviously, it's not as widely celebrated as St. Patrick's Day of Ireland. In fact, a lot of people hardly remember or know when it is or whether to celebrate it at all. Besides a few English flags in pubs you could hardly see much evidence of the event. Although in my former company our CEO was a diehard Englishman that we were 'gently' coerced to wear red and whites on the day and our offices decorated with red and white flags and buntings.

Sam of Becks & Posh sought to redress the problem by teaming up with Monkey Gland of Jam Faced to host a one-time blog event of What's For Pud? Traditional British food is not renowned for its popularity or sophistication but the puddings (desserts, puds, afters) are something else. My own personal favourite is the Sticky Toffee Pudding. Among the store bought ones, Marks & Spencers comes up trumps in my book. Really really delish and so satisfying. I wanted it to be my entry but I wasn't sure if it's English or where exactly it originated. Then I pondered on Sussex Pond but I don't want to go steaming for 3 hours! So to be safe I chose another favourite that I am sure is from England.

As the name suggests, Bakewell Tart originally came from Bakewell, Derbyshire - that's Mr. Darcy's home county mind you. I've visited that town a decade ago, too long ago that I could hardly remember what it looked like except that it's near that beautiful pile of a house called Chatsworth. I tried to delay posting this with a plan to visit the Peak District and Bakewell a week ago during the school term break so I could have some really attractive pictures of the town. But the family car died and we couldn't make the 4-hour drive. Such a shame. :(

The tart was originally known in the form of Bakewell Pudding which according to legend has been in existence as far back as the 1500s. The more recent history of it tells of a mistake (like the Tarte Tatin) in the kitchen of the White Horse coaching inn when an inexperienced cook mistook the instructions for a strawberry tart. Instead of putting the egg and sugar in the pastry, it was poured on top of the jam which was on an obviously plainer crust thus accidentally creating this delightful dessert (or tea fodder depending on your inclination).

Anyhow, the tart is a thin layer of raspberry or strawberry jam on a shortcrust pastry with almond cake on the next layer then topped with icing. I really do not fancy the icing, in fact whenever I eat a shop-bought one I scrape it off completely so I just omitted it this time so as not to prolong the start of my enjoyment of it.

Just look at that nice sliver of tart above, a lovely meld of the raspberry jam and almond based cake. The addition of orange and lemon zests was a brilliant idea of Brian Turner from whose book, Favourite British Recipes, I adapted my lovey-dovey delish tart.


All puffed up just out of the oven.


Bakewell Tart

*Pastry:
175 g  [heaping 1 1/3 cup] plain flour
pinch of salt
25 g  [5 tsp] caster sugar
finely grated zest of orange and lemon (optional)
80 g  [1/3 cup] cold unsalted butter
2-3 Tbsp cold water

*Filling:
100 g  [5 Tbsp] raspberry or strawberry jam
3 eggs
115 g  [1/2 cup] caster sugar
115 g  [scant 1/2 cup] unsalted butter - melted
115 g  [1 cup + 2 Tbsp] ground almonds
25 g  icing sugar, mixed with a little water (optional)
  • For the pastry:
    1. Mix the flour, salt, sugar, orange and lemon zests in a bowl.
    2. Cut in the cold butter into the flour mixture with a pastry cutter or with two butter knives until breadcrumb-like in texture.
    3. Sprinkle the cold water while tossing the mixture until it can be gathered into a ball. Press and knead a little to keep it together. Wrap in plastic and chill for 30 minutes.
    4. Preheat oven to 180°C/fan 160°C/350°F/gas mark 4.
    5. Roll out and line a 25cm (10-inch) tart pan. Crimp the edges.
    6. Warm the jam. (Optional) Press into a sieve to remove seeds. Spread over the base of the tart.

  • For the filling:
    1. Beat the eggs with the sugar.
    2. Fold in the melted butter and ground almond slowly.
    3. Pour carefully on the pastry-lined tart pan.
    4. Bake in the oven for about 35 minutes. Remove and cool completely.
    5. (Optional) Pour the icing in the centre of the tart and using a palette knife spread as thinly as possible.

Tagged with: and

Saturday, 22 April 2006

SHF 18: Red Wine Tart

Red Wine Tart
First thing that came to my mind for the current SHF 18 are one of those liquour-laced cakes or desserts. But I thought why put a puny little amount when you can have it as a main ingredient. Thanks to a recipe I found in Anne Willan's fabulous book, A Kitchen in Burgundy, I was able to do a certainly interesting dessert.

As usual I made some blunder. Instructions clearly said to bake blind but my eyes were wide open when I did - I forgot the baking beans! So the pastry was too puffed up to my liking but no matter it still did the job. In fact, it was a very nice butter biscuit/cookie base so good that I balled up the excess and baked into cookies.

As for the filling, it didn't quite looked like the sea-of-tranquility smooth as that in Anne's book's picture. More like the Pink Floyd-y dark-side-of-the-moon pockmarked. But I was more surprised by the taste. I was preparing to dislike it or just have a passable 'okay' kind of flavour. However, it was only a little alcoholic, mildly bitter, and had an unexpected grape-y flavour (well *duh* wine is made from grapes for pete's sake!). I used (well actually used up left-overs) Merlot wine although Anne suggested to use Pinot Noir for a more fruity flavour. I have to say this is a keeper of a recipe although I definitely have to fiddle with the sugar in the pastry probably change it to caster sugar maybe even to icing sugar to remove the grittiness. And most of all to remember those blasted baking beans!


Red Wine Tart

*Sweet Pastry (Pate Sucree)
175 g  [1 1/2 cup] plain flour
100 g  [7 Tbsp] butter - softened
3 egg yolks
100 g  [scant 1/2 cup] caster sugar
1 tsp vanilla

*Filling:
2 tsp cornstarch
2 tsp ground cinammon
2 eggs
100 g  [1/2 cup] sugar
250 ml  [1 cup] red wine

1/2 cup double cream for decoration
  • For the pastry:
    1. Mix salt and flour in a bowl. Cut in the chilled butter with a pastry cutter or with 2 butter knives. Rub butter in with your fingers until mixture resembles coarse breadcrumbs.
    2. Combine egg yolks and vanilla in a small bowl. Sprinkle this mixture to the butter-flour mixture and gather the dough into a ball.
    3. Knead and press dough between your hands just enough to hold it together. Do not over knead.
    4. Wrap in plastic and chill for 30 minutes. Preheat oven to 375°F/190°C/fan 170°C.
    5. Roll out into an 11-inch circle. Line and press into a 23cm [9-inch] fluted tart pan. Prick base with fork.
    6. Put an aluminium foil (shiny side down) on the pan and fill this with dry or ceramic beans.
    7. Bake for 15-20 minutes. Remove foil and beans and bake for another 5 minutes. Cool.

  • For the filling:
    1. Combine cornstarch and cinammon and mix well.
    2. Whisk egg gently in a bowl and add the cornstarch mixture. Keep froth to minimum.
    3. Stir in the wine gently.

  • Place the tart pan on a baking sheet. Put this on the oven shelf and while it's partially pulled out gently pour the filling in the pan. Push it gently in the oven.
  • Bake for 20-25 minutes in 375°F/190°C/fan 170°C.
  • Remove from oven and cool 5 minutes. Unmold. Cool completely.
  • Before serving whip double cream until stiff peaks. Pipe on the edge of pie with a star tip.

Wednesday, 19 April 2006

Fish Cakes

Fish Cake
I've always followed closely a number of regular columns in the BBC Good Food magazine. One of them is the 'Ultimate' series currently done by Angela Nilsen. Wherein she attempts to find or develop the ultimate the best recipe for our favourite dishes and desserts. That actually, is my objective, too. Sometimes I go to all sort of lengths to source out the ingredients or required cooking utensils just so I could do my 'ultimate' creation. This just underlines my keen interest in this column.

For this month's edition, she makes fish cakes. I love fish but often than not the fish cakes I find in the fish & chips around here or even in restaurants are chock-full of fillings and very little fish. A name change to 'fish-flavoured cakes' should be done to aptly describe them. Hence, I was heartened to discover Angela's recipe to be more fish and less fillings. I could clearly see whole flakes in it with just enough of the potatoes to keep it together. I also love the tartare-style sauce she made. Even my sauce-finicky husband roundly approved!


Fish Cakes

450 g  skinned fillet of white fish (haddock, cod, etc.)
2/3 cup milk
2/3 cup water
2 bay leaves
350 g  floury potatoes (Maris Piper, King Edward, etc.) - peeled and quartered
1/2 tsp finely grated lemon zest
1 Tbsp finely chopped chives
1 Tbsp chopped fresh flat-leaf parsley
1 egg
85 g  white breadcrumbs
flour
1/4 cup oil for frying

*Tartare-style Sauce:
1/2 cup mayonnaise
1 Tbsp capers - rinsed, drained, and roughly chopped
1 tsp Dijon mustard
1 tsp creamed horseradish
1 shallot - finely chopped
1 tsp finely chopped flat-leaf parsley
  1. Mix all ingredients for the sauce. Set aside.
  2. Put the fillet of fish in a pan. Add the bay leaves, milk and water. Cover, bring to boil and simmer for 4 minutes. Remove from heat and leave covered for 10 minutes to finish cooking the fish. Drain the fish from the pan and cool completely on a plate.
  3. Put potatoes in a saucepan with just enough boiling water to cover them. Bring back to boil and simmer for about 10 minutes or until cooked but not broken up. Drain in a colander for one minute and then bring the potatoes back to the hot saucepan on the lowest heat. Let them dry out for 1 minute and mash the potatoes in the saucepan. This will result in a dry and fluffy mash. Take off the heat and mix in 1 Tbsp of the tartare-style sauce, lemon zest, chives, and parsley. Season well with salt and pepper.
  4. Flake the fish in big chunks into the mashed potatoes. Mix a few times just enough to combine them. Set aside.
  5. Beat egg in a shallow bowl. Put the breadcrumbs in a plate.
  6. Divide the potato mixture into 4 or 5. With floured hands, shape each piece into a ball then flatten them to form small cakes.
  7. Sit the cakes one by one in the egg bowl and spoon over egg to coat completely. Then sit the cakes in the breadcrumbs and pat sides and top to cover completely. Transfer on a plate, cover and chill for 30 minutes.
  8. Heat oil in a pan. Drop a little dry breadcrumbs in it, if it sizzles it is ready. Fry the fish cakes on medium heat for about 5 minutes on each side or until crisp and golden.
  9. Serve with the sauce and and lemon wedges.

Tuesday, 11 April 2006

A Foodbloggers Meme Around The World

The talented Dilek of Dilekce, one of the non-English foodblogs I regularly read (well actually just drool at pictures since I don't have a clue on what the text is all about), has tagged me for a meme. Let me have a go at these questions ...

1. Please list three recipes you have recently bookmarked from foodblogs to try.

Like Dilek, I also have a long wish list but here's an excerp:
  • Choco-mocca Liquer - by the Passionate Cook. Once I get those resealable bottles I'll make a big batch and force my friends to take one each.
  • Creme Brulee - from Keiko of Nordljus. I know this is pretty basic but I've never done one and I think using one of those torch thing is quite cool.
  • Kangkong Blachan - from Reid's Onokinegrindz and Stellie's Babyrambutan. Several times I have assembled the ingredients for this but somehow I never get to cook it.

2. A foodblog in your vicinity

As far as I know, the nearest one to me is Johanna of the Passionate Cook.


3. A foodblog located far from you

Probably one of the farthest would be someone like Clare of Eatstuff. I've visited and enjoyed her food blog from time to time when I get the chance to bloghop.


4. A foodblog (or several) you have discovered recently (where did you find it?)

I actually met Monkey Gland at that EB with Sam of Becks&Posh when she came to town. But I have to admit I only got to read his blog Jam Faced recently and I think I'm hooked. Him and Sam are co-hosting the one-off food blogging event of What's For Pud?


5. Any people or bloggers you want to tag with this meme?

I hope these people hasn't been tagged yet: Sha-sha who's somewhere in the Mediterranean right now, Jmom in North Carolina, and Boo_licious in Malaysia.


Friday, 7 April 2006

Spinach With Fried Garlic

Spinach with Fried Garlic
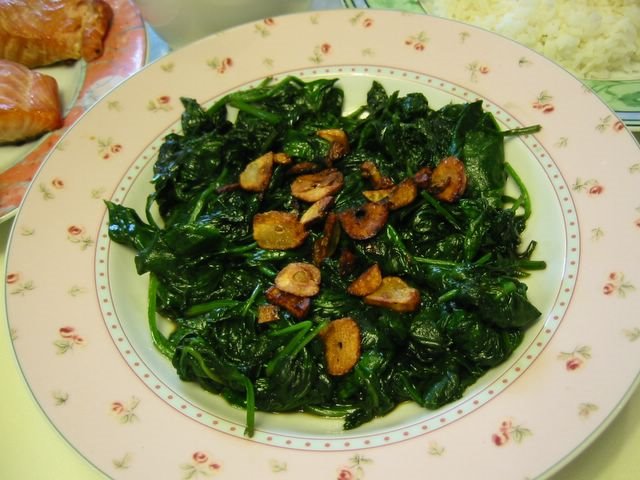
Here's one recipe that I adapted from Ken Hom's Hot Wok that I use when I have excess spinach from the usual sinigang. The other stir-fry spinach recipe that I blogged here also have garlic although it's not as fried crisp as these. I love the crunch of the garlic in contrast with the soft spinach besides the utter simplicity of the cooking and the ingredients themselves.


Spinach with Fried Garlic

750 g  fresh spinach - washed and drained well
1 1/2 Tbsp oil
2 Tbsp thinly sliced garlic
1 tsp sea salt
pinch of sugar
  1. Heat oil gently in a wok. Add in the salt and garlic. Fry on low heat until garlic is golden and crisp.
  2. Remove with a slotted spoon and drain on paper towels.
  3. Heat the oil again this time on high heat until it is smoking.
  4. Tip in the spinach and stir-fry for about 2 minutes.
  5. Add a pinch of sugar. Stir-fry for a further 3-4 minutes or until spinach is wilted.
  6. Remove and dish up. Scatter fried garlic on top. Serve immediately.

Sunday, 2 April 2006

Spiced Apple Cake

Spiced Apple Cake
I adapted this loosely on Delia Smith's recipe in her How To Cook Book 1. This is probably my third try on the recipe with lots of changes from the original. For one, I reduced the baking time and temperature because at 190C for 1.25 hours it practically reduced the top to cinders. Then the sugar in the cake is increased to improve the blandness. I felt there was too much baking powder so that got reduced and I will try to reduce more of it in my next tries. Despite these, you can see it did come out quite well. A very nice tea-time treat to have with a hot cuppa of tea (coffee for some).


Spiced Apple Cake

350 g  peeled and chopped baking apples (Golden Delicious/Bramley/Braeburn/Cox)
275 g  [2 cups] plain flour
110 g  [scant 1/2 cup] butter - melted
2 eggs - slightly beaten
1/2 tsp salt
1 Tbsp baking powder
1 tsp ground cinnamon
1/8 tsp ground cloves (optional)
1/2 whole nutmeg - finely grated (about 1 tsp)
170 g  [3/4 cup] caster sugar
175 ml  [scant 2/3 cup] milk

*Topping:
75 g  [1/3 cup] demerara sugar
75 g  [heaping 1/2 cup] self-raising flour
1 tsp ground cinnamon
25 g  [2 Tbsp] butter - softened
50 g  pecans or walnuts - roughly chopped
1 Tbsp cold water
  1. Preheat oven to 350°F/180°C/fan 160°C/gas mark 4. Grease the bottom of a 23 cm (9-inch) springform round cake pan.
  2. Mix the topping - combine the sugar, cinnamon, nutmeg, and flour in a small bowl. Cut in the soft butter with two butter knives into the mixture. Then proceed to rub in it with your fingertips. Add in the nuts - mix well. Sprinkle the cold water and toss. Set aside.
  3. Combine the flour, cinnamon, cloves, baking powder, and salt in another bowl.
  4. Put the eggs in a big bowl. Add in the milk, sugar, and melted butter.
  5. Add the flour mixture into the egg mixture with a wooden spoon in as few stokes as possible just enough to combine.
  6. Fold in the chopped apples.
  7. Pour into the greased cake pan.
  8. Sprinkle the topping on the surface of the batter.
  9. Bake in oven for 1 hour or until a skewer inserted in the middle comes out clean.
  10. Cool for about 5 minutes, turn out from the pan then cool completely.

Friday, 31 March 2006

LP 8: Puto

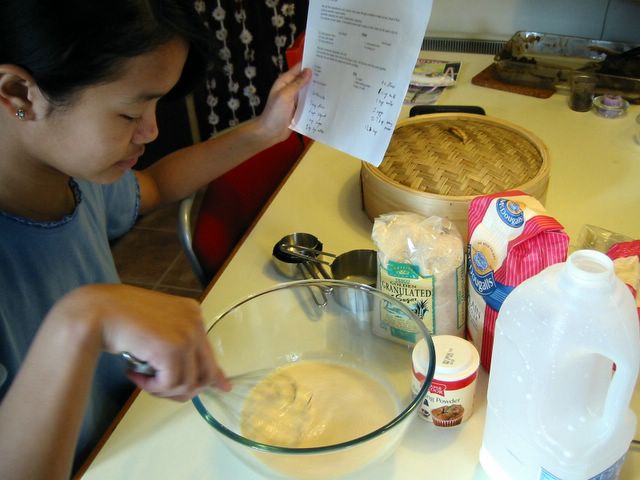
The current theme of the eighth Lasang Pinoy, hosted by the lovely Iska of Edible Experiments, is centered on food for/by children. I wanted to create my husband's favourite childhood snack of bibingkang malagkit but my recipe fell short of expectations. The bottom - soggy, the top - too sweet. Maybe I'll blog it some other time. So off I went recruiting my kids in making a very simple Filipino steamed cake - puto. Mind you this is not your regular traditional puto which is made of malagkit (sticky rice) flour. This is of recent provenance, probably as early as the 80s when the popular Filipino bakeshop, Goldilocks, came up with this rich cake-like puto. There are very few ingredients to have and it's just a matter of mixing them all up in a bowl which a kid can easily do. My eldest daughter remarked that the batter is very much like that of a pancake. Well what do you know, she was right of course. More like a very sweet pancake version which is steamed instead of panfried. My kids are usually enthusiastic with 'helping' out in cooking and baking especially ones where they are actively involved in as opposed to just watching. I hope this would encourage them to be more adventurous in eating as well as in kitchen activities.

J2 mixing it
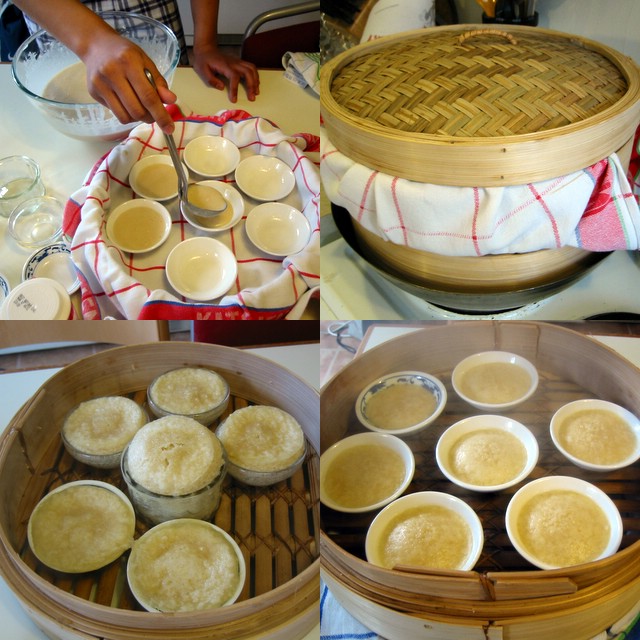
You don't know how much frustrations this seemingly innocuous snack has given me for the last ... oh ... 15 years. It's not a problem in the batter, more on the process of making these cakes rise in the steaming. The biggest Darth Vader-like enemy of steaming puto is water or condensation dripping/forming on top while it's cooking. Once water dripped on top then your puto is doomed to be earthbound. Never to rise in all its peaked glory. I've had this problem over and over again in the years that I was trying to make it. Often times I have to disguise my failure from our guests by saying it's actually my new version of kutchinta. LOL! I changed steamers, used rice cookers, metal steamers, and now just about having moderate success using a cheap and simple bamboo steamer. Really, sometimes you don't need high-tech gadgets to achieve good results.

puto galore
The recipe is something I got from my sister-in-law, Ate Eva, in Toronto which in turn she got from a friend of hers. I have to tone down the recipe considerably because it was cloyingly rich (nakaka-uta). The original measure of 2 tablespoons baking powder is I think too much. It actually have an slight aftertaste which I don't like so I proceeded to halve the baking powder. Same with the milk and eggs. I also added salt since I noticed that it doesn't rise as much as I want to and as you know, salt reacts with the baking powder that causes cakes to swell. As for my dreaded steaming, normally I would cover the baking pan to prevent condensation to drip on it. But since I'm using small (different sized at that) moulds, it would be truly troublesome to cover them all individually. Life is too short for me to get that tedious. So I covered the top of the steaming basket itself with a cloth. That didn't work since the water vapours came in unimpeded thru the slats at the bottom. So I moved the cloth onto the bottom of the first level basket. Finally, I had my well-risen puto (well most of the time).


Rich Puto


Rich Puto

2 cups plain flour
1 cup milk
1 cup water
1 egg - slightly beaten
1 Tbsp baking powder
scant 1/2 tsp fine salt
1 1/3 cup sugar
  1. Mix all ingredients well.
  2. Pour into small cake moulds. (Any small ramekins or tiny bowls/plates may be used). Cover with aluminium foil, tea towels or cloth (or you may cover the steamer itself with cloth).
  3. Steam in medium heat for about 20-25 minutes.
  4. Remove from heat and pry off the puto from the moulds with a butter knife. Serve warm or cold.
*Variation: Mix grated or slivers of cheese just before steaming.


Monday, 27 March 2006

Chicken Soy Sauce

Chicken Soy Sauce
"Chicken again?!" is my kids' gripe whenever they see a winged creature on my chopping board. I was afraid they might picket outside the kitchen to demand other food. Well, what can I do? Barring bird flu or salmonella, chicken is probably the cheapest meat you can have. We really prefer fish and other seafood but my gulay! The prices of fish here in London! No way we can afford them everyday. Unlike back in the Phils. where fish is so commonplace that people turn up their noses on galunggong (fish similar to mackerel). Getting back to my cooking, I came face to face with some chicken and this laziness to go to the supermarket for additional ingredients. Solution -> find a recipe which uses the usual cupboard ingredients or ones that I already have and voila mwala! Here comes the Chinese Cooking for Beginners by Huang Su-Huei to the rescue.


Chicken Soy Sauce

500 g  - 600 g  chicken legs or wings - cut into bite-size pieces
1 Tbsp soy sauce
oil for deep-frying
1 potato (about 250 g) - cut into bite-size pieces
1 medium carrot - cut into bite-size pieces
1 green onion - cut into 1/2-inch pieces
1 1/2 Tbsp cooking wine

*Sauce:
1 cup water
1/2 Tbsp sugar
2 Tbsp soy sauce

*Thickener:
1 Tbsp water
2 tsp cornstarch
  1. Marinate the chicken in the 1 Tbsp soy sauce for about 20 minutes.
  2. Mix the sauce and thickener in separate containers. Set aside.
  3. Heat the oil in the wok and deep-fry the marinated chicken for about 4 minutes or until golden. Remove and drain briefly in paper towels. Set aside.
  4. Deep-fry the potatoes and carrots until golden (about 3 minutes). Drain and set aside.
  5. Remove the oil from the wok and then add 1 Tbsp oil.
  6. Stir fry the green onions until aromatic.
  7. Add the chicken, wine and sauce. Cover, bring to boil and simmer for 5 minutes.
  8. Add in the potatoes and carrots. Cook for a further 10 minutes.
  9. The sauce should reduce to about 1/2 cup. Stir in the thickener and bring gently to boil. Dish up and serve.

Friday, 24 March 2006

Ginataang Halo-Halo

Ginataang Halo-halo

This is one of my all-time favourite hot Filipino snack. Although there was a time when just the mention of the name makes me turn green - not with envy - but as in almost sick. See, there was a period (a long one) when my father insisted on having this *every* Sunday without fail. We, of course, loved it what with my father asking for gabi (taro) and ube (purple yam) to be required in the mix. The ube makes the sweet soup turn rather bluish as if somebody tipped in some tina (blue laundry tint). But no matter how much you love a certain food, if you have it every week for more than a year, your infatuation soon wanes. Nowadays I cook it only several times a year usually in winter time when having something hot and soupy is almost de rigeur for our family.

The ingredients I used here is based on what I can source in my area. So fresh coconut milk is out as with saba banana. That's one thing I miss from Pinas. The plantain, in my opinion, still can't compete with the taste and texture of the saba. But I can't find it anywhere here so to the plantain I must stick. One thing about plantain, when it's very ripe it will literally turn almost black. I was wondering before why grocers continue to display 'rotten' pieces of these. Until a Filipina friend kindly informed me that it still edible in that state. In fact, most prefer it black-ripe for a softer and sweeter banana.

I noticed as well that the sweet potatoes (kamote) here is softer or rather cooks more easily than the ones back home. And lastly, I think I prefer to use the glutinous rice flour rather than soaking the malagkit overnight then grinding it then straining it in a cheese cloth. *sigh* The ready-made flour just makes ife so much easier. By the way, there's a lot of coconut soup in this one since I love it soupy rather than chock-full of halo with hardly any soup.


Bilo-bilo


Ginataang Halo-Halo
(Mixed Fruits In Sweet Coconut Milk)

*For the bilo-bilo (glutinous rice balls):
1 cup malagkit (glutinous) rice flour
scant 1/2 cup water

3 x 400 ml cans of coconut milk
3 x 400 ml cans of water (use the can of the coconut milk)
3/4 cup sugar
1/3 cup tiny sago (tapioca) pearls
500 g  kamote (sweet potato) - peeled and cut into serving size pieces
350 g  gabi (taro/eddo) - peeled and cut into serving size pieces
2 pcs ripe plantain bananas - peeled and cut into serving size pieces
250 g  fresh or canned langka (jackfruit) - drained and cut into 1/2-inch thick pieces
coconut cream (optional)
  1. Mix the malagkit rice flour and water. Add in more water or flour to make into a dough-like consistency.
  2. Get a small piece off it and, with your hands, roll into a ball about 1/2-inch in diameter. Repeat until you have used up all of the dough. Set aside.
  3. In a big pot, tip in all the coconut milk and water. Bring to boil - watch out this mixture usually boils over.
  4. Add the sago pearls. Turn down heat and continue to simmer uncovered until there are no more opaque white bit in the middle of the sago pearls (about 20 minutes).
  5. Add in the sugar and stir to dissolve. Taste to see if the sweetness is to your liking. If not, add more sugar.

  6. Tip in the bilo-bilo (glutinous rice balls) in the pot. Bring to boil again until all the bilo-bilo has floated on the surface.
  7. Add the gabi, simmer for 3 minutes.

  8. Add the kamote and banana and simmer for another 4 minutes or until the gabi and kamote are almost cooked.
  9. Add the langka and cook for another 3-4 minutes.
  10. Serve hot in a bowl with 1-2 Tbsp of coconut cream on top.

Friday, 17 March 2006

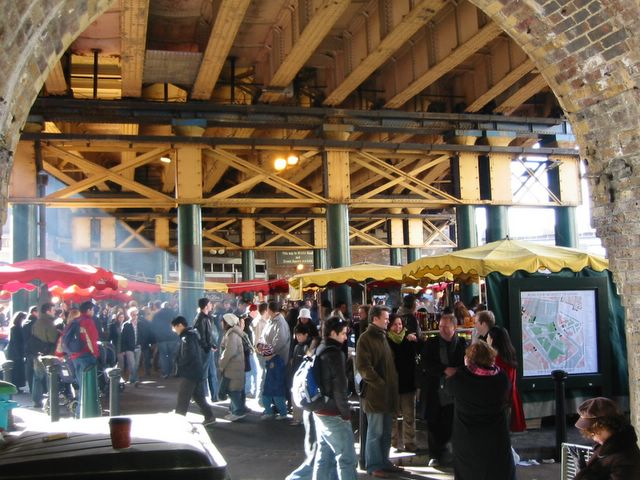
Borough Market


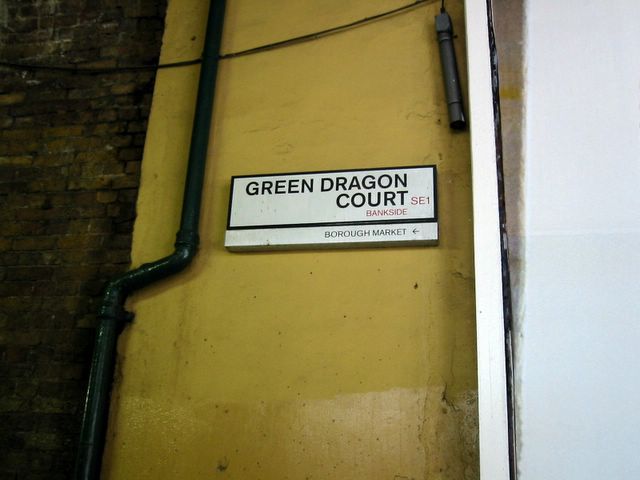
Underneath the railway arches of London Bridge station, beside the Southwark Cathedral lies this small open air food shopping area called Borough Market. On this approach you can access the market through the small alley of Green Dragon Court. [Click on the pictures for a bigger view.]

Borough Market
I have heard a lot about it, mostly along the lines of excited chatter on great foodie finds or fresh organic produce. One fine Saturday in October I was able to verify that and I had a great time with my son foraging through the numerous stalls with loads of wonderful produce usually from small artisanal producers.

Its got a great atmosphere with lots of people mingling and craning their necks on the goods laid out on the tables. A favourite of my son is the hot apple juice laced with cinnamon. Lovely when drank in cold cold weather.

If you look closely, the place might seem familiar because it's always been a popular movie location - Harry Potter 3, Bridget Jones, Lock Stock and 2 Smoking Barrels, etc.)


In the early mornings (as in pre-dawn) the market caters more for the food/restaurant trade and wholesales. I have it from a reliable source (thanks Hanna) that it's open for retail trade on weekdays as well as on Saturdays. Fridays and Saturdays are its busiest.


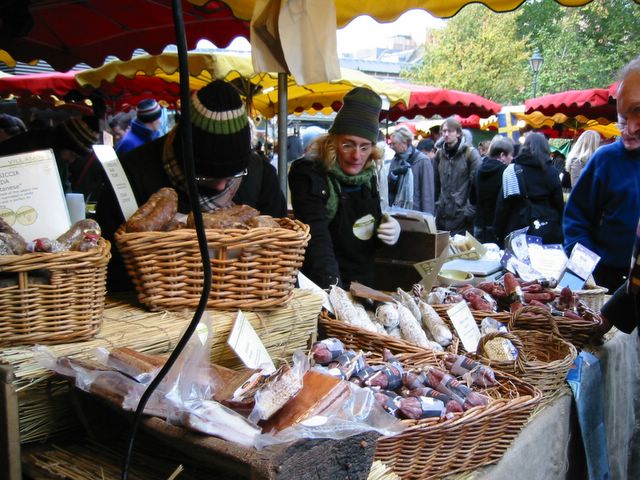
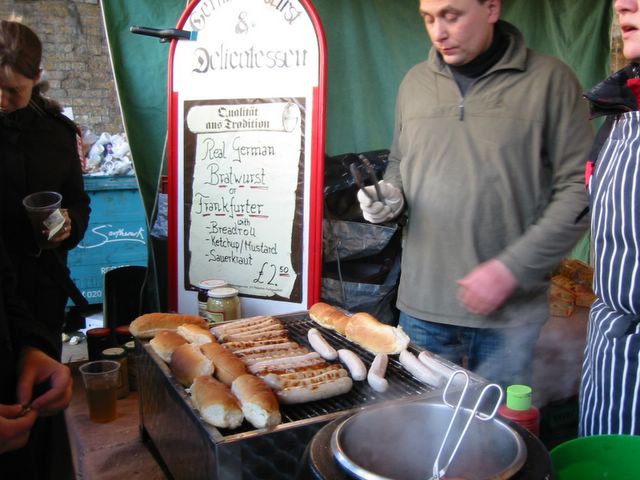
Among the few things you can find there are saucisson sec (dry French sausages) of different flavours. The truffle saucisson is particularly delish. There is a stall for bratwurst and other types of German sausages, pickles, etc.


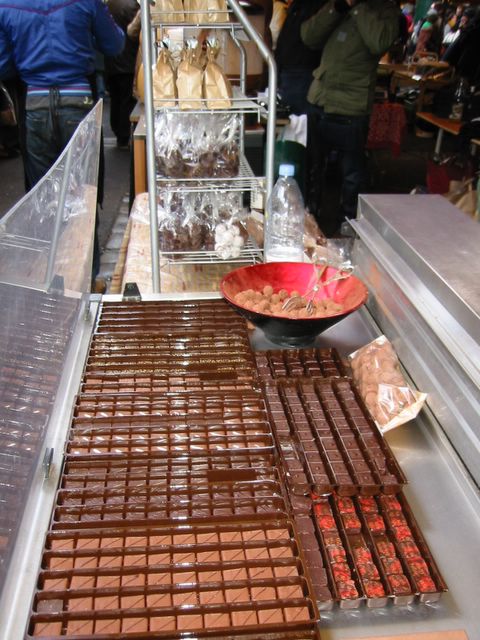
You can also find all manner of sweets, chocolates, fudges, toffees, etc. Baked goods also abound - numerous breads, cakes, pies, tarts, cookies.


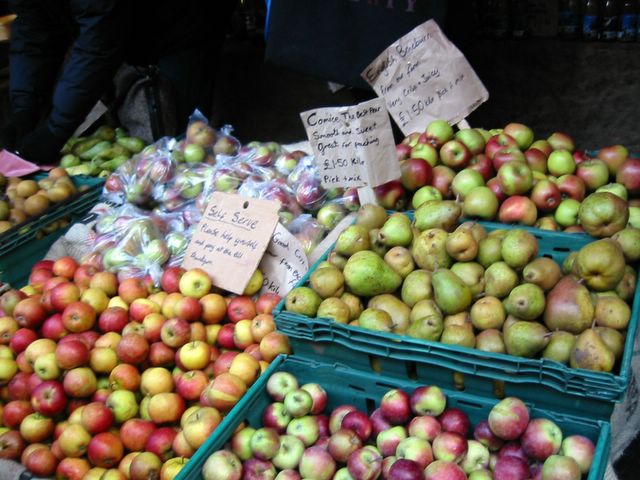
I love rummaging through the stalls with fruits and vegetables where they have both organic and regular ones. You can often see unusual and hard to find vegetables that you don't normally get from your local supermarkets.

There are also a number of stalls selling food on the go - juicy hamburgers, raclette sandwiches, roast pork sandwiches, pizza (crust remained crispy!), oysters, yoghurt and others. You will never go hungry there definitely.


Anything food related can be found there. Just take a look at these lovely hand painted plates for sale. The same stall also sells coasters, placemats, and aprons.


Besides the temporary stalls, there are food shops, pubs, and restaurants which are open everyday since they are in permanent spaces. The restaurant (and overpriced) Fish! can be found there with a new one right above the market whose name I couldn't recall.


Among the favourite shops that I love returning to again and again are Brindisa for anything Spanish (chorizos, wines, paprika, etc.; they also have a separate tapas bar), Neil's Yard for robust breads and cheese and a branch of Konditor & Cook's for delectable cakes, cookies, and other sweet stuff.