Early this year my good blogger friend from Boston gave me Mario Batali's Molto Italiano a real gem of a cookbook. Stella must have known that we're a big fan of Italian cooking and what a great gift it is. Full of authentic Italian recipes, you know, the kind that Italian women traditionally cook at home for their families.
My son was nagging me to make this and since I have a batch of lasagna pasta to use up I decided to give it a go. Just a few modifications and alterations later I could say we've successfully adapted Mario's recipe. Actually my favourite of the whole lot is the basic tomato sauce which I like so much I froze the leftovers for use another day.
First you make the basic tomato sauce and beschamel sauce:

2 Tbsp olive oil
1 onion - diced
4 cloves garlic - sliced
1/2 cup finely chopped carrots
3 Tbsp chopped fresh thyme or 1 Tbsp dried thyme
2 x 400 g cans of plum tomatoes or chopped tomatoes
- In a big saucepan, heat the olive oil on medium heat.
- Saute onion and garlic until soft and translucent - about 6-7 minutes.
- Add carrot and thyme; cook for another 5 minutes or until carrot is soft.
- Add the tomatoes and bring to a boil.
- Lower heat and simmer until thick - about 20 minutes. Season with sea salt.
- This can be stored in the fridge up to 1 week or frozen up to 6 months.
Bechamel Sauce
1/4 cup plain flour
5 Tbsp unsalted butter
3 cups whole milk
1 tsp ground sea salt
1/4 tsp freshly grated nutmeg
- Heat a saucepan over medium heat then add butter to melt.
- Add the flour and stir until smooth. Continue cooking until light brown while stirring. This will take about 5 minutes.
- Stir in the milk 1 cup at a time. Bring to a boil while whisking constantly until smooth.
- Cook for about 10 minutes or until thick while still whisking constantly.
- Remove from heat and season with the salt and nutmeg.
- Let cool completely. You may transfer to another container, cover and refrigerate until ready to use.
Cannelloni
(Cannelloni al Forno)
1 Tbsp butter
250 g minced pork
250 g minced veal or beef
3/4 cup grated parmesan cheese
1 cup whole milk
1 Tbsp flour
1 large egg - beaten
1/2 tsp ground sea salt
pinch of freshly ground nutmeg
black pepper
lasagne pasta sheets
1 1/2 cup tomato sauce
1 cup bechamel sauce
stock
- Cook lasagne pasta sheets according to instructions. Drain and lay flat on kitchen towels.
- In a medium sauce pan, melt the butter on high heat.
- Add the meats, cook stirring to break up any lumps until browned.
- Add salt and a little stock. Bring to boil then simmer for 20 minutes, stirring from time to time. At the end of 20 minutes there should be very little juice left in the pan.
- Stir in the milk, 1/2 cup parmesan cheese, and flour. Bring to a boil then reduce heat and cover to simmer for another 15 minutes, stirring frequently.
- Remove from heat and cool completely.
- Add the egg, season with nutmeg and black pepper. Set aside.
- Preheat oven to 350°F/180°C/fan 160°C.
- Put about 3 Tablespoonful of meat filling along the long side of a cooked lasagne sheet. Roll up the pasta around the filling to form a log or cylinder. Repeat with the rest of the pasta and fillings.
- Spread about 1/3 of the tomato sauce on the bottom of a wide baking dish. Arrange the cannelloni 'logs' seam side down in the single layer in the baking dish.
- Top with the remaining tomato sauce and then with the bechamel sauce. Finally sprinkle the remaining parmesan cheese on top.
- Bake in the oven for 25 minutes until the sauces are bubbly and the pasta edges are crisp and brown. Serve hot.

I was wondering to do different with a slab of pork belly. I could always impose an adobo on it but where's the fun in that? So a quick scan among my posse of oriental cookbooks yielded this very easy stew. The ingredients are easy to source, too. Nothing exotic nothing out of the ordinary but resulted in a very good and tasty pork stew great with steamed rice. This is adapted from the Australian Women's Weekly's Chinese Cooking Class Cookbook.
Garlic-Black Beans Pork
750 g pork belly - chopped in serving-size pieces
1 Tbsp fermented black beans - roughly chopped
1/2 Tbsp minced garlic
2 1/2 Tbsp dark soy sauce
2 tsp grated ginger
2 Tbsp oil
2 tsp cornflour
2 tsp cooking wine
2 Tbsp water
- (Optional) Heat the oil in a pot or wok and brown the pork pieces for a few minutes.
- Combine pork, black beans, garlic, ginger, and soy sauce in a pot.
- Pour enough water to cover the pork.
- Bring to boil then lower heat and simmer for about 1 hour 10 minutes or until meat is tender.
- Add a little hot water from time to time if it is drying up too much. But at the end of the cooking there should be only a little sauce left.
- Combine cornflour, wine and water. Stir into the pot and simmer until sauce thickens - about 1 minute. Remove from heat and serve.
 The current theme of the 20th edition of Lasang Pinoy blogging event is called binalot or 'wrapped-up'. Mita of The Unofficial Cook, who is hosting it this time, announced this blogfest a few weeks ago.
I already knew what I was going to make and dutifully called my mother and aunt at the weekend to get the recipe right. This is my very first time to make Lumpiang Sariwa so please give me some slack if you think it looks a bit far off from the traditional.
Lumpiang Sariwa literally means 'fresh springroll'. Well it's not exactly all fresh because the filling is fully cooked although that lone leaf of raw lettuce would probably qualify it for freshness. I guess it's called 'fresh' as opposed to the usual fried lumpia. The traditional wrapper for this is the same one that you use for the fried lumpias. But in the recent years it became more crepe-like in size, taste and texture.
The recipe is a medley of my family's and my sister-in-law, Ate Eva, in Toronto. And I just remembered (it's been years since I ate one of these) as I was taking a bite that I really don't like camotes or potatoes in it. I much prefer it with just veggies and whatever meat is included. I also found the wrapper quite rich so next time I'm gonna reduce the eggs and probably add a little salt to make it more savoury. The sauce or paalat reminded me that fresh minced garlic is preferred over crispy fried ones. Well, like most first time attempt of mine these are just a few from a litany of changes I plan to make next time I make it besides the fact that I should really make the size of the lumpia smaller.

(Fresh Springrolls)
*Filling:
100 g pork belly - thinly sliced
200 g shirmps or prawns - roughly chopped
2 cups julienned sweet potatoes
3 cups shredded cabbage
2 cups shredded green beans (bitchuelas)
1 cup shredded water chestnut (apulid)
1 cup julienned carrots
1 cup bean sprouts
1/2 cup stock
2 Tbsp oyster sauce
1/2 Tbsp minced garlic
1 medium onion - sliced
1/2 tsp salt
2 Tbsp oil
- Put sliced pork in a pot and add salt and just enough water to cover it.
- Bring to a boil then simmer until all the water evaporates. As soon as it starts sizzling add the oil and fry the pork until golden brown. Set aside.
- Saute garlic and onion until the onion is translucent.
- Stir in the shrimps and cook for 2 minutes.
- Pour in the stock. Add the oyster sauce. Bring to boil.
- Add the sweet potatoes; cover and cook for 2 minutes on medium heat.
- Add the carrots, beans and water chestnuts. Cook under cover for another 2 minutes.
- Add the bean sprouts and cabbage. Cover and cook for another 2 minutes.
- Remove from heat. Cool and drain in a colander for several hours. Reserve drained liquid.
*Wrapper:
3 eggs - beaten
1 1/2 cups water
2 Tbsp melted butter
1 1/4 cups flour
- Mix eggs, water, and butter.
- Add flour and beat until smooth and lump-free.
- Gently heat a 10-inch wide non-stick pan (a crepe pan would be best). Brush it with a little butter.
- Once hot enough pour in 1/3 cup of the batter. Swirl quickly to cover the bottom of the pan completely.
- Cook on low heat until the edges start to peel off the pan. Turn over and cook for a few seconds more. Dish up and repeat.
Note: I usually put butter for the first wrapper only.
*Sauce (Paalat)
stock
1/2 cup brown sugar
2 Tbsp dark soy sauce
1 tsp salt
2 Tbsp cornstarch
3 Tbsp water
- Dissolve the cornstarch in the water. Set aside.
- Take the liquid drained from the filling and add enough stock to make up 2 cups.
- Put this in a saucepan and add brown sugar, soy sauce, and salt. Bring to boil.
- Add the cornstarch mixture and bring to boil again. Remove from heat.
*To serve:
2 Tbsp minced garlic
roughly ground roasted peanuts
fresh lettuce leaves
Lay the wrapper on a plate. Put a lettuce on top then put about 2 Tablespoonfuls of the filling. Sprinkle some ground peanuts on top.
Fold the wrapper to enclose the fillings.
Serve with the minced garlic, ground peanuts and the paalat sauce.
I was on a 1-week training course in the Holborn area of London the week before. Whenever I think of Holborn, the image conjured was a vast expanse of tall office buildings virtually desert-like in terms of foodie shops. How wrong I was!
The training house I went to was in the Rosebery Avenue-Clerkenwell Road area. While doing a walk-about after our usual sandwich lunch, I discovered a small market in Leather Lane which is parallel to the jewellery centre of London - Hatton Gardens. See the pictures below, to see more closely click on the pictures for an enlarged version.
Leather Lane has the usual low-priced stalls for you name it - books, clothes, bags, shoes, jewelries, flowers, etc.
But what made my eyes widen with delight are cafes, delis, food stalls, and restaurants that offer interesting food that are not of your usual fastfood chains.
First, let me show you some of the cafes:
This one serves not only burgers and chips but also kebabs, doners, and other Middle Eastern delights.
As the name suggests, they do nice bagels plus curries, couscous ... more Middle Eastern fares.
Oasis is of healthy-organic food genre. You should see their offerings - they looked so delicious.
Here is one of a few juice bars in the market. They looked pretty busy on the day.
Now we come to the curry kiosks. The one on the left is the Indian variety and on the left is the Thai variety. Goodness, just smelling the waft of spices from these stalls made my mouth water even though I've just eaten my lunch at the time!
This is probably the kiosk with the longest queue, one that offers authentic-looking Mexican food.
There must be quite a number of Mediterranean residents here as gleaned from the number of cafes and restaurants offering the cuisine like this one ...
... and this one.
There are also authentic Italian delis in the area like Terroni & Sons in Clerkenwell Road.
This one is on Theobald Road which is about 2 minutes walk from Leather Lane.
Above is just one of the authentic-looking Italian restaurants in the area which together with the delis and an Italian Catholic church nearby suggests a high concentration of Italian immigrants in the place.
Leather Lane Market
Leather Lane
London EC1
Opening times: Monday-Friday 10:00AM - 3:00PM
Nearest tube station: Farringdon or Chancery Lane

How did the dish go? It should have been great but either the 1 tablespoon blachan is too much or the brand I bought is especially salty. It resulted in me and the husband fishing out the strands of kangkong from the salty sauce then smothering it with lots of steamed rice. And the whole house smelling like a shrimp stink bomb exploded. That's why in the recipe below I drastically reduced the blachan to just 1 teaspoon then I'll just go from there. But it's so nice to have a veg quite different from the usual ones especially when paired with hot grilled fish. Yum!
Kangkong Blachan
350 g kangkong (ung choi, tung choi)
1 tsp blachan (belachan, shrimp paste)
2 Tbsp hibe (dried shrimps)
2 red chillies - chopped
2 cloves garlic
2 Tbsp oil
1/2 cup water
- Cut the kangkong into 3-inch lengths. Rinse well in water then drain.
- Soak the hibe in hot water for 20 minutes. Drain.
- Grind or pound the blachan, hibe, red chillies, and garlic until fine.
- Heat oil in wok and stir fry the blachan mixture for about 3 minutes.
- Turn up heat and add in the kangkong. Stir fry for about 2 minutes.
- Add the water and cook for 1 more minute.
- Serve immediately.

It wasn't until I stumbled upon Angela Nielsen's recipe in the BBC GoodFood magazine that I found a carbonara without any cream! It proved to be just the right taste that we wanted aided by that technique of adding a few tablespoons of pasta water to keep it moist and glossy. You have to keep in mind that timing is essential here. It is important to keep the pan off the heat while stirring the pasta with the egg mixture otherwise the sauce will curdle. Also keep your serving bowls warm to prevent the loss of heat in the pasta while eating. Cold carbonara is not too enticing believe you me.
Spaghetti Carbonara
125 g pancetta or streaky bacon - chopped
40 g Parmesan cheese - finely grated
40 g Pecorino cheese - finely grated
3 large eggs - beaten
2 garlic cloves - peeled and left whole
60 g (1/4 cup) butter
300 g spaghetti
salt and pepper to taste
- Mix the 2 cheeses together then add about 3/4 of it to the eggs, mixing it well. Set aside the rest of the cheese mixture for garnishing.
- Slightly squash the garlic by pressing under the blade of a knife. Set aside.
- Bring a big pot of water with salt to boil then drop in the spaghetti. Cook according to package instructions (usually bring to boil then start timing for 11 minutes).
- While the spaghetti is cooking, heat a large wide pan and melt the butter.
- When the butter has melted drop in the garlic and pancetta.
- Fry on medium heat until pancetta is crisp and golden.
Remove the garlic cloves. Keep the pan on low heat.
- When the spaghetti is ready, drain but make sure to reserve some of the pasta water.
- Put the spaghetti in the pan and mix well with the pancetta.
- Remove the pan from the heat and stir in the egg-cheese mixture.
- Stir to mix well adding about 2-3 tablespoons of the reserved pasta water to keep it moist and glossy.
- Serve immediately on warmed bowls sprinkled with the reserved grated cheese and freshly ground black pepper.

I've always been intrigued by risotto and as more cookbooks and magazine articles I read lauding its virtues I was actually intimidated. I had to get a very precise recipe to guide risotto newbies like me. Luckily, I just got Angela Nielsen's The Ultimate Recipe Book from where I adapted this recipe.
Lesson learned: use a heavy, wide pan. Mine was heavy but it was a pot not a wide pan. Therein lay my main problems, I found it hard to stir towards the end. Actually I used a cast iron pot so when I finished and turned off the heat it still had lots of residual heat that dried out my risotto. So probably next time I'll just settle for a thick bottomed wide pan.
My primary objective here besides having a go at cooking risotto is to use seasonal ingredients. Asparagus season here in UK is quite short. It starts from late April up to June-early July only. Many regard British asparagus as one of the best in the world. They even have an asparagus festival at the Vale of Evesham late this month which I hope I can attend just to satisfy my curiosity. Peas, one of my fav vegs, are also in season so that gets my nod in here. But not broad beans, I've not been fond of them types, so I omitted that in my risotto.
Well, what do I think of it? I love it! Especially when eaten with the crunchy asparagus and wholesome peas. It's already a complete meal so you can perfectly eat it on its own though I'm thinking of what meats I can serve it with if ever. That said I don't think I can eat more than a big bowlful of it because I find it quite rich. Maybe I should reduce the cheese or mix the stock with some water?
I can't help comparing this with lugaw, that rice comfort food loved by Filipino. It's not far off to be honest I'd like to think risotto is the posh, more upscale sister of lugaw. :) For me, the main difference is in the cooked grains. The risotto's grains retains its shape thereby avoiding it being mushy while lugaw is meant to be mushy and more porridge like. I wonder if I can cook the malagkit rice variety like a risotto and retain its shape. Abangan ang susnod na kabanata! Wait for the next installment.
Risotto Primavera
1 Tbsp olive oil
65 g [1/4 cup] butter
1 garlic clove - minced
3 spring onions - finely chopped
4 shallots - finely chopped
350 g risotto rice (Carnaroli, Arborio, Vialone)
1/2 cup white wine
200 g shelled fresh peas (or frozen ones - thawed)
250 g asparagus
100 g parmesan cheese - finely grated
5 1/2 cups of chicken or vegetable stock
- Snap the woody bases from the asparagus and slice each into 4 diagonal pieces.
- Put the stock in a pot and bring to a simmer. Keep this simmering while cooking the risotto.
- In a thick bottomed wide pan (beside or close to the simmering stock), heat olive oil and 2 Tbsp of the butter until bubbly.
Saute the onions and garlic on medium heat for about 3 minutes until soft.
- Stir in the rice and cook while stirring often for about 2-3 minutes.
- Add the wine and keep stirring until almost all the wine has evaporated.
- Put the timer on for 20 minutes.
- Add 1 big ladleful of stock to the rice and bring to simmer (do not boil; you may have to lower the heat) while stirring constantly until all the liquid has been absorbed.
- Repeat adding ladleful of stock and stirring when the previous amount has been absorbed.
- After 14 minutes (meaning 6 minutes left in your timer), add the peas to the rice.
- At the same time drop the asparagus in the stock. Let the asparagus simmer for 4 minutes while you're stirring and adding stock to the rice. After 4 minutes, remove with a slotted spoon add it to the rice mixture.
- At this point you should taste the rice, it should be soft but still with a bite in the centre. Also add seasonings if you think it needs some.
- The timer should have gone off by now and you should have the desired texture. If not, continue adding stock and stirring until done.
- Take the pan off the heat then add half the parmesan and the rest of the butter plus a little of the stock to keep it moist.
- Cover the pan and let it rest for about 3 minutes.
- Serve with a sprinkling of parmesan on top.
Once upon a time when I was still in my early 20s, I decided to start teaching myself to bake. After all, I thought to myself, we've got an oven I've got all my baking utensils and most of all I've got my handy Betty Crocker cookbook so what could be harder than bake some cakes? Like most people I tackled my first baking project with a brownie which was a resounding success. So feeling very brave I decided to bake another chocolate concoction - a 2-layer chocolate cake complete with buttery icing.
I went about buying all the ingredients and baking pans including a brand new hand mixer. I followed the recipe religiously (or so I thought) and in it went in the oven. When it came out I noticed it was looking particularly dark but I just shrugged thinking maybe that's what it was supposed to be. I proceeded to lovingly put icing on and in between the whole structure. Then I took a slice and eagerly tasted it. Ackk! I spat it out as quickly as I put it in my mouth. It was the most bitter cake I've tasted in my life! Which means I forgot to put in sugar!! Oh the agony and disappointment after all the trouble I went through. But most of all I dreaded getting teased by relatives for the rest of my life! Mwahahaha!
The cake was ready to be consigned to the rubbish bin but my father came to the rescue. He ate it despite the extremely bitter cake. He just slathered more of the icing. For 1 whole week he diligently ate 1 slice a day until he finished it - all by himself as you would have guessed since not even our dogs nor cat wanted it. I'd like to think he did it just for me but probably he just hated to have all the ingredients and my efforts go to waste. ;)
Ever since then I never attempted baking a chocolate cake until a few years ago when I came upon Angela Nielsen's recipe she dubbed The Ultimate Chocolate Cake in the BBC Good Food magazine. Well, I liked the idea of a recipe tested so many times to perfection and I tell you she did not lie. It was indeed a moist and very chocolately with just the right balance of sweetness. I had to alter the chocolate ganache since my kids are not fond of dark chocolate so I had to put in half dark and half milk chocs. I didn't bother to decorate it with chocolate curls since it would get readily devoured anyway. As proof just look below how I found my newly baked cake when I left it to cool ... hmmm ... there must be lots of chocolate monsters around my house stealthily scarfing down slices of it.
Next time, I will experiment with buttercream and whipped cream icings to see which ones can better complement it.
Have some?
Chocolate Cake
200 g butter - cut in pieces
200 g dark chocolate (about 70% cocoa solids)
85 g [1/2 cup + 1 Tbsp] self-raising flour
85 g [1/2 cup + 1 Tbsp] plain flour
1/2 cup hot water
1 Tbsp instant coffee granules
1/4 tsp bicarbonate of soda (baking soda)
200 g [1 cup + 1 Tbsp] golden caster sugar
200 g [1 cup + 2 Tbsp firmly packed] light muscovado sugar
13 g [2 Tbsp] cocoa powder (optional)
3 medium eggs
5 Tbsp buttermilk
grated chocolate or curls for decoration (optional)
- Preheat oven to 325°F/160°C/fan 140°C/gas mark 3. Butter a 20cm (8-inch) round baking pan and line the base.
- Dissolve the instant coffee in the hot water, set aside.
- Put a heatproof bowl over a saucepan of simmering water and melt the dark chocolate and butter in it.
- Once melted remove from heat and add in the coffee. Stir just enough to combine.
- In a small bowl, beat the eggs and stir in the buttermilk, set aside.
- In another large bowl, combine the flours, sugars, cocoa (if using), and bicarbonate of soda.
- Stir in the melted chocolate mixture and the egg mixture. Mix everything until well blended and have a smooth consistency.
- Pour the batter into the prepared baking pan and bake for 1 hour 25 minutes or until a skewer poked in to centre comes out clean.
- Cool slightly in the baking pan then turn out to cool completely on a wire rack.
- When completely cool, slice horizontally in half.
- Spread a little of the ganache in the bottom layer and sandwich it with the top layer.
- Spread the rest of the ganache on top and sides of the cake smoothing with a spatula or palette knife.
*For the Chocolate Ganache:
100 g dark chocolate (like above)
100 g milk chocolate
1 cup double cream (heavy cream)
2 Tbsp golden caster sugar
- Break the dark and milk chocolates into pieces in a heatproof bowl.
- Meanwhile, put the double cream and sugar in a saucepan and heat until it is about to boil.
- Pour immediately onto the chocolates. Stir until all the chocolates have melted. Cool for a few minutes then whisk until smooth and thickened.
- Set aside to cool for 1-2 hours (may put in the fridge) or until it is thick enough to spread on the cake.
Finally, a sweet and sour dish without the tell-tale red tinge of ketchup. This is quite a departure from the usual Chinese standard though not entirely alien to the Filipino cuisine since we have ketchup anaemic 'agridulce' sauces used as a dip or (obviously) as sauce.
Warning: don't overcook the meatballs because they will turn dry and tough once it's been sitting on your dinner table for a few minutes. That's what happened to me first time I attempted this. The red hot chilli peppers (not the band) is entirely optional while the vegetables can be varied according to your taste. Just think of the colour, texture, and taste combination when you decide on some other veggies to put in the mix. My beloved Chinese Cuisine by Huang Su-huei provided the recipe that I adapted. This is actually on the cover of the cookbook!
Sweet and Sour Meatballs
500 g minced pork or beef
1/2 tsp salt
1 Tbsp cooking wine
2 Tbsp cornstarch
1/4 cup water
1 cup mangetout/snow peas (sitcharo) - topped and tailed
1 cup button mushrooms - [the smaller the better]
1 cup sliced carrots - precooked
1 red chilli pepper - sliced
1/2 Tbsp minced garlic
*Sauce:
3 Tbsp sugar
3 Tbsp vinegar
3 Tbsp soy sauce
1/2 cup water
1/2 Tbsp cornstarch
dash of sesame oil
- Mix all the sauce ingredients in a small bowl and set aside.
- Dissolve the salt and cornstarch in water and cooking wine. Mix well with the meat and form into about 1-inch balls.
- Deep fry meatballs for about 3 minutes. Drain and set aside.
- In a wok, heat up 2 Tbsp oil. Stir fry the chilli pepper and garlic until aromatic.
- Add the snow peas and button mushrooms and stir fry for 1 minute.
- Stir in the carrots and meatballs. Cook for a few seconds.
- Add the sauce and bring to boil. Simmer for 2 minutes. Dish up and serve.
 Well, thank goodness the resurrection of Lasang Pinoy coincided with my re-entry into the fold of Pinoy food blogging. It was fortuitous enough for me to have a post waiting for a chance to be published. This edition is hosted by Afbeercan of Eat Matters - a food blog with beautiful delectable pictures.
More than a month ago, Stel and Sha were witness to my obsession with custards at the time. I baked daan tart (Chinese egg tarts) - the delectable kind you find in dimsum trolleys. A Chinese dim sum cookbook (with English translations of course) was whipped out and I followed the recipe to the letter. My kids were eagerly awaiting the tarts, anxiously peering through the oven glass door. Five minutes after I took it out of the oven they were gobbling it up. They only ate one each and left the rest to completely cool off. But when it did it was met with "Yecchh! It's green !" Indeed, the custard turned greyish-green. Hahaha! It was all right when I tasted it but had that very unappetising colour of molting fungus. Did I overcook it? Could it be that the only ingredients of the custard are egg yolks and syrup? I didn't try to find out because I've just about given up on having a 'eureka' moment for daan tart (that was my fourth experiment).
Instead I turned my obession to egg pies. You know, that type of custard set on a pastry case. Of course my earliest memories of these would be the one you get from bakeries on the Philippines - less eggy more on the milky side set on sweet shortcrust crumbly pie shell with a very dark skin on top. Lately in my travels here and in France I would encounter something similar various names - creme tart, creme flan, nature flan, custard tart, etc. but it would always be that same custard on a pie crust. Although I have to admit the European model is more on the eggy side.
My search for a recipe in the internet started several years ago but I can't find a decent one. Then when I was flicking through various cookbooks that has been neglected gathering dust in the book shelves, I came upon Gordon Ramsay's Sunday Lunch cookbook. (Even though I abhor his constant swearing on the telly, his recipes has been very reliable, quite accurate and really works based on my experience.) He has in there a custard pie recipe which I didn't lose time in adapting and trying out. It turned very very successful ! At last my long lost egg pie/creme flan/creme tart I've found you !
I will have to make it another time without the beating of the egg whites. Let's see if adding whole eggs without beating it separately will result in the same delicious pie. Take note, this is not exactly like the commercial version we buy in the Phils. This is a more eggy version which for me is preferable. Try to use the best possible eggs and milk. If budget permits organic, go for it. As always, the quality will shine through the finished product.
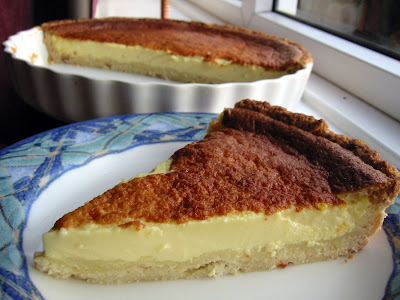
(Custard Pie/Tart)
* For the pastry:
125 g [1/2 cup] unsalted butter - at room temperature
90 g [1/3 cup + 1 Tbsp] caster sugar (superfine)
250 g [1 cup + 2/3 cup] plain flour
1 egg - beaten
1-2 Tbsp cold water
* For the filling:
2 1/3 cup milk
4 eggs - separated
100 g [1/2 cup] caster sugar (superfine)
1 1/2 Tbsp cornflour (cornstarch)
- To make the pastry:
- Combine flour and sugar in a bowl.
- Cut in the butter with two butter knives or a pastry cutter. Then rub in the butter with your fingers until it resembles coarse breadcrumbs.
- Mix in lightly the egg and knead the dough until it just about comes together. If necessary sprinkle cold water if the dough seems dry.
- Knead for a short while and form into a ball. Do not over knead or it will be difficult to roll out.
Wrap in plastic or cling film and chill in the fridge for about 30 minutes to firm it up.
- Roll out thinly on a floured table top to a circle about 12 inches in diameter.
- Line a 23 cm (9 inch) pie pan or fluted flan tin making sure to press the pastry well into the sides.
- Put the tin on a baking sheet and bake blind: line the pastry with foil and baking beans.
- Bake in a preheated oven to 200°C/fan 180°C/400°F/gas mark 6 for 15 minutes.
- Remove foil and baking beans then return to oven to bake for another 5 minutes.
- Trim the excess pastry from the edge of the flan tin with a knife.
- To make the filling:
- Turn the oven temperature down to 180°C/fan 160°C/350°F/gas mark 4.
- In a bowl, mix the flour, sugar, and egg yolks.
- Stir in the milk into the mixture.
- In a separate bowl, whip the egg white to soft peaks and fold gently into the milk/egg yolk mixture with a metal spoon.
- Place the pastry lined flan tin on a baking sheet.
- Pour the filling in the tin and bake for 20 minutes until the top is brown.
- Bring down oven temperature to 110C/fan 90C/250F and bake for a further 1 hour until the custard is just set. The centre should wobble a little.
- Remove from oven and cool completely.

My current stash of this wonderful bread was about to expire and I was left with a choice between having indigestion in eating it all up or be less greedy and make some panettone bread and butter pudding. Bread and butter pudding, I now realised, is simply custard-soaked pieces of bread. It's a wonderful ending for my beloved panettone because the recipe I adapted from the BBC Goodfood magazine was easy to do and utterly divine. The original recipe is here if you're interested.
Panettone Pudding
250 g panettone (about 5 medium slices)
1/2 cup double cream
1 cup milk
2 eggs
1 tsp vanilla extract
2 Tbsp caster sugar (superfine)
icing sugar (for sprinkling - optional)
softly whipped cream, to serve
- Grease a 850ml/1-1/2 pint (about 3 1/2 cups - a 9inch x 9inch deep pan will do) baking dish with a little butter.
- Preheat the oven to 160°C/fan 140°C/gas mark 3.
- Cut the panettone into wedges then in half, leaving the crusts on. Arrange the bread in the baking pan.
- In a bowl, whisk together the eggs, cream, milk, vanilla extract and sugar and pour evenly over the panettone. Let it soak for a few minutes.
- Put the dish in a deep roasting pan and pour hot water around it to a depth of about 2.5 cm/1 inch
- Bake for 35 minutes until the pudding is just set.
- (Optional) Dust top with icing sugar and serve with whipped cream or ice cream.

Then an email exchange with the Karen, our Kapampangan-cuisine expert food blogger, cleared the haze of mystery - it had something to do with fermentation! She said that in the old days when most people make their own tocinos they keep the salt and sugar cured pork in glass jars and let it ferment for a few days. Crucially, according to Karen, the rule of thumb in curing tocino is 5 days in the fridge or 3 days without refrigeration. Care should be taken here since as you well know there is a fine line or a short period between being fermented and getting rotten! I played around with the curing/storing time in the fridge and my current standard is 5 days minimum and 7 days max. After that the meat really goes off and you don't really want to eat stinking tocino, would you?
It's only now that I realised why people would get shop-bought tocino instead of making one themselves. In this age of TV, fast food, and instant gratification, imagine waiting for almost a week to get your homemade tocino fix! I think I'll make several batches and try to freeze it next time.
See that picture of tocino below? It is naturally reddish after the fermentation so red food colouring prevalent in commercial version is not needed. You would also avoid any artificial ingredients by avoiding the said food colouring. My proportion for the salt and sugar here is still at the tweaking stage so please adjust it to your liking as you see fit. Plus I'll be also experimenting in adding honey or pineapple juice or golden syrup or brown/muscovado sugar. I will surely keep this post updated whenever I make any progress.

1 kg pork (preferably well marbled with fat like the shoulder part)
1 Tbsp fine salt
5 Tbsp granulated sugar
- Slice the meat into about 1/4-inch thick and into serving sizes.
- Mix salt and sugar well in a bowl.
- Add the pork and mix in, making sure that it is well coated.
- Put in a covered glass container and store in the fridge for about 5 days.
- To cook:
- Put tocino in a non-stick pan and add just enough water to cover it.
- Bring to boil then bring heat down and simmer for about 30 minutes or until tender. Add hot water a little at a time if it is drying up too much.
- When the water has nearly evaporated (this should be near the end of 30 minutes), drizzle some oil on it, turn heat to very low and let it fry gently. Stir occasionally and let the meat scrape the sticky residue in the pan. Cook until golden brown.
Look how blessed I am, receiving another parcel out of the blue just 1 month from the one from Hawaii. This time it came from Boston sent by a long-time blogging friend who was generous enough to send me uncommon Pinoy ingredients, my favourite 'quamoy' dried plums, and a great cookbook by Mario Batali. I was flicking through the pages and quickly marked out a lot of pages that I want to try out. She also sent a steam plate tongs that I've been searching for in all the Oriental groceries I happen to visit here in UK. I distinctly remember having several when I was in Hong Kong but it disappeared when we moved here. And I've been tong-less ever since. ;)
Thanks very very much, Stel, for the wonderful gifts you sent my way. It is greatly and hugely appreciated, my friend. I've been wanting to send some to you and other blogging friends but my current killer work schedule just makes it so so hard. I hope I can make it up to you soon. :)
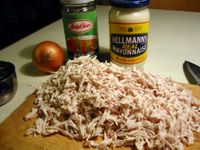

A reader recently asked on how to make tuna sandwich. I told her I will posting something about sandwich fillers. Little did I realise that the pictures and my post saved on draft for the past year do not have the tuna one she needs. I had to quickly do some this morning so I could post the pictures here. It would have been complete if I had something for cheese pimiento. Maybe I can do that some other time.
These are very simple sandwich spreads which I am posting mainly for my kids. You must have noticed "sarnie" at the title. Like a lot of things here in Britain, that is the nickname for sandwich. As for the name itself, it was bestowed on two slices of bread with a meat (usually) in the middle after the Earl of Sandwich. The medieval earl apparently loved to eat these a lot.
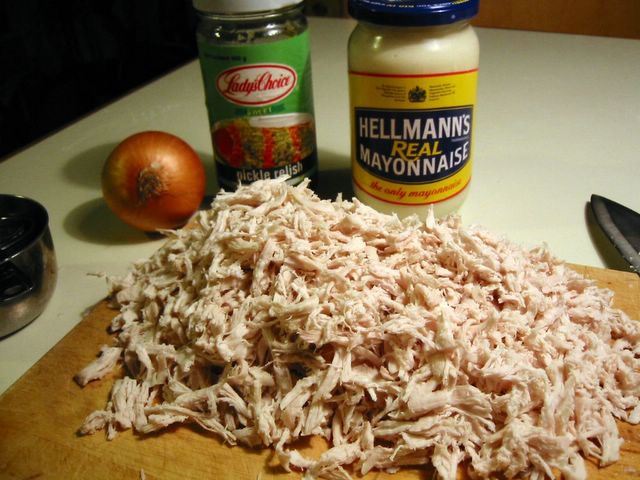
Chicken Sandwich Spread
3 cups cooked chicken meat - chopped or flaked
1 1/3 cup mayonnaise
3 1/2 Tbsp chopped sweet pickle relish
2 Tbsp finely chopped onion
freshly ground salt and pepper
- Combine all ingredients in a bowl. Taste and season with salt and pepper if needed.

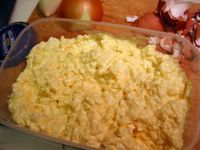
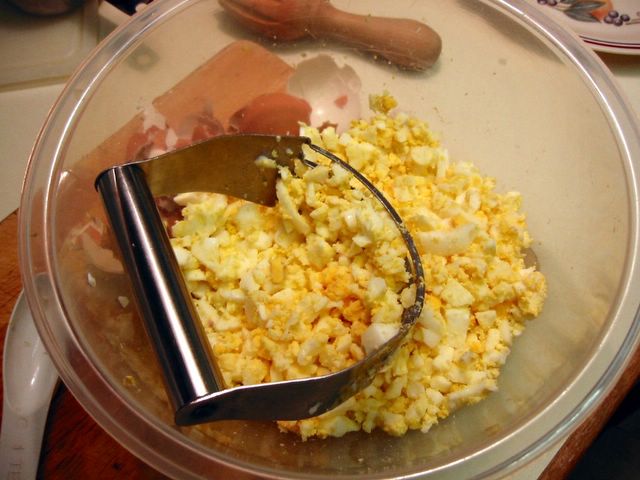
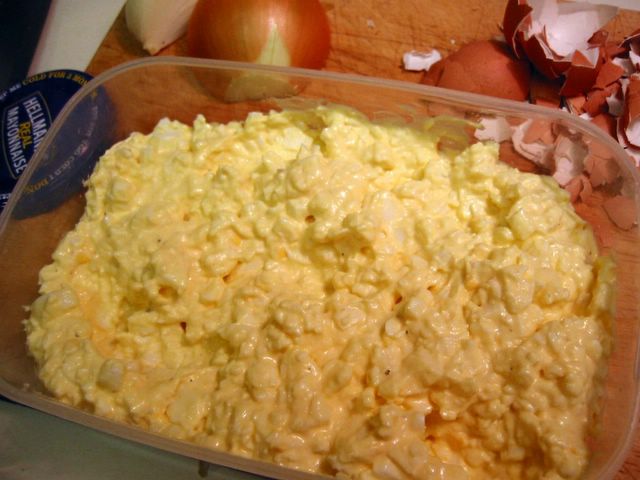
Egg Mayo
5 hard boiled eggs - chopped
2/3 cup mayonnaise
freshly ground pepper
- Combine all ingredients in a bowl. Taste and season with salt and pepper if needed. If you use Hellmann's mayonnaise, usually no additional salt is necessary.
Tuna-Mayo-Sweetcorn
2 x 185 g cans of tuna in oil
1/2 cup cooked sweetcorn (or sweetcorn from cans)
1/3 cup mayonnaise
salt and pepper to taste
- Drain tuna from oil then flake it in a bowl. Add all other ingredients. Taste and add salt and/or pepper if needed.
Tuna Mayonnaise
2 x 185 g cans of tuna in oil
2 Tbsp chopped onion or green onion
1 Tbsp chopped sweet pickle relish
salt and pepper to taste
- Drain tuna from oil then flake it in a container. Add in all other ingredients. Taste and add salt and/or pepper if necessary.
Here's what you can do when you've got that odd small quantity of beef left. Too little to freeze, too fiddly to stir-fry with vegetables, and especially too much of a waste to throw away. I adapted this from my old reliable Chinese Cooking For Beginners by Huang Su-huei. It originally had 1 tsp sugar in it but I completely omitted it since I really don't want a sweet fried rice. This is very adaptable such that you can add in other veggies or left over meat in it.
Beef Fried Rice
150 g [about 1/2 cup] minced beef
1 cup chopped onions
2 1/2 cup steamed rice (chilled left-over rice is best)
3 Tbsp ketchup
1/2 tsp fine salt
1 tsp Worcestershire sauce
2-3 Tbsp oil
- Mix ketchup and salt in a small bowl. Set aside.
- Heat a wok and add the oil. Fry the onion until translucent (about 3-5 minutes).
- Add the ground beef and cook in medium heat until cooked (about 5-6 minutes). Make sure to separate the tiny beef pieces with your spatula or cooking spoon.
*OR*
To make it more tender, add about 1/4 cup hot water and simmer for 30 minutes or until beef is tender and all the water has evaporated.
- Sprinkle the Worcestershire sauce on the beef and cook for a few minutes more.
- Add the ketchup mixture, mix well. Then add in the rice and stir fry until rice is heated through and mixed well.
I overspent on carrots last week so I had this big bunch sitting in my fridge's vegetable box waiting to be used. I've never done a carrot soup before so I guess that was the natural direction it was taking. Luckily, there was this reader recipe in the current edition of the BBC Good Food magazine (is it obvious I like that magazine?!) that was precisely what I was looking for. Jenny Martin was gracious enough to share her recipe to all readers and here I am tweaking it a little bit here and there according to my taste. For one thing, I found the pureed carrots on the sweet side. Well, unless I wanted a dessert, a few twist of the salt mill did the job of making it more savoury.
Carrot Soup
1 medium red onion - chopped
1 tsp minced garlic cloves
2 Tbsp olive oil
1 small sprig of fresh thyme or rosemary - use the leaves only
6 large carrots (about 800 g) - peeled and chopped
1 Tbsp sherry or rice wine (optional)
725 ml [2 1/2 cups] stock
fresh chives - snipped (optional)
cheese - grated or crumbled (optional)
salt and pepper to taste
- Gently cook the onion, garlic, and thyme in oil in a pot until the onion is soft and translucent (around 10 minutes). Stir occasionally.
- Add the carrots, cook for about 3 minutes.
- Increase heat and add the wine (if using). Let simmer until almost all of the wine has evaporated.
- Pour in the stock and bring to boil. Lower heat and simmer until carrots are soft - about 30-40 minutes. Add more water or stock if it's becoming too dry.
- Using a blender, food processor or hand-held blender, whizz the soup until completely smooth.
- Return to the pot and heat through. Taste and season with salt and/or pepper.
- Serve in bowls with grated cheese and sprinkled chives on top.
 I will not let the month of February to go by without me posting about a wonderful parcel from our close friend Ernie who lives in Hawaii. Boy was it filled with unusual food of the likes of taro pancakes and papaya seed salad dressing. I can't wait to try them out. No parcel from Hawaii would be complete without the usual wonderfully yummy macadamia. Ernie emailed us a day after we received it to warn us to go easy on the nuts because they're quite fatty. Well, it was too late! We've eaten them all! :) Thanks very much Ernie. We hope we can visit you there to enjoy the great beaches and learn the hula.
'Chocolate by Brand' is the current theme of one of the longest running event in the blogging world. David Lebovitz hosts this 27th edition of Sugar High Friday. He encourages us to make a dessert out of our chocolate bars and write about them.
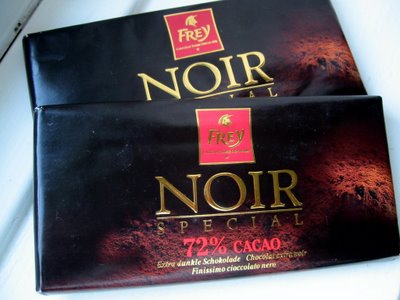
The chocolate bars I nabbed is by Frey - dark variety with 72% cocoa content. Wow, that's the highest I've used for cooking. Why I got it? It was on sale at the local Migros grocery near my sister's place when I visited her in Geneva a few months ago. You know me, I love value for money that means anything on sale!
Unlike some 70% chocolate I had before, this one is very deeply dark brown almost black actually. I savoured a small bite of it that showed it had smoothness, just the right amount of sugar and creaminess, a hint of coffee, with a little bitterness in the finish. Although I couldn't really tell how it would compare to one of those single-estate-organic-super-high-end types that your get from uber cool chocolate boutiques. All I can say is I like its smell, colour, and taste. Now let's see how it would fare when cooked.
I wanted to make something uncomplicated that would show the real qualities of chocolate. First thing that came to mind was chocolate truffles which I thought was perfect but then I've already posted one and for SHF, too! So out came this recipe from my burgeoning clippings from the BBC GoodFood magazine. It looks simple enough until I read closely about 'finely chopped' and 'crushed'. Turned out it requires more elbow grease. Oh well, things I have to do to have my sugar fix. :) The recipe originally asked for dried apricots but I bet any dried or candied fruit would be lovely in it. Things like cherries, pineapples, cranberries, even crystallised ginger! I did not include any chopped nuts because I thought there's too many things in it already. Maybe next time I'll lose the ground almond and put in the nuts. The chocolate itself had to be sufficiently chilled after melting to make it easy enough to mold into a log. Once you've done that the rolling on the crushed biscuits is easy peasy.
How did it taste? Well, the honey had a definite influence on it so other honey flavours would give it a different slant (even golden syrup would be interesting). Despite the number of distractions on this log (did I say I'm making something uncomplicated?), the chocolate still shone through. Dark, very slightly bitter, at the same time meltingly smooth in the mouth. Such a nice change from the gritty chocolates my husband brought home last Christmas.
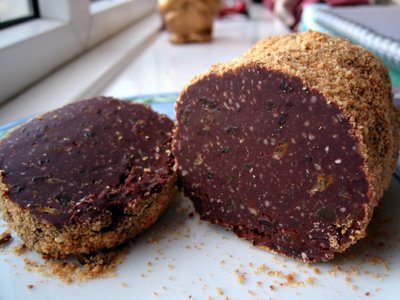 Chocolate Salami
250 g dark chocolate or combination of milk and dark chocolates
100 g butter
3 Tbsp clear honey
100 g ground almonds
100 g dried or candied fruits (apricots, cherries, etc.) - finely chopped
50 g toasted nuts (optional) - finely chopped
100 g amaretti biscuits - crushed
- Melt chocolate, butter and honey in a heatproof bowl over simmering water in a saucepan.
- Remove from heat and add almonds, toasted nuts (if using), and dried fruits.
- Cool completely and chill in fridge for about 1-2 hours until it is of dough-like consistency.
- Shape into a log (about 2 inches thick) and roll on crushed amaretti biscuits.
- Wrap in greaseproof paper and again tightly in foil.
Chill overnight in fridge.
- Before serving slice into rounds with sharp knife.
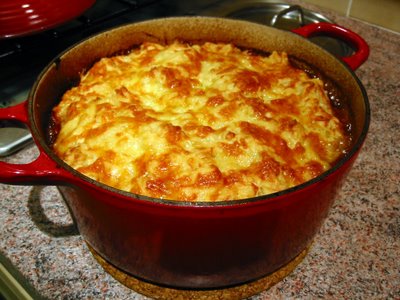 Andrew's call for stews as a new blogging event got me excited. Ever since the IMBB event stopped I was hoping someone would come up with a similar widely encompassing blog meme. It's nice to have one that would gather bloggers all over the world from all manners of persuation and basically have a big blogworld foodfest.
As per usual habit, I wanted to submit something Filipino but my husband emphatically said he doesn't want any stew that has tomatoes in it. I think the recent spate of pastas on our dinner table has done him in. That ruled out the Pinoy angle since all the stews without that offending ingredient I have already blogged before. So I've decided to do a simple beef stew but with its dumplings twisted into a muffin-like topping.
I had to do some adjustment to the recipe by Lesley Waters in the GoodFood magazine. For one, I thought it had too much sauce but the topping dough sucked up a lot of it so that was alright. Still the sauce was on the thin side so I noted in the recipe to add a little of the flour coating. Plus I had to add some Worcestershire sauce to correct its blandness and add mushrooms and reduce the carrots. There were too many changes that I think the beef stew was from my own recipe and I just kept the topping which was fab, by the way, and extremely yummy. It was looking particularly attractive with the cheese on top baked to a crisp golden colour.
Muffin-topped Beef Stew
500 g stewing steak - cut into chunks
2 Tbsp flour - seasoned with salt and pepper
2 Tbsp olive oil
1 large onion - chopped
2 medium carrots - peeled and chopped
2 large parsnips - peeled and chopped
200 g mushrooms - sliced
1 bay leaf
2 Tbsp tomato paste (optional)
1 Tbsp Worcestershire sauce
1 cup red wine
2 cups stock
*Topping:
225 g flour (about 1 1/2 cups)
1 Tbsp baking powder
140 g cheddar cheese - grated (about 1 1/2 cups)
2 Tbsp olive oil
2/3 cups milk
- Preheat oven to 150°C/fan 130°C/300°F.
- Toss beef in seasoned flour. Reserve 1/2 Tbsp of excess flour mixture.
- Heat the olive oil in a pot. Brown the flour-coated beef in high heat. If need be, do it in batches. Remove from pot once colour changes. Set aside.
- Lower heat and fry onions until soft and translucent - about 5 minutes.
- Add the carrots, parsnips, mushrooms. Cook 2 minutes.
- Stir in the reserved flour mixture and cook for a few seconds.
- Bring back beef in the pot. Stir and cook for 1 minute.
- Add bay leaf, tomato paste (if using), Worcestershire sauce, red wine, and stock.
- Bring to boil then put in oven. Bake for 1 3/4 - 2 hours of until the beef is tender.
- While the stew is in the oven, make the topping: Mix flour, baking powder, and half of the cheese.
- Combine milk and olive oil.
- Stir in milk mixture to the flour mixture to form a soft dough. If need be, add milk a little more at a time.
- Once the stew is done, remove the pot from the oven and raise the temperature to 190°C/fan 170°C/375°F.
- Spread (you may have to use your hand) on top of the stew and sprinkle the rest of the cheese on top.
- Bake for 15 minutes or until golden brown.
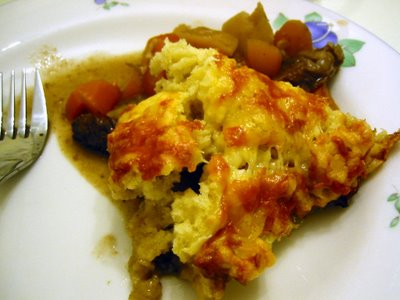
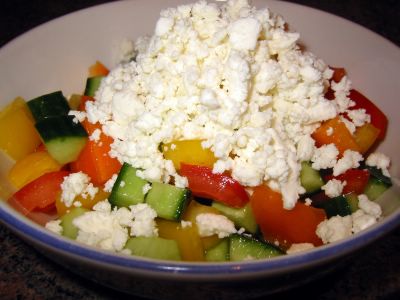 Last time I stayed with my sister in Geneva she served me this salad. We really don't know its name. She got the idea when she was served this at a friend's party who also don't have a name for it. So I just named it after the dominant veg.
I'm not a big fan of raw bell peppers but this veg combination and the cheese complementing it had me sold on the idea. It had definite echoes from a traditional Greek salad but is much simpler and, in my opinion, healthier without the olive oil.
This is perfect paired with meat dishes giving a refreshing respite from the richness and oil of the meat with its crunch and tang. Slight saltiness comes from the feta cheese to save it from being on the edge of being bland. You can easily replace the feta with any crumbly cheese like the Filipino kesong puti (white cheese) or cottage cheese. Of course you have to adjust the seasonings according to the cheese of your choice.
Bell Pepper Salad
1 yellow bell pepper* - deseeded and diced
1 orange bell pepper* - deseeded and diced
1 cucumber
3 medium tomatoes
100 g feta cheese (or any crumbly cheese)
salt and pepper to taste
- Cut the ends of the cucumber. Cut in half lengthwise. Scrape the center of the cucumber and discard. Slice the cucumber into small cubes.
- Slice the tomatoes crosswise and remove the seeds. Cut into small cubes.
- Mix all the vegetables in a serving bowl. Season to taste with salt and/or pepper*.
- Crumble the feta cheese on top. Chill.
- Before serving toss the vegetables with the cheese.
*Note: If you can't find these colours in bell peppers, just choose two of different colours - red and green for example.
Put less salt for salty cheese like feta and more salt for blander cheeses like kesong puti or cottage cheese.