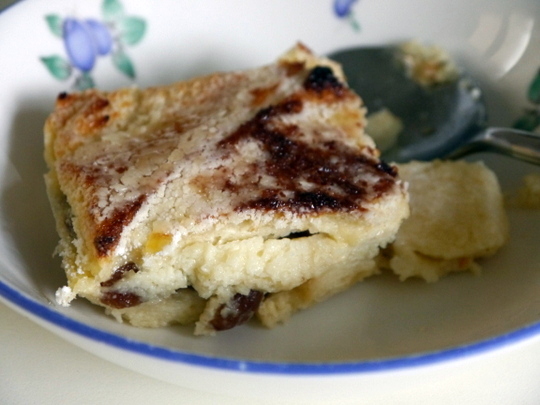
One of my favourite comfort food is Bread and Butter Pudding. It has that ability to be classified as both a dessert or a snack depending on how you serve or how much you eat.
A lot of bread puddings I have the experience of buying in shops are too stodgy. They resemble more like slightly sweetened thick chewy bread. But not this one. I do love this recipe because is lighter and the ratio of the egg to milk/cream is just right. Plus the sugar is just right - not too sweet. I got this from an old ripped-off page of the BBC Good Food magazine with the recipe coming from the chef Paul Heathcote. Thanks Paul.
I know I burned some of the pudding top but believe me it's not that badly burnt. It's probably just the lighting angle of the picture. Not a problem for me because I'm partial to slightly charred food!
6-7 slices of white bread - crusts removed
65 g [1/4 cup] butter - softened
100 g sultanas or raisins
250 ml [1 cup] full-cream milk
250 ml [1 cup] double cream (heavy cream)
3 medium eggs (or 2 large eggs)
50 g [1/4 cup] caster sugar
1 tsp vanilla extract
25 g icing sugar
25 g apricot jam - warmed and sieved (optional)
- Preheat oven to 190°C/fan 170°C/375°F. Grease a 1.5 litre ovenproof dish, about 2.5 inch deep.
- Butter the bread slices generously and cut each into 4 triangles.
- Arrange a layer of the bread in the prepared dish.
- Sprinkle the sultanas on top.
- Then arrange the remaining bread slices on top of this.
- Make the custard - mix the cream, milk, eggs, vanilla, and caster sugar in a bowl.
- Strain the cream mixture over the bread slices and leave to soak for about 5 minutes.
- Put the dish in a larger roasting tin in the oven. While the oven rack (with roasting tin) is about a third out of the oven, carefully pour hot water in the roasting tin to come halfway up the side of the dish.
- Bake for 30 minutes until the top is golden and the custard is lightly set.
- Remove the dish from the roasting tin and leave to cool for about 15 minutes.
- Preheat grill to the highest setting.
- Generously dust the top of the pudding with sifted icing sugar and glaze under the grill until golden brown. If it starts to puff up remove and leave to cool a little longer before returning to the grill.
Note: It will be more efficient if you use a cooking torch to glaze the icing sugar.
- [Optional] Brush the top with the warmed apricot jam. Serve with clotted cream or warm custard.
One of the ways Filipinos flavour and preserve fish (especially bangus or milkfish) is by marinating and drying them. One such technique is called 'daing'. By which the fish is marinated for hours and optionally dried out in the sun afterwards.
I don't have the luxury of having the delicious bangus in our neck of the woods. So I go for the nearest one available - sea bass. The one advantage of sea bass over the bangus is its got less bones. So there's less to be wary about.
It's been years since i have marinated bangus and I have forgotten that it takes several hours or overnight to make the vinegar-based marinate to permeate the fish completely. Otherwise, once you've pan-fired it, the flavour is hardly noticeable. So make sure to marinate it for a long time - I reckon at least 8 hours or overnight.

(Fried Marinated Fish)
2 pieces bangus (milkfish) or other white fleshed fish like sea bass
2/3 cup palm vinegar or any white vinegar
2 tsp sea salt flakes
1 tsp black pepper corns - cracked
4 cloves (or more) garlic - smashed
- Ask your fishmonger to butterfly or fillet your fish.
- Combine all the other ingredients and stir until the salt is dissolved.
- Put in a non-reactive container (plastic, glass, or ceramic) and marinate the fish in it for at least 8 hours or overnight.
- Remove from marinade and drain briefly.
- Heat oil in a frying pan on medium-high heat. Pan fry the fish about 3-4 minutes on each side. Serve hot with steamed rice.
It's that time of the year again for my husband's birthday. Another excuse to experiment with one of the listed cake recipes in my to-bake list. I chose a caramel cake because I know my husband's fond of caramel. So Corinne's wonderful looking Filipino-style caramel cake recipe gets taken out.
It is essentially an airy chiffon cake with a pourable icing. The cake was good although I would have liked the caramel icing to be a little bit sweeter so I adjusted the recipe. And be very careful in caramelizing the sugar. I found out it burns very easily after it starts turning brown. Also, I didn't bother with cutting the cake in half horizontally and ice the middle. I thought there was not enough icing to spread around. This step is marked optional because our cake was just fine as it is.
Filipino-Style Caramel Cake
*For the Vanilla Chiffon Cake:
4 large egg whites
1/4 tsp cream of tartar
1 cup plus 2 Tbsp sifted cake flour (or plain flour)
1 1/2 tsp baking powder
1/2 tsp salt
3/4 cup white sugar - divided
1/4 cup corn or vegetable oil
4 large egg yolks
1/3 cup water
1/2 tsp vanilla extract
- Preheat oven to 180°C/fan 160°C/350°F.
- Line the bottom of an ungreased 20cm/8-inch round 3-inch high pan.
- In a large bowl, beat the egg whites and cream of tartar on high speed until frothy.
- Add in half of the sugar (6 Tbsp) gradually while beating until stiff peaks form.
- In another bowl, combine the cake flour, baking powder, salt and the rest of the white sugar. Mix well.
- Add in the egg yolks, water and vanilla. Beat with electric mixer or by hand until smooth and well blended.
- Pour batter into the prepared pan.
- Bake for about 50 minutes or until top springs back when lightly touched or a skewer poked in the middle comes out clean.
- Invert pan into wire rack immediately and cool completely. To release cake from pan, carefully run a thin knife around sides of pan and invert cake onto a large serving plate.
- [Optional] Cut the cake in half horizontally. Invert the top half onto a cake plate and spread a little icing on it. Top it with the other cake half cut side down.
- Pour the rest of the icing on the cake spreading evenly on top and the sides.
**Tip: For easier handling, wrap your cake very well in cling film, then refrigerate overnight before frosting.
*For the Caramel Icing:
2 egg yolks
1/2 cup white sugar - divided
1 1/2 cups evaporated milk (one 375 ml can) - divided
1 1/2 Tbsp cornstarch
1/4 cup boiling water
1/4 cup butter - cubed
1/2 tsp vanilla extract
- Whisk the egg yolks with 2 Tbsp of the sugar in a small bowl/jug. Add in 1/4 cup of the evaporated milk and all of the cornstarch. Mix well and set aside.
- In a heavy saucepan, over low to medium heat, carefully caramelize the remaining (1/4 cup) sugar.
- When sugar is completely melted and a golden brown colour, add boiling water (careful it will splatter).
- Bring back to a boil while stirring ocassionally making sure all the caramel well mixed into the water.
- Gradually add in the rest of the evaporated milk (1 1/4 cups) while stirring. Heat mixture just until it starts to boil.
- Without turning off the heat, pour a little of the caramel mixture into the egg yolk mixture while constantly stirring to temper the eggs. Mix until smooth.
- Pour this back into the remaining caramel mixture in the saucepan. Mix until icing reaches a thick consistency.
- Remove from the fire and then add in the butter and vanilla extract. Let cool just a little bit, whisking once in while. The mixture will thicken more as it cools.
- Pour onto cake while still warm.
Note: This icing is pourable. Let it flow smoothly over the top and sides of the cake. Put strips of baking paper under your cake to catch the drips.
Mamon is a well-loved little sponge cake snack in the Philippines. For this recipe, the sponge is essentially a chiffon cake. I adapted the recipe from the wonderful baking blog Heart of Mary which is penned by a Filipina based in Australia.
She suggested there that greasing of the little cake tins is optional. Well you know me, anything to save labour is most welcome. But it did not work for me. The cakes stuck in the tins especially at the bottom. So that's one thing required in mine - grease the tins well.
The cakes came out really fluffy and they did not sink (which I was afraid it might do). They tasted wonderful, too, and not dry at all. I just had to reduce the salt because it came out a bit salty. So this recipe is well recommended.

{A}
1 cup plus 2 Tbsp sifted cake/plain flour
1 1/2 tsp baking powder
1/4 tsp fine salt
6 Tbsp white sugar
{B}
1/4 cup vegetable oil or melted butter
4 large egg yolks - at room temperature
1/3 cup water
1/2 tsp flavouring (vanilla, butter, lemon, or orange extract)
{C}
4 eggwhites
1/4 tsp cream of tartar
{D}
6 Tbsp white sugar
- Preheat oven to 180°C/fan 160°C/350°F.
- Grease 10 small mamon tins. You can also use small brioche tins or small metal pudding moulds.
- In a bowl, beat {C} on high speed until frothy. Gradually add in the sugar {D} and beat until stiff peaks are formed.
- In another large bowl, combine {A}, mix well. Add in {B}. Beat with electric mixer or by hand until smooth and well blended.
- Gradually and gently fold in egg whites into the egg yolk mixture.
- Pour the cake batter equally into the 10 tins. Give the tins a gentle shake and a tap to remove air bubbles and to level off the batter. Arrange them on a large baking tray.
- Bake for 25-30 minutes or until tops are golden brown and a skewer inserted into the centre of the cakes come out clean.
- Immediately invert the tins onto a baking paper-lined wire rack. Tap the tins to release the cakes. Turn the cakes over and let ir cool off completely.
- [Optional] While still warm, brush the tops with melted butter. This will allow the cakes to absorb some of the butter thus giving it more flavour. Finish off by sprinkling some granulated sugar on the tops.

 It's that time of the year again where baking and blogging for breads is compulsory for the World Bread Day. I don't mind it at all. In fact, I look forward to it come October knowing that I will add something in my list of breads that I've tried. As always every year this is hosted by the very generous Zorra of Kochtopf.
I have decided to bake something with chocolate to hit two birds with one stone. For it is also Chocolate Week here in UK. This recipe I adapted from a special insert in the current September issue of Waitrose's magazine. It is very good except that the filling was quite runny. So the instructions said to cut it in half lengthwise and then twist them together, I knew that it will be a messy affair if I did that. Hence, I just twisted them intact. I expected that it won't be too good looking when finally baked but I was rewarded with a nice swirl inside that was revealed when cut. And the taste of the bread itself was excellent. This is a definite keeper of a recipe. I just have to tweak that filling so it won't ooze out too much.

*Dough:
7 g sachet easy bake yeast
250 g strong white bread flour
3 Tbsp dark brown sugar
1/2 tsp fine salt
1/4 cup whole milk
1 large egg - beaten
75 g unsalted butter - softened
*Filling:
1/4 cup whole milk
75 g milk chocolate - finely chopped
50 g dark chocolate - finely chopped
1 Tbsp cocoa
3 Tbsp caster sugar
1/2 tsp vanilla extract
1/2 tsp ground cinnamon
*Glaze:
3 Tbsp dark brown sugar
3 Tbsp water
*For the dough:
**Manual method:
- Gently warm the milk in a pan until it is just lukewarm, remove from heat. Stir in the yeast and set aside for about 5-10 minutes. By then, then yeast should be foaming (it is activated). If not, discard it and start again from the beginning with fresh milk and yeast.
- Mix all the dry ingredients in a bowl. Make a well in the centre and add the milk-yeast mixture, egg, and butter.
- Knead mixture in an electric mixer with a dough hook attachment for 6-8 minutes or mix and knead by hand for 10 minutes until smooth.
- Cover with cling film, put in a warm place and leave to double in size (about 2 hours).
**Bread machine method:
- Put all ingredients according to the manufacturer's instructions (usually with the yeast first) and put on the dough program. This will include its first rising.
*For the filling:
- While dough is doing its first rise, heat the milk until steaming. Remove from heat and then add the chopped chocolates.
- Stir until chocolates has completely melted.
- Add in all the other ingredients. Stir to mix completely. Set aside to cool completely.
**Assembly:
- Punch down dough and lay out on a floured surface. Roll out to a rectangular size about 12 x 18 inches (30 x 45 cm).
- Spread the chocolate filling all over the dough. Roll up tightly like a log starting from the short end. Pinch the edges to seal it.
- Trim the ends of the roll. Cut in half lengthwise with a floured knife.
- Tightly twist the two strips over each other with the filling facing outwards.
- Transfer to the prepared tin. Cover with cling film or tea towel and leave to rise in a warm place to double size (about 1 hour).
**For the glaze:
- While the dough is doing its second rise, place the sugar and water in a saucepan and boil for about 2 minutes until syrupy. Set aside.
**Baking:
- Preheat oven to 180°C/fan 160°C/350°F. Bake for 25-30 minutes until cooked through.
- Brush half the syrup over the babka and leave for 15 minutes.
- Brush again with the rest of the syrup then cool completely on a wire rack.

A surprisingly delicious beef stew was unearthed from the Bon Appetit website. I bought a kilo of meaty beef ribs (short ribs) in the Birmingham market a few weeks ago and was looking for a recipe to make a tasty dish out of it. And I was not the least disappointed. The things that made it standout are the bones, which gave extra flavour, the garlic (surprising I know) and the excellent red wine I got in our pantry.
This is great with rice, mash potatoes, or just boiled new potatoes with steamed veggies on the side. I only cooked half of the recipe so I adjusted it accordingly.
Red Wine Braised Short Ribs of Beef
1 kg bone-in beef short ribs, cut crosswise into 2-inch pieces
sea salt and freshly ground black pepper
2 Tbsp vegetable oil
1 large onion - chopped
1 large carrot - peeled, chopped
1 celery stalk - chopped
1 1/2 Tbsp plain flour
2 tsp double-concentrated tomato puree (tomato paste)
375 ml [half a bottle] dry red wine (preferably Cabernet Sauvignon)
5 sprigs flat-leaf parsley
4 sprigs thyme
2 sprigs oregano
1 sprig rosemary
1 fresh or dried bay leaves
1/2 head of garlic - halved crosswise
2 cups beef stock
- [Optional] Preheat oven to 180°C/fan 160°C/350°F.
- Season short ribs with salt and pepper.
- Heat oil in a large oven-proof pot over medium-high. Brown short ribs on all sides in batches, about 8 minutes per batch. Transfer short ribs to a plate. Pour off all but 2 Tbsp. drippings from the pot.
- Saute onions, carrots, and celery in the same pot and cook over medium heat. Stir often, until onions are browned and tranlucent, about 5 minutes.
- Add flour and tomato paste. Stirr constantly, until well combined and deep red, about 2-3 minutes.
- Stir in wine, then add short ribs with all of its juices. Bring to a boil; lower heat to medium and simmer uncovered until wine is reduced by half, about 20 minutes.
- Add all herbs including the garlic. Stir in stock. Bring to a boil, cover, and transfer to oven. Cook until tender for about 2-2.5 hours.
OR
Cook on the hob in very low heat until short ribs are tender, about 1.5 hours.
- Transfer short ribs to a platter. Strain sauce from pot into a measuring cup. Spoon fat from surface of sauce and discard.
- Season sauce to taste with salt and pepper. Serve in shallow bowls over mashed potatoes or boiled new potatoes with sauce spooned over.

I quickly post any recipe I find that worked marvellously first time I tried it. This particular one came from the recent Waitrose Magazine for September 2016. The combination of chocolate (milk or dark) with the banana and toffee glaze is so moreish. My only complaint is that it is hard to make the glaze settle on top since the suggested cake tin is a bundt cake pan. Next time I will bake this in a square or rectangular pan so that the delicious glaze will stay on top and nothing will go to waste.
For the Daim chocolate bars, the equivalent of these are Hershey's Skor or Heath bars or any chocolate covered hard toffee bars.
Chocolate Banana Toffee Cake
200 g unsalted butter - softened
75 g caster sugar (suprefine sugar)
100 g light muscovado sugar
4 large eggs
4 very ripe medium bananas - mashed (about heaping 1-1/2 cups)
3 Tbsp sour cream
2 tsp vanilla extract
50 g cocoa powder (plus extra for dusting)
225 g plain flour
50 g cornflour (cornstarch)
2 tsp baking powder
1 tsp bicarbonate of soda (baking soda)
75 g chopped Daim bars or dark/milk chocolate chips (plus some chopped for topping)
Glaze:
200 g light muscovado sugar
75 g unsalted butter
100 g double cream
25 g dark chocolate - chopped
1/2 tsp vanilla extract
pinch of salt
- Preheat oven to 190°C/fan 170°C/375°F. Butter 10-inch bundt pan and then dust with cocoa powder. Tap out the excess cocoa powder.
- In a bowl, mix thoroughly the plain flour, cocoa powder, cornflour, baking powder, and bicarbonate of soda.
- In another bowl, add sour cream to mashed banana and vanilla.
- Cream the softened butter and the caster and muscovado sugars in a big bowl for about 5 minutes or until light and creamy.
- Keep beating while adding eggs one at a time.
- Add the banana mixture. Beat until well combined.
- Using a wooden spoon or spatula, fold in the flour mixture.
- Fold the chopped Daim chocolate bars or chocolate chips (whichever you're using).
- Pour into the prepared pan and bake for 40 minutes or until a skewer poked in the middle comes out clean.
- Take out of the oven, cool for 5-10 minutes and then invert into a rack and cool completely.
*For the glaze:
- Gently heat butter, cream and sugar in a small saucepan until the sugar is dissolved.
- Bring to boil, lower heat and simmer for 30 seconds.
- Remove from heat and add dark chocolate, vanilla and pinch of salt. Stir until smooth.
- Cool for 10 minutes or until a bit thickened while stirring from time to time.
- Drizzle over the cake. Let set for a few minutes.
- [Optional] Scatter chopped Daim over the top.
This recipe is from one of the hundreds of torn-off magazine pages that I save in the hope of trying it out "later". That "later" is now ten years and I reckon it's high time I try it again. The first time it was quite bland so I upped the sugar this time. It turned out quite good although it's more cake-like than a chewy/crispy cookie. The self-raising flour has a lot to do with that.
I adapted this from an advertisement feature in the BBC GoodFood magazine of December 2006 - almost 10 years!

125 g [1/2 cup] unsalted butter - softened
200 g [1 cup packed] light muscovado sugar
2 eggs
2 tsp vanilla extract
225 g wholemeal(or plain) self-raising flour
25 g cocoa
75 g dried cranberries
100 g white chocolate chips
100 g milk chocolate chips
12 pecan halves (optional)
- Mix together the butter and sugar in a bowl using a wooden spoon.
- Add eggs one at a time making sure to mix well everytime.
- Add vanilla extract.
- Sift the flour and cocoa into the bowl and mix well.
- Add in the cranberries and chocolate chips and combine well.
- Cover with cling film and chill in the fridge for about 1 hour.
- Preheat oven to 180°C/fan 160°C/350°F.
- Shape the dough into 2-inch (about 75 g) balls - yields 12-14 pieces.
- [Optional] Press a pecan piece on top of each of the balls.
- Arrange the balls about 1-inch apart on greased baking trays. Flatten them slightly. If necessary bake in batches.
- Bake for 15 minutes or until firm to the touch.
- Leave on the tray for about 5 minutes and transfer on a rack to cool completely.
How nice to use up my expiring sour cream and a glut of in-season lemons. This is the reason why I like recipes in website that's got reader reviews. You cannot go wrong with a highly rated one with hundreds of reviewers like this keeper of a recipe from my favourite Epicurious website. My daughter and I thought we were going to have a great big mound of a lemon-flavoured pound cake with most of it going to waste. Thankfully we were wrong. We love it to bits so much so that we actually finished it a couple of days later.
Lemon Sour Cream Pound Cake
3 cups cake flour (or plain flour)
1 tsp bicarbonate of soda (baking soda)
1/2 tsp fine salt
1 cup unsalted butter - softened at room temperature
2 1/2 cups sugar
5 eggs - room temperature
1/3 cup fresh lemon juice
2 Tbsp grated lemon peel
1 cup sour cream
*Glaze:
2 cups icing sugar (confectioner's) - sifted
2 Tbsp lemon juice
- Preheat oven to 160°C/fan 140°C/325°F. Grease 10-inch tube or bundt pan. Dust pan with flour; tap out excess flour.
- Sift flour, baking soda and salt into a bowl - combine well.
- Using an electric mixer, beat butter in large bowl at medium speed until fluffy.
- Gradually add sugar and beat 5 minutes.
- Add eggs 1 at a time, beating just until combined after each addition.
- Beat in lemon juice and peel.
- Using a wooden spoon or rubber spatula, fold in the flour mixture.
- Mix in the sour cream. Transfer batter to prepared pan.
- Bake cake until skewer inserted near center comes out clean, about 1 hour 30 minutes.
- Let cake cool in pan on rack 15 minutes. Turn out cake onto a rack.
- Carefully turn cake right side up on rack (if using tube pan) and cool completely. (Can be prepared 2 days ahead. Wrap in foil and let stand at room temperature.)
*For the glaze:
- Combine the icing sugar and lemon juice. If it's too thick, add water a little at a time to get a pouring consistency.
- Once cake is completely cool, drizzle with the lemon glaze.

We love pasta and we love meatballs, too. We already got a tried and tested spaghetti meatballs recipe but it doesn't stop us to be always on the lookout for any decent meatballs recipe out there in the world. So it's normal that we try out this much vaunted recipe from the Epicurious website that's got a very high review rating from readers. They were right! Only a few adjustments in the recipe and it's all thumbs up from the whole family. The recipe is humongous. Probably enough to feed a horde of people for a party. So I promptly halved and reduced volume and spice proportions and it scaled down well.
Spaghetti and Meatballs
*For the meatballs:
750 g minced beef
250 g minced pork
1 1/2 cups torn day-old Italian bread (or any white bread)
1 cup whole milk
1 medium onion - chopped
2 Tbsp extra-virgin olive oil
5 garlic cloves - finely chopped
3 large eggs
60 g [about 1 cup] parmesan cheese - grated
3 Tbsp finely chopped fresh flat-leaf parsley
2 Tbsp finely chopped fresh oregano (or 1/2 tsp dried)
1/2 Tbsp grated lemon zest
2 1/2 tsp fine sea salt
1/2 tsp ground black pepper
1/2 cup vegetable oil (for frying)
*For the tomato sauce:
6 x 400 g cans of chopped or plum tomatoes
1 medium onion - chopped
3 garlic cloves - finely chopped
3 Tbsp extra-virgin olive oil
2 tsp fine sea salt
1/2 tsp ground black pepper
1 kg dried spaghetti
*To make tomato sauce:
- In a large pot, heat the olive oil and cook the onions in medium heat until soft - about 5 minutes.
- Add the garlic and cook until softened - about a further 2 minutes.
- Add the rest of the ingredients, bring to a boil then lower heat and simmer uncovered stirring occasionally until thickened - about 45 minutes to 1 hour.
- Midway through cooking, you can crush the whole tomatoes with a spatula or stick blender.
*To make meatballs:
- Fry the onions in a wide frying pan on medium heat. Cook until softened while stirring occasionally - about 5 minutes.
- Add garlic and cook while stirring occasionally until fragrant and softened - about 2-3 minutes. Transfer to a bowl and cool completely.
- Soak bread in milk for about 20 minutes or until soft. Squeeze the bread firmly to remove excess milk. Discard excess milk.
- In a large bowl, combine all the ingredients except for the vegetable oil. Mix with your hands just until combined - do not overmx.
- Form into balls about 28 g (1 oz) in weight or about 1 1/2-inch in diameter.
- Heat vegetable oil in the same pan used with the onion and fry the meatballs in batches without crowding until browned all over - about 5 minutes each batch.
- Add fried meatballs into the tomato sauce and simmer for about 30 minutes.
- Cook spaghetti according to instructions in the packet.
- Serve spaghetti with meatballs and sauce with the optional grated parmesan cheese on top.
What a nice way of using up my soon to expire dried dates and Golden Delicious apples. The recipe in the Good Food Magazine was found upon googling for any tray bakes with apples and dates as main protagonists.
A lot of the volume of the ingredients were changed though, as per comments of reviewers. And out came a very pleasant and delish tea/coffee fodder. See, that's why I like recipe websites where there are a lot of honest reviewers because you can then adjust the recipe according to real life experiences of real people in ordinary kitchens. That way trial and error (that I often do) is minimised and ingredients and efforts not wasted.
[Gosh this is sounding like a IT project writeup.]
Date & Apple Bars
185 g [3/4 cups] butter
140 g [about 1 medium] cooking apple - cored, peeled, and chopped
140 g stoned dried dates - chopped
200 g [1 cup packed] light brown sugar
175 g [heaping 1-1/3 cups] plain flour
1 tsp bicarbonate of soda (baking soda)
100 g porridge oats
- Preheat oven to 190°C/fan 170°C/375°F. Grease and line a 18 cm (7-inch) square baking pan.
- Put the chopped apples in a saucepan. Add 2-3 Tbsp water and cook until soft and pulpy. This may take between 5-10 minutes and you may have to add a bit more water.
- Add in 25 g (2 Tbsp packed) of the brown sugar and the dates. Continue cooking for a further 5 minutes or until the apple is smooth and mixed well with the dates. You should have a very thick paste at this point. Remove from heat and cool completely. You may puree the mixture in a food processor or blender.
- Gently melt the butter in a saucepan; cool.
- Combine the flour, bicarbonate of soda, and remaining sugar in a bowl.
- Add in the melted butter and mix well.
- Press half of the flour mixture in the prepared pan.
- Spread the apple-date mixture on top.
- Cover with the rest of the flour mixture and press gently.
- Bake for 30-35 minutes until golden and firm.
- Cool copletely in the baking pan. Remove and cut into bars or squares.

I've never had blondies but have read about it in some American magazines for years. It intrigued me enough to put it in my list of things to bake if I have a chance. One came up recently when a colleague had a leaving do where we usually bring all manner of snacks and sweet things for everyone to partake.
My verdict? It's essentially a cookie dough baked in the shape of a bar or square. The dough have to be light in colour of course, afterall 'blondie' is the name. So nothing really like a major discovery here but it is delicious just the same. I adapted the recipe from the excellent The New Best Recipe (by Cook's Illustrated) cookbook.
Blondies
230 g [1 3/4 cups] plain flour
1 tsp baking powder
1/2 tsp fine salt
185 g [3/4 cup] unsalted butter - melted and cooled
300 g [1 1/2 cups packed] light brown sugar
2 large eggs
1 1/2 tsp vanilla extract
200 g [1 cup] chocolate chips (milk, dark, white, or combination)
1 cup pecans (or walnuts, macadamia nuts) - chopped
- Preheat oven to 180°C/fan 160°C/350°F.
- Grease and line a 13x9-inch baking pan with baking parchment.
- Combine the flour, baking powder, and salt in a bowl. Set aside.
- Mix the melted butter and brown sugar in another bowl.
- Add the eggs one at a time while whisking.
- Add vanilla and mix well.
- Fold the flour mixture into the egg mixture. Do not overmix.
- Next, fold in the chocolate chips and nuts and mix well.
- Pour into the prepared baking pan and bake for 23-25 minutes.
- Cool completely in the pan a wire rack.
- Remove from pan and transfer to a cutting board and cut into bars.
I've always wanted to combine the two most favourite fruits our family like to include in baking - apples and bananas. The experimentations over the years were not very successful at all. Most of the recipes were from the internet and they range from the really soggy ones (too much bananas) to the dry ones (not enough moisture) and the too sweet ones.
This one fits the bill, although I have to adapt and reduce or increase some of the ingredients, but generally it's quite good and not overly sweet which I guess is why it's called a 'bread'. That's one of my dilemna, do I call it a bread or a cake? For me, it can be classified as a cake but then it's not very sweet so a bread then? Whatever it is, teatime or coffee time would be better with this addition.
Thanks to Kelly in Just A Taste for the great recipe I adapted.
Banana Apple Bread
260 g [2 cups] plain flour plus 1 Tbsp extra
1 tsp bicarbonate of soda (baking soda)
1/2 tsp fine salt
1 tsp ground cinnamon
95 g [6 Tbsp] unsalted butter - melted
150 g [3/4 cup] granulated sugar
2 large eggs
2 tsp vanilla extract
1/4 cup buttermilk
1 cup mashed overripe bananas (about 2-3 bananas)
1 large baking apple - diced small (about 1 1/4 cups)
2-3 Tbsp demerara sugar or granulated sugar for sprinkling
- Preheat oven to 180°C/fan 160°C/350°F. Line a 9x5-inch loaf pan with baking parchment.
- Combine flour, cinammon, salt, and bicarbonate of soda in a bowl.
- Sprinkle 1 Tbsp flour on the diced apples and toss to coat. Set aside.
- In another bowl, mix sugar with melted butter.
- Add eggs one at a time and beat each time.
- Add bananas and vanilla, stir to mix.
- Fold dry mixture to the wet mixture alternately with the buttermilk.
- Then fold in the apple.
- Pour into the prepared loaf pan.
- [Optional] Sprinkle top generously with demerara sugar.
- Bake for 55 minutes or until a skewer pierced in the middle comes out clean.
This is more like a cake than a bread to be honest. But it's very very nice especially when straight out of the oven and slathered with butter. This is adapted from the Betty Crocker website and is obviously for a bread machine. You will have convert when doing it manually such as activating the yeast first, then putting them all together in a bowl. Then proving twice and finally baking. Right now I don't have the time nor the energy to do it that way. So to the bread machine I will stick!
Sour Cream and Vanilla Bread
1 sachet [2 tsp] fast action dry yeast
3 cups bread or strong flour
3 Tbsp sugar
1 1/2 tsp fine salt
1 Tbsp vanilla extract
1 egg - slightly beaten
1/3 cup sour cream
1 Tbsp butter - softened
1/2 cup water
- Put all ingredients in a bread machine in the order given (or according to your bread machine's instructions).
- Select White/Basic bread cycle. Do not use delay timings. After baking, remove from pan and cool on a wire rack.

I named it Dark Carrot Cake, instead of just Carrot Cake as Angela Nilsen did in The Ultimate Recipe Book where I adapted this from, because I plan to bake other types of carrot cakes among the thousands out there online and on cookbooks. The darkness stems from the dark muscovado sugar it uses which lends it a nice treacly smell and taste. Although it is also the source of my mild irritation because dark muscovado tends to ball-up into lumps when mixed with liquid. You can bet I did a lot of smashing and pressing to get rid of the lumps. But if you use newly bought or fresh from the box one, it won't lump that much. If you're not interested in pressing away lumps, just replace the dark muscovado with light muscovado.
Despite this, the cake is lovely especially when made a day ahead and paired with the accompanying cream cheese icing. Enjoy!

85 g nuts (walnuts, brazil nuts, etc.)
1 medium orange
115 g [scant 1 cup] raisins
225 g self-raising flour
1 1/2 tsp bicarbonate of soda
1 tsp ground cinnamon
175 g dark muscovado sugar
175 ml sunflower oil
3 eggs
280 g finely grated carrots (about 2-3 medium carrots)
*Icing:
100 g full-fat cream cheese - room temperature
50 g unsalted or slightly salted butter - softened
50 g [heaping 1/3 cup] icing sugar
1 tsp lemon juice
- Preheat oven to 160°C/fan 140°C/325°F.
- [Optional] Toast nuts in a baking sheet in the oven for about 5-10 minutes.
- Finely chop nuts. Finely grate the zest from the orange set aside.
- Squeeze 2 Tbsp of juice from the orange and pour it over the raisins in a bowl. Leave to soak for about 20 minutes while you make the cake.
- Grease and line the base of a 8-inch/20 cm round or square baking pan with baking parchment.
- Combine the flour, cinnamon, and bicarbonate of soda.
- Put sugar in mixing bowl. Rub between fingers to break up lumps.
- Add in oil and beat with electric mixer on low speed until well mixed and have broken down as much of the little lumps as you can.
- Beat in eggs one at a time.
- Gently stir in the flour mixture with a large metal spoon.
- Fold in carrots, nuts, raisins (with the liquid), and orange zest.
- Pour into the prepared baking pan and bake for 45-50 minutes for a round pan and 55-60 minutes for a square pan or until a skewer poked in the centre comes out clean.
- Let the cake cool in the pan for 5 minutes.
- Turn out on a wire rack, peel off the lining and let it cool completely.
- Mix all icing in a bowl. Spread over cake. Best if cake is left for a day or two before icing and eating.
Here's one very simple sweets recipe that's very much welcome all year round especially during the holidays. My youngest was especially proud of this since she did most of this for her Girl Guides confectioner's badge. Granting that was more than 4 years ago, this post took sometime to publish I have to admit.
Some versions of rocky road involves biscuits both in chunks and crumbs. We prefer this version adapted from 101 Cakes & Bakes by BBC GoodFood magazine where no biscuits mar the beauty and deliciousness of chocolates, nuts, marshmallows plus our preferred Maltesers.

500 g milk or dark chocolate - broken into pieces
10 marshmallows - cut into small pieces*
85 g pecans, walnuts, or almonds (or combination) - roughly chopped
200 g Maltesers (optional)
- Melt chocolate in a heatproof bowl over a saucepan of simmering water. Cool a little.
- Add in the rest of the ingredients, mix well.
- Pour mixture into an 8-inch (20 cm) square baking pan lined with baking paper.
Leave to set for around 2 hours.
- Remove from baking pan and cut into 1-inch squares with a knife dipped in hot water and wiped.
Note: You may add biscuits, dried fruits, and other things that may take your fancy.
'Twas my birthday and the kids decided to bake something for me. How nice! They were thinking of doing the Chocolate Date Fudge Cake. But I told them that it's too complicated for beginners like them and just steered to something simpler. They came up with this keeper of a recipe from Sue Lawrence's Book of Baking.
Why is it called a 'surprise' cake? Well, it's got mayonnaise in it! At first I thought it was odd but come to think of it - mayonnaise consists of eggs and oil which is precisely what you put in a cake. I tell you, it was really easy to do and it turned out quite well. It's a shame my pictures don't give it justice. We had slices of it with custard and it was so delicious.

250 g self-raising flour
50 g cocoa powder
1/4 tsp baking powder
200 g caster sugar
2 tsp vanilla extract
200 g good quality mayonnaise
1 medium egg
160 ml [2/3 cup] cold water
- Preheat oven to 180°C/fan 160°C/350°F. Butter and flour a 9-inch/23cm round pan or 8-inch/20cm square pan.
- Sift (optional) the flour, cocoa, and baking powder into a large bowl.
- Stir in the sugar. Make a well in the centre.
- Add in all the other ingredients.
- Beat with electric mixer until smooth.
- Pour into the prepared pan and bake for 30 minutes or until a skewer inserted into the centre comes out clean.
- Cool on a wire rack and remove from pan.
- Ice with fudge frosting or serve with custard/cream.
 It's that time of the year again for the World Bread Day to celebrate anything to do with breads in the food blogging world. Zorra of Kochtopf as usual is ably hosting this fine blogging event.
I always loved fruited breads like tea breads/cakes, fruit loafs, etc. Toast them lightly then slather with butter and scoff down with some Earl Grey tea - yum! So what better way to try making a fruited bread than baking the Irish Barm Brack. The timing is quite right, too. For it is also traditionally served during Halloween.
I first had Barm Brack when an Irish family friend gifted us with one. It was the dark variety but packed chock-a-block full of fruits. Oh wow, it was a great introduction to this wonderful tea-time bread.
Sue Lawrence's Book of Baking provided me with a workable recipe with the help of my trusted Panasonic bread machine.

500 g strong white flour (or bread flour)
1/8 tsp ground nutmeg
1 tsp ground mixed spice
7 g sachet of easy-blend dried yeast
1 tsp fine sea salt
50 g [scant 1/4 cup] unsalted butter
50 g nbsp;[1/4 cup] caster sugar
150 g [1 cup] currants
50 g [1/3 cup] dried mixed peel
50 g [1/3 cup] sultanas
300 ml [1 1/4 cups] tepid milk
*Glaze:
1 Tbsp sugar
1 Tbsp water
- Hand Method:
- Combine the flour, yeast, spices, and salt in a bowl. Rub in the butter.
- Stir in the sugar and dried fruits; then the milk.
- Once combined, turn out on a floured surface and knead for about 10 minutes until smooth.
- Place in an oiled bowl, invert dough so that the top is oiled. Cover with cling film and let rise in a warm place for 2-3 hours.
- Bread Machine Method:
- Put all ingredients according to the bread machine instruction and set to dough setting.
- Butter a 20 cm/8 inch baking pan. Punch down dough and shape into a round to fit into the prepared pan. Cover with greased cling film and let rise in a warm place for another hour.
- Preheat oven to 220°C/fan 200°C/425°F/gas mark 7. Bake the bread for 15 minutes, then lower temperature to 200°C/fan 180°C/400°F. Bake for a further 30-35 minutes. Cover loosely with foil in the last 15 minutes. It is cooked when it sounds hollow when tapped at the bottom.
- While it is baking, make the glaze - boil the water in a small saucepan; add the sugar and cook on low heat until dissolved. Brush the syrup glaze on top of the bread and return to the oven for 2 minutes.
- Remove from baking pan and cool completely on a wire rack before slicing.
Chicken lollipops are good appetizers and very popular among kids. There's something about having a 'handle' on a piece of fried chicken that entice everyone. It is essentially fried chicken wings that are easy to make and you can use any type of marinade you like. The only hard thing about it is the preparation of the wing drummette itself where you have to scrape the meat from the bone without detaching completely and then pushing the meat all the way to the end of the bone. It is much better and easier if you can find a butcher who can do this for you. For instructions on how to do this, here a couple of links from Saveur and a video from Stella Culinary.
I've used a very simple lemon and soy sauce marinade here to make Filipino-style chicken lollipops. It was quite effective since the taste is not mixed with so many other spices and flavours. But if you want a more 'sophisticated' taste then go ahead and add more spices to the marinade.
Chicken Lollipop
1 kg chicken wings
2 Tbsp lemon juice
3 Tbsp soy sauce
1 egg - beaten
1 Tbsp milk (optional)
plain flour
Panko breadcrumbs
- Cut, separate and prepare the chicken wings using the instructions in this link and/or in here.
- Mix the marinade of lemon juice and soy sauce in a bowl. Taste to see if the sour-salty combination is according to your liking. If not, adjust lemon juice and soy sauce.
- Marinate prepared chicken wings for about 1 hour.
- Drain chicken from marinade.
- Arrange flour and breadcrumbs in separate shallow bowls. Beat egg with milk (if using) in another bowl.
- Dredge chicken wings in flour first then dip in egg mixture and finally roll in the breadcrumbs. Let rest on a rack for about 30 minutes.
- Deep fry for 10 minutes or until golden brown.
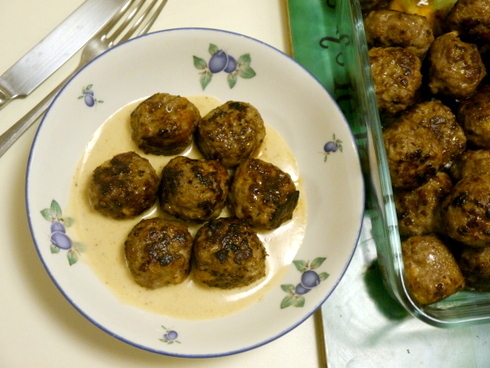
Meatballs are much appreciated in our family. Although mainly in the spaghetti meatballs type, we also like Swedish meatballs which we often buy in the local Ikea whenever we have a chance to lumber around there. But this is the first time I have created these from scratch. Really it's very similar to the other meatballs I've done before but the main difference is in the cooked chopped onions and allspice in it. Actually, the allspice is very very important otherwise you won't have that smell and taste typical to Swedish meatballs. Alton Brown provided me with a great recipe that I adapted. And although the kids didn't like the white gravy I still think all of it is great tasting. I adjusted the recipe to cater for 1 kg of meat since almost all the minced pork or beef packets sold here are in 500 g sizes.
Swedish Meatballs
2-1/2 slices of white bread (or 2/3 cup breadcrumbs)
1/3 cup milk
4 Tbsp melted butter
2/3 cup finely chopped onions
1-1/2 tsp fine sea salt + a pinch
500 g minced pork
500 g minced beef
2 large eggs
1/2 tsp black pepper
1/3 tsp ground allspice
1/4 tsp grated nutmeg
*Gravy
1/4 cup plain flour
3 cups beef stock
1/4 cup double cream
- Tear the white bread into pieces into a bowl. Add in the milk and leave to soak for about 30 minutes or until soft.
- In a 12-inch high-sided skillet, heat the 1-1/2 Tbsp of the butter and saute the minced onions. Sprinkle a pinch of the salt and cook until soft. Remove into a bowl or dish and let cool.
- Mash the soaked bread then add the rest of the ingredients. Combine until well mixed.
- Form into 1-1/4 inch balls (28 g/1 oz).
- Fry in the same skillet used for the onion using the rest of the melted butter in medium to low heat. Cook until golden brown on all sides (about 7-10 minutes). Do not crowd them too much; if need be fry in batches in which case you may have to add more butter.
- After frying, put the meatballs in a preheated 95°C/fan 75°C/200F oven to keep warm while making the gravy.
*For the gravy:
- You should have about 1 Tbsp of melted butter left in the skillet used for frying the meatballs. Decrease the heat to low and sprinkle the flour in it. Whisk until light brown - about 2 minutes.
- Add the beef stock gradually and simmer until thick.
- Stir in the double cream and cook until thick. Taste and adjust seasoning.
- Serve either covering the meatballs or on the side.