I have to break my blog's long streak of baked desserts with this wonderful dish which can either be a vegetarian main meal (without the bacon of course) or an appetiser. Adapted from next month's edition (Nov 2006) of the BBC GoodFood magazine, walnuts are in season now so I thought of doing this while these nuts are still relatively cheap. I was already preparing to dislike it when the bacon began to unravel and spill out the contents in 2 of the mushrooms. But I was pleasantly surprised with its yumminess - the bland mushroom going well with the creamy goat's cheese, the crunch of the walnuts and the smoky saltiness of the bacon. Lovely eaten with some leafy salad on the side.
The original recipe called for the bacon to be tied around the mushroom. But either my mushrooms were too big or the bacon rashers were too short that it didn't have much to give to tie it. So I put it in place with toothpicks and just removed them before serving. Another deviation I made is with the mushrooms. It was supposed to be open cup but I can't find any so I got the next best thing - big closed cup ones which I just sliced off the stem and the part around it making it effectively 'open cup'. It worked well if I may say so. :)
 Stuffed Mushrooms with Walnuts & Goat's Cheese
6-8 open cup mushrooms, stalks removed
2 Tbsp oil
2 shallots or 1 small onion - chopped
1 garlic clove - finely minced
80 g [1/2 cups] chopped walnuts
2 tsp chopped fresh sage leaves or 1 tsp dried
2 Tbsp chopped fresh parsley
175 g firm goat's cheese - sliced into 6-8 pieces
6-8 thin rashers streaky bacon
- Preheat oven to 190°C/fan 170°C/375°F/gas mark 5.
- Lightly grease a baking sheet and place mushrooms stem side up on it.
- Fry the onion in oil until soft.
- Add garlic, herbs, chopped walnuts, and seasonings (salt/pepper). Remove from heat.
- Spoon the walnut mixture in the mushrooms. Top with a slice of goat's cheese.
- Tie a rasher of bacon around each mushroom (tied at the top). If the rashers are not long enough for tying, secure on the mushrooms with toothpicks.
- Bake for 15-20 minutes or until mushrooms are tender and the bacon crisp.
- Remove toothpicks (if using) before serving.
They say 'charity begins at home'. I'm exercising that virtue with the shameless plugging of a business venture set-up by relatives.
Several times I've been asked (or emailed) of any online Filipino shops that would deliver within Europe. I, of course, have to answer in the negative because I don't know of any at that time. Well, that changes now with the launch of the Online Pinoy Market. Initially they are offering pharmaceutical products that are well known and popular in the Philippines. Items like vitamins and facial moisturisers. These are now available for distribution (meaning for retailers) and very soon available for retail.
So please visit their temporary website (final one available soon) here and get in touch with the contact person for your orders.
Good luck in OPM's new venture !
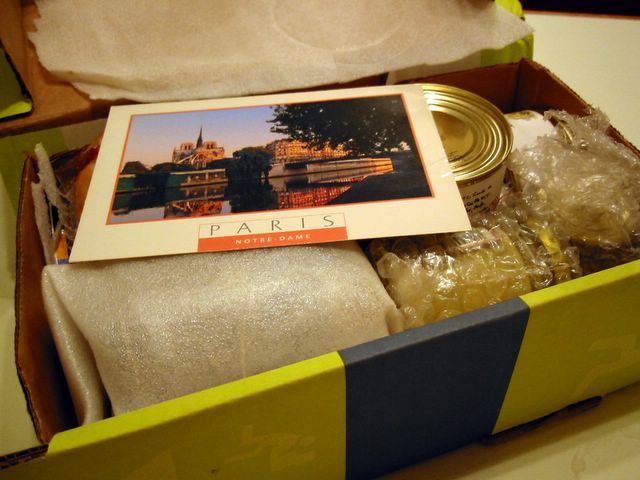
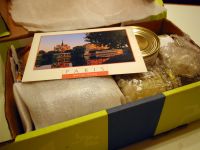
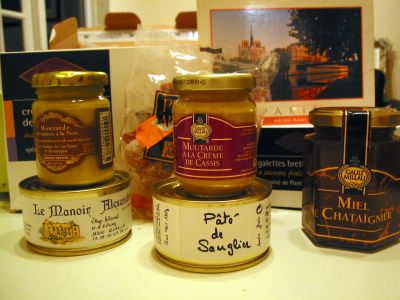 I've been tardy in blogging about the nice package I received from France maybe I'm too busy eating it all up! Thanks very much Betty for the very very nice Breton Galletes and another crepe-like biscuit which I forgot the name because they've all been eaten up by my kids. Other gems in the box are - chestnut tree honey, honey candies, walnut and currant mustard, quail pate, and wild boar pate. I was relieved that Betty wrote out the translations in her accompanying postcard I was nearly ready to grab my daughter's French-English dictionary. Betty, who's an American living in Aveyron, France, blogs at Cuisine Quotidienne.
Ahh, it's so nice to receive a parcel from a mystery sender knowing that you will find goodies in it. I had always participated in EBBP since the beginning but I was so tied up with work and moving house that I didn't make it in the last 2. I'm glad I'm back in the swing of things.
A big thanks is also sent on its way to Johanna of the Passionate Cook who tirelessly organised this edition. Her round up is here.

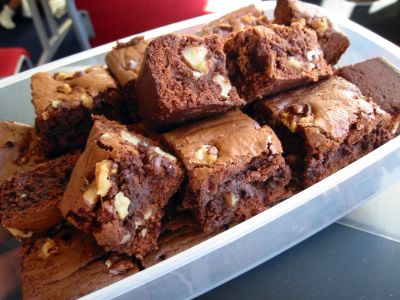 A colleague celebrated her birthday (Happy Birthday Aldora!) which was a perfect excuse for me to bake a cake. I was skeptical of the recipe's name because for the most part, all 'fudge' brownies I made were inconvertibly unfudge-like. Did I overbake them? Maybe. Or my old oven was a dud. Yeah blame it on the oven again. Now that we've moved house with a newish oven I'm running out of excuses. Well funny enough it did turn out good and well fudgy in the middle. Hooray!
Lesley Allen provided the recipe I adapted from the Great American Food cookbook.
Fudge Brownies
150 g [1 cup] plain flour
1/8 tsp fine salt
170 g [6 oz] dark chocolate (at least 60% cocoa mass)
1 tsp instant espresso coffee
1 tsp vanilla extract
125 g [1/2 cup] unsalted butter - softened
170 g [3/4 cup] caster sugar (superfine)
110 g [1/2 cup] firmly packed soft brown sugar
120 g [1/3 cup] golden syrup or light corn syrup
3 large eggs
120 g [1 cup] roughly chopped pecan or walnuts
- Grease and flour lightly a 9-inch (23 cm) square pan. Preheat the oven to 180°C/fan 160°C/350°F/gas mark 4.
- Mix the flour and salt well then set aside.
- Break chocolate into pieces and melt in a heatproof bowl over a saucepan of simmering water.
- Add the instant espresso coffee and stir until well combined. Remove from heat and set aside.
- Beat the butter, sugars, and vanilla until light and fluffy (about 3 minutes). Add the golden syrup and mix well.
- Add eggs one at a time beating well after each addition.
- Beat in the melted chocolate mixture.
- Add in the flour and beat at low speed until smooth.
- Fold in 2/3 of the nuts.
- Pour the batter into the prepared pan. Sprinkle the rest of the nuts on top.
- Bake for 40-45 minutes until a thin skewer poked in the middle comes out clean but not dry - DO NOT overbake!
- Remove from oven and cool in the pan for a few minutes then turn out to a rack to cool completely. Cut into squares and serve.
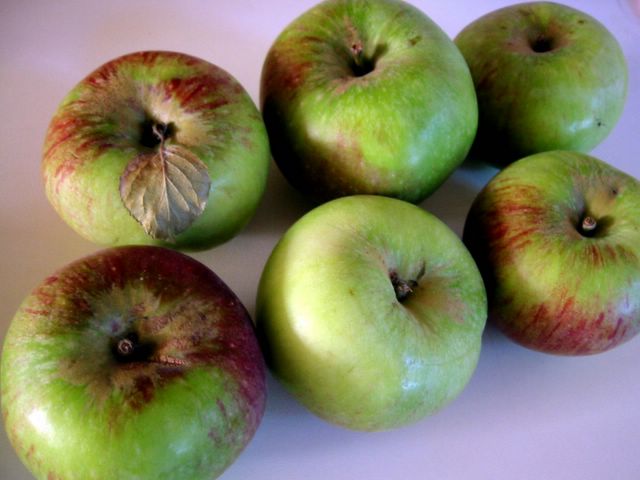
 The first lot of this season's apple came my way through the kindness of my colleague Colin and his wife. They were nice enough to give me a big shopping bagful of these wonderful tart apples. At first I thought they were Bramleys but upon slicing it and taking a bite it looks like a cross between a Bramley and a Granny Smith. The size and the outside looks very much like a Bramley. The main difference is that you can eat it raw unlike the Bramley, which although excellent as a cooking apple, is virtually inedible in its raw state. Colin didn't have a clue on this variety's actual name. He did say that they use it for both baking and as a dessert apple. Thanks to them we've got a more than enough for several cakes and pies which will definitely not go amiss with my son.
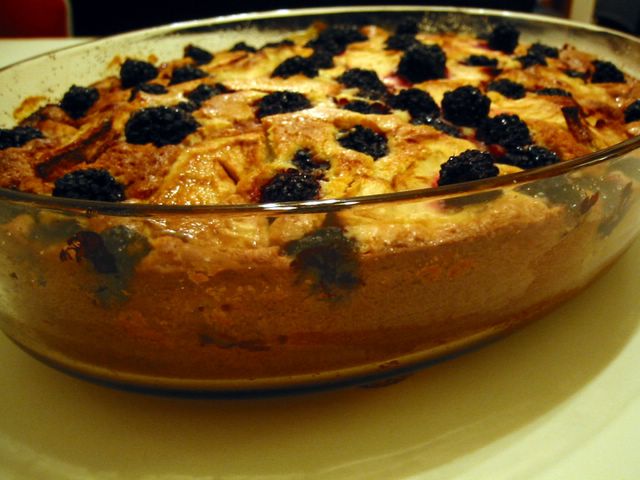
I seem to have the habit lately of doing the cover dish in the BBC GoodFood magazine. The October 2006 provided the recipe of which the only procedure to slow you down is the peeling, coring and slicing of the apples. The cake is more of the pudding type - stodgy, dense, and quite filling. I like the fact that it's not very sweet and jam-packed with this season's fruits.
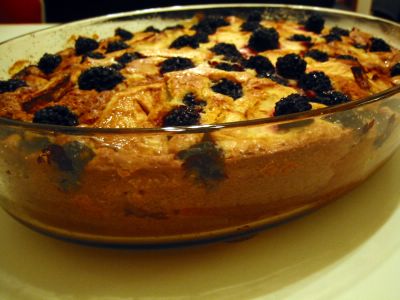 Apple & Blackberry Cake
175 g butter - softened
300 g plain flour
4 tart cooking apples - Bramleys, Granny Smith, etc. (about 800gm/1lb 12oz)
a squeeze of lemon juice
284 ml carton whipping cream or double cream
225 g [1 cup] golden caster sugar, plus 1 Tbsp for sprinkling
3 eggs
300 g fresh blackberries
- Butter a 12-inch x 8-inch pan (30cm x 20cm) or a 13-inch x 9-inch (33cm x 23cm) oval pan. Preheat oven to 200°C/400°F/fan 180°C/gas mark 6.
- Peel, core and slice the apples. Place in a bowl and toss in lemon juice to stop it from going brown. Set aside.
- In a saucepan, put cream and butter. Bring to boil in medium heat. Set aside.
- Beat sugar and eggs in a big bowl for about 3 minutes or until thick.
- Add in the cream mixture and beat until well combined.
- Fold in flour with a metal spoon until smooth.
- Pour in the prepared pan.
- Put slices of apple on top, making some of them to sink a little into the batter.
- Scatter blackberries over the apples.
- Sprinkle the sugar on top.
- Bake for 50 minutes until golden and pulling away from sides.
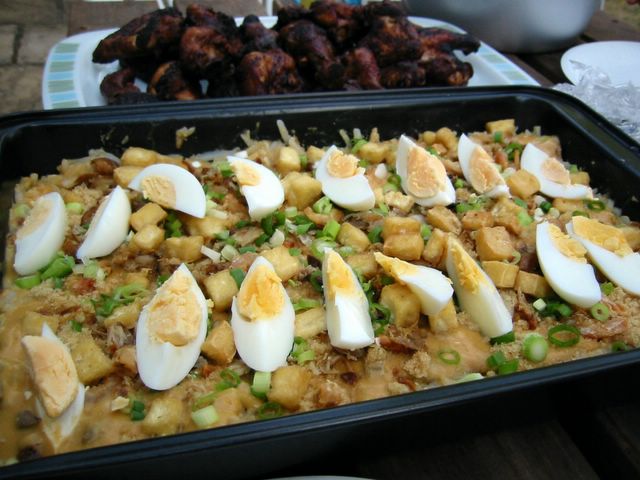
What will you do if you're far away from the Phils. and wanted to make pancit palabok with just the ingredients available in your local supermarket? That's the dilemna I had years ago when I had a hankering for a pancit palabok (aka pancit luglog) and the only Asian ingredients I can source out is the rice vermicelli and achuete (for the red colouring).
Well, most of the ingredients like garlic, green onions, pork cracklings (chicharon), and shrimps are widely available so no problem with that. For the other key ingredients like tinapa - I substituted smoked mackerel; achuete - although I had this, you can substitute it with red food colouring; calamansi - use lemon or lime or combination. The only problem is the red sauce that is at the very heart of this dish. I ran out of those ready mix packets that is so common nowadays. I didn't want to make it from scratch, i.e., pound shrimp heads, squeeze out juice, thicken with cornstarch then redden with achuete, too tedious for me. My SIL, Ate Eva, from Toronto came to my rescue saying that they've been using condensed cream of mushroom soup in place of the red sauce for ages. She was right, it was a good substitute although it's obviously on the creamy side. Trust the ingenuity of hungry Pinays to come up with the goods no matter where they are in the world. So there I have it, all the ingredients for a pancit palabok.
My next gripe would be the noodles. Or maybe lets discuss first the different names associated with this type of dish. Where I come from in Cavite, it's always called pancit luglog and almost always had the thin rice vermicelli - you know the kind that you use for the pancit guisado. The term 'luglog' would stem from the way the noodles are cooked or heated. 'Luglog' in Tagalog means 'to dip'. The tindera (vendor) would put a portion of the noodles in woven (bamboo?) elongated ladle-like tool then dip it for a few minutes in a big pot with continously boiling water or stock (for better taste). She would then put it in its eco-friendly packaging - cone-shaped wrapper of banana leaves and old newspapers. I don't know if it's peculiar to Cavite but the version there uses lots of sliced lip-puckeringly sour kalamias. I loved the the crunch and sourness it imbibes in my fav afternoon snack.
As for the pancit palabok, it was only when I moved to the suburbs of Manila that I began hearing it referred to as such. What I saw was essentially the same but for the noodles which was noticeably thicker. The word 'palabok' literally means garnish, decoration or embellishments. So it refers to the numerous things you sprinkle on top of the red sauce.
Now for the noodle gripe, I have no problem with the rice vermicelli but if you're going to serve this as a pre-mixed buffet dish it's best to use the thicker rice noodles so as to not make it too soggy while it's sitting there on the table. As of now, I haven't found a brand of thick noodles that I could say I'm satisfied with. All of the ones I tried takes about 25 minutes of boiling before it gets completely cooked. At that point it has disintegrated to 1-2 inch pieces and the water I boiled it in looked like those gawgaw mixtures my mother used to starch our clothes in! My sister told me that our aunt Ate Letty soaks her noodles first before boiling it. I did one time but still it broke up into pieces it did not hold its long strands (although it took less boiling this time.) Fortunately despite this limitation, the noodles is still completely edible though I would preferred it if the cooked strands are longer.
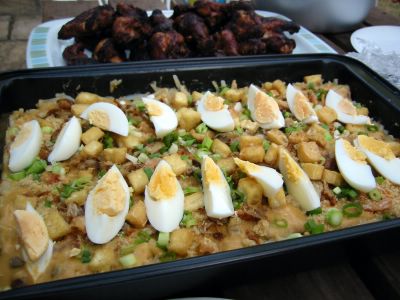 Expat's Pancit Palabok
450 g thick rice noodles
1 x 425 g can of condensed cream of mushroom soup
3 Tbsp achuete seeds (or red food colouring)
1/2 cup hot water
drop of lye water (optional)
150 g smoked fish (mackerel or haddock)
5 spring onions - chopped
1 whole head of garlic - minced
250 g of fresh shrimps or 1/2 cup of dried shrimps (hibe)
4 squares of tofu - diced (optional)
100 g of pork cracklings (chicharon) - ground/pounded
3 hard boiled eggs - quartered
lemon juice mixed with fish sauce (patis)
- Soak the rice noodles for several hours or overnight.
- Bring a potful of stock or water to boil. Drop the soaked rice noodles in it and cook until done.
- Soak the achuete in the hot water for at least 30 minutes. (Optional) Put 1 or 2 drops of lye water in it, stir to mix and soak for a few minutes more. Drain and reserve the water.
- Steam the fresh shrimps, cool, then peel them and set aside. If you're using dried shrimps - soak them in warm water for about 1 hour. Drain water and then set aside.
- Remove skin of the smoked fish and shred it. Dry fry (means no oil) or bake for a few minutes. Set aside.
- If using tofu, fry in oil until crispy. Set aside.
- Fry the minced garlic gently in oil. Drain from the oil and reserve both fried garlic and the oil used.
- Combine the cream of mushroom soup and achuete water in a saucepan. Cook gently while stirring. If the sauce is too thick add a little water at a time until it is about the consistency of yoghurt.
- To assemble buffet style:
- Mix a portion of noodles with the red sauce, some garlic, pork crackling, spring onions, shrimps, and tofu. Add some lemon juice/patis mixture to taste. Transfer to the serving dish.
- Repeat the procedure until you have filled up your serving dish. Spread a thin layer of the red sauce on top and garnish with garlic, pork crackling, spring onions, shrimps, tofu, then topped with hard boiled eggs.
- Serve lemon juice and patis on the side.
Oh I have not forsaken thee, my dear blog ...
After 100 hundred years of inactivity I am back! Blame the new job and the house move for keeping me just soo busy with no computer or internet connection for quite sometime. The stress of the move also put me off cooking new things and blogging about food. It was an email from Johanna inviting UK bloggers to some food/cooking events that had me salivating and spurred me on continuing my food blog. Needless to say I am keen in joining them especially in that Christmas market in Bath. Oooh how exciting!
Less exciting is my growing discovery that this part of the West Midlands has been left out from the blessings of the patron saint of foodies. There is quite a dearth of good food markets, shops, delis or restaurants (except baltis). I think I will have to do the 45-minute drive to central Birmingham, Ludlow, Shropshire, and nearby counties to avail me of these. Though mind you, I haven't explored the farm shops that dot the rural areas near us. Not to worry, this all means that I'll just have to cook and bake more at home to make up for the shortage, isn't it? Always spot an opportunity in adverse conditions, that's what I say.
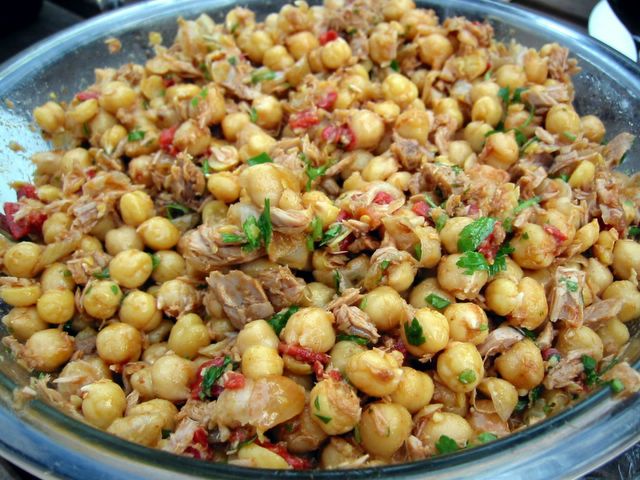
So what's cooking now? Before we left our dear Surrey, our friends hosted a little potluck barbecue for us. I've always been wanting to try this chickpea salad from Jenny of Pertelote (thanks Jenny!) ever since she brought it in our very first London food blogger soiree in Johanna's place last year. I did it the same as in her recipe except I changed the order of adding things with a plus in salt and black pepper as well.
This is the first time I've worked with chickpeas (garbanzos in Spanish and Tagalog) and was quite fascinated the morning after soaking them to find that they've swelled up more than double its dried state. I was very tempted to remove the skins after cooking them but I have to add the vinegar and oil before it cools off completely. So I just let some of the skins remain for the sake of taste. One thing I have to say is don't skimp on spices like paprika because the chickpeas are quite bland and needs a lot of flavouring to balance it out. On a whole, this is great to have with some bread and of course the barbecued meats.
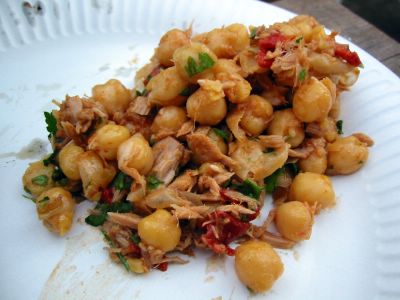 Tuna-Chickpea Salad
500 g dried chickpeas
2 tsp bicarbonate of soda (baking soda)
1 x 185 g jar roasted peppers - chopped
2 Tbsp sherry vinegar or white wine vinegar
6 Tbsp extra virgin olive oil
1 big onion - chopped
1 tsp ground cumin
1/2 tsp ground fennel seeds
1/2 tsp dried chilli flakes
2 tsp smoked paprika
2 x 180 g can of tuna chunks in oil - drained and flaked
1/2 cup chopped fresh parsley
salt and freshly ground black pepper to taste
- Put dry chickpeas in a bowl and cover with lots of cold water. Stir in bicarbonate of soda and leave to soak overnight.
- Next day, drain and rinse and drain again the chickpeas. Put in a pot, cover with water and bring to a boil. Reduce heat and simmer gently for about 1 hour and 30 minutes or until well cooked.
- While it's cooking, whisk the olive oil and vinegar in a small bowl, set aside.
- Once the chickpeas are cooked, immediately drain into a bowl and mix in the vinegar mixture while still warm.
- Add in the roasted pepper, salt and black pepper. Set aside.
- Fry the onions gently until soft and translucent. Add the cumin, fennel, chilli, and half the paprika. Set aside.
- You can do things up to this point and keep in the fridge until half an hour before serving.
- Before serving, mix everything in a big bowl including the parsley and the rest of the paprika. Take care in mixing so as not to break up the tuna too much. Serve as part of buffet or with bread.

 She was telling the truth! Lesley Allin that is, the author of the Great American Food cookbook. I've done several good recipes of hers before though the last two was quite so-so that's why I was quite reluctant to try once more. But I had to because all my other cookbooks are packed in boxes (for our move) and hers is the only one available that has a blueberry muffin recipe.
I just have to make some since I can't resist the heaps of blueberries in the supermarkets. They looked all so plump, juicy and delicious. They're good for you, too. Besides being a good source of vitamin C, fibre and being fat-free, it apparently can lower cholesterol as well.
About the muffins, the last ones (from a cookbook I shall not name) I made were not quite up to par with all the berries sinking to the bottom. I think I chucked most of them in the bin. This time, the batter held its mettle and managed to hold on to the blueberries and make them evenly distributed. The muffin itself was cakey and smelled fantabulous just like what any self-respecting muffin should be. Lovely to eat warm or cold. So Lesley's now back in my good books. :)
Blueberry Sour Cream Muffins
200 g [1 1/4 cups + 2 Tbsp] self-raising flour
1/4 tsp fine salt
1/2 tsp bicarbonate of soda (baking soda)
45 g [3 Tbsp] unsalted butter - softened to room temperature
170 g [heaping 3/4 cup] caster sugar (superfine)
2 large eggs
1 cup sour cream
grated rind of 1 lemon*
1 tsp vanilla extract*
200 g [about 1 1/2 cup] fresh or frozen blueberries
granulated sugar for sprinkling
- Preheat oven to 400°F/200°C/fan 180°C. Grease or line with paper liners a 12-hole muffin pan.
- Combine the flour, salt, and bicarbonate of soda in a bowl. Mix well and set aside.
- In a big bowl, beat the butter and the sugar.
- Add the eggs one at a time. Beat until light and fluffy.
- Add the sour cream and lemon rind and/or vanilla. Beat to mix.
- Fold in the flour mixture with a wooden spoon.
- Add in the blueberries.
- Spoon the mixture into the prepared muffin pans.
- Sprinkle the tops of the muffins with about 1/2 tsp of granulated sugar.
- Bake for 15-20 minutes.
- Cool for 5 minutes before removing muffins from the pan.
*Note: You may use either the lemon rind or vanilla or use both.
 Hey, stay awhile and have some raspberry sorbet. We gotta beat this summer heat with other than sitting in front of an electric fan or lying on the beach. Cold and icy confections are one of my favourite things in summer. One of the more popular one is the sorbet. Very much like an ice cream except there's nary a drop of dairy in it. Because of its ultra low fat properties it's well loved by dieters and the health conscious.
Well, I do diets but I wasn't too keen on sorbets before until I made this one last week. The intensity of the fruits' flavour and its instant yumminess further reinforced the idea that homemade is better than shop-bought. Just look at that pink confection speckled by pockets of raspberry pulp. Isn't it pretty?
I found this recipe by chance when I was lazily surfing at the Daily Telegraph's Food and Drink Section whereupon I saw Tom Norrington-Davies' article and recipes of sorbets. Thanks Tom!
I chose to make this one chiefly because I've got all the ingredients right in my fridge. Besides raspberries are everywhere in the shops so it makes sense to buy and use what's in season to take advantage of its freshness at the peak of its flavours. He was right when he said that the raspberry and banana combination was a revelation. It was indeed with the banana giving it a creamier body and nicely combining with the distinctive taste of the raspberry.
This time I followed Tom's recipe to use fresh egg whites. Next will be time to try the booze. See these two are used to slow down the formation of ice crystals as you freeze it. I try to avoid using fresh egg as much as possible so we'll see how it goes next time I make a sorbet.
Raspberry-Banana Sorbet
*For the sugar syrup:
250 g granulated sugar
250 ml [1 cup] water
250 g raspberries
1 very ripe banana
juice of half a lemon
350 ml [1 1/3 cups + 2 Tbsp] syrup
1 egg white
- For the sugar syrup:
- Place the sugar and water in a saucepan. Stir to dissolve the sugar.
- Bring to boil then cool completely.
- For the sorbet:
- Puree the banana, raspberries, lemon juice, and syrup in a food processor or blender.
- Pass through a sieve to remove the pips.
- Beat the egg white to soft peaks then fold into the fruit mixture.
- Put the mixture in a bowl (if it is not yet in one) and then put it in the freezer.
- Freeze for one hour.
- Remove from freezer and you should see a rim of soft, frozen sorbet around the edge.
- Whisk it back into the middle using a hand whisk or a fork.
- Freeze it again this time for 2 hours.
- Beat the sorbet again.
- Freeze for the third time for 1 hour.
- Beat it for the last time and transfer it to a tub or container for the final freezing.
- If you freeze it completely, let it stay in the fridge for about 15 to 20 minutes before serving it.
- Suggested serving: pair with rich chocolate ice cream.
*Note: You can skip all the freezing and beating by using an ice cream machine.
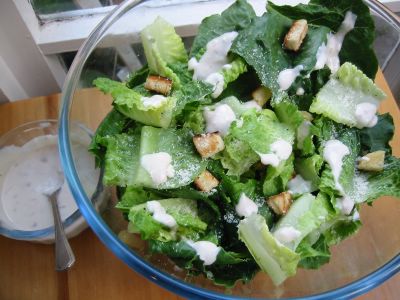
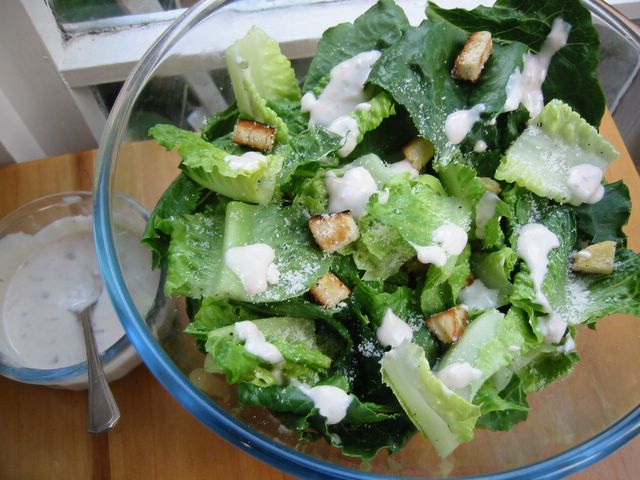
I've always liked Caesar Salad but have been put off in making it because of the effort and length of time to make the dressing. You are in effect making a mayonnaise with all that whipping of eggs and vinegar. Plus the thought of salmonella in the fresh egg makes me reluctant to serve it on the family dinner table. So there you have it - all my excuses. ;) Whether thru health concern, lack of time or just plain laziness I've thought of enough in not doing this from scratch. So you could just imagine how long we've suffered through store-bought Caesar Salad with ready-made croutons and its creamy sauce in a plastic packet [*over-acting mode on*].
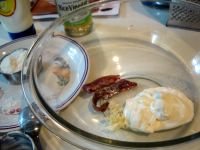

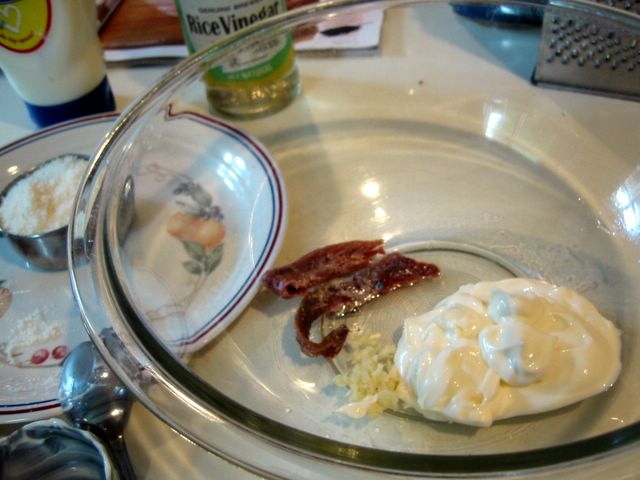
Now I think I've found our savior of a recipe. This one that I found in last month's BBC GoodFood magazine is simple but sophisticated enough for my taste. (I know, I know, my taste can be pedestrian. LOL!) Kinda like in between the store-bought ones and the fancy-schmaltzy all-fresh-ingredients salad in upscale restaurants. The pain of making the mayonnaise is taken away with the use of ready made ones. It even got anchovies and hand-made croutons, wooo! Get a load of that. Though one thing I noticed is that the taste of a whole garlic can be too strong for others. If that is the case, the best way is to just give it a hint of the flavour by rubbing a cut garlic clove in the bowl and whatever utensil you'll use for whisking.
Beginner's Caesar's Salad
1 large romaine or cos lettuce - torn or cut into large pieces
1 cooked or grilled chicken breast [optional] - sliced in bite-sized pieces
3 thick slices of crusty bread (ciabatta, baguette, etc) - diced
2 Tbsp olive oil
*Dressing:
5 Tbsp mayonnaise
1 Tbsp white wine vinegar or rice wine vinegar
2 anchovies from a tin or bottle
1/4 cup finely grated parmesan cheese
1 garlic clove* - crushed or minced [see Note]
extra shaved or grated parmesan cheese
- Make the croutons:
- Put the diced bread in a non-stick pan. Drizzle the olive oil on it and some salt, making sure that the bread has absorbed all of the oil.
- Fry on medium heat. Turn the bread pieces from time to time. Cook until golden brown.
- Remove from pan and cool completely.
*OR*
- Preheat oven to 200C/fan 180C/400F. Place bread pieces onto a baking tray.
- Drizzle the oil and some salt making sure that bread absorbed the oil.
- Bake for about 10 minutes or until golden brown, turning then halfway through.
- Remove from oven and cool completely.
- Make the dressing:
- In a bowl, mash the anchovies well.
- Add in the garlic (if using), mayonnaise, and vinegar. Whisk to combine well.
- Stir in the grated parmesan. It should have the consistency of yoghurt. If it's too thick, whisk in some warm water a little at a time.
- To assemble:
- Just before serving, put in a bowl the lettuce, half of the chicken (if using), and half of the croutons, and drizzle most of the dressing. Toss to mix.
- Scatter on top the rest of the croutons and chicken. Drizzle the rest of the dressing. Serve immediately.
*Note: If a whole garlic in the dressing is too strong, you can just add in a hint of garlicky taste by cutting a whole garlic in half and then rubbing the inside of the bowl and the whisking utensil (fork or small whisk) to be used for making the dressing.
*Variations: Instead of chicken, you can put in crumbled crispy fried bacon or flaked canned tuna.
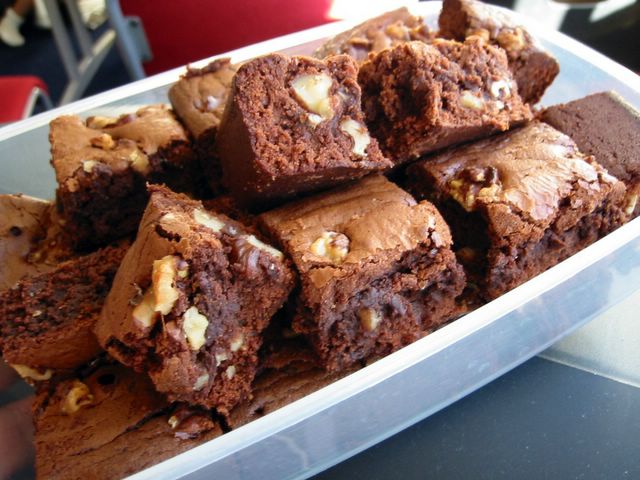
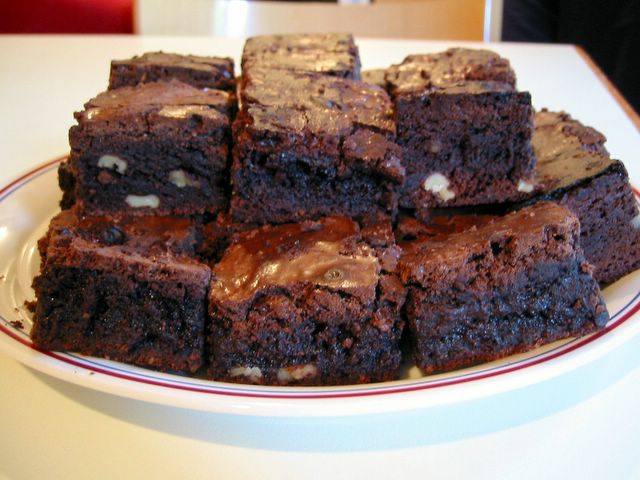
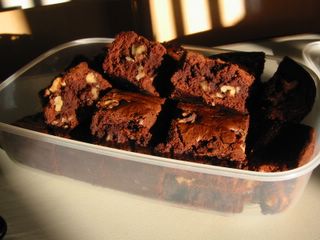
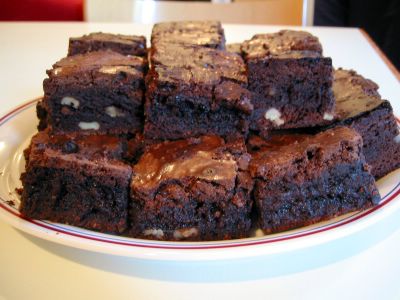 This is the very first brownie I ever baked in my life. I found it at the back of a Baker's baking chocolate carton eons ago when I was still single and was trying hard to keep myself busy with something mildly creative. It is indeed very scrumptious and quite rich. I had to reduce the sweetness and the nuts to cater to my taste. Other than that, I don't think there's anything else to change. This goes to show the hidden gems you can find behind jars, wrappers, and boxes. As far as I know they are well tested in the kitchens of the producing companies. They may not be fancy but 95% of the time they do work. Sometimes it even gives me ideas on how and where to use the ingredient. Like the cookbook by Phil Vickery that I got free from Carnation condensed milk, it's got super delectable looking desserts ranging from cakes and cookies to ice creams and mousses. All made with condensed milk. How's that for dozens of ideas?
Scrumptious Brownies
This is the very first brownie I ever baked in my life. I found it at the back of a Baker's baking chocolate carton eons ago when I was still single and was trying hard to keep myself busy with something mildly creative. It is indeed very scrumptious and quite rich. I had to reduce the sweetness and the nuts to cater to my taste. Other than that, I don't think there's anything else to change. This goes to show the hidden gems you can find behind jars, wrappers, and boxes. As far as I know they are well tested in the kitchens of the producing companies. They may not be fancy but 95% of the time they do work. Sometimes it even gives me ideas on how and where to use the ingredient. Like the cookbook by Phil Vickery that I got free from Carnation condensed milk, it's got super delectable looking desserts ranging from cakes and cookies to ice creams and mousses. All made with condensed milk. How's that for dozens of ideas?
Scrumptious Brownies
250 g dark chocolate (about 70% cocoa content)
1 cup butter
5 eggs
2 1/2 cups sugar
1 Tbsp vanilla
1 1/2 cups plain flour
1 1/2 cups coarsely chopped walnuts
- Preheat oven at 190°C/fan 170°C/375°F. Grease and line a 13 x 9-inch baking pan with greaseproof paper with a little overhanging the side.
- Melt chocolate and butter in a heatproof bowl set over simmering water in a saucepan.
- When completely melted, remove from saucepan and cool slightly.
- Beat eggs, sugar and vanilla in separate large mixer bowl on high speed for 10 minutes.
- Beat in melted chocolate mixture on low speed.
- Add flour, beating just to blend.
- Using a wooden spatula, stir in nuts.
- Spread in the prepared baking pan.
- Bake for 35 to 40 minutes or until cake tester inserted into center comes out almost clean. *Do not* overbake!
- Cool in pan. Loosen sides with a butter knife then grab the extra overhanging greaseproof paper on the sides and remove the brownie from the pan. Cut into squares.
 Strawberry - my favourite berry. It's summertime again and the produce section in shops are filled with all kinds of berries which my family would certainly take advantage of. My son likes raspberries, my daughter like cherries and strawberries (like me) and the husband likes everything! Good thing they like most fruits to compensate for not particularly wanting to eat much veggies.
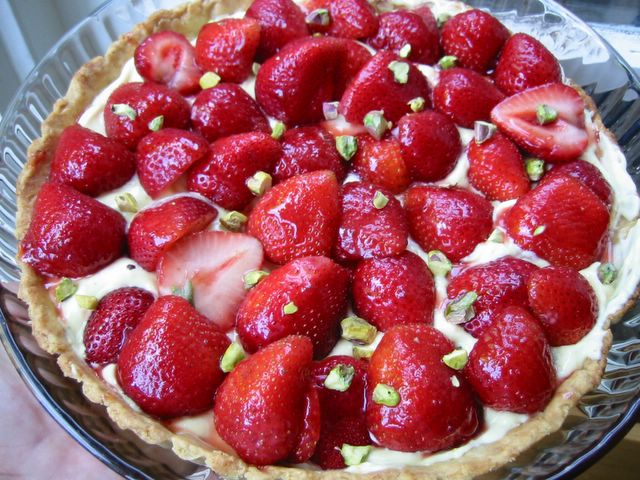
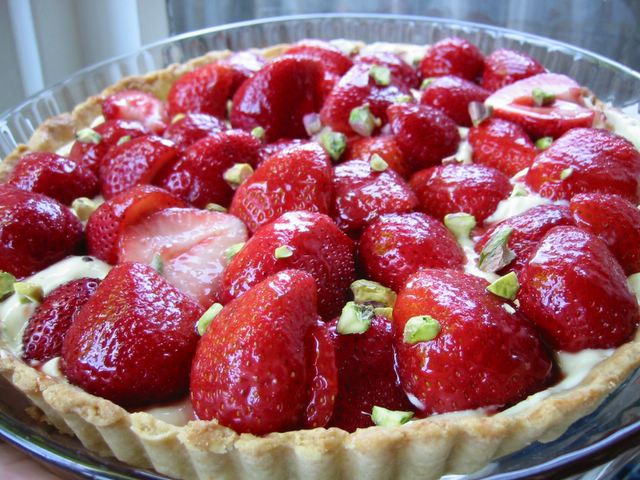
I found this irresistible tart on the cover of last month's BBC Good Food magazine and I thought I just had to make it. Good thing we were invited by good friends of ours for a barbecue so I have a good excuse. I tweaked this recipe of Phil Vickery a little bit to cater to my taste - increasing the sugar in the filling and decreasing the jam (you don't really need that much). My youngest helped me a lot in making this. Actually, she's bragging to our hosts that she made it. ;) And rightfully so. She helped cut in the butter, she rolled the dough and pressed it in the pan, she hulled the strawberries, mixed the fillings, glazed the pastry as well as the strawberries, and sprinkled over the nuts. I say - well done my little one!
Fresh Strawberry Tart
*Crust:
100 g unsalted butter - chilled and cubed
200 g plain flour
2 tsp caster sugar (superfine)
1 egg - beaten
*Filling:
250 g cream cheese
3 Tbsp caster sugar (superfine)
grated zest from 1 small orange
1/4 cup fresh orange juice (from the small orange)
1 Tbsp chopped fresh mint (optional)
500 g strawberries - hulled and halved
3 Tbsp strawberry jam
1 1/2 Tbsp water
3 Tbsp chopped, shelled pistacios
- Preheat oven to 200°C/fan 180°C/400°F.
- For the pastry crust:
- Put flour and sugar in a bowl, mix well.
- Add the cubed butter and cut it in the flour mixture with a pastry cutter or 2 butter knives until of coarse breadcrumbs consistency.
- Add only 3/4 of the beaten egg (reserve the rest for glazing). Toss the mixture, adding a little water if needed, until the dough just about comes together into a ball.
- Wrap plastic or cling film and chill in the fridge for 20 minutes.
- Roll out the dough evenly on a floured surface to about 1.5 inches/4 cm larger than a 9-inch/23cm tart pan (preferably with removable bottom).
- Put the rolled dough on the tart pan and press it in. Trim excess pastry from the edge.
- Prick base well with a fork and chill in the fridge for 30 minutes.
- Line the pastry case with greaseproof paper or foil then fill with baking beans. Bake for 15 minutes.
- Decrease oven temperature to 160°C/fan 140°C/325°F. Remove the foil with the baking beans and cook for a further 10 minutes.
- Take out the oven and brush with the reserved beaten egg (to prevent the crust from getting soggy with the filling). Put back in the oven for about 2-3 minutes.
- Remove from oven and cool completely.
- For the filling and assembly:
- Beat the cream cheese with the sugar, juice, and orange zest. Mix in the chopped mint.
- Spread the mixture on the pastry case and arrange the strawberries prettily on top.
- Gently heat the strawberry jam and the water while stirring all the time. Sieve the jam (optional) and then brush over the strawberries to give it an attractive gloss.
- Sprinkle the chopped pistachios on top. Remove from tart pan and serve.

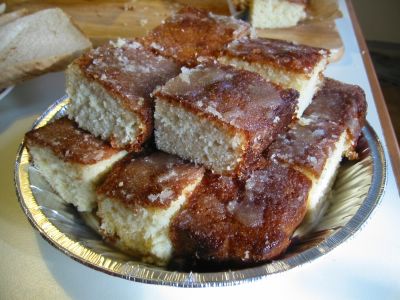 My youngest had their cake-sale day a few weeks ago. Of course she 'demanded' that I bake at least one. I thought this traditional English cake would suit since it's universally liked plus fits the school requirement of 'no nuts' in the cake. The kids and parents in the cake-sale gave their approval by snapping up these squares within a few minutes of being laid on the table. The week after, my daughter was one of the few kids called to come forward by the headmaster in front of the whole school assembly. She was commended for bringing in (in his words) "the delicious lemon drizzle cake and marbled brownies" and was given a round of applause. Ahhhhh ...
As you can see the sugar in the drizzle did not get dissolved well in the lemon juice so I updated the recipe to include a step of heating the juice with the sugar to avoid that sugary crust on top. Actually others like it better that way but for me I'd rather have it right in, drenching the cake making it a bit soggy and moist but oh so yummy with its sweet-sour tang.
This is an easy one-bowl recipe. So easy in fact that even my 13-year-old daughter can make it unaided. The lining and buttering of the pan was the only thing she didn't like. I adapted this from mine (and Sha's) current fav baking book - the BBC GoodFood magazine's 101 Cakes & Bakes.
Lemon Drizzle Cake
100 g butter - softened
175 g [1 1/4 cups] self-raising flour
1 tsp baking powder
175 g [1/2 cup + 1/3 cup] caster sugar (superfine)
2 large eggs
6 Tbsp milk
finely grated rind of 1 lemon
*Icing
5 Tbsp lemon juice
50 g [6 Tbsp] icing sugar (confectioner's)
2 Tbsp caster sugar (superfine)
- Preheat oven to 350°F/fan 160°C/180°C/gas mark 4. Butter and line the base of a 11 x 7 inches cake pan.
- Put all ingredients in a bowl. Mix and beat for about 3 minutes.
- Pour into the prepared pan and bake for 25-30 minutes or until a skewer poked in the middle comes out clean.
- While it's baking, mix the icing - gently heat the lemon juice with the sugars in a small saucepan until the sugars are dissolved.
- Once the cake is out of the oven, poke or pierce it all over the top with a long skewer or toothpick. Make sure you pierce all the way through the bottom of the pan.
- Pour the icing evenly on top of the cake (now with lots of holes) while still hot. Let cool, slice and serve.
 Here is a snack or 'in-between-meals' meal that I often had as a child growing up in Cavite. It's very similar to the previous Ginataang Totong I blogged more than a year ago. The abundance of coconuts in the Philippines means that a lot of its by-products find its way into the local cuisine and snacks are no exceptions. So you can find a lot of variation with sweet coconut soup with glutinous rice then flavoured with some other ingredients such as mais (corn), munggo (mung beans), chocolate, etc. These are often served hot but a lot of people love it chilled cold from the fridge.
If you can get fresh corn on the cob then by all means please use that. The flavour it imparts in the soup is the best. Shred or remove the kernels (yasyasin) by sliding off a knife diagonally across the side of the cob. It may be a bit messy but it just ensures that it will bring out the flavour from the cut kernels as which is much better than having the kernels intact. But if in a bind, you can use thawed frozen sweetcorn though not as packed with flavour as the fresh ones.
Ginataang Mais
(Coconut Soup with Glutinous Rice and Sweetcorn)
1 cup fresh shredded sweetcorn kernels (or thawed frozen ones)
1/2 cup glutinous rice
5 cups coconut milk
1/3 cup sugar
1 tsp sea salt
1/3 cup coconut cream (optional)
- In a pot, bring to boil the coconut milk with the sugar and salt. Taste the soup to see if it is sweet enough for you. If not, add more sugar.
- Add the glutinous rice, bring back to boil then lower down the heat and simmer until the rice is almost cooked.
- Stir in the corn and simmer again until rice is cooked.
- Serve hot or cold with some coconut cream on top.
 A friend brought a bag of frozen prawns to our door and requested me to turn it into a marmalade ... sorry ... sweet and sour prawns for a birthday party. Sure thing my dear, I said. I gladly did it even if I didn't exactly have a recipe. (Always loved prawns as with most seafood.) I have one for the pork version but not for this crustacean. So I adapted the sauce from the former (from Huang Su Huei's Chinese Cuisine) and whipped the marinade from another shrimp recipe. It turned out quite good and no bottled sweet and sour sauce, too. :)
Sweet and Sour Prawns
A friend brought a bag of frozen prawns to our door and requested me to turn it into a marmalade ... sorry ... sweet and sour prawns for a birthday party. Sure thing my dear, I said. I gladly did it even if I didn't exactly have a recipe. (Always loved prawns as with most seafood.) I have one for the pork version but not for this crustacean. So I adapted the sauce from the former (from Huang Su Huei's Chinese Cuisine) and whipped the marinade from another shrimp recipe. It turned out quite good and no bottled sweet and sour sauce, too. :)
Sweet and Sour Prawns
500 g shelled and deveined shrimps or prawns
1 egg white - lightly beaten
1 1/2 Tbsp cooking wine
1/2 tsp sea salt
1 1/2 Tbsp cornstarch
1 Tbsp oil (optional)
*Sauce:
1 tsp minced garlic
1 medium onion - chopped into bite-size pieces
1 bell pepper (red or green) - roughly diced
1 x 227 g can of pineapple chunks - drained of juice
6 Tbsp sugar
6 Tbsp water
1/4 cup ketchup
1/4 cup white vinegar
1/4 cup pineapple juice
1 tsp sea salt
*Thickener:
2 Tbsp cornstarch
3 Tbsp water
- Dissolve 1/2 tsp salt in the cooking wine. Mix well with the prawns in a bowl. Marinate for about 20-30 minutes.
- Add in the egg white, mix well, then cornstarch, mix well again. If the mixture is really thick like a batter, mix in the 1 Tbsp oil to separate the prawns.
- Drop each piece of prawn in hot oil and deep dry for about 2 minutes. Drain briefly on paper towels. Set aside.
- In a separate bowl, combine the ketchup, pineapple juice, sugar, vinegar, and salt. Stir well to dissolve the sugar and 1 tsp salt. Set aside.
- In another container, mix the thickener by dissolving the cornstarch in the water. Set aside.
- Heat 2 Tbsp cooking oil in a wok. Saute the onion and garlic for about 2 minutes. Make sure not to burn the garlic.
- Stir in the bell pepper and cook for about 1 minute.
- Add in the pineapple chunks, cook for 30 seconds.
- Tip in the ketchup mixture and bring to boil.
- Add in the thickener and bring to boil again.
- Stir in the deep-fried prawns, toss lightly for a few seconds or until prawns are well coated by the sauce. Dish up and serve.
It's been awhile since I've blogged. Please excuse my silence due to my hectic work and family life at this point of time. I'm now working in the West Midlands while my family is still in Surrey. So I stay during weekdays up north then comeback down every weekend. It's stressful yes, that's why plans are afoot to move everybody up near where I'm working. I'm keen to move to a more permanent accommodation there so that our family life would be more stable and of course so I could keep on blogging about food!
Come to think of it, it's a good thing my new work is in still in England otherwise this blog would have to be renamed the Scottish Patis or Irish Patis. LOL!
Never mind my current crisis, I'd like you to see my brother-in-law's blog about my almost 2-year-old niece Mia and their lovable dog Baba. They are his inspiration for his excellent children book Baba the Bear. Do have a look at both the personal blog and the book's website and see the very cute illustrations that only a former Disney animator like him can come up with.
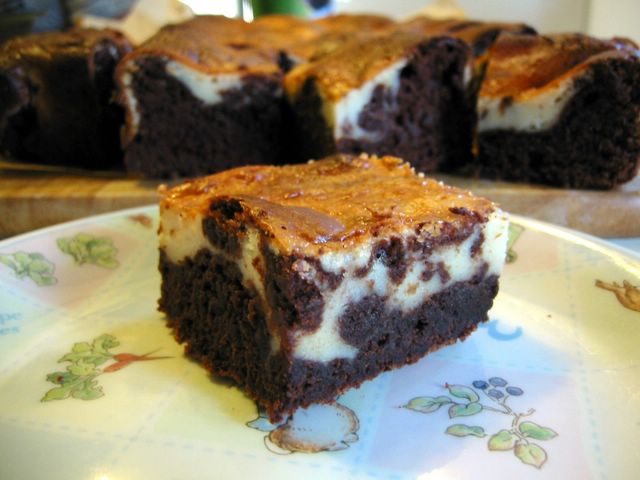
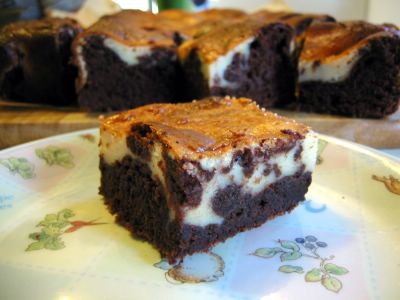 It's not as marbled as I liked it to be but I think this will do for a marbling virgin. ;) My youngest's school was having their cake sale fund-raising day so she wanted me to bake at least one cake. Take note she said - I have to bake - no maybes, no requests, it's compulsary! Well, fortunately her mum is quite up to the challenge. One of the school's requirements was there should be no nuts in any of the cakes to take into consideration some of her nut-allergic schoolmates. I found this in the Cookies cookbook (the name of the author escapes me at the moment). Lovely texture and very nice luscious taste even with the walnuts omitted meaning it's a definite keeper of a recipe.
Marbled Brownies
It's not as marbled as I liked it to be but I think this will do for a marbling virgin. ;) My youngest's school was having their cake sale fund-raising day so she wanted me to bake at least one cake. Take note she said - I have to bake - no maybes, no requests, it's compulsary! Well, fortunately her mum is quite up to the challenge. One of the school's requirements was there should be no nuts in any of the cakes to take into consideration some of her nut-allergic schoolmates. I found this in the Cookies cookbook (the name of the author escapes me at the moment). Lovely texture and very nice luscious taste even with the walnuts omitted meaning it's a definite keeper of a recipe.
Marbled Brownies
250 g dark chocolate (about 70% chocolate) - chopped
125 g [1/2 cup] butter
350 g [1 3/4 cup] caster sugar (superfine)
4 eggs
115 g plain flour
1/4 tsp fine salt
1 tsp baking powder
2 tsp vanilla extract
115 g [1 cup] chopped walnuts (optional)
*For the plain batter:
50 g [scant 1/4 cup] butter - softened
175 g [2/3 cup] cream cheese
115 g [heaping 1/2 cup] caster sugar
1 egg
2 Tbsp plain flour
1 tsp vanilla extract
- Preheat oven to 180°C/fan 160°C/350°F/gas mark 4. Grease and line a 13 x 9 inch baking pan, grease the lining paper as well.
- For the chocolate batter:
- Melt the dark chocolate and butter in a heatproof bowl set on a saucepan of simmering water (making sure that the bottom of the bowl does not touch the water).
- Once melted, mix to combine, remove from saucepan and cool slightly.
- Add the vanilla and stir to mix.
- Sift the flour, baking powder, and salt in a small bowl. Set aside.
- Beat the eggs with an electric mixer until light and fluffy (about 4-5 minutes). Then gradually add the caster sugar while beating until well combined and smooth.
- Gently fold in the flour mixture in batches using a metal spoon until well blended.
- Next, gently fold in the melted chocolate mixture and walnuts (if using). Set aside about 1 1/2 cups of this chocolate batter.
- For the plain batter:
- Beat the cream cheese and butter together until well blended.
- Add in the caster sugar. Mix well.
- Beat in the eggs, vanilla, and flour. Mix well.
- Spread the chocolate batter in the prepared baking pan. Pour the plain batter on top.
- Drop spoonful mounds of the reserved chocolate batter on top of the plain batter.
- Using a metal skewer or butter knife, swirl mixtures to marble making sure not to blend completely.
- Bake for 35-40 minutes until just set.
Cool for 5 minutes in pan then unmold and cool completely. Cut into squares or bars for serving.
 Maki's new food blogging event caught my eye the last time I visited the IMBB portal. She asked us to blog about restaurants, shops, markets, or anything foodie or cooking related in our locale that we can recommend to visitors. Thank goodness she extended the deadline because I was caught up with work, moving and all that jazz and didn't have time to do a write up.
I really don't want to blog about places in central London because as expected with popular tourist places, you just have to search in the internet to get reviews even to the most obscure hole-in-the-wall places. There are so many books and magazines with exhaustive listings of the best foodie places. So I thought of sharing with you a place a just a little bit outside in the north of central London that me and my family love to visit once in a while (because it's quite far from our place).
Although I occasionally like fancy shmaltzy restaurants, you know the type where there are so many cutleries and glasses on the table you wouldn't know where to begin, I can confidently say that I am a more of a 'rough and ready' type of eater. Probably more bistro than haute cuisine. Besides the obvious savings in money, I like the informality and unpretentiousness of these simple no-nonsense eateries where the most essential thing - the food - is the core of the experience. Therefore, it's no wonder that I'm quite fond of Oriental City.
I first found it when 2 months after arriving here in UK from Hong Kong, we were missing our usual dose of hot satisfying Asian food. That time there was a dearth of authentic oriental restaurants in our area. In fact, there was none. All of the Chinese restos then were catering to the Western palate. You know, the sweet-and-sour-springroll-chow-mein type of food. I trawled our yellow pages (internet then were at its infancy) and saw this Oriental mecca in north London.

Yaohan Plaza was the name in its first incarnation, touting the phrase "All of Japan in One Roof". Then the Japanese parent company got broke so now the new owners named it Oriental City which I think is quite apt since under its roof it is a meld of all kinds of shops and restaurants from the Orient.
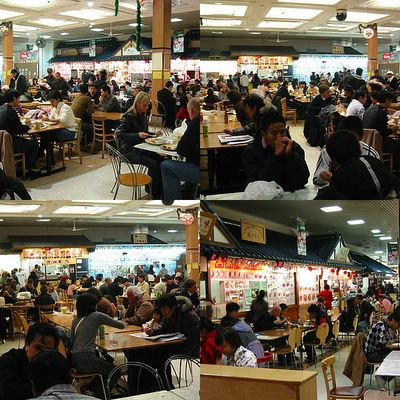
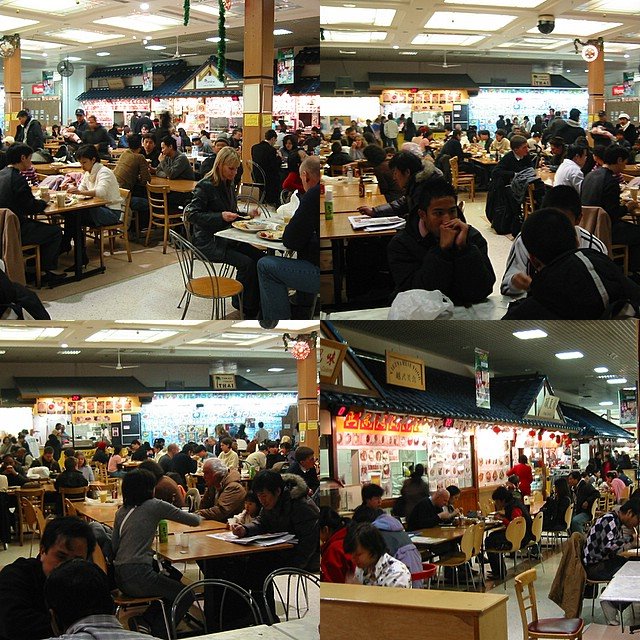
Besides the waft of barbecue (in summer) and the distinctive smell of durian just outside the main door from the car park, you first sense the busy sights, sounds and atmosphere of the food court where there are an abundance (by London standards) of different kinds of oriental cuisines - Chinese, Japanese (love the bentos), Indian (nice thali), Malaysian, Singaporean, Thai, Korean. Thankfully here our family don't have the usual problem when eating in just one resto since we all have different tastes and idea on what to eat. The only thing I am lamenting is the absence of a Filipino stall there. *sigh* 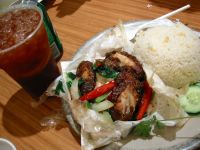

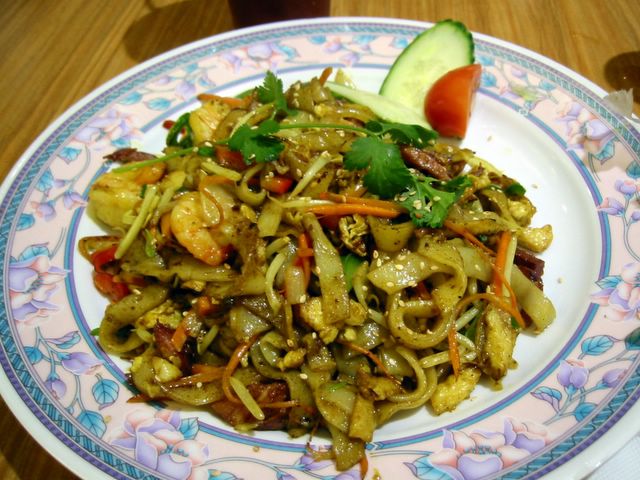
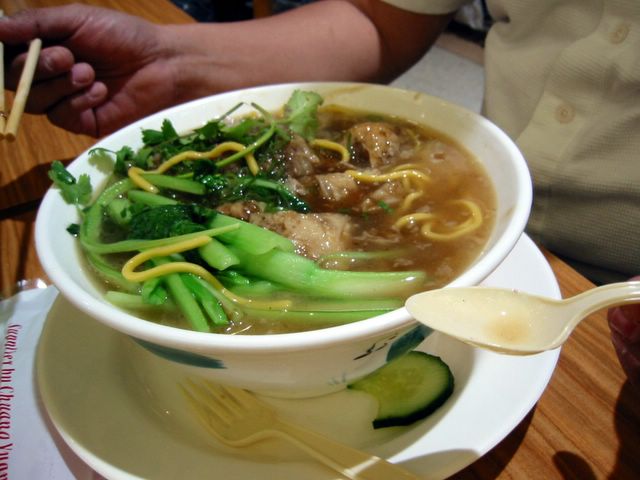
Just to give you a sampling of what we had last time ... [left] paper wrapped Thai chicken with rice and iced lemon tea; [right] Malaysian-style noodles which I am currently addicted to. It's basically the same as the curry flavoured Singapore-style fried noodles but with flat rice noodles. 

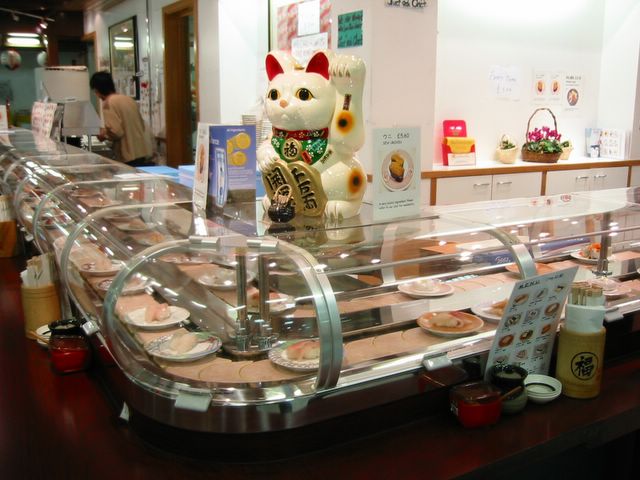
[left] Noodle soup for my husband (I can't remember if it's Chinese or Japanese ramen); [right] They also got your favourite conveyor belt Japanese sushis.
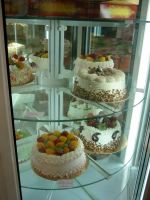
All these at very reasonable prices and often very good quality. The place also have cake shops and a Japanese bakery which made me almost jump for joy when I saw it since I've always been a fan of Japanese breads and cakes when I discovered it in Hong Kong.

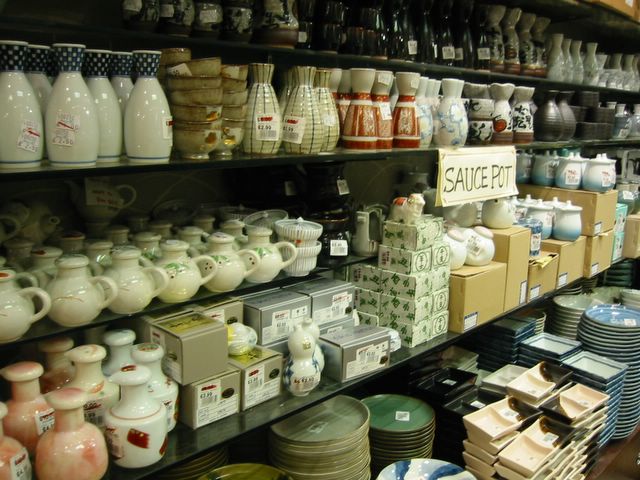
There are several shops that sells Japanese ceramics and other kitchen and bathroom knick-knacks, a jewelry shop, Japanese bookshop, video arcade, 2 other Chinese restaurants, 1 expensive Japanese restaurant, an aquarium and fish shop, and a central hall where events are regularly held.
Oriental City
399 Edgware Road
London NW9 0JJ
*nearest tube station: Colindale (Northern Line)
Tel. No.: +44 (0)20 8200 0009
Opening hours: Mon-Sat 10am-9pm (food court and supermarket)
Sun 10am-8pm (food court)
Sun 12nn-6pm (supermarket)
Update [01 Aug 2014]: This beloved centre closed its door for the last time on 1st June 2008. There are still no replacement food centre dedicated to Oriental cuisine in the London area as of this time.
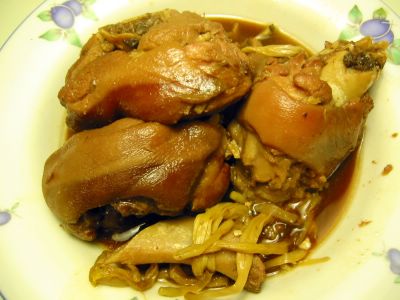
 Whenever I see a hippo it always reminds me of paksiw na pata and vice versa. I wonder why? ;) Must be something to do with the folds of fatty skin and bulging roundness in its body.
Pata is the Filipino name for pork legs. Come to think of it, the word is actually Spanish. Paksiw is one of the standard traditional Filipino way of cooking dishes almost at par with the ever popular adobo probably because of its simplicity and ease of preparation. Certainly it's very similar to adobo except that the proportion of vinegar to soy sauce or salt is higher. It also uses dried banana blossoms. Now, I used to think that the ones we actually use is the dried lily buds same as the ones the Chinese use . But a check with a fellow food blogger, with my mother in the Phils, and on inspecting a packet from a Pinoy food store here, confirmed that we indeed use dried banana blossoms. It was not a fairly tale or a misnomer. Though you can definitely substitute the dried lily buds if it's not available - I can attest to that.
Like most Filipino dishes, this is best eaten with piping hot steamed rice and for me a little side dip of patis. Yum!
 Paksiw Na Pata
1 kg bone-in pork legs - chopped into 2-inch thick pieces
1/2 cup vinegar
1/4 soy sauce
1 bay leaf
1 tsp peppercorns
1 Tbsp minced garlic
1 cup water
1-2 dried sprigs of oregano (optional)
2 Tbsp brown sugar
1/4 cup dried banana blossoms or dried lily buds
- Combine all the ingredients except the brown sugar and dried banana blossoms in a pot. Bring to boil then lower heat and simmer for 1.5 hours or until pork legs are tender. Add more hot water if it is drying out too much.
- Stir in the brown sugar and banana blossoms and simmer for a further 5 minutes.
- Serve hot with steamed rice.
 Waste not want not - the recycling mantra. When you don't have much resources (aka money) you think of lots of ways to save. That includes recycling clothes, everyday things, and most of all food. Recycling is more or less a way of life in the Philippines. You just don't throw things away. Things have to be re-used until they've broken down to pieces or if it's of no use to anyone. As for food, you don't let it spoil either by eating it all or recycling it. It takes some imagination and skill to successfully do the latter while making the food remain edible and tasty. The current edition 15th edition of Lasang Pinoy (hosted by Mike of Lafang) hopefully will showcase all the wonderful ways of recycling food.