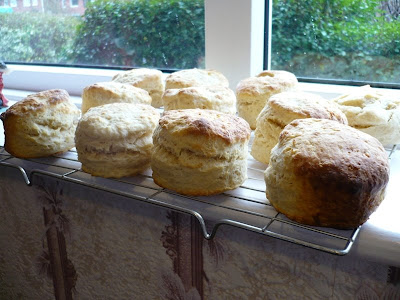
Scones here are more or less the equivalent of what the Americans call biscuits. They are favourite staples of afternoon teas. I love to have them with some clotted cream and strawberry jam plus a steaming cup of Earl Grey. They are one of the more easier quickbreads to make. So easy even my daughters can make them without my help at all.
One of the secrets in making a flaky, fluffy and well-risen scones is by using buttermilk. It reacts with the baking powder in the self-raising flour to give us light and airiness in the scones. Also when rubbing the butter into the flour, lift it a little bit to incorporate more air in the mixture. The other one is in dipping the cutter in flour before cutting into the dough. If it's not well floured it tends to crimp the edges which prevents it from rising well.
This particular recipe is adapted from Angela Nilsen's The Ultimate Recipe Book. I reduced the milk to make it less sticky and increased the sugar a little for more sweetness.
Buttermilk Scones
450 g self-raising flour
1/2 tsp fine salt
75 g [5 Tbsp] caster sugar (superfine)
100 g chilled butter
1 cup buttermilk
1/4 cup milk
a little flour for dusting
- Preheat oven to 220°C/fan 200°C/425°F/gas mark 7. Lightly grease a baking sheet.
- Mix flour and salt in a bowl.
- [Optional] Cut butter into small pieces.
- Add butter to the flour mixture and using a pastry cutter or two butter knives, cut the butter into the flour mixture until they are pea-sized. Then shift to using your fingers and rub the butter and flour mixture lifting as you go along to aerate the mixture until it more or less resembles bread crumbs. Try not to over rub as the scones will be lighter if the mixture is a bit flaky.
- Add sugar and mix well.
- Mix the buttermilk and milk. Make a well in the middle of the flour mixture and pour the buttermilk mixture in it.
- Gently mix them together until it forms a soft and sticky dough.
- Put the dough in a lightly floured surface and knead 3 or 4 times only to get rid of the cracks. Do not overwork the dough or it will become tough.
- Pat the dough gently to a thickness of about 1-inch. Dip a 2-1/2 inch round fluted cutter in flour and cut out the scones by pushing down quickly without twisting. Make sure to dip the cutter in flour every time before cutting through the dough.
- Cut out the rest of the dough by gathering the trimmings lightly then patting to 1 inch thick again.
- Place in the baking sheet and sift a light dusting of flour on top or glaze with beaten egg. Bake for 10-12 minutes or until well risen and golden.
- Cool on a wire rack uncovered for crisp tops or loosely covered with a tea towel if you prefer it soft.
- Serve with clotted or whipped cream and strawberry jam.

2 comments:
Hi there, I like your recipe, but what if I just want to use regular non-self rising flour. How much baking powder and soda should I use?
Thanks
Suzanne
Hello Suzanne, you can use 4 teaspoon of baking powder with the plain flour. Happy baking!
Post a Comment