My current stash of this wonderful bread was about to expire and I was left with a choice between having indigestion in eating it all up or be less greedy and make some panettone bread and butter pudding. Bread and butter pudding, I now realised, is simply custard-soaked pieces of bread. It's a wonderful ending for my beloved panettone because the recipe I adapted from the BBC Goodfood magazine was easy to do and utterly divine. The original recipe is here if you're interested.
Panettone Pudding
250 g panettone (about 5 medium slices)
1/2 cup double cream
1 cup milk
2 eggs
1 tsp vanilla extract
2 Tbsp caster sugar (superfine)
icing sugar (for sprinkling - optional)
softly whipped cream, to serve
- Grease a 850ml/1-1/2 pint (about 3 1/2 cups - a 9inch x 9inch deep pan will do) baking dish with a little butter.
- Preheat the oven to 160°C/fan 140°C/gas mark 3.
- Cut the panettone into wedges then in half, leaving the crusts on. Arrange the bread in the baking pan.
- In a bowl, whisk together the eggs, cream, milk, vanilla extract and sugar and pour evenly over the panettone. Let it soak for a few minutes.
- Put the dish in a deep roasting pan and pour hot water around it to a depth of about 2.5 cm/1 inch
- Bake for 35 minutes until the pudding is just set.
- (Optional) Dust top with icing sugar and serve with whipped cream or ice cream.

Then an email exchange with the Karen, our Kapampangan-cuisine expert food blogger, cleared the haze of mystery - it had something to do with fermentation! She said that in the old days when most people make their own tocinos they keep the salt and sugar cured pork in glass jars and let it ferment for a few days. Crucially, according to Karen, the rule of thumb in curing tocino is 5 days in the fridge or 3 days without refrigeration. Care should be taken here since as you well know there is a fine line or a short period between being fermented and getting rotten! I played around with the curing/storing time in the fridge and my current standard is 5 days minimum and 7 days max. After that the meat really goes off and you don't really want to eat stinking tocino, would you?
It's only now that I realised why people would get shop-bought tocino instead of making one themselves. In this age of TV, fast food, and instant gratification, imagine waiting for almost a week to get your homemade tocino fix! I think I'll make several batches and try to freeze it next time.
See that picture of tocino below? It is naturally reddish after the fermentation so red food colouring prevalent in commercial version is not needed. You would also avoid any artificial ingredients by avoiding the said food colouring. My proportion for the salt and sugar here is still at the tweaking stage so please adjust it to your liking as you see fit. Plus I'll be also experimenting in adding honey or pineapple juice or golden syrup or brown/muscovado sugar. I will surely keep this post updated whenever I make any progress.

1 kg pork (preferably well marbled with fat like the shoulder part)
1 Tbsp fine salt
5 Tbsp granulated sugar
- Slice the meat into about 1/4-inch thick and into serving sizes.
- Mix salt and sugar well in a bowl.
- Add the pork and mix in, making sure that it is well coated.
- Put in a covered glass container and store in the fridge for about 5 days.
- To cook:
- Put tocino in a non-stick pan and add just enough water to cover it.
- Bring to boil then bring heat down and simmer for about 30 minutes or until tender. Add hot water a little at a time if it is drying up too much.
- When the water has nearly evaporated (this should be near the end of 30 minutes), drizzle some oil on it, turn heat to very low and let it fry gently. Stir occasionally and let the meat scrape the sticky residue in the pan. Cook until golden brown.
Look how blessed I am, receiving another parcel out of the blue just 1 month from the one from Hawaii. This time it came from Boston sent by a long-time blogging friend who was generous enough to send me uncommon Pinoy ingredients, my favourite 'quamoy' dried plums, and a great cookbook by Mario Batali. I was flicking through the pages and quickly marked out a lot of pages that I want to try out. She also sent a steam plate tongs that I've been searching for in all the Oriental groceries I happen to visit here in UK. I distinctly remember having several when I was in Hong Kong but it disappeared when we moved here. And I've been tong-less ever since. ;)
Thanks very very much, Stel, for the wonderful gifts you sent my way. It is greatly and hugely appreciated, my friend. I've been wanting to send some to you and other blogging friends but my current killer work schedule just makes it so so hard. I hope I can make it up to you soon. :)


A reader recently asked on how to make tuna sandwich. I told her I will posting something about sandwich fillers. Little did I realise that the pictures and my post saved on draft for the past year do not have the tuna one she needs. I had to quickly do some this morning so I could post the pictures here. It would have been complete if I had something for cheese pimiento. Maybe I can do that some other time.
These are very simple sandwich spreads which I am posting mainly for my kids. You must have noticed "sarnie" at the title. Like a lot of things here in Britain, that is the nickname for sandwich. As for the name itself, it was bestowed on two slices of bread with a meat (usually) in the middle after the Earl of Sandwich. The medieval earl apparently loved to eat these a lot.
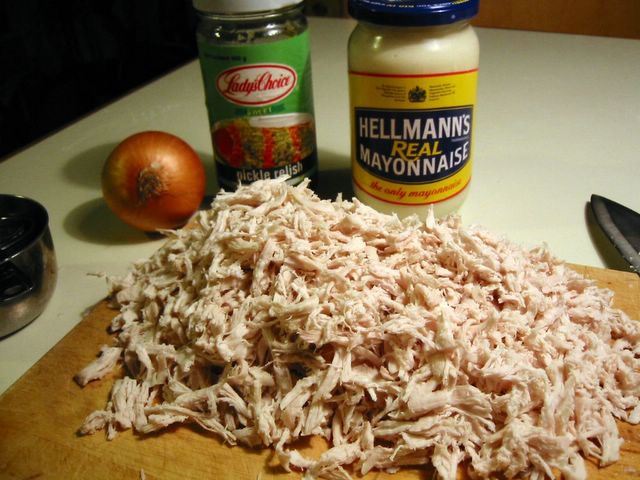
Chicken Sandwich Spread
3 cups cooked chicken meat - chopped or flaked
1 1/3 cup mayonnaise
3 1/2 Tbsp chopped sweet pickle relish
2 Tbsp finely chopped onion
freshly ground salt and pepper
- Combine all ingredients in a bowl. Taste and season with salt and pepper if needed.

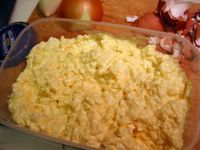
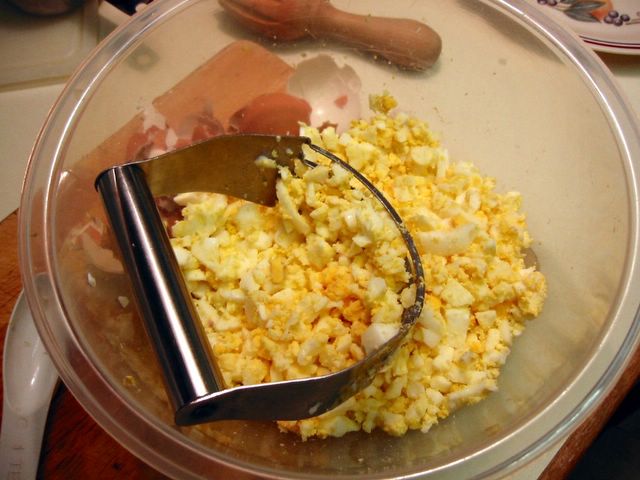
Egg Mayo
5 hard boiled eggs - chopped
2/3 cup mayonnaise
freshly ground pepper
- Combine all ingredients in a bowl. Taste and season with salt and pepper if needed. If you use Hellmann's mayonnaise, usually no additional salt is necessary.
Tuna-Mayo-Sweetcorn
2 x 185 g cans of tuna in oil
1/2 cup cooked sweetcorn (or sweetcorn from cans)
1/3 cup mayonnaise
salt and pepper to taste
- Drain tuna from oil then flake it in a bowl. Add all other ingredients. Taste and add salt and/or pepper if needed.
Tuna Mayonnaise
2 x 185 g cans of tuna in oil
2 Tbsp chopped onion or green onion
1 Tbsp chopped sweet pickle relish
salt and pepper to taste
- Drain tuna from oil then flake it in a container. Add in all other ingredients. Taste and add salt and/or pepper if necessary.
Here's what you can do when you've got that odd small quantity of beef left. Too little to freeze, too fiddly to stir-fry with vegetables, and especially too much of a waste to throw away. I adapted this from my old reliable Chinese Cooking For Beginners by Huang Su-huei. It originally had 1 tsp sugar in it but I completely omitted it since I really don't want a sweet fried rice. This is very adaptable such that you can add in other veggies or left over meat in it.
Beef Fried Rice
150 g [about 1/2 cup] minced beef
1 cup chopped onions
2 1/2 cup steamed rice (chilled left-over rice is best)
3 Tbsp ketchup
1/2 tsp fine salt
1 tsp Worcestershire sauce
2-3 Tbsp oil
- Mix ketchup and salt in a small bowl. Set aside.
- Heat a wok and add the oil. Fry the onion until translucent (about 3-5 minutes).
- Add the ground beef and cook in medium heat until cooked (about 5-6 minutes). Make sure to separate the tiny beef pieces with your spatula or cooking spoon.
*OR*
To make it more tender, add about 1/4 cup hot water and simmer for 30 minutes or until beef is tender and all the water has evaporated.
- Sprinkle the Worcestershire sauce on the beef and cook for a few minutes more.
- Add the ketchup mixture, mix well. Then add in the rice and stir fry until rice is heated through and mixed well.