 It's that time of the year again where baking and blogging for breads is compulsory for the World Bread Day. I don't mind it at all. In fact, I look forward to it come October knowing that I will add something in my list of breads that I've tried. As always every year this is hosted by the very generous Zorra of Kochtopf.
I have decided to bake something with chocolate to hit two birds with one stone. For it is also Chocolate Week here in UK. This recipe I adapted from a special insert in the current September issue of Waitrose's magazine. It is very good except that the filling was quite runny. So the instructions said to cut it in half lengthwise and then twist them together, I knew that it will be a messy affair if I did that. Hence, I just twisted them intact. I expected that it won't be too good looking when finally baked but I was rewarded with a nice swirl inside that was revealed when cut. And the taste of the bread itself was excellent. This is a definite keeper of a recipe. I just have to tweak that filling so it won't ooze out too much.

*Dough:
7 g sachet easy bake yeast
250 g strong white bread flour
3 Tbsp dark brown sugar
1/2 tsp fine salt
1/4 cup whole milk
1 large egg - beaten
75 g unsalted butter - softened
*Filling:
1/4 cup whole milk
75 g milk chocolate - finely chopped
50 g dark chocolate - finely chopped
1 Tbsp cocoa
3 Tbsp caster sugar
1/2 tsp vanilla extract
1/2 tsp ground cinnamon
*Glaze:
3 Tbsp dark brown sugar
3 Tbsp water
*For the dough:
**Manual method:
- Gently warm the milk in a pan until it is just lukewarm, remove from heat. Stir in the yeast and set aside for about 5-10 minutes. By then, then yeast should be foaming (it is activated). If not, discard it and start again from the beginning with fresh milk and yeast.
- Mix all the dry ingredients in a bowl. Make a well in the centre and add the milk-yeast mixture, egg, and butter.
- Knead mixture in an electric mixer with a dough hook attachment for 6-8 minutes or mix and knead by hand for 10 minutes until smooth.
- Cover with cling film, put in a warm place and leave to double in size (about 2 hours).
**Bread machine method:
- Put all ingredients according to the manufacturer's instructions (usually with the yeast first) and put on the dough program. This will include its first rising.
*For the filling:
- While dough is doing its first rise, heat the milk until steaming. Remove from heat and then add the chopped chocolates.
- Stir until chocolates has completely melted.
- Add in all the other ingredients. Stir to mix completely. Set aside to cool completely.
**Assembly:
- Punch down dough and lay out on a floured surface. Roll out to a rectangular size about 12 x 18 inches (30 x 45 cm).
- Spread the chocolate filling all over the dough. Roll up tightly like a log starting from the short end. Pinch the edges to seal it.
- Trim the ends of the roll. Cut in half lengthwise with a floured knife.
- Tightly twist the two strips over each other with the filling facing outwards.
- Transfer to the prepared tin. Cover with cling film or tea towel and leave to rise in a warm place to double size (about 1 hour).
**For the glaze:
- While the dough is doing its second rise, place the sugar and water in a saucepan and boil for about 2 minutes until syrupy. Set aside.
**Baking:
- Preheat oven to 180°C/fan 160°C/350°F. Bake for 25-30 minutes until cooked through.
- Brush half the syrup over the babka and leave for 15 minutes.
- Brush again with the rest of the syrup then cool completely on a wire rack.

 It's that time of the year again for the World Bread Day to celebrate anything to do with breads in the food blogging world. Zorra of Kochtopf as usual is ably hosting this fine blogging event.
I always loved fruited breads like tea breads/cakes, fruit loafs, etc. Toast them lightly then slather with butter and scoff down with some Earl Grey tea - yum! So what better way to try making a fruited bread than baking the Irish Barm Brack. The timing is quite right, too. For it is also traditionally served during Halloween.
I first had Barm Brack when an Irish family friend gifted us with one. It was the dark variety but packed chock-a-block full of fruits. Oh wow, it was a great introduction to this wonderful tea-time bread.
Sue Lawrence's Book of Baking provided me with a workable recipe with the help of my trusted Panasonic bread machine.

500 g strong white flour (or bread flour)
1/8 tsp ground nutmeg
1 tsp ground mixed spice
7 g sachet of easy-blend dried yeast
1 tsp fine sea salt
50 g [scant 1/4 cup] unsalted butter
50 g nbsp;[1/4 cup] caster sugar
150 g [1 cup] currants
50 g [1/3 cup] dried mixed peel
50 g [1/3 cup] sultanas
300 ml [1 1/4 cups] tepid milk
*Glaze:
1 Tbsp sugar
1 Tbsp water
- Hand Method:
- Combine the flour, yeast, spices, and salt in a bowl. Rub in the butter.
- Stir in the sugar and dried fruits; then the milk.
- Once combined, turn out on a floured surface and knead for about 10 minutes until smooth.
- Place in an oiled bowl, invert dough so that the top is oiled. Cover with cling film and let rise in a warm place for 2-3 hours.
- Bread Machine Method:
- Put all ingredients according to the bread machine instruction and set to dough setting.
- Butter a 20 cm/8 inch baking pan. Punch down dough and shape into a round to fit into the prepared pan. Cover with greased cling film and let rise in a warm place for another hour.
- Preheat oven to 220°C/fan 200°C/425°F/gas mark 7. Bake the bread for 15 minutes, then lower temperature to 200°C/fan 180°C/400°F. Bake for a further 30-35 minutes. Cover loosely with foil in the last 15 minutes. It is cooked when it sounds hollow when tapped at the bottom.
- While it is baking, make the glaze - boil the water in a small saucepan; add the sugar and cook on low heat until dissolved. Brush the syrup glaze on top of the bread and return to the oven for 2 minutes.
- Remove from baking pan and cool completely on a wire rack before slicing.
 The lovely Zorra of Kochtopf is again hosting the World Bread Day 2014 food blog event. An annual virtual gathering of food bloggers to celebrate anything to do with bread.
For my entry, I'm harking back to the very first bread I ever successfully baked. When I started baking more than two decades ago I got really stressed when baking with yeast (well nowadays I still get a little anxious). I think it's the worry that the dough won't rise that I constantly peek while it is proving. This might have contributed to my first few attempts at bread making to fail. So when I saw the Make-Ahead Potato Bread Rolls in my beloved hardbound Betty Crocker cookbook, I lost no time in trying it. See, in that recipe the rising is not done in a warm place but in the fridge - overnight! How great is that? No more stressing, hand wringing and peeking to see if the dough rose at all. Anyway, the bake was successful but I never got to bake that bread again until now more than 25 years later.
One thing I only remembered now is that the shaping of the dough into balls can be a bit hard. They would not follow easily the shape I want. Maybe I should let it come to room temperature first before shaping? I'll find out next time. There's also one thing I remembered - how delicious it is especially when warmed. My youngest daughter loved it so much she slathered it with strawberry jam - one of the few times I saw her do that. This is a definite keeper of a recipe.
Potato Bread Rolls
1 package [2 1/4 tsp] active dry yeast
1 1/2 cups warm water
2/3 cup sugar
1 cup unseasoned mashed potato
2 eggs
1 1/2 tsp fine sea salt
2/3 cup butter - softened
7 - 7 1/2 cups plain flour
- In a bowl, dissolve the yeast in the warm water together with 2 tsp of the sugar. Set aside. It should foam and bubble after 10 minutes. If it did not, this means the yeast is dead so discard the mixture and start again with a new batch of yeast.
- Add the sugar, potatoes, eggs, butter, salt and 3 cups of the flour. Mix with electric mixer on low speed until smooth.
- Add in enough of the rest of the flour to make the dough easy to handle. Knead on a floured surface for about 5 minutes of until smooth and springy.
- Grease a bowl and place dough in it. Turn dough to grease all over. Cover tightly with cling film and let rise in the fridge for at least 8 hours but not more than 5 days.
- Punch dough gently and knead for a few turns. Divide dough into 2 equal pieces for loaf and 4 equal pieces for rolls.
*For small dinner rolls:
- Shape dough into 1 1/2 inch balls. Arrange on a greased baking sheet 1 inch apart. Cover and let rise in a warm place until double (about 1-2 hours).
- Brush with melted butter or egg wash (beaten egg with 1 Tbsp water or milk).
- Bake in an oven preheated to 200°C/fan 180°C/400°F for 15-20 minutes.
*For clover leaf rolls:
- Grease muffin pans. Shape into 2-inch balls and put in the muffin pans. Using scissors, cut balls into halves and then into fourths.
- Brush with melted butter and let rise in a warm place until double (1-2 hours).
- Bake in an oven preheated to 200°C/fan 180°C/400°F for 15 minutes.

 It's World Bread Day! The previous year's blog event for this special day always passed me by. Bread making wasn't really in my arsenal of kitchen skills. But now that I've done bread making more often than I used to, I thought taking part in this once-a-year event would be the best thing. Zorra has been wonderfully hosting this event for the past three years.
One thing that helped me recently is my Panasonic bread maker. It's more than a year old actually but I've only used it several times. We're not too keen with the quality of the baked bread it churns out. The bread itself (or the middle) comes out too moist or wet. We've tried making many different kinds of bread in it (using the recipe book that it comes with) but they all come out the same. I tried reducing the liquid but the bread was worse. So nowadays I just use it as a bread kneader and first riser which it does beautifully. My bread making efforts are definitely reduced and there is less mess all around.
Okay this is not the first ever bread that I did but I was hoping to perfect this bread to use as a staple in our pantry. Perfect as in looking, smelling, and tasting like ones we buy from shops. My benchmark actually is Warburton Toastie which my family loves and in our opinion is the best commercial sandwich bread around. The Best Recipe Cookbook (my constant guide mowadays) provided the recipe that I adapted.
How did it go? It was good although my youngest and my husband was put off by the yeasty smell. So I guess next time I will reduce the yeast considerably. Mind you, I used active dry yeast successfully in the bread maker which in all its instructions always say to use instant dry yeast. But active dry yeast is just fine. All you have to do is 'wake it up' or activate it by dissolving in warm liquid and letting stand for a few minutes. I find it's helpful as well in knowing if your yeast is still good when you see (or not see) it foaming. With the instant dry yeast you won't know until after the first rising and by then all that dough is wasted.

520 g bread flour
1 tsp fine salt
1/3 cup warm water
1 cup warm milk
3 Tbsp sugar
2 Tbsp unsalted butter - melted
1 package (2 1/4 tsp) instant yeast or active yeast
- Mix the flour and salt in a bowl. Set aside.
- Mix the water, milk, butter, sugar, and yeast. Stir to dissolve yeast and sugar. If using active dry yeast, let stand for about 10 minutes until the mixture starts to foam.
- Hand method: Mix yeast mixture with the flour until it comes together enough to handle. Turn out on a lightly floured surface and knead for about 5 minutes until the dough is smooth and satiny. Shape into a ball. Put the dough in a lightly oiled bowl, rubbing it around to coat it lightly with oil. Cover with a plastic wrap and place in a warm place until the dough doubles in size (about 2 hours).
- Bread machine method: Pour the yeast mixture in the bread machine then pour the flour and salt mixture on top. Set machine to dough setting and turn on. This will take about 2 hours to complete the kneading and rising.
- Once the first rising is done, place the dough on a lightly floured surface and knead for a few minutes. Shape into a log and place in a greased 9 x 5-inch loaf pan. Press it gently so it touches all four sides of the pan. Cover with greased plastic wrap and place in a warm place to rise until double in size (about 1 hour).
- Bake in a 180°C/fan 160°C/350°F pre-heated oven for 40 to 50 minutes.
- Remove from pan and tap bottom of bread. If it sounds hollow the bread is ready, if not return to pan and oven for another 5 minutes. Turn out onto a wire rack and cool completely.
Note: If you want a crispy crust, put another baking pan below the loaf pan in the oven. Fill this with about 1-2 cups of boiling water. This will provide moisture throughout the baking of the bread making the crust crispy.

 SHF was the very first blogging event that I joined way back in autumn of 2004. Those were the days when blogging was so new and exhilarating. You know almost all of the food bloggers by heart because there were only a few of us around that time. Now bloggers are in the thousands and that's just in the food category. How time flies.
After a long while of not being able to participate in SHF, I made it a point to make sure I do it this time besides the fact that my blog needs the regular update once and again. The current theme of SHF is spice, hosted by Anita of Dessert First.
There were two choices for me to bake, either a spiced creme caramel or this mango upside-down cake. Well the sight of some Indian mangos in the supermarket did it for me. And so it was, only if I waited a little longer for it to ripen the cake would have been perfect. But that is the point of trying, isn't it? Give it a go, if it's not to your liking then do adjustments the next time.
As for cardamom, I fell in love with this spice when I started sampling Indian sweets. I love its heady aroma and the way it melds well with ingredients like chocolate. I will surely be making use more of this fragrant spice.
Paul Rankin's recipe is the one I adapted from the BBC GoodFood magazine of November last year.

160 g butter - softened
100 g caster sugar
2 large eggs
175 g self-raising flour
2-3 Tbsp milk
1 Tbsp lime or lemon juice
lime or lemon zest (optional)
2 Tbsp soft brown sugar
2 cardamom pods, seeds only, crushed
1 slightly ripe mango - peeled and sliced
- Preheat oven to 190°C/fan 170°C/375°F/gas mark 5.
- Beat 100 g of the butter with the caster sugar in a bowl until light and fluffy.
- Add the eggs one at a time, beating well after each addition.
- With a wooden spoon, fold in the flour.
- Add the milk and mix to a soft dropping consistency. If it is too thick, add more milk.
- In a 20 cm oven-safe frying pan, melt the rest of the butter (60 gm) with the brown sugar, cardamom, lemon zest and lemon juice. Stir to mix.
- Add the mango slices and cook for about 5 minutes or until it is a bit soft but still firm. If you're using a separate baking pan instead of the frying pan, pour the mango slices into the baking pan.
- Arrange the cooked mango slices well at the bottom then spoon the cake batter on top.
- Bake for 20 minutes or until risen and beginning to shrink away from the sides.
- Remove from oven. Slide a knife around the edges of the pan then turn the cake out onto a serving plate. Serve warm with some Greek yoghurt or cream.

 Sorry Andrew, although you asked us to make something more uncommon Indonesian fares for the latest installment of WTSIM, I just couldn't help doing this chicken satay recipe that I have bookmarked about two years ago. When I read how Mike of Lafang gushed about his friend's satay recipe I thought just have make this and the current theme of Indonesian for WTSIM seems the perfect excuse for me to do it.
The very first time that I had Indonesian food was when I lived in cosmopolitan Hong Kong. Back then I was aware that our country's neighbor's food is similar to ours although a bit more on the spicy side. So when a Dutch friend invited us in Cinta restaurant down in Wan Chai, we didn't lose time ordering the likes of rijsttafel, nasi goreng, sago malacca, and of course chicken satay. The latter was served imaginatively where a small charcoal grill is brought to the table and you grill the skewered chicken on right there. Lovely!
As can be gleaned from some of the names of traditional Indonesian dishes, there were Dutch influences in the country by way of the Dutch East India company that colonised it starting in the 17th century. Rijsttafel - means rice table and is a collection of small amounts of different dishes, rice or vegetables in a wide platter. Sort of like a precedent of the tasting menu. It was perfect for me since I love sampling different dishes in one sitting.
Anyway, this satay recipe is really good. I just made a small adjustment in the salt department. I thought it needs a little bit more seasoning so the adjustment is already there. The one lesson for me here is to cut the meat in chunks not in thin slivers! At the grill, my slivers were either sticking to the metal grills or disintegrating altogether. But they were oh so tender. Love them!

1/2 tsp ground fennel seeds
1/2 tsp ground coriander seeds
1 medium onion or 6 shallots - chopped
2 cloves garlic
1 stalk lemon grass, white part only - chopped
1 tsp turmeric
1 inch fresh ginger - peeled
2 tsp sugar
1/2 tsp fine salt
1 tbsp vegetable oil
750 g chicken thighs or breasts - cut into 1-inch chunks
bamboo skewers
- Grind or pound the garlic, ginger, fennel, coriander, onion, lemon grass, turmeric into a paste.
- Add sugar and salt, mix well.
- Marinate chicken into this mixture for at least 2 hours or overnight.
- Soak bamboo skewers in water for about 30 minutes. Thread the marinated chicken through the skewers.
- Brush with oil and grill on hot charcoals.
- Serve with peanut sauce and fresh salad.
Peanut Sauce
1 medium onion or 6 shallots - chopped
2 cloves garlic
2 stalks lemon grass, white part only - flattened or chopped
2 dried red chillies - soaked, drained and chopped
4 tbsp peanut oil
1 tsp ground coriander seed
1 tsp ground turmeric
1 1/2 cups coconut milk
1 1/2 Tbsp sugar
1/2 Tbsp fish sauce
1/2 cup peanuts - finely chopped
1 1/2 Tbsp tamarind paste
salt to taste
- Grind or pound the onion, garlic, lemon grass, and chillies into a paste.
- Heat the peanut oil in a saucepan.
- Saute the onion mixture in the hot oil on medium heat for a few minutes or until fragrant.
- Add the coriander and turmeric. Cook for about a minute.
- Stir in the coconut milk and bring slowly to a boil while stirring continously.
- Add the fish sauce, sugar, tamarind paste, and peanuts. Simmer while stirring occasionally until thick or desired consistency is achieved.
 The 21st edition of Lasang Pinoy is brought to you by Bryan of Fire Water Husband (blog under renovation) who has this great idea of Cooking for Heroes. It's just as well that our current logo features the exact hero I want to cook for - Andres Bonifacio.
Even in my elementary school days I feel our dear old Andy Boni got a raw deal. I do believe he should be our national hero for he started the Katipunan, he started the ball rolling to begin the revolution and break free from the colonial masters. And what did he get for all his heroism and troubles? He got salvaged (executed) for being a rival party in the election for the head honcho of the revolutionary government. Then he lost out again almost a hundred years later in being a national hero. If that's not a raw deal I don't know what is.
It's no use arguing now about his place in history but what is undeniable is his courage, heroism, and his love of his country and fellow Filipinos. To you Andres, a big lambanog toast for being a real Pinoy! Thank you for all the things you have done for us.
What I have in mind to cook for him is something that can be considered essentially Filipino and at the same practical and nutritious for a revolutionary who had to eat on the go. And I thought why not our classic pancit. It's a complete meal in itself. It's got carbs, protein from the meat, and some wholesome veggies thrown in the process. Sounds like a good idea to me. :)
For the pancit recipe itself, this is the culmination of several years of my family's sacrifice of eating pancit as soggy and undercooked or dry and a bit tough or almost tasteless (prompting lots of toyo and lemon juice heaped on it). It took me awhile to get the hang of cooking the noodles just right. There is also the case with the oil, I used to put as little oil as possible while at the same time wondering what makes my mother's pancit well separated and really nice. Well I increased the oil exponentially with each batch - et voila! The oil is crucial! (I bet my doctor's not happy about this.) Too little will make it dry (obviously) and will tend to make it clump together. I also took my mother's advice of cooking the veggies separately to prevent it getting soggy. So like most dishes, cooking pancit successfully has a lot to do with timing. One revelation as well is that the richer your stock the better tasting your pancit will be. That my friend is guaranteed. :)
Pancit Bihon Guisado
250 g thin or medium rice noodles (bihon)
3 Tbsp oil
1 Tbsp minced garlic
1 medium onion - sliced
1/3 cup jullienned carrots
1/4 cup sliced celery (optional)
15 pieces mangetout (sitcharo)
1 cup shredded cabbage
1 cup sliced meat - chicken, pork, shrimp or combination of these*
1 1/2 cups rich stock
2 Tbsp dark soy sauce
freshly ground pepper
salt
additional stock or water
- Soak the noodles in tepid water for about 20 minutes or until soft. Using scissors, cut into desired lengths. Drain and set aside.
- In a wok, heat 1 Tbsp of the oil in medium heat. Saute half of the garlic and half of the onions.
- Add the meat and stir fry a little. Season with salt and pepper.
- Add about 1/4 cup stock or water and simmer until done. You may have to add a bit more stock from time to time to keep it from drying out.
- When the meat is done, add the carrots, mangetout, and celery. Stir to combine. There should still be some liquid in the wok if not add about 2-3 Tbsp stock and then cook under cover for 2 minutes.
- Add the cabbage, stir fry for a few seconds and cook under cover for 1 minute.
- Remove from heat and transfer to a dish. Set aside.
- Using the same wok (no need to wash unless there's some burnt crust in the bottom), heat the remaining 2 Tbsp oil on medium heat.
- Saute the remaining garlic and onion until onion is translucent.
- Tip in the stock and any sauce drained from the meat and veg mixture.
- Add the soy sauce and season with black pepper.
- Bring to boil then add the noodles. Cover and bring to boil again then lower heat to medium-low.
- Once the sauce starts getting absorbed by the noodles (about 5 minutes), toss and stir the noodles (preferably with large forks for easier tossing) until all the sauce is absorbed and the noodles are fully cooked. The tossing also make sure that the strands are separated and do not clump together. Don't worry if the bottom is getting a bit crusty. At the end there should be no sauce left but the noodles should still be moist, cooked but not soggy.
- Add half of the meat/veg mixture and toss to mix.
- Dish up and transfer to a dish. Top with the rest of the meat/veg mixture. Serve with calamansi or lemon on the side.
*Note: You may use precooked meat in which case add it in at the same time as the carrots and mangetout.
 Well, thank goodness the resurrection of Lasang Pinoy coincided with my re-entry into the fold of Pinoy food blogging. It was fortuitous enough for me to have a post waiting for a chance to be published. This edition is hosted by Afbeercan of Eat Matters - a food blog with beautiful delectable pictures.
More than a month ago, Stel and Sha were witness to my obsession with custards at the time. I baked daan tart (Chinese egg tarts) - the delectable kind you find in dimsum trolleys. A Chinese dim sum cookbook (with English translations of course) was whipped out and I followed the recipe to the letter. My kids were eagerly awaiting the tarts, anxiously peering through the oven glass door. Five minutes after I took it out of the oven they were gobbling it up. They only ate one each and left the rest to completely cool off. But when it did it was met with "Yecchh! It's green !" Indeed, the custard turned greyish-green. Hahaha! It was all right when I tasted it but had that very unappetising colour of molting fungus. Did I overcook it? Could it be that the only ingredients of the custard are egg yolks and syrup? I didn't try to find out because I've just about given up on having a 'eureka' moment for daan tart (that was my fourth experiment).
Instead I turned my obession to egg pies. You know, that type of custard set on a pastry case. Of course my earliest memories of these would be the one you get from bakeries on the Philippines - less eggy more on the milky side set on sweet shortcrust crumbly pie shell with a very dark skin on top. Lately in my travels here and in France I would encounter something similar various names - creme tart, creme flan, nature flan, custard tart, etc. but it would always be that same custard on a pie crust. Although I have to admit the European model is more on the eggy side.
My search for a recipe in the internet started several years ago but I can't find a decent one. Then when I was flicking through various cookbooks that has been neglected gathering dust in the book shelves, I came upon Gordon Ramsay's Sunday Lunch cookbook. (Even though I abhor his constant swearing on the telly, his recipes has been very reliable, quite accurate and really works based on my experience.) He has in there a custard pie recipe which I didn't lose time in adapting and trying out. It turned very very successful ! At last my long lost egg pie/creme flan/creme tart I've found you !
I will have to make it another time without the beating of the egg whites. Let's see if adding whole eggs without beating it separately will result in the same delicious pie. Take note, this is not exactly like the commercial version we buy in the Phils. This is a more eggy version which for me is preferable. Try to use the best possible eggs and milk. If budget permits organic, go for it. As always, the quality will shine through the finished product.
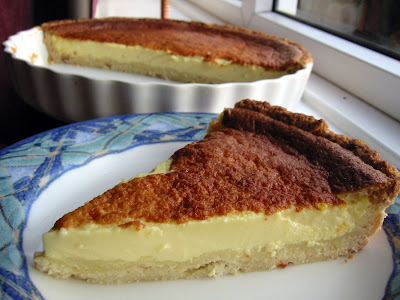
(Custard Pie/Tart)
* For the pastry:
125 g [1/2 cup] unsalted butter - at room temperature
90 g [1/3 cup + 1 Tbsp] caster sugar (superfine)
250 g [1 cup + 2/3 cup] plain flour
1 egg - beaten
1-2 Tbsp cold water
* For the filling:
2 1/3 cup milk
4 eggs - separated
100 g [1/2 cup] caster sugar (superfine)
1 1/2 Tbsp cornflour (cornstarch)
- To make the pastry:
- Combine flour and sugar in a bowl.
- Cut in the butter with two butter knives or a pastry cutter. Then rub in the butter with your fingers until it resembles coarse breadcrumbs.
- Mix in lightly the egg and knead the dough until it just about comes together. If necessary sprinkle cold water if the dough seems dry.
- Knead for a short while and form into a ball. Do not over knead or it will be difficult to roll out.
Wrap in plastic or cling film and chill in the fridge for about 30 minutes to firm it up.
- Roll out thinly on a floured table top to a circle about 12 inches in diameter.
- Line a 23 cm (9 inch) pie pan or fluted flan tin making sure to press the pastry well into the sides.
- Put the tin on a baking sheet and bake blind: line the pastry with foil and baking beans.
- Bake in a preheated oven to 200°C/fan 180°C/400°F/gas mark 6 for 15 minutes.
- Remove foil and baking beans then return to oven to bake for another 5 minutes.
- Trim the excess pastry from the edge of the flan tin with a knife.
- To make the filling:
- Turn the oven temperature down to 180°C/fan 160°C/350°F/gas mark 4.
- In a bowl, mix the flour, sugar, and egg yolks.
- Stir in the milk into the mixture.
- In a separate bowl, whip the egg white to soft peaks and fold gently into the milk/egg yolk mixture with a metal spoon.
- Place the pastry lined flan tin on a baking sheet.
- Pour the filling in the tin and bake for 20 minutes until the top is brown.
- Bring down oven temperature to 110C/fan 90C/250F and bake for a further 1 hour until the custard is just set. The centre should wobble a little.
- Remove from oven and cool completely.
'Chocolate by Brand' is the current theme of one of the longest running event in the blogging world. David Lebovitz hosts this 27th edition of Sugar High Friday. He encourages us to make a dessert out of our chocolate bars and write about them.
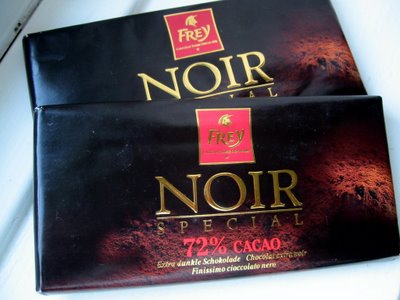
The chocolate bars I nabbed is by Frey - dark variety with 72% cocoa content. Wow, that's the highest I've used for cooking. Why I got it? It was on sale at the local Migros grocery near my sister's place when I visited her in Geneva a few months ago. You know me, I love value for money that means anything on sale!
Unlike some 70% chocolate I had before, this one is very deeply dark brown almost black actually. I savoured a small bite of it that showed it had smoothness, just the right amount of sugar and creaminess, a hint of coffee, with a little bitterness in the finish. Although I couldn't really tell how it would compare to one of those single-estate-organic-super-high-end types that your get from uber cool chocolate boutiques. All I can say is I like its smell, colour, and taste. Now let's see how it would fare when cooked.
I wanted to make something uncomplicated that would show the real qualities of chocolate. First thing that came to mind was chocolate truffles which I thought was perfect but then I've already posted one and for SHF, too! So out came this recipe from my burgeoning clippings from the BBC GoodFood magazine. It looks simple enough until I read closely about 'finely chopped' and 'crushed'. Turned out it requires more elbow grease. Oh well, things I have to do to have my sugar fix. :) The recipe originally asked for dried apricots but I bet any dried or candied fruit would be lovely in it. Things like cherries, pineapples, cranberries, even crystallised ginger! I did not include any chopped nuts because I thought there's too many things in it already. Maybe next time I'll lose the ground almond and put in the nuts. The chocolate itself had to be sufficiently chilled after melting to make it easy enough to mold into a log. Once you've done that the rolling on the crushed biscuits is easy peasy.
How did it taste? Well, the honey had a definite influence on it so other honey flavours would give it a different slant (even golden syrup would be interesting). Despite the number of distractions on this log (did I say I'm making something uncomplicated?), the chocolate still shone through. Dark, very slightly bitter, at the same time meltingly smooth in the mouth. Such a nice change from the gritty chocolates my husband brought home last Christmas.
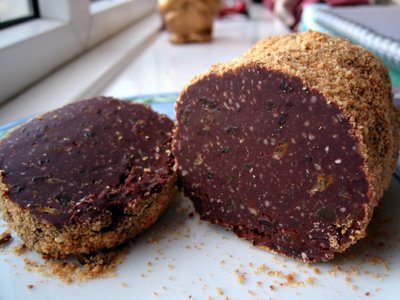 Chocolate Salami
250 g dark chocolate or combination of milk and dark chocolates
100 g butter
3 Tbsp clear honey
100 g ground almonds
100 g dried or candied fruits (apricots, cherries, etc.) - finely chopped
50 g toasted nuts (optional) - finely chopped
100 g amaretti biscuits - crushed
- Melt chocolate, butter and honey in a heatproof bowl over simmering water in a saucepan.
- Remove from heat and add almonds, toasted nuts (if using), and dried fruits.
- Cool completely and chill in fridge for about 1-2 hours until it is of dough-like consistency.
- Shape into a log (about 2 inches thick) and roll on crushed amaretti biscuits.
- Wrap in greaseproof paper and again tightly in foil.
Chill overnight in fridge.
- Before serving slice into rounds with sharp knife.
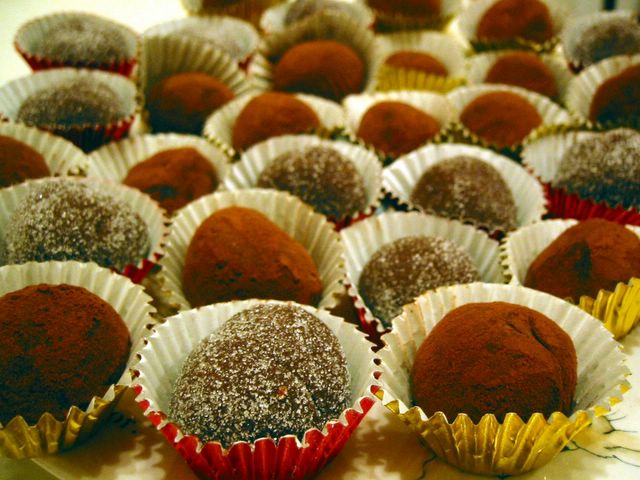
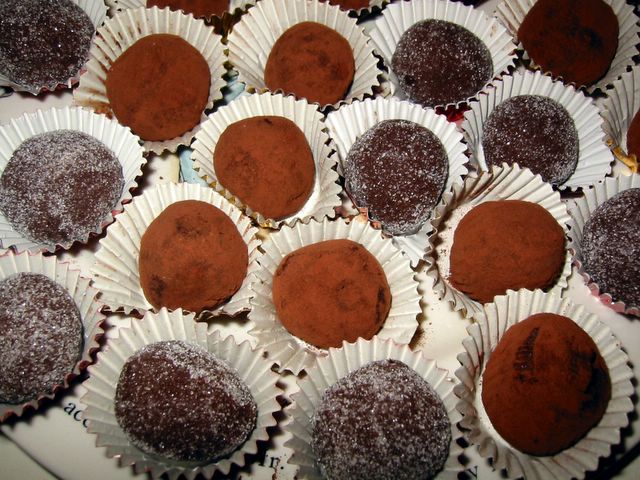
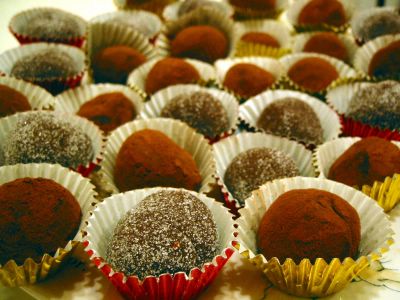 Johanna of the Passionate Cook was very enthusiastically encouraging us to create one of the more lusciously delicious concoctions man has ever created - chocolate truffles. I've always wanted to make one of these little pieces of delight. The sheer sensation of creamy melting chocolate in my mouth sealed my decision to participate in this 25th edition of the SHF.
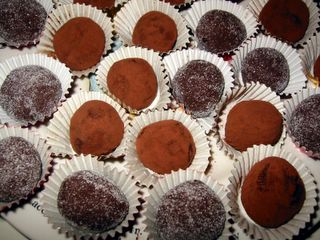
I wanted to create truffles that my kids would want to eat. So bitter chocolate is out while a little bit of sugar is in. This recipe I adapted from Phil Vickery's A Passion for Puddings cookbook was a little bit unusual since it uses condensed milk. I was a bit skeptical if it will be as meltingly luscious as ones made with double creams but it did convincingly deliver. The orange liquor had to be replaced with just normal orange extract for my kids' sake and although I didn't have any orange zest it was orangy enough to our taste. The ultimate taste was whether my kids will eat it. Well, as of this time they have eaten one each and reached for more. They naturally gravitated for ones rolled in vanilla sugar so I'll definitely remember that next time I make more of these moreish cloud of chocolate heaven.
Chocolate & Orange Truffle
200 g dark chocolate (70% cocoa solids)
300 g condensed milk
3 Tbsp double cream (heavy cream)
2 Tbsp orange liqueur or 1 tsp orange extract
finely grated zest of one orange (optional)
cocoa powder or icing sugar or vanilla sugar
- Melt chocolate, double cream, and condensed milk in a heatproof bowl over simmering water in a saucepan.
- Mix in the orange liqueur or orange extract and zest (if using).
- Remove from heat and cool completely to room temperature.
- Cover and chill in the fridge for about 4 hours or overnight.
- Spread cocoa powder or sugar on a wide plate.
- Have a bowl of iced water in your working area.
- Using a teaspoon, scoop a teaspoonful of the chocolate mixture and shape into balls using your hands then roll on the cocoa powder or sugar. Repeat until you have used up all the truffle mixture. Dip your hands from time to time in the iced water to cool it down and prevent the melting of the truffles while you're rolling it.
- Chill in the fridge.
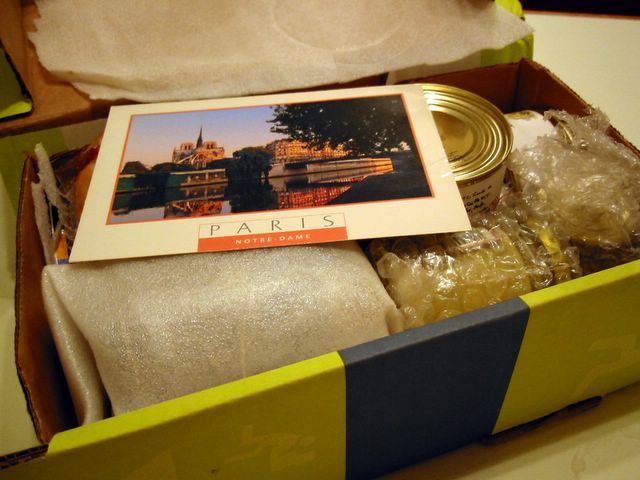
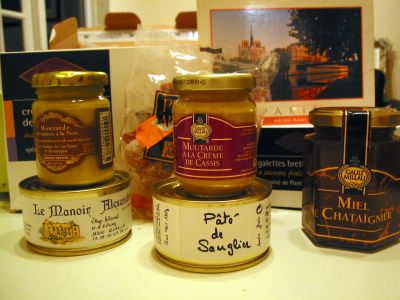 I've been tardy in blogging about the nice package I received from France maybe I'm too busy eating it all up! Thanks very much Betty for the very very nice Breton Galletes and another crepe-like biscuit which I forgot the name because they've all been eaten up by my kids. Other gems in the box are - chestnut tree honey, honey candies, walnut and currant mustard, quail pate, and wild boar pate. I was relieved that Betty wrote out the translations in her accompanying postcard I was nearly ready to grab my daughter's French-English dictionary. Betty, who's an American living in Aveyron, France, blogs at Cuisine Quotidienne.
Ahh, it's so nice to receive a parcel from a mystery sender knowing that you will find goodies in it. I had always participated in EBBP since the beginning but I was so tied up with work and moving house that I didn't make it in the last 2. I'm glad I'm back in the swing of things.
A big thanks is also sent on its way to Johanna of the Passionate Cook who tirelessly organised this edition. Her round up is here.
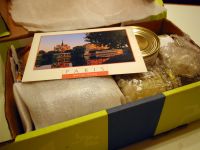

Don't you notice my last 3 posts were all for food blogging events? Just goes to show how involved I am offline with things such as moving and buying a car, etc.
Well then, let's get down to business. I was gifted immensely by a good friend in Greece with loads, and I mean loads, of food stuffs that she made her sister carry on the latter's way back here in London. Thanks Sha! *mwah* One of the wonderful things she gave me was this big block of fresh salted fish roe called 'tarama' in Greek. As expected, I immediately set out to make some taramasalata - the Greek fish roe dip or salad dressing greatly enjoyed here and one of mine and my husband's favourites.
Derrick's theme in the current IMBB edition says to use stale bread. Mine used nearly new bread but I'm sure using not-so-new ones is okay. I was thoroughly fascinated with the making of this delightful dip which is very much akin to making mayonnaise though sans the eggs. Which also reminds me to grab a food processor in the next sale because holding a handheld mixer on one hand and slowly dripping olive oil in the other is no fun at all. Definitely not. :( What's more fascinating for me is how long this dip stayed unspoiled in the fridge with no loss in taste until nearly a month! The recipe I adapted is from another friend, Stel, who in turn adapted it from Craig Clairborne.
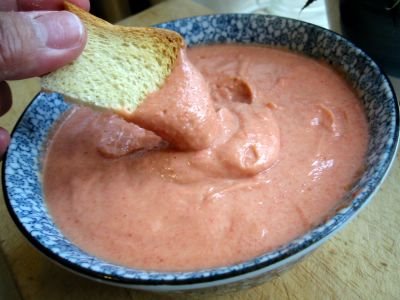 Taramasalata
1/4 cup fresh salted fish roe
3 crustless white bread
1/2 cup olive oil
2 1/2 Tbsp lemon juice
- Soak the bread slices briefly in warm water and then squeeze dry. Set aside the water.
- Combine the bread and fish roe in a bowl and with a handheld mixer beat the mixture for a few seconds until completely combined (or use a food processor).
- While the mixer is still running, add the olive oil slowly in a thin stream.
- When all the olive oil is incorporated, add the lemon juice little by little also.
- The resulting consistency should be that of thick mayonnaise. If it is too thick to your liking, add some of the reserved soaking water until you get the viscosity that you want.
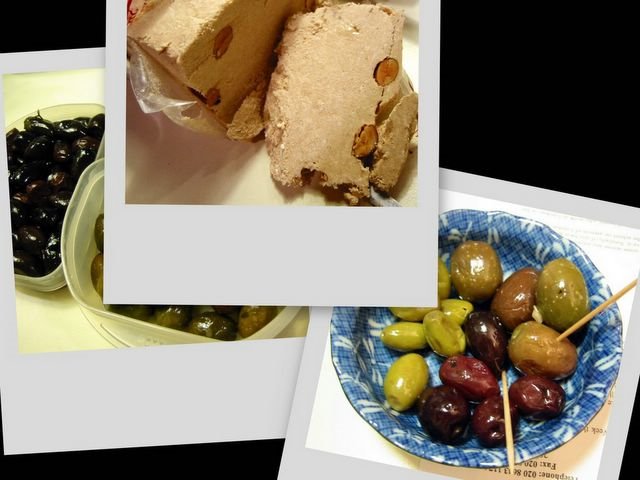
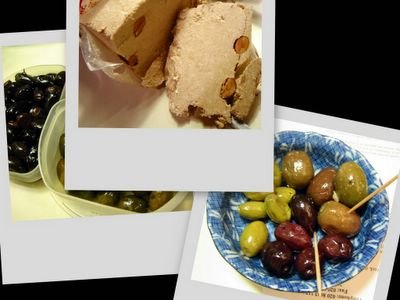
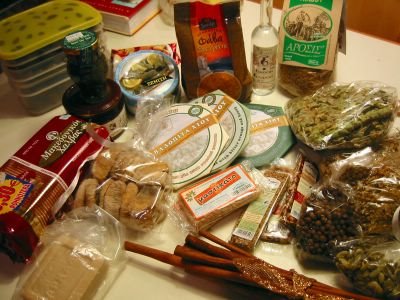 I can't finish this post without shamelessly bragging about what I got from Sha. Just look at that spread above. And to think that I just requested for some halva (see below). You know me, a thorough nut lover. All the labels were Greek to me - figuratively and literally. So I let my smell and taste be my guide. My husband loved all the different olives and both of us enjoying the varied flavours of teas, the sweets they were long gone (I love the gum mastic flavoured ones; now I know what they use to make Turkish delights and the wafers in some reminded me of the communion wafers in church), the other items like mushroom orzo, various canned and bottled goodies, etc. - I will try to make the savouring of them last as long as possible. :) Thanks very very much Sha. :)
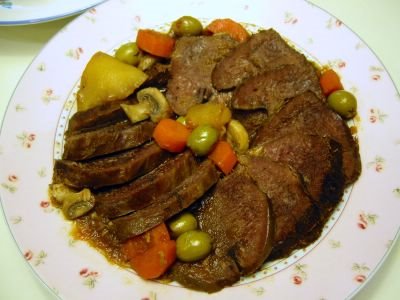 I know Cia encouraged us to make something different out of innards and offal. But I'm pretty helpless on this since I really do not cook offals that often. So you would have to forgive me if I make this thoroughly standard fiesta dish. Cia, as mentioned, of Pabulum is currently hosting the 9th edition of Lasang Pinoy.
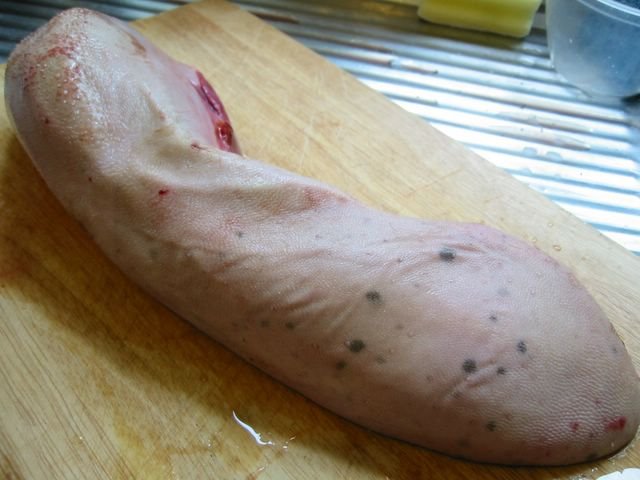
I had a lot of fun making this I must say. Starting with shopping for the tongue. Now I wouldn't find this in any ol' supermarket around here so off I went to Tooting (no kidding!) which has a very lively (and cheap) market. (I must blog about this place soon). Lots of fresh veggies and fruits plus this is where I get my fix on pork legs (properly cut), goat meat, whole baby back ribs, fresh chicken liver galore, and supermarket-rare offals - all in very reasonable prices. I went in a butcher shop and got this big boy of a tongue.
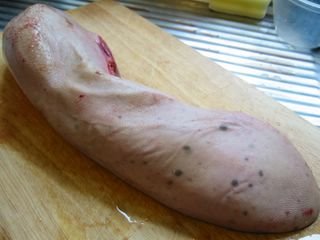
It was more than 14 inches long and ... well ... resembles something like ... oh never mind. Hehehe! Finding a big pot to fit it in was a challenge but I managed to unearth one of my moth-balling-seldom-used stock pots and just about fit it in. The removal of the skin was a joy - not! Reynaldo Alejandro's recipe from The Food of the Philippines (where I adapted this from) said to scrape or peel. Well I scraped and scraped and scraped but most of the white film is still there. So I had to slice it off trying to take off as little and as thinly as possible. After a prolonged struggle with a double dead tongue I finally got it all off! Hurray, on to the cooking!
The marinade was quite good, though, I noticed that you can substitute cooking wine or lemon for the vinegars. I bet it would taste great as well. The only problem I had was in the browning of the meat since the marinade has sugar hence the residue got burned. I had to wash up the pot pronto before continuing with the sauteing. I know I lost some good flavours with all those drippings washed away but it was burned and I don't want that to ruin the sauce. Other than that everything else was surprisingly a breeze. And I originally thought it would be horrific including the taste and texture of the meat. The first time I had this was when I was 12 years old and even then, even though I had a pretty fussy tastebud I loved that properly tenderly cooked lengua from a relative's wedding banquet. Finally, I was able to recreate it.
Lengua Estofado
1.5 kg beef tongue
*Marinade:
1 tsp peppercorns
1 bay leaf
3 Tbsp cider vinegar or white cooking wine
3 Tbsp soy sauce
3 Tbsp sugar
2 tsp sea salt
1 cup water
3 Tbsp oil
1/4 cup minced garlic
1/2 cup minced onions
1/2 cup finely chopped tomatoes
350 g potatoes - peeled, quartered and sliced
1 big carrot - peeled and sliced
salt and freshly milled black pepper
1/3 cup pimiento-stuffed olives
1 cup button mushrooms - halved or sliced
- Boil the tongue in a large pot of water for 20 minutes. (You may cut the tongue in half if it cannot fit). Drain from water and leave until cool enough to handle.
- Peel off the (usually white) outer skin. You may have to use a very sharp carving knife for this. Trim ends and wash.
- Combine all marinade ingredients and marinate the tongue for 1 hour or overnight.
- In a large pot heat the oil and brown the tongue on all sides. Remove and set aside.
- If the residue in the pot is not burned, use it with the same oil, if it is then clean the pot and heat it up again with about 2 Tbsp oil.
- Saute garlic for about 2 minutes in gentle heat - *do not* burn it.
- Turn up the heat and add in the onion, cook for about 4-5 minutes or until translucent.
- Add in the tomatoes and cook until soft.
- Put the tongue back in the pot together with the marinade.
- Add about 1/2 cup water. Bring back to boil and then simmer for 2.5 hours or until tender. Prick the tongue to let the liquid penetrate. You may add more boiling water a little at a time if it is drying out too much.
- Tip in the potatoes and carrots - cook for about 5 minutes.
- Add in the mushrooms and cook for another 5 minutes.
- Just before serving, remove tongue from sauce and slice crosswise. Arrange in a platter and ladle sauce and vegetables on top. Serve hot.
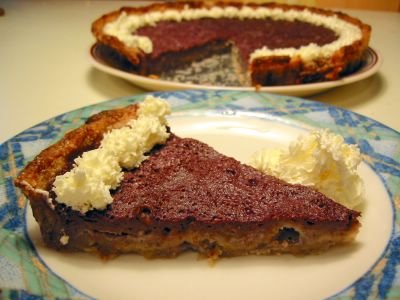 First thing that came to my mind for the current SHF 18 are one of those liquour-laced cakes or desserts. But I thought why put a puny little amount when you can have it as a main ingredient. Thanks to a recipe I found in Anne Willan's fabulous book, A Kitchen in Burgundy, I was able to do a certainly interesting dessert.
As usual I made some blunder. Instructions clearly said to bake blind but my eyes were wide open when I did - I forgot the baking beans! So the pastry was too puffed up to my liking but no matter it still did the job. In fact, it was a very nice butter biscuit/cookie base so good that I balled up the excess and baked into cookies.
As for the filling, it didn't quite looked like the sea-of-tranquility smooth as that in Anne's book's picture. More like the Pink Floyd-y dark-side-of-the-moon pockmarked. But I was more surprised by the taste. I was preparing to dislike it or just have a passable 'okay' kind of flavour. However, it was only a little alcoholic, mildly bitter, and had an unexpected grape-y flavour (well *duh* wine is made from grapes for pete's sake!). I used (well actually used up left-overs) Merlot wine although Anne suggested to use Pinot Noir for a more fruity flavour. I have to say this is a keeper of a recipe although I definitely have to fiddle with the sugar in the pastry probably change it to caster sugar maybe even to icing sugar to remove the grittiness. And most of all to remember those blasted baking beans!
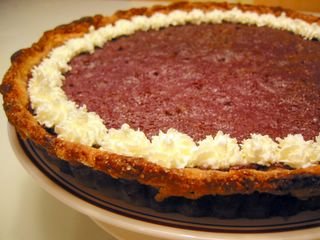 Red Wine Tart
*Sweet Pastry (Pate Sucree)
175 g [1 1/2 cup] plain flour
100 g [7 Tbsp] butter - softened
3 egg yolks
100 g [scant 1/2 cup] caster sugar
1 tsp vanilla
*Filling:
2 tsp cornstarch
2 tsp ground cinammon
2 eggs
100 g [1/2 cup] sugar
250 ml [1 cup] red wine
1/2 cup double cream for decoration
- For the pastry:
- Mix salt and flour in a bowl. Cut in the chilled butter with a pastry cutter or with 2 butter knives. Rub butter in with your fingers until mixture resembles coarse breadcrumbs.
- Combine egg yolks and vanilla in a small bowl. Sprinkle this mixture to the butter-flour mixture and gather the dough into a ball.
- Knead and press dough between your hands just enough to hold it together. Do not over knead.
- Wrap in plastic and chill for 30 minutes. Preheat oven to 375°F/190°C/fan 170°C.
- Roll out into an 11-inch circle. Line and press into a 23cm [9-inch] fluted tart pan. Prick base with fork.
- Put an aluminium foil (shiny side down) on the pan and fill this with dry or ceramic beans.
- Bake for 15-20 minutes. Remove foil and beans and bake for another 5 minutes. Cool.
- For the filling:
- Combine cornstarch and cinammon and mix well.
- Whisk egg gently in a bowl and add the cornstarch mixture. Keep froth to minimum.
- Stir in the wine gently.
- Place the tart pan on a baking sheet. Put this on the oven shelf and while it's partially pulled out gently pour the filling in the pan. Push it gently in the oven.
- Bake for 20-25 minutes in 375°F/190°C/fan 170°C.
- Remove from oven and cool 5 minutes. Unmold. Cool completely.
- Before serving whip double cream until stiff peaks. Pipe on the edge of pie with a star tip.
The talented Dilek of Dilekce, one of the non-English foodblogs I regularly read (well actually just drool at pictures since I don't have a clue on what the text is all about), has tagged me for a meme. Let me have a go at these questions ...
1. Please list three recipes you have recently bookmarked from foodblogs to try.
Like Dilek, I also have a long wish list but here's an excerp:
- Choco-mocca Liquer - by the Passionate Cook. Once I get those resealable bottles I'll make a big batch and force my friends to take one each.
- Creme Brulee - from Keiko of Nordljus. I know this is pretty basic but I've never done one and I think using one of those torch thing is quite cool.
- Kangkong Blachan - from Reid's Onokinegrindz and Stellie's Babyrambutan. Several times I have assembled the ingredients for this but somehow I never get to cook it.
2. A foodblog in your vicinity
As far as I know, the nearest one to me is Johanna of the Passionate Cook.
3. A foodblog located far from you
Probably one of the farthest would be someone like Clare of Eatstuff. I've visited and enjoyed her food blog from time to time when I get the chance to bloghop.
4. A foodblog (or several) you have discovered recently (where did you find it?)
I actually met Monkey Gland at that EB with Sam of Becks&Posh when she came to town. But I have to admit I only got to read his blog Jam Faced recently and I think I'm hooked. Him and Sam are co-hosting the one-off food blogging event of What's For Pud?
5. Any people or bloggers you want to tag with this meme?
I hope these people hasn't been tagged yet: Sha-sha who's somewhere in the Mediterranean right now, Jmom in North Carolina, and Boo_licious in Malaysia.
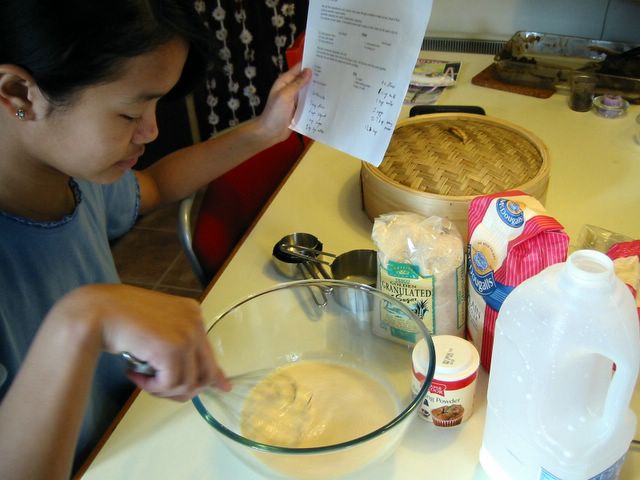
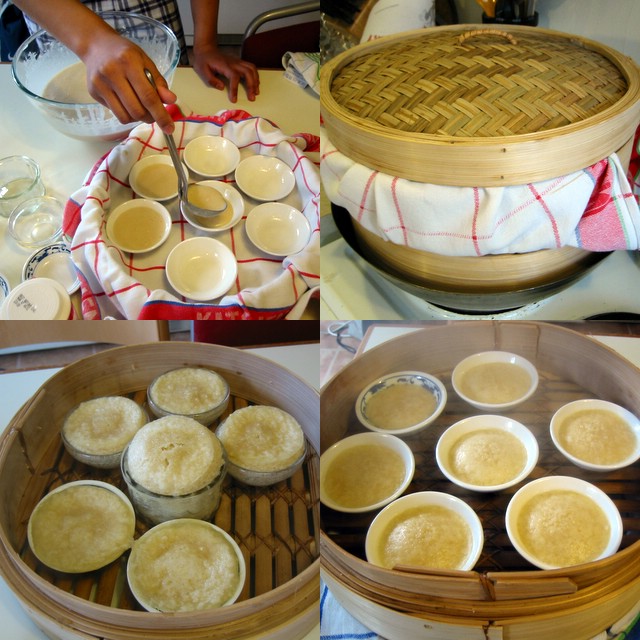
 The current theme of the eighth Lasang Pinoy, hosted by the lovely Iska of Edible Experiments, is centered on food for/by children. I wanted to create my husband's favourite childhood snack of bibingkang malagkit but my recipe fell short of expectations. The bottom - soggy, the top - too sweet. Maybe I'll blog it some other time. So off I went recruiting my kids in making a very simple Filipino steamed cake - puto. Mind you this is not your regular traditional puto which is made of malagkit (sticky rice) flour. This is of recent provenance, probably as early as the 80s when the popular Filipino bakeshop, Goldilocks, came up with this rich cake-like puto. There are very few ingredients to have and it's just a matter of mixing them all up in a bowl which a kid can easily do. My eldest daughter remarked that the batter is very much like that of a pancake. Well what do you know, she was right of course. More like a very sweet pancake version which is steamed instead of panfried. My kids are usually enthusiastic with 'helping' out in cooking and baking especially ones where they are actively involved in as opposed to just watching. I hope this would encourage them to be more adventurous in eating as well as in kitchen activities.
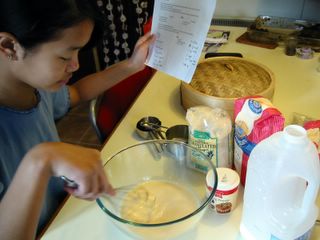
You don't know how much frustrations this seemingly innocuous snack has given me for the last ... oh ... 15 years. It's not a problem in the batter, more on the process of making these cakes rise in the steaming. The biggest Darth Vader-like enemy of steaming puto is water or condensation dripping/forming on top while it's cooking. Once water dripped on top then your puto is doomed to be earthbound. Never to rise in all its peaked glory. I've had this problem over and over again in the years that I was trying to make it. Often times I have to disguise my failure from our guests by saying it's actually my new version of kutchinta. LOL! I changed steamers, used rice cookers, metal steamers, and now just about having moderate success using a cheap and simple bamboo steamer. Really, sometimes you don't need high-tech gadgets to achieve good results.
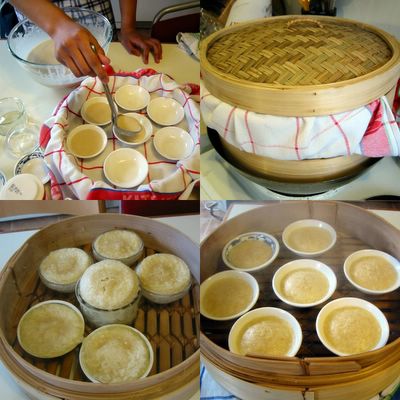
The recipe is something I got from my sister-in-law, Ate Eva, in Toronto which in turn she got from a friend of hers. I have to tone down the recipe considerably because it was cloyingly rich (nakaka-uta). The original measure of 2 tablespoons baking powder is I think too much. It actually have an slight aftertaste which I don't like so I proceeded to halve the baking powder. Same with the milk and eggs. I also added salt since I noticed that it doesn't rise as much as I want to and as you know, salt reacts with the baking powder that causes cakes to swell. As for my dreaded steaming, normally I would cover the baking pan to prevent condensation to drip on it. But since I'm using small (different sized at that) moulds, it would be truly troublesome to cover them all individually. Life is too short for me to get that tedious. So I covered the top of the steaming basket itself with a cloth. That didn't work since the water vapours came in unimpeded thru the slats at the bottom. So I moved the cloth onto the bottom of the first level basket. Finally, I had my well-risen puto (well most of the time).
 Rich Puto
2 cups plain flour
1 cup milk
1 cup water
1 egg - slightly beaten
1 Tbsp baking powder
scant 1/2 tsp fine salt
1 1/3 cup sugar
- Mix all ingredients well.
- Pour into small cake moulds. (Any small ramekins or tiny bowls/plates may be used). Cover with aluminium foil, tea towels or cloth (or you may cover the steamer itself with cloth).
- Steam in medium heat for about 20-25 minutes.
- Remove from heat and pry off the puto from the moulds with a butter knife. Serve warm or cold.
*Variation: Mix grated or slivers of cheese just before steaming.
 Gising na! Wake up! Breakfast time ... that's the current theme of the 7th Lasang Pinoy ably hosted by the early-morning-food blogger Joey of 80 Breakfasts.
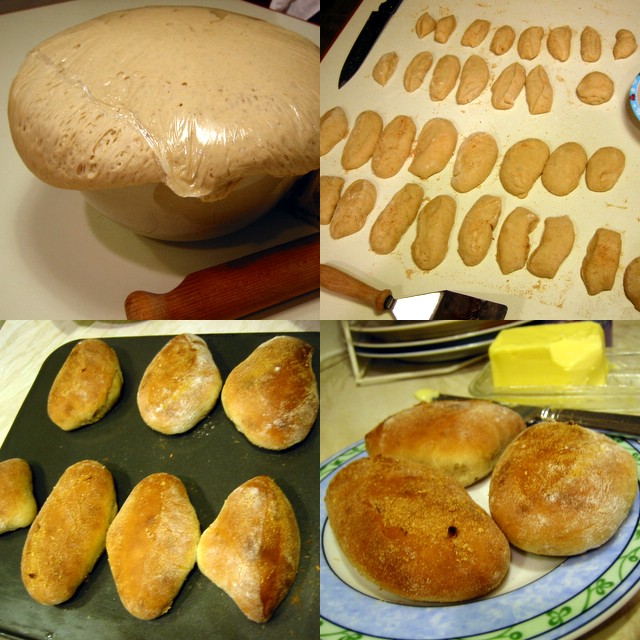
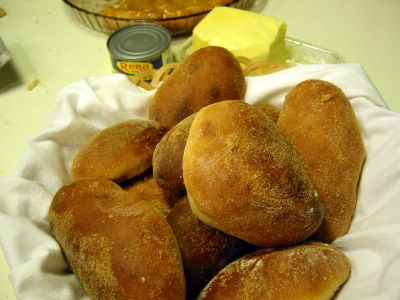
The traditional breakfast of Filipinos has been rice or garlic fried rice with either fried/grilled fish, tocino, or longganisa. But in our family, a lot of our mornings are filled with that ubiquitous crusty roll endemic to Filipinos called Pan de Sal (also spelled without the spaces - pandesal) which means literally bread with salt. I could imagine the original pan de sal must have been more on the salty side rather than the sweet one that is common now which is how I have always known what a pandesal should taste. There was a long time in my youth that I could not imagine a morning without a warm pandesal to satiate my hunger. It's very versatile you see, you can spread a variety of things between its fluffy insides such as butter, liver spread (pate), jams, preserves, matamis na bao, peanut butter, pancit, ice cream - you name it. Or you simply dunk it in coffee or tea.
Sometimes even in the evenings when someone in the household comes home late, passes by a bakery then buys fresh-off-the-oven pandesal. You can bet that anyone among us kids will awaken with the fragrant waft of the hot pandesal. Down the stairs we came to partake in the midnight snack. I love it smeared with liver spread. Yum!
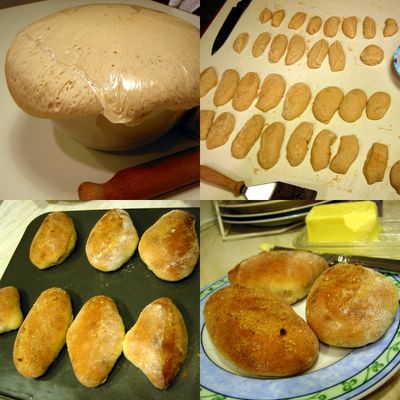
This is my very first time to bake pandesal and I had to call my aunt in Cavite to get her recipe which she got from her Home Economics subject when she was studying in Teacher's College about 35 years ago. Yeah that long ago. Now I don't know if I misheard the measurement of the liquids because the dough turned out very sticky and really hard to handle. I don't know if it's supposed to be like this. I think I'll be calling my aunt again in the weekend. Despite the intense stickiness, I managed to knead it (with a lot of help from sprinkled flour) and let it rise. She said it will double in bulk after 2 hours, I think mine tripled that's one reason why I suspect there's too much yeast. Maybe the yeast that I use here is more potent/concentrated. I'll certainly have to play around with the proportions in this recipe later. It was also hard for me to cut it to uniform-sized individual rolls since it's very soft. Thank goodness it came out alright from the oven - fragrant and crusty though somewhat moist inside. I don't know if it's supposed to be like this but it certainly was good enough for my family. :)
 Pan de Sal
8 cups plain flour
1/4 tsp salt
1 cup sugar
1/2 cup cooking oil
2 1/2 cups cold water
1/2 cup lukewarm water
1 Tbsp yeast
- In a small bowl, combine the lukewarm water, 1 tsp of the sugar and yeast. Let stand for about 15 minutes in a warm area. By this time it will be foamy; whisk well.
- In a big bowl, mix cold water with oil, salt and the rest of the sugar. Stir until sugar and salt are dissolved.
- Add the yeast mixture and 1 cup of the flour. Stir to combine.
- Add the rest of the flour a little at a time. Mix with a wooden spoon until dough pulls away from the sides of the bowl.
- Knead the dough on a floured surface until smooth. If needed sprinkle some more flour to keep the dough from sticking too much.
- Put in a greased bowl and turn to coat the dough all over with oil.
- Cover and let rise in warm place for 2 hours.
- Punch dough and turn out on a floured surface.
- Divide into 4 and roll each into logs. Cut the logs into individual rolls.
- Sprinkle breadcrumbs on the rolls and arrange in greased baking sheets.
- Cover with a damp cloth and let rise for 30 minutes.
- Bake in a preheated oven of 200°C/fan 180°C/400°F for 13-15 minutes.
- Remove from baking sheet. Serve hot or cold.
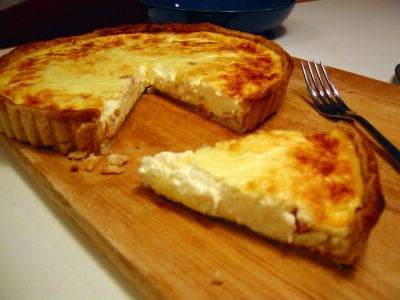 The 23rd monthly edition (hosted by Cucina Testa Rossa) of the premier food blogging event Is My Blog Burning? requires us to create something staunchly French. I was planning on taking on the formidable task of cooking bouillabaisse or cassoulet but the sheer scale of the mammoth undertaking made me chicken out. Just the number of ingredients plus the length of time it will take to cook it completely intimidated me. I could easily have opted for the more easy or shorter versions of it but for me that would be cheating. So in came this idea of doing my son's request of a Quiche Lorraine.
A quiche is also known as a flan or tart. This version, as you might have guessed, originated in a north-eastern region of France called Lorraine. A once independent and properous region, it was only assimilated to what we know now as France as late as 300 hundred years ago. Due to its position by the German border, it saw its owners changing hands several times during World War I and II. More of its history can be seen here.
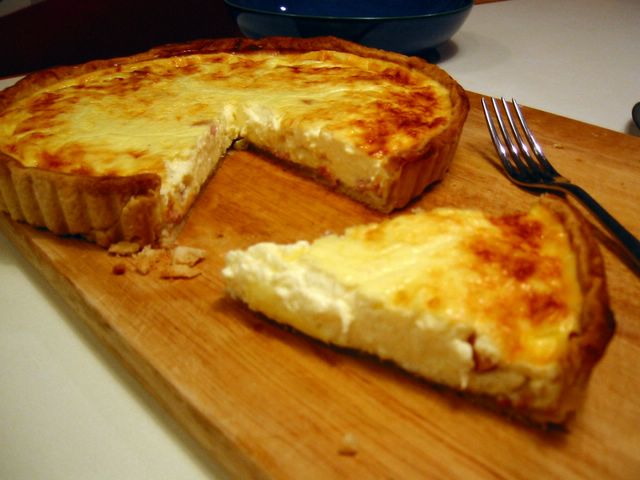
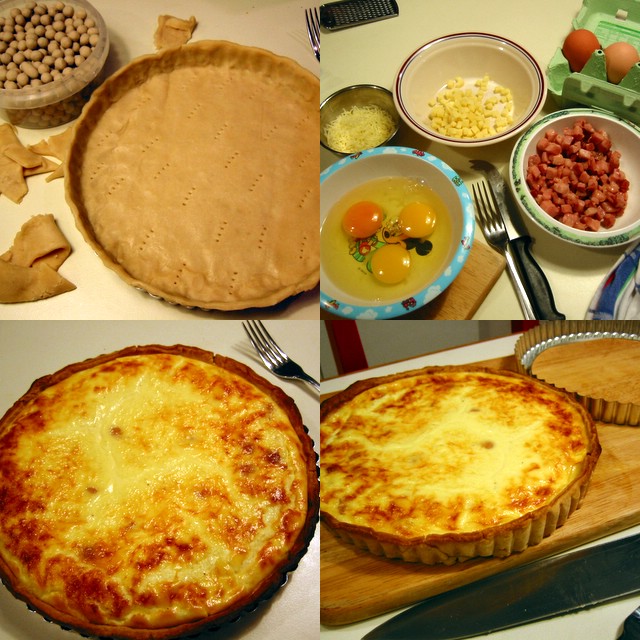
The first time I made this is via a BBC Good Food magazines 'ultimate' recipe. In there, it instructed to add Gruyere cheese. I did, but my son would not even touch it. He objected to the smell of the cheese. So I researched on what constitute a traditional quiche Lorraine. According to Elizabeth David in her book, French Provincial Cooking, the Quiche Lorraine that the natives of that region regard as such is simply a savoury custard pie with eggs, cream, smoked bacon and *no* cheese. That was a revelation to me, since everywhere I went whether here in UK or in Paris, these tarts almost always have some cheese in them. But I have to agree with Ms. David because when we passed by the area of Nancy in Lorraine last year, all the Quiche Lorraines we ate had no smidgen of cheese.
That settled it, I have to do this first without the cheese then with it (just to make the comparison). I have to admit I liked it regardless if it has cheese or not. Surprisingly, my son favoured the one with cheese. Could it be because I used the less smelly mature cheddar? The dominant flavour of the smoked bacon in the custard was simply divine whether served hot or cold. Although I have to remember next time to make the crust thicker. I like it thick as a foil to the richness of the filling. This is best served with a big salad and a chilled Sauvignon Blanc. (sorry no pictures of the wine) Recipe was adapted from the September 2005 issue of the BBC Good Food Magazine.
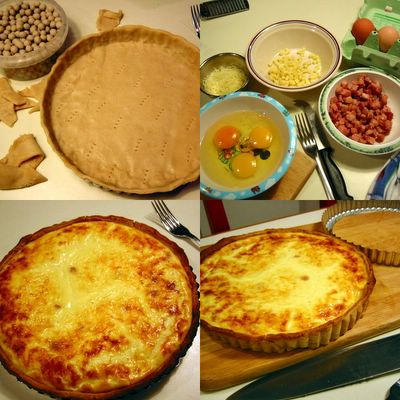 Quiche Lorraine
*Pastry
175 g [1 1/3 cups] plain flour
100 g chilled butter
1 egg yolk
3-4 Tbsp cold water
*Filling:
400 ml [1 2/3 cups] double cream (or half creme fraiche, half double cream)
50 g Gruyere or mature cheddar (optional)
150 g smoked/unsmoked bacon lardons or streaky bacon slices
3 eggs - beaten
pinch ground nutmeg
- Take 2/3 of the cheese and cut it into small dice. Grate the remaining 1/3 of the cheese.
- Dice the bacon finely.
- For the pastry:
- Put all the ingredients in a food processor and process until it forms into a ball.
- Or if you don't have a food processor: cut the butter into the flour in a bowl until it has the consistency of coarse crumbs.
- Add in the egg yolks and toss with fork.
- Sprinkle the water little by little until you can gather the mixture into a ball.
- Press and knead between your hands until it just about holds together.
- Roll out with a rolling pin into a circle 11 inches (28 cm) wide.
- Carefully put on a fluted tart pan.
- Trim the pastry edges about 1/4 inch higher than the pan edge.
- Press the pastry into the flutes and prick the base with a fork.
- Chill for 10 minutes in the fridge.
- Preheat oven to 200°C/fan 180°C/400°F.
- Bake blind: put a piece of aluminum foil (shiny side down) on the pastry-lined pan. Fill it up with dry or ceramic beans and place on a baking sheet before putting in the oven. Bake for 15 minutes.
- Remove foil and beans. Bake for another 4-5 minutes.
- For the filling:
- Reduce oven temperature to 190°C/fan 170°C/375°F.
- Fry the bacon (without oil) in a small frying pan.
Remove any liquid that comes out and cook until bacon changes color. Drain on paper towels.
- Mix the double cream, eggs, and nutmeg in a container.
- Scatter the fried bacon and diced cheese on the bottom of the pastry case.
- Pull out half of the oven shelf and place the pastry case/tart pan on the baking sheet.
- Pour the double cream mixture in the pastry case. Scatter the grated cheese on top.
- Carefully push the oven shelf back in. Bake for 25-30 minutes or until golden brown.
- Remove from oven and cool for about 5 minutes. Serve hot or cold.
Tagged with:
IMBB23 +
French
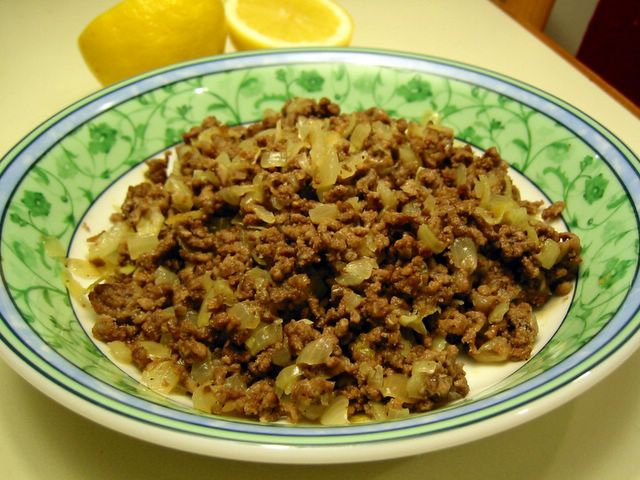
 This month's edition of Lasang Pinoy is hosted by the lovely Ting of Worldclass Cuiscene with a theme of 'pulutan'. When you hear 'pulutan' you should think along the same vein as the Spanish tapas. It's usually a dish that is specifically eaten with alcoholic drinks. Because of the close similarity, the concept might have come from the Spanish. (Please don't hold me hostage with that last statement, I'm just speculating from the obvious.) Due to the nature of its purpose, it's usually very spicy or at least very tasty to encourage you to drink more.
When the theme was announced it stupefied me since I haven't cooked pulutan to anyone. The one dish I wanted to try was sisig but pork cheek and/or ears are not normally what you see lying around the supermarket shelves here. The only other one I know is spicy adobong mani (garlic fried peanuts) which I think is so simplistic. Well Lasang Pinoy, in my opinion, deserves better than that. So what other recourse I had than call for help from the mga manginginom (drunken masters) I know. Good thing they came up trumps with this Kapampangan (Ilokano?) dish of bagis which was sooo tasty and so easy to do even a half-inebriated guy can whip this up in no time at all. A big thanks is in order to my BIL Derek and his friend Al Dayao (who gave the original recipe) for sharing this with us. Tagay na !
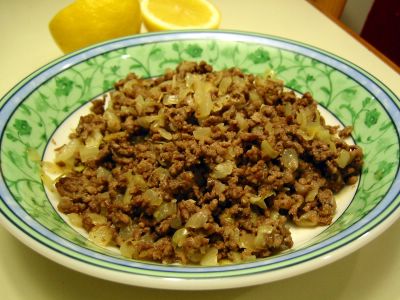 Bagis
Bagis
500 g minced beef
2-3 Tbsp lemon juice (from about 1 whole lemon)
1 1/2 cups chopped onions (about 2 medium)
1 tsp Tabasco sauce (or to taste)*
1 1/2 tsp sea salt
freshly milled black pepper
- Marinate the minced beef in lemon juice for 24 hours or overnight.
- Combine the marinated beef (including the marinade) and the rest of the ingredients in a pan and cook in medium heat. As it cooks, the beef will render its juice and fat so you do not need to put any water or oil.
- Once the mixture starts bubbling away, turn down heat and simmer until all the liquid has evaporated and the beef starts sizzling from its own fat. Dish up and serve with some stiff drinks. :p
*Note: You may use fresh chopped chillis or dried chilli flakes in place of the Tabasco.