Thursday, 25 November 2004

Something Light


After eating all those sweet stuff I decided to have something light for lunch. I got some leftover sausages, a bowl of fresh crunchy salad and an Italian viniagrette dressing. And presto lunch is ready!


Sausage Salad

sausages (or bacon or ham)
ready prepared fresh salad
salad dressing of your choice
  1. Arrange sausages in a baking tray. Grill for 15 minutes or bake for 30 minutes or pan fry for 10 minutes.
  2. While grilling, toss salad with the salad dressing.
  3. Slice sausages diagonally crosswise. Mix with the prepared salad. Serve.

Wednesday, 24 November 2004

Chili Con Carne

Chili Con Carne

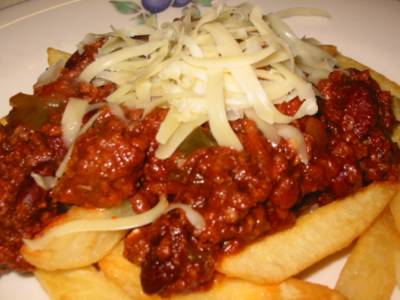
This is one of our winter staples. I cook this in a big batch and then bag them for freezing. Then we just take them out whenever we need a quick fix and reheat in the oven or microwave. Very good with chips or rice, topped with grated cheese, and served with a big salad.

This recipe is still in the 'evolutionary' stage. I'm still continually tweaking it. Trying to add this or reduce that so don't be surprised if later you will find some measurements changed. But I would say this is okayish, relatively mild. It's not as spicy hot as the genuine chilis in the deep south of the US. But at the same time it's not as lame as the ones I often get around here. Why they're practically like cottage pie fillings without the mash on top! The best one I have tasted in terms of flavour (not in spiciness) is in that Buffalo Bill show in the Disney village in Disneyland Paris (of all places!). It was not spicy hot but it was really delish. I wonder what they put in there? Beef bouillion? Ketchup? Wine? Beer?


Chili Con Carne

1 kg  minced beef (or 500 g  minced beef and 500 g  minced pork)
125 g  bacon - chopped
1 1/2 Tbsp oil
1 1/2 Tbsp minced garlic
2 medium onions - chopped
1 1/2 Tbsp hot chili powder (or 3 Tbsp mild chili powder)
1 Tbsp paprika
2 jalapeno peppers - chopped (optional)
1 Tbsp dried oregano
1 tsp ground cumin
1 Tbsp cocoa (or 1 oz/30 g  unsweetened chocolate)
1 1/2 Tbsp Worcestershire sauce
1/2 Tbsp cider vinegar
800 g  canned chopped tomatoes or tomato sauce (passata)
400 g  canned kidney beans - drained and washed
1 green bell pepper - chopped
salt and pepper to taste
  1. Heat oil in a large pot. Fry bacon until light brown.
  2. Saute in same oil the garlic and onion in low-medium heat until onion is translucent (about 5 minutes).
  3. Add beef and cook until brown (another 5 minutes).
  4. Mix in oregano, chili powder, paprika, cumin, cocoa, and the jalapeno peppers. Cook for a few minutes.
  5. Add all the rest of the ingredients - tomato sauce, vinegar, Worcestershire sauce. Mix well.
  6. Bring to boil then turn heat to low and simmer for 1 hour. If the sauce becomes too dry put in some beef stock or water a little at a time.
  7. Mix in kidney beans and bell pepper and simmer for another hour. Taste and adjust seasonings. Serve.
Note: This dish freezes well. Divide and pack into individual plastic containers or bags and freeze.

Sunday, 21 November 2004

IMBB #10 - Holiday Cookies

Holiday Date-Nut Cookies

This month's 'Is My Blog Burning?' food blogging event number 10 is themed holiday cookies. A virtual cookie swap hosted by Jennifer the Domestic Goddess. I decided to make two cookies, well one is a real cookie while the other is "sort of" a cookie, a micro muffin actually.

The one in the foreground in the picture above is a recipe I adapted from Epicurious. I wanted something chock-a-block with nuts and fruits. Something that would be on a theme with the hedonistic indulgence we go through every year during the Christmas season. This one is really packed with them no doubt about it. Almost like a fruit cake or Christmas pudding except in a cookie form. It's got so much nuts and fruits that was soooo hard to stir it at the end stage. Actually I was not stirring, more like pushing the fillings into the batter. But the result is a rich, crunchy at the edges, a little moist in the middle cookie (or biscuit as they call it around here in UK). I just found it a tiny bit sweet, maybe I should reduce the sugar next time or maybe it's the pineapple? Also, I will reduce the temperature next time 'coz I find it a bit too brown at the edges (I actually burned some of them) or maybe it's my oven? Yeah right, blame the oven!


Holiday Date-Nut Cookies

Holiday Date-Nut Cookies

500 g  pitted dates - chopped
1 2/3 cups [250 g] chopped candied pineapples
1 1/2 cups [200 g] coarsely chopped Brazil nuts
2 cups [250 g] slivered almonds - lightly toasted
2 1/2 cups flour
1 tsp baking soda
1 tsp cinnamon
1 tsp salt
1 cup [250 g] unsalted butter - room temperature
1 1/2 cups sugar
2 large eggs
  1. Preheat oven to 400°F/200°C/fan 180°C/gas mark 6. Grease cookie sheets if they are not non-stick.
  2. Combine fruit and nuts in a bowl. Add 1/2 cup flour and mix to separate pieces.
  3. Combine remaining 2 cups flour, baking soda, cinnamon, and salt in a small bowl. Mix well.
  4. Beat butter in a large bowl until light. Gradually add sugar, beating until fluffy.
  5. Beat in eggs 1 at a time.
  6. Fold in dry ingredients into the butter mixture.
  7. Mix in fruits and nuts.
  8. Form into balls about 1 1/4-inch in diameter, flatten a little bit and put in the prepare cookie sheets spacing 1 inch apart.
  9. Bake until cookies are golden brown, about 10 minutes.
  10. Cool 2 minutes in the cookies sheets. Transfer to rack and cool. (Can be prepared 1 week ahead. Store in airtight container.)


This next one is very easy peasy lemon squeezy. I added chopped glace cherries to give a 'holiday' look and feel. This recipe is from my sister-in-law in Toronto, Canada who very kindly give me lots of recipes and pointers in cooking and baking.

I was supposed to bake this as a cookie but I found the batter too runny very much suited to a muffin pan which was the intention of the recipe. I do not want to fiddle with the recipe because I know the proportion has been well tested by my SIL. Good thing I found 2 micro muffin pans in my cupboard. It is indeed micro because the diameter of the top is only 1 inch. I didn't have any muffin liners (at these sizes I don't know where I can get them). So I greased them and floured well. The resulting macaroons were absolutely cute! And most of all really scrumptious.


Coconut Macaroons

Coconut Macaroons

1/4 cup melted butter
1/2 cup [100 g] granulated sugar
2 eggs - beaten
1 tsp baking powder
2 cups [200 g] dessicated coconut
1 can condensed milk (400 gm)
1 tsp vanilla
1/2 cup [70 g] flour
1/2 cup chopped glace cherries (optional)
glace cherries - sliced into four lengthwise (optional)
  1. Preheat oven to 350°F/180°C/fan 160°C/gas mark 4.
  2. Mix melted butter, vanilla, eggs and condensed milk.
  3. Add in sugar, dessicated coconut, flour, and baking powder.
  4. Pour into lined or greased and floured muffin pans. Top with a quartered glace cherry.
  5. Bake for 12-15 minutes for micro muffins or 20 minutes for normal sized muffins.

Thursday, 18 November 2004

Chicken With Tausi

Chicken with Black Beans

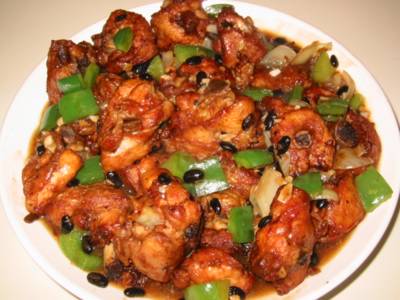
I love tausi (fermented black beans), not to eat them, but just to have them included in a dish. I usually skirt around them when eating. But the fragrance it exudes especially during cooking is really great. The aroma it imbibes to dishes for me are just so mouthwatering. It has that salty tangy smell and taste that it gives to meats and vegetables alike.

This is one of my favourites and it is adapted from the Chinese Cuisine cookbook by Huang Su-Huei. The saltiness of the tausi is enhanced by the spiciness of the garlic and balanced by the green bell peppers. Try it you'll like it.


Chicken with Black Beans

1 kg  chicken legs - chopped into bite-sized pieces

*Marinade:
1 Tbsp soy sauce
1 Tbsp cooking wine
2 Tbsp cornstarch
1/4 tsp salt

oil for frying
1 medium brown onion
2 Tbsp fermented black beans
1 Tbsp minced garlic
1 green bell pepper - diced into 3/4-inch squares

*Mix for sauce:
2 Tbsp soy sauce
dash of sesame oil
1 cup water
1 Tbsp cornstarch
  1. Mix chicken with marinade and set aside for about 20 minutes.
  2. Heat wok then add oil; deep fry the chicken in 5 minutes, or until golden brown and meat is cooked. Remove and drain. Remove the oil from the wok.
  3. Reheat the wok and then add 1 1/2 Tbsp oil. Stir-fry the brown onion until fragrant.
  4. Add fermented black beans and minced garlic. As much as possible do not mix often by spatula at this point because this will mash the black beans and it will make the dish very salty. Try to mix it by just shaking the wok.
  5. Add bell pepper and mix.
  6. Add sauce and chicken to wok; cook for 2 minutes, or until the sauce has thickened. Transfer to a serving dish and serve.

Wednesday, 17 November 2004

Sabaw ng Tahong


That's "Mussels Soup" in English. My husband insisted that he wanted mussels with soup last weekend. He scoured all the nearby supermarkets for fresh mussels. Fortunately, on the third one he visited he got the very last kilo of mussels sitting on the shelf. I already cooked mussels with wine before so I decided to try this traditional Filipino recipe. It is sort of like the Tinolang Manok substituting the chicken with the shellfish. Problem is I did not have anymore chili tops (talbos ng sili) so I used a chili itself but finely minced. It was a success with the hot soup warming us up in a chilly evening. Happy husband slurping away. He actually finished it all by himself.


Sabaw ng Tahong
(Mussels Soup)

1 kg  fresh tahong (mussels)
1 Tbsp oil
2 tsp minced garlic
1 medium onion - chopped
1 inch square ginger - peeled and julliened
2 tsp patis (fish sauce)
4 cups rice water* or water
a bunch of talbos ng sili (chili tops) or finely minced chili
  1. Put the mussels in a bowl of cold water. Discard ones that float, whose shells are broken or open. Scrape off barnacles from the shells and pull the hairy beards. Change the water several times and keep it under water until you cook them.
  2. Heat oil in a pan. Saute garlic in low heat until light brown. Add onion and saute until translucent (about 5 minutes). Add ginger and cook for about 3 minutes.
  3. Add patis, cook briefly, add rice water; bring to boil.
  4. Drain mussels from the cold water and tip in the pot once the rice water boils. Cover and cook in high heat for 4 minutes.
  5. Mix in the chili tops or minced chili. Cover again and cook for very briefly for around 10 seconds. Remove from heat. Serve.
*Rice water - set aside the water mixture that you used for washing rice before cooking it. So essentially you have to cook rice first before cooking this dish.

Tuesday, 16 November 2004

Dippity Doo Dah

Here's a dip recipe in time for your Thanksgiving celebrations. My husband was waxing lyrical about a very simple but very delicious dip he had when he flew to Switzerland. And very simple, indeed, with just two ingredients. This is especially great for vegetable batons or biscuits for cheese. Thanks to Yvonne and Allan in Switzerland for this great dip recipe.


Chilli Cream Dip

100 g  Philadelphia cream cheese
4 Tbsp Thai sweet chilli sauce
  • Mix thoroughly with fork in a bowl until well combined and uniform.
  • Serve with carrots, cucumber, and celery batons or other veggies. Also suitable with biscuits for cheese.

Monday, 15 November 2004

Steamed Fish

Steamed Fish


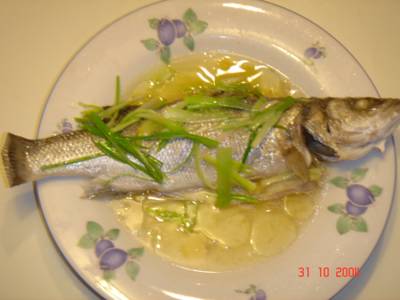
This is one of the simplest and most subtle way cooking a fresh fish. By simply steaming it with just enough spicings to bring out the best in the succulent and juicy fresh fish you can find. It will be very hard to hide inferior quality fish since there are no heavy seasonings or sauce to cover it. This has to be eaten right after it comes out of the wok. It does not reheat well.

Apologies for the plate I used since I do not have an oval plate. When I instructed my husband to buy fish and the plate, he refused to buy the plate saying that it was 3 times more expensive than the fish! If the fish was any bigger I would have cut it in half to fit. It is ideal to have a plate that will mimic the shape of the fish in order to catch all the fish juices. Besides it is easier to lift an oval one from the wok than a round one. I used sea bass for this but almost any white fleshed fish can be used here - lapu-lapu (grouper), pampano (pomfret), karpa (carp), and others.


Steamed Fish

1 fish (about 500 g) - cleaned, gutted and scaled

*Marinade:
1 Tbsp cooking wine
1 tsp sea salt
2 green onions - sliced into 2 inch lengths and then shredded lengthwise
3 slices ginger root

dash of pepper
1/2 tsp sesame oil
2 green onions - sliced into 2 inch lengths and then shredded lengthwise
2 Tbsp oil
  1. [Optional] Cut two diagonal slits on each side of the fish.
  2. Mix marinade ingredients on a plate and marinate both sides of fish for about 15 minutes.
  3. Put about 1 1/2 cups water in a wok and bring to boil.
  4. Once it boils, put the steamer in the wok and put the plate with the fish on the steamer. Cover and steam over high heat for 15 minutes.
  5. About 3 minutes before cooking is up, heat the 2 Tbsp oil until smoking hot.
  6. Remove plate from the steamer, sprinkle the other shredded green onion, pepper, and sesame oil on the fish. Pour hot oil over it (be careful this might splatter). Serve immediately.

Friday, 12 November 2004

Sugar High Fridays # 2

Tarte Tatin

It's that Sugar High Fridays #2sweet tooth event again, a spin-off from Is My Blog Burning? and hosted by the Domestic Goddess. Food bloggers are cajoled to post their creation on a certain day (of course a Friday) based on a certain theme. For #2 Jennifer chose apples. I was originally planning on doing small individual apple strudel but decided that they're quite tedious to do. I was reading Baby Rambutan's blog where she mention Tarte Tatin and I thought what a great idea!

{Update}The lovely Tarte Tatin was invented because of an accident. In the 1880s, two sisters Stephanie and Caroline Tatin were running their family's Hotel Tatin in Lamotte-Beauvron, France. Stephanie was in charge of the kitchen and one time baked an apple tart where she erroneously put the apples first in the pan before the crust. She served this right away without even cooling it. Their customers loved it thus, the Tarte Tatin was born. For more info click here. Now that I've thought about it, seems like this was the precursor of the pineapple upside down cake. I might be wrong but I think the the principle is the same - fruit with caramelised sugar at the bottom with a flour based crust or cake on top.{End Update}

On to the baking, first I have to buy a skillet. We were at an outlet mall in the middle of Kent when I saw that there was a Le Creuset shop there. With my husband and kids in tow, I marched in and was greeted by the amiable shop assistant. She could probably see that steely determination in my eyes to walk off with a skillet. And my oh my, I saw my tarte tatin pan - not exactly skillet but more like a cake pan in cast iron with handles on the side. It can be used as a pot cover (if you buy the pot), a skillet, or a baking pan. Wonderful! Not only that, it's 50% off. Oh I'm in retail heaven! Out came the card from the wallet, kerchinggg! And I went home with my new cast iron pan grinning. No matter that I originally intended to buy shoes, but a cast iron pan is just as good although I can't wear it! Hehehe!

Next is the recipe, I found one in Delia Smith's How to Cook - Book 3. Very few ingredients and I hoped easy to make. It says in the original recipe to have 25 gm butter and 25 gm lard for the crust. Well I don't have lard so I just used 50 gm of butter.

It was surprisingly easy to make. Except for the slight kneading and the peeling and coring apples it was quite straight forward. It needed some patience though, because in simmering the apples you have to start at very low heat. So it took about 10 minutes before you see some bubbles to come up. Then after that you have to watch it like a hawk when the heat is turned up otherwise you will end up with Tarte Burned. But it was really quite easy to make and that is coming from a baking klutz like me.
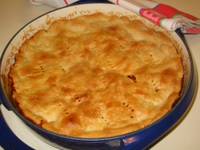
This is how it looks like when you put in the rolled pastry on top, prick it all over and bake it for 25 minutes.




As you can see the finished product on a plate looked sunken in the middle because I don't have a flat plate big enough for it.


When I tasted it though, my oh my, it was really great! It would have been better if I had some whipped cream around. The caramelised sugar is similar to the that of the karyoka in the Philippines (skewered puffed glutinous rice balls with caramelised muscovado sugar sauce). Even my finicky son loved it but said he preferred just the crust with the syrupy sauce. The down side of it is that you have to serve it while still very warm because the sauce will harden as it cools - and it hardens quite a lot. I felt really pleased, afterall this is one of those rare occassions that I baked it right the first time!

[Note: I thought the sauce is on the sweet side so maybe next time I will reduce the sugar or not to reduce the sauce too much. But I retained the original sugar measure and will update it once I have test baked the reduced sugar version.]


Tarte Tatin

*Pastry:
110 g  plain flour
50 g  unsalted butter - at room temperature, cut into small pieces
2-3 Tbsp cold water

*Filling:
8 large Golden Delicious apples (or Cox)
75 g  unsalted butter - softened
175 g  golden caster sugar

24 cm (9 1/2 inch) non-stick, heavy-based frying pan (ovenproof even the handle)


*For the Pastry:
  1. Sift the flour into a large mixing bowl from a height (to air it).
  2. Cut the fats into the flour with a knife (or pastry cutter), before rubbing the mixture lightly with your fingertips, lifting everything up and letting it fall back into the bowl to give it a good airing.
  3. When the mixture reaches the crumb stage, sprinkle in enough of the cold water, to bring it together to a smooth dough that leaves the sides of the bowl absolutely clean, with no crumbs left.
  4. Lightly knead to bring it fully together, then place the pastry in a plastic food bag and chill it in the fridge for 30 minutes.

*For the Filling:
  1. Peel the apples and cut them in half (or quarter) vertically and remove the core and pips.
  2. Spread the softened butter evenly over the base of the pan and sprinkle the sugar on top.
  3. Place the apples in concentric circles, cut side up. When you get to the centre you may have to cut them into quarters to fill in any gaps.
  4. Put pan over a low heat so the butter and sugar melt very slowly together. This might take around 8-10 minutes.
  5. Preheat oven to 425°F/220°C/fan 200°C/gas mark 7.
  6. Increase the heat slightly to make the sugar to caramelise. Watch it carefully and gently shake it from time to time so the apples do not stick and burn. Cook until the apples are soft but still retain their shape and the sugar a rich amber colour. This will take about 20-25 minutes. Remove from heat.

*To Bake:
  1. Get the pastry from the fridge and roll it out to an 11 1/2 inch (29 cm) round. (It can be done easier by rolling it between two plastic sheets such as cling films.)
  2. Fit it over the top of the pan allowing some to tuck down at the edge.
  3. Prick the the pastry base all over with a fork so the steam is released and the pastry don't go soggy.
  4. Place the pan in the centre shelf of the oven and bake for 20-25 minutes or until the pastry is crisp and golden brown.
  5. Remove from oven and allow it to cool for 5 minutes.
  6. Get a plate larger than the pan and put it on top (top side down). Holding both the pan and plate with gloves, invert the pan onto the plate giving it a little shake before.
  7. Serve the tart warm with some creme fraiche or whipped cream. Yum!

IMBB Events

Did you know that there are a number of Is My Blog Burning? food blogging events underway? Click on the link to the blog and see which event you can participate in. Right now the events for November are:

Sugar High Fridays - 12th November (alright it's a bit late now but still doable). Hosted by the Domestic Goddess .

Does My Blog Look Good In This? - 15th November hosted by Ronald.

IMBB #10 - 21st November also hosted by the Domestic Goddess.

Do join and participate and 'meet' other food bloggers and of course have lots of culinary fun. We cooking enthusiasts sometimes need some challenges to discover other culinary delights that we would not otherwise stray into and what better way to force us :-) than to participate in these events! Come on and have a go ...

Monday, 8 November 2004

Chicken With Apulid

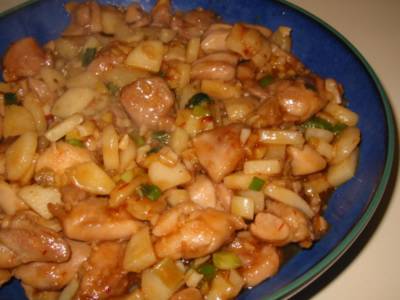
Apulid is water chestnut in English. I have a big can of apulid to finish and this is the first recipe that I did. I've moaned about this in here where you can also find lots of info on apulids, tips on how to store them plus links to a number of recipes using it. Thanks to ManangKu for that.

This dish has quite a nice crunch from the apulid with a piquant taste from the vinegar and a little bit of spiciness from the chilli sauce. It is quite easy to make and any type of chicken boneless meat can be used. Although I'm partial to the boneless thigh part because I find it tastier than the picho (breast). This recipe is from the Chinese Cuisine cookbook by Huang Su-Huei. I've only used up a quarter of the can so expect more apulid recipes in later posts.


Chicken With Water Chestnuts


Spicy Chicken with Water Chestnuts

500 g  chicken meat
1/3 cup oil for frying
1 cup apulid (water chestnuts) - roughly chopped

*Marinade:
2 tsp cooking wine
1 1/2 Tbsp cornstarch
1 1/2 Tbsp soy sauce

*Spicy mixture:
1 1/2 Tbsp chopped green onion
1 1/2 Tbsp chopped ginger root
1 1/2 Tbsp chopped garlic clove
2 tsp hot chilli paste

*Mix sauce:
2 tsp cooking wine
1 1/2 Tbsp soy sauce
2 Tbsp water
1 Tbsp sugar
1 1/2 tsp cornstarch
1 1/2 tsp white vinegar
dash of sesame oil
dash of Szechuan peppercorn powder (optional)
  1. Cut the chicken meat into 1-inch cubes. Add marinade and mix; marinate for 20 minutes. Before stir-frying, add 1 Tbsp. oil and mix so that the meat will separate easily during frying.
  2. Heat wok then add oil. Stir fry the chicken until cooked; remove and drain.
  3. Remove the oil from wok. Reheat the wok then add 2 Tbsp. oil. Add spicy mixture; stir-fry until fragrant.
  4. Add water chestnuts and stir-fry to mix.
  5. Add chicken meat and mix sauce. Turn heat to high; quickly stir-fry to mix. Remove and serve.


Thursday, 4 November 2004

Haloscan

Haloscan commenting and trackback have been added to this blog.

Yes haloscan is here. But they didn't tell me that all the other comments in the whole of my blog will disappear! Waaaahhhhh!!

Oh well ...

Wednesday, 3 November 2004

Sotanghon Soup

Sotanghon Soup

Hot on the heels of Ting-aling's post, here is another version of the dish. This is very nice to have on a cold windy autumn night. Besides warming me, it reminds me of the time I was slurping it up in Kaka Luming's corner store.

Sotanghon is the Filipino name for the bean thread noodles (aka cellophane noodles) which is made from mung beans. It is thin, like vermicelli, almost transparent, smoother and more slippery than most other noodles. Used not only in soups but also in lumpia (spring rolls) and pancit (chowmein-like dish).

The key thing in this recipe is the garlic - lots and lots of it. It says 1/2 head of garlic which is around 2 tablespoonfuls. Do not skimp on it because it imparts a somewhat lemony flavour (curious isn't it?) and great aroma. Besides garlic is
good for you, it lowers cholesterol, minimises high blood, even acts as an antibiotic. Just make sure you brush your teeth afterwards. :-) Also, I know there are variations with carrots, celery and other vegs but I like mine as simple as this.


Sotanghon Soup

6-7 cups chicken stock
2 Tbsp oil
1/2 head of garlic - minced
1/2 medium onion - sliced
1 cup chopped or flaked cooked chicken meat
1 Tbsp patis (fish sauce)
4 dried Chinese black mushrooms (shiitake)
200 g  sotanghon (bean thread) noodles
chopped green onions
  1. Soak the dried mushrooms in hot water for about 20 minutes. Remove and squeeze out excess water. Cut and discard stems, slice caps into fourths.
  2. Heat oil in a pot. Saute garlic and onion in low to medium heat. Make sure the garlic is not burned.
  3. Add chicken meat, mushrooms and patis. Cover and simmer for 3 minutes.
  4. Add chicken stock and bring to boil.
  5. Drop the sotanghon noodles in the soup and simmer for about 3 minutes or until noodles are tender and cooked. You may at an early stage cut the noodles with scissors to shorten lengths and make it more manageable to handle.
  6. Garnish with chopped green onions. Serve hot with combined lemon juice and patis on the side.


Tuesday, 2 November 2004

I Can't Believe There's No Butter !

Nigella Lawson's latest cookbook is under fire (or is it in hotwater?) in a London Times online article.

Oh shock shock horror horror! Nigella forgot to put butter in her list of ingredients! Let's phone Westminister and complain about this stupefying omission. NOT. I didn't know cookbook misprints can cause such coverage. ::Groan:: What's the matter? Nothing more serious left to report on the news? I would expect this in the food section but not at the front of an online newspaper. Well at least it gave me something to blog about. :-) A printer's mistake does not deserve a "front page" treatment, in my opinion. Although the celebrity status accorded to these chefs can get really out of hand, but for a foodie like me it has its positive side. It raises people's awareness and educates everyone in being more discerning on the food we prepare and eat. That is a good thing. It usually leads to better nutrition and hopefully better health for the readers and viewers.

Hmm, maybe I could try to do that Nigella cake without butter let's see how it turns out.

Monday, 1 November 2004

Chicken and Chinese Sausage Rice Pot

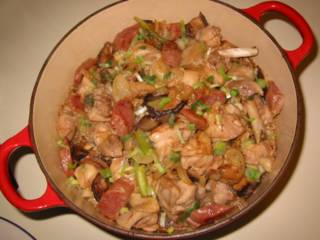
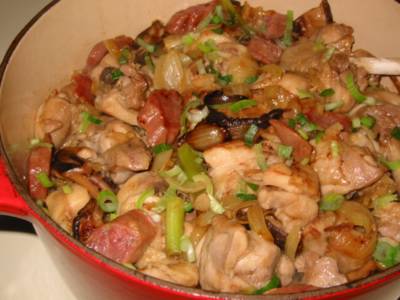
This post is for Claudine of >Delectation. I was drooling at pictures of her Clay Pot Chicken that I told her I'll soon do my winterly chicken rice pot. Purple Girl couldn't wait so she did hers right away. (techie hint: I need trackback facility here!) I went to our local Chinese grocery for my provisions but they ran out of clay pots! There must be a syndicate of food bloggers in Croydon conspiring to cook clay pot chicken all in one weekend ! The only one lying there has a lot more chips than Mike Tyson. :Sigh: I think I'll pass. So I went back to my good 'ol reliable cast iron pot. It may not have the aroma of a clay pot but keeps the heat in just as good. I actually have several recipes of this but decided to stick to this trusted stove top version first then later I'll make the foray to a steamed version.

The basics of this are: cook the rice in a pot, when water begins to dry out put the meats on top. That simple, but you do have to do the timing right additionally the quality and freshness of your ingredients is greatly apparent in the finished product. So keep that in mind in getting your ingredients. The cooking of the meats (chicken and sausage) plus whatever veg you include is done gently by the steam rising from the cooking rice underneath. It can be done either by putting the pot on a stove top or by cooking in a ceramic bowl in a steamer. You can order this dish as a dimsum in most Chinese restaurant but usually the dimsum version is small and enough only for one person. There is no reason why you cannot make this in a big pot enough for a family.


Chicken Rice Pot

I remember well where I tasted my best chicken rice pot. I was working in the offices of a big construction company in Mongkok, Hong Kong. My colleagues dragged me to a nearby hole-in-a-wall eatery for lunch. I couldn't remember the name due to the sign all in Chinese characters. The dingy small restaurant served nothing but rice pots - of all different kinds/toppings - but except for drinks - serves nothing else. I was wondering how they could survive in such a very limited menu and I could imagine they have slow days as well since rice pots are not very popular in the summer. Anyway, I naturally had to turn to my colleagues to translate for me that I wanted a very safe chicken with mushrooms. I had to do this because whenever I open my mouth to talk in Cantonese I'm thinking I can earn a living being a stand-up comedian - they all laugh at me all the time! Ai-yah! Cantonese intonations are sheer torture!! Hah, but I can swear in the dialect like any of them, usually I'm more fearless because I don't know what the hell I'm talking about - hahaha! My gawd, I'm digressing so much. As I was saying, after ordering we had to wait for about 25 minutes before we get our nourishment. I was puzzled why the long wait, this is not a Michelin starred venue, why do we have to wait that long? It turned out they only put the crocks in their steamer after you've ordered so that everything is ultra fresh.


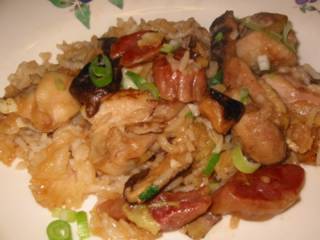
When I had a taste of their creation I became a believer (cue - Monkees song). It was sublime! The aroma it brought forth was just fabulous - the steam from the rice, the shiitake mushroom, the chicken was so fresh it was a bit sweetish. The simplicity of it was magnificent - the subtle cooking that brings out the best flavour of the ingredients - really mahvelous dahlings! And not in a small way, the soy based sauce they poured greatly enhanced the aroma and taste. I read somewhere that Chinese chefs are very secretive about this pouring sauce so much so that they never entrust the mixing of it to their assistant chefs. Certainly in that resto there must be a demand, for a saw a great many, actually crates, of these pouring sauce in their own brand name. I didn't realise the influence of that sauce to the dish so I did not buy one. But from then on I was hooked and went about trying to reproduce it at home.


The Chinese sausage I used is only about 4 1/2 inches long that's why I used four. If it was the regular variety (which is about 7 inches long) I would normally use 2 links. You can use the regular variety or the liver sausage type. These types of sausages are always available in Chinese groceries. They were air dried to take out most of the moisture hence they have a shrivelled appearance (like a blogger getting too much radiation glow from a PC monitor, now who could that be? ... Hmmm). :LOL:

The best compliment I got this evening was from my husband who, once I opened the lid and this great aroma permeated our kitchen, said it transported him back to a street in the Happy Valley-Wan Chai area where he was a regular customer of streetside turo-turo (eateries) there. He said "Ahh, smells like Hong Kong." while he tucked in eagerly. Kain na! (Let's eat!)


Chicken and Chinese Sausage Rice Pot

500 g  chicken - cut into cite sized pieces
2 cups rice
4 Chinese dry black mushrooms
4 links Chinese sausages - cut into 1/2-inch diagonal pieces
1 medium onion - sliced
2 green onions - cut into 1-inch pieces
1 Tbsp minced green onions
1 Tbsp oil

*Marinade:
1 Tbsp light soy sauce
1/2 Tbsp cooking wine
1/2 tsp sesame oil
1/2 tsp cornstarch
1/2 tsp minced garlic
1/2 tsp minced ginger

*Sauce:
2 Tbsp light soy sauce
1 Tbsp rice wine (or cooking wine)
1/2 tsp sugar
drops of sesame oil
  1. Mix all ingredients for the marinade in a bowl. Add chicken, mix well. Set aside and marinate for at least 30 minutes.
  2. Soak mushrooms in hot water for 10 minutes. Remove then squeeze out excess water. Cut out and discard stems and slice caps into four sections.
  3. Put rice in a clay pot (or any medium sized pot preferably a thick one that will hold heat well) and rinse several times to remove excess starch and avoid cooked rice from being malata (gummy). Level off the rice and add enough water to reach up to the first joint of your middle finger. This is about 2cm (3/4 inch) from the rice to the water level.
  4. Cover and cook on high until it boils. When it reaches boiling point reduce heat to low.
  5. While the rice is not yet boiling, heat oil in a wok and stir fry the onion, green onion, chicken, sausage, and mushrooms for 3 minutes.
  6. Once you see that the rice is levelling off and the water is just beginning to dry out, add the stir fried meats on top of the rice. Cover and DO NOT lift the lid for about 25 minutes.
  7. Meanwhile, mix all ingredients for the sauce in a small saucepan and heat to near boiling.
  8. When the 25 minutes is over, serve the rice pot right away. Pour the heated sauce on top and sprinkle the minced green onion.