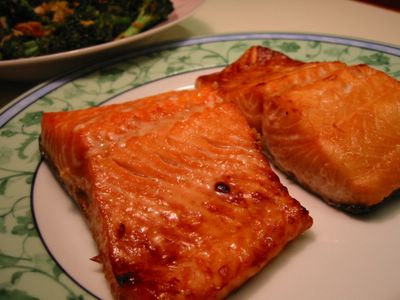
Boredom is the mother of variation - that's according to me. ;) We love grilled salmon but so far we only do it one way. And I'm ready to give a go on some other flavours. Years ago I did a grilled salmon recipe that involves putting some kind of gremolata on top with lots of garlic, pesto, and I think sun-dried tomatoes. It was fab! Unfortunately I've lost my copy so my search is on for that award-winning recipe. Meanwhile, last night I have to prepare my meal in a hurry. Here comes Delia Smith's recipe of Teriyaki Salmon to the rescue though I have to change the measurement of practically every ingredient. But it's very simple and easy to make with the salmon coming out very nice golden brown. Yum!
Teriyaki Grilled Salmon
500 g salmon fillets
1/2 Tbsp minced garlic
1 Tbsp grated ginger
1/4 cup soy sauce
1/4 cup rice wine
2 tsp sugar
- Mix all ingredients, except the salmon, in a shallow dish. Marinate salmon in this concoction for 1-2 hours in the fridge turning it once in a while.
- Preheat oven grill to the highest setting for 10 minutes.
- Spread a little oil on the grilling pan to be used and put under the grill until hot.
- Place salmon fillets skin side down on the pan and position about 3 inches under the grill. Cook for about 7-8 minutes. Dish up and serve.
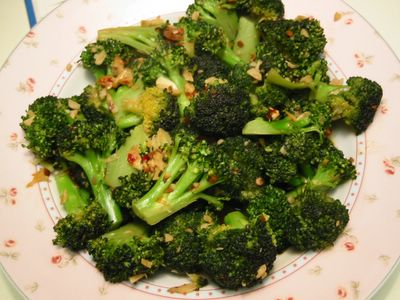
After all the sweet things I blogged earlier, it's about time I post here what I 'normally' eat. Vegetables for example. Usually I just steam them and have it with some meat - fish, pork, chicken, or beef. Other occasions when I have the time, I cook it a different way to relieve boredom or just for the heck of it, like this one. I adapted it from Ken Hom's Hot Wok cookbook. Very few ingredients, easy to make and not salty so I didn't have to reduce Ken Hom's salt ;) though I have to with the sesame oil.
It's important to blanch or steam the broccoli first to retain its firmness while stir frying and also to make sure that it gets cooked through. The plunging into cold water right after blanching/steaming is to stop the broccoli from cooking further preventing it from getting mushy later and to preserve its vibrant green colour.
Spicy Broccoli
450 g [1 lb] fresh broccoli - florets separated and stem peeled
1 Tbsp cooking oil
2 Tbsp minced garlic
1 tsp sea salt
1 tsp sugar
freshly ground black pepper
2 Tbsp cooking wine (rice wine or dry sherry)
1 Tbsp chilli bean sauce
2-3 Tbsp hot water
1 tsp sesame oil
- Mix cooking wine, sea salt, sugar, pepper in a small bowl. Set aside.
- Steam or simmer the broccoli pieces in a saucepan of boiling water for about 2-3 minutes. Drain and then plunge into a bowl of ice cold water for about 30 seconds. Drain again thoroughly.
- Heat a wok over high heat until hot. Add oil and when it is very hot and smoking, stir fry garlic and chilli bean sauce briefly.
- Add in the cooking wine mixture and broccoli. If it is getting a bit dry, add in a few tablespoon of hot water at a time. Stir fry for about 4 minutes or until broccoli is cooked through or fork tender.
- Add the sesame oil and continue to stir fry for 30 seconds. Dish up and serve.

Savoury muffins were my intended entry to the 13th edition of Is My Blog Burning? food blogging event which this time is hosted by Makiko of Just Hungry. However, when I saw this in the book 101 Cakes & Bakes by BBC's Good Food magazine, I thought I just have to make these remembering that Easter is almost upon us and they would make good substitutes for those chocolate eggs kids get *every* year. My youngest (J3) and I had a blast making these especially when it came to putting the finishing touches - icings and mini eggs on top. This was one of the most enjoyable IMBB I had, not only were our creations sold out (kids were arguing on who gets to give to his/her friends) but the muffins were really good and scrumptious plus attractive, too.
One of the recent things I discovered, if you half fill one of the cups in the muffin pan with hot water, it will keep the inside of the muffins moist. The water keeps the air in the oven humid and prevents the pan from getting too hot.
The muffins are miniature simnel cakes. You know that rich, traditional (in the West) Easter cake made up of dried fruits and a layer of marzipan in the middle. The miniature versions have got that layer, too. J3 very much enjoyed rolling and flattening those marzipans probably as much as the excitement of waiting for the lot to come out of the oven. Try these they're really very good with a delectable taste of orange, raisins, currants, mixed spice, nutmeg, and almonds with a topping of mini chocolate eggs of course!
Simnel Muffins
250 g dried mixed fruits
grated zest and juice of 1 medium orange
175 g butter - softened
175 g [3/4 cup + 2 Tbsp] golden caster sugar
3 eggs - beaten
300 g [2 1/4 cup] self-raising flour*
1 tsp mixed spice
1/2 tsp nutmeg
5 Tbsp milk
175 g marzipan
*For Decorating:
200 g [1 3/4 cup] icing sugar
2 Tbsp orange juice
sugar eggs or sugar coated mini chocolate eggs
- Put the mixed dried fruits in a bowl with the orange zest and juice. Leave to soak for 1 hour.
- Preheat the oven to 180°C/fan 160°C/350°F/Gas Mark 4. Line 12 deep muffin pans with paper muffin cases.
- Beat together butter, sugar, eggs, and milk in a bowl. In another bowl mix the flour, nutmeg, and mixed spices. Add the flour mixture to the butter mixture and beat for about 3-4 minutes until light and fluffy. Stir in the fruits well.
- Half fill the muffin cases with the mixture.
- Divide the marzipan into 12 equal pieces, roll into balls, then flatten with your thumb. Put one in each muffin case and top with the rest of the mixture.
- Bake for 25-30 minutes, until risen, golden and firm to the touch. Remove and cool in racks completely.
- For the decoration: beat together the icing sugar and orange juice. Drizzle over the cooled muffins and top with a cluster of mini chocolate eggs.
Notes: *1 cup self-rasing flour = 1 cup plain flour + 1 1/2 tsp baking powder + 1/2 tsp salt.
For more moist muffins: line and put batter in only 11 of 12 muffin cups leave one of the cups in the middle empty. Half fill the 12th muffin cup with hot water.
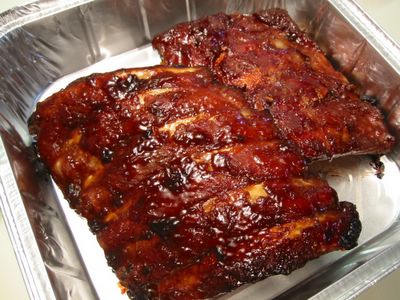
I've discovered a method of baking pork ribs in the Great American Food by Lesley Allin which I got from our local library. It just involves baking the ribs in a covered pan until tender then browning it further either in the oven or in an outdoor barbecue. A tender baked BBQ back ribs could be had, I thought, with any type of marinade or barbecue sauce as long as the procedure is the same. This was put to the test when I adapted Ainsley Harriott's marinade from his Big Cookout cookbook. Marinade from one cookbook was wedded with cooking method from another and luckily it resulted in a marriage from cooking heaven. ;)
Chinese Roast Ribs
1 sheet pork ribs (about 700 g/1.5 lbs)
*Marinade:
2 garlic cloves - minced
1/2 tsp fine sea salt
2 Tbsp caster sugar
1 Tbsp hoisin sauce
1 Tbsp yellow bean sauce
2 Tbsp soy sauce
1 Tbsp rice wine or dry sherry
- Mix together all ingredients for the marinade.
- Put ribs in a roasting pan and pour over the marinade to cover evenly. Cover pan with foil and refrigerate for at least an hour (better yet overnight), turning occasionally.
- Preheat oven to 200°C/fan 180°C/400°F/Gas Mark 6.
- Bake ribs with the marinade (in pan still covered with foil) for at least 1 hour or until fork tender, turning over once midway during cooking.
- After this, remove foil and the cooking of the ribs can be finished outdoors in a barbecue or in the oven.
- To finish cooking in the oven, lay ribs meat side down and baste with the pan juices. Return to oven and bake uncovered for 25 minutes.
- Turn the ribs over and again baste well with pan juices and bake for a further 25 minutes or until fall-apart tender. Dish up and serve.
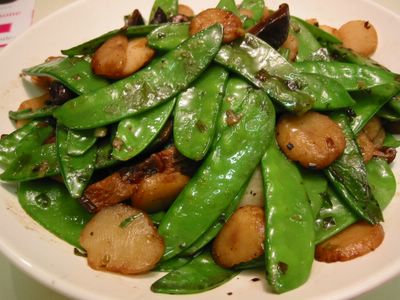
Ken Hom's combination of vegetables in his stir fries is something I've always loved. Though I do have problems with the saltiness of his dishes. More often than not I have to reduce (sometimes considerably) either the salt or soy sauce or the fish sauce to give my kidneys some respite. Other than that, his inventiveness and ability to adapt traditional Chinese recipes to contemporary ingredients and Western kitchens is never in doubt. I've often consulted his cookbooks whenever I need to have some 'imaginative' Asian dish. This one is adapted from his Hot Wok cookbook.
Stir Fried Mangetout and Water Chestnuts
(Ginisang Sitcharo at Apulid)
225 g drained canned water chestnuts (apulid)
30 g dried Chinese black mushrooms
1 Tbsp groundnut oil
3 Tbsp finely chopped green onions
225 g mangetout (snow peas/sitcharo) - trimmed
1 Tbsp rice wine or dry sherry
2 Tbsp dark soy sauce
1/2 tsp sea salt
1/4 tsp freshly ground black pepper
1 tsp sugar
3 Tbsp water
1 tsp sesame oil
- Soak the mushrooms in hot water for about 20 minutes. Drain and squeeze out the excess liquid. Cut and discard the stems and finely shred the caps into thin strips.
- Combine the soy sauce, sea salt, rice wine, pepper, sugar, and water in a bowl. Set aside.
- Heat a wok over high heat until hot. Add the oil, when it is smoking hot add the green onions and stir fry for 10 seconds.
- Add the mangetout and mushrooms. Stir fry for 1 minute.
- Add the soy sauce mixture and continue to stir fry for another 3 minutes.
- Add the water chestnuts and cook for a final 2 minutes.
- Stir in the sesame oil, dish up and serve at once.
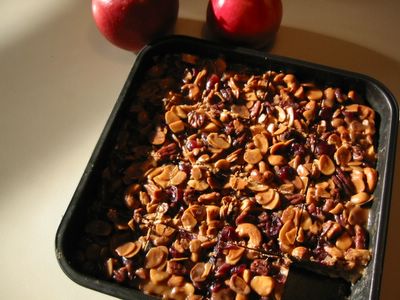
This is my entry to the monthly food blogging event Sugar High Friday (SHF). Initiated by the baking diva Domestic Goddess, this edition (which the 6th, BTW) is hosted by Debbie of Words To Eat By. SHF is a community effort of food bloggers from all over the world wherein the post in their blog at a certain date is of the theme set by the host. This 6th edition has the theme of caramel. Also, SHF is a spin-off from the highly successful and original food blogging event Is My Blog Burning? (IMBB), started by Alberto of Il Forno.
Okay on with the recipe, I found this recipe from the 101 Cakes & Bakes cookbook published by the BBC GoodFood Magazine. It was originally named Margaret's Caramel Nut Squares in honour of the chef who created it - Margaret Fineran. However, I decided to change it to Honey Caramel since the flavour of the honey is very dominant.
Probably because the cookbook is quite small (around 5x5 inches), the instructions were not very detailed. I now see several modifications I'd like to do to it. Like the pastry, instructions said to 'line' the pan. It didn't say to line just the bottom or including the sides. From the results, I think I will just line the bottom next time. Also the pastry came out dense. I don't know if it's supposed to be like this but I was half expecting it since you're supposed to pour the hot boiling caramel/nut mixture onto the pastry in the pan. And it was *bloody* hard to cut through it - maybe because it was still frozen. The caramel and nut filling was a bit soft when thawed after coming out of the freezer. Again I don't know if it's supposed to be like this. Despite all that I love the looks of it and the flavours are very nice with the honey flavour dominating the sweetness plus all those lovely combination of nuts and cranberries. All that coming from a nutter ... oh I mean a nut lover. ;)
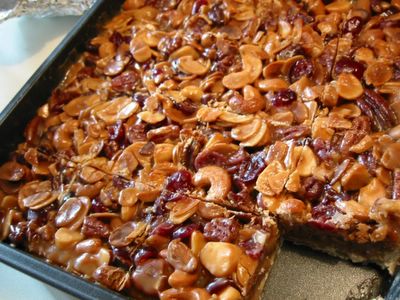
Honey Caramel Nut Squares
* Pastry:
175 g plain flour
50 g icing sugar
85 g cold butter
1/4 tsp vanilla
1 small egg - beaten
*Filling:
85 g granulated sugar
175 g clear honey
50 g butter
284 ml tub of double cream (heavy cream)
100 g pecan nuts - toasted
100 g flaked almonds - toasted
100 g whole hazelnuts - toasted
100 g pistacios, unsalted - toasted
50 g dried cranberries
whipped cream, to serve
- Preheat oven to 180°C/fan 160°C/350°F.
*For the pastry:
- Mix flour and icing sugar in a bowl. Cut the cold butter
into the flour mixture with a pastry cutter until crumbly.
- Mix the vanilla and beaten egg; add to the flour mixture. Stir until the mixture comes off the side of the bowl. Form the dough into a ball and knead a little. Wrap in cling film and chill for 30 minutes.
- Roll out pastry dough on a lightly floured surface or floured greaseproof paper and use to line a 23cm/9-inch square pan. Bake for 7 minutes.
*For the filling:
- Heat the butter and double cream in a saucepan until hot.
- In another saucepan, put the sugar and honey and bring to boil without stirring. When the sugar mixture is boiling, pour the hot cream mixture in it and simmer while stirring for 2-3 minutes.
- Mix in the nuts and cranberries to the saucepan.
- Spoon the whole lot into the hot pastry case. Return to the oven for 7 minutes.
- Remove, cool, then cover and freeze for 3-4 hours.
- Cut into squares, thaw for 30 minutes, and serve with the whipped cream.
Note: You may use any combination of nuts as long as they weigh 400 g in total.
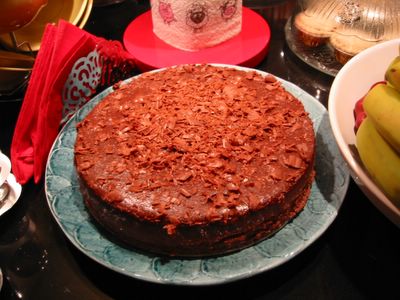
I made this for a friend having a party. Two times I've made this in the past and everytime it came out a disaster. The reasons were the same - water leaked inside the cake pan. This type of cheesecake baking needs a water bath wherein the cake pan is immersed in a larger pan filled with hot water. Of course to prevent the water from seeping in the cake pan you have to wrap it well with foil. First time I attempted this, the foil I had was too small/short so when I filled up the bigger pan with water I didn't realise it trickled in resulting in soggy oozing cake mess. Yuk! Three years later I tried it again, I made sure I bought a big roll of foil the one used for turkeys. No problem with that. But then after wrapping it, I was moving the wrapped cake pan on the kitchen table. I didn't realise (again!) that it created a small hole in the foil. Hence, I ended up with the same sorry soggy cake.
This time around not only I made sure I carefully wrapped and handled the cake pan, I even doubled the foil just to be sure. And thank goodness I am finally rewarded with a nice evenly baked chocolate cheesecake.
The only thing is when I had it, I forgot how strong the properly home baked cheesecake would taste. Unlike the store bought ones whose cheesy taste is very very mild. So for this you would need just a small portion coupled with whipped cream or ice cream.
Adapted from the US edition of Ladies' Home Journal issue of November 1993 (yes that old!).
Chocolate Cheesecake
225 g (8 oz) semisweet or dark cooking chocolate
1/4 cup brewed coffee or water
1 cup chocolate wafer crumbs
1/4 cup butter - melted
3 x 225 g (8 oz) cream cheese
1 cup sugar
2 large eggs
1 cup sour cream
1 tsp vanilla
Boiling water
Icing sugar and chocolate curls
- Melt chocolates with coffee in a heat proof bowl (or double boiler) over gently simmering water.
- Preheat oven to 180°C/fan 160°C/350°F. Combine wafer crumbs and butter in a bowl. Press crumbs into the bottom of a 9-inch springform pan.
- Beat cream cheese in a large mixer bowl until smooth. Beat in sugar until light and fluffy. Add eggs one at a time. At low speed, beat in chocolate.
- Add sour cream and vanilla, beating just until blended. Pour batter into prepared pan.
- Wrap outside of the pan with double sheets of thick aluminum foil. Take care that there are no holes in the foil.
- Place in a roasting pan in oven and pour boiling water in the roasting pan to come halfway up sides of springform pan.
- Bake 55 minutes or until sides of cheesecake are puffed and center is just set.
- Remove from water bath and cool completely on wire rack. (Can be made ahead. Cover and refrigerate up to 2 days).
- Remove sides of the pan. Garnish top with confectioner's sugar and chocolate curls.
Note: You may substitute chocolate biscuits/cookies (such as Oreo) for the chocolate wafers.

A common problem with cooking flour based sauces is the tendency of flour to form into lumps which can be quite hard to eliminate. I used to do all sort of things to get rid of them - from straining, stirring with 2 wooden spoons, to mixing it with water first before putting in the pan, etc. But nothing worked consistently or perfectly. Until I read several years before Delia Smith extolling the virtues of this sauce flour (above left) which I think she helped develop. Apparently this sauce flour has much less gluten in it than your average everyday flour thus reducing lumping significantly. I was skeptical at first but I did try it the next time I made a sauce needing flour. At it really worked as they claimed - very minimal lumps in my sauce. Previously, I slaved away stirring furiously like a maniac to try to get rid of the darn lumps. However, this flour really saved me a lot in terms of elbow grease and it tasted and thickened marvellously like any other all purpose flour.
Another tool that helped me achieve lumpless sauce heaven are these whisks (above right) first touted as "Wonder Whisks" by Lakeland Ltd. - my favourite kitchen shop. As with the flour sauce, I was doubtful it will do as it claims. So I put it to test when I made my first cassava cake using normal plain flour and it worked brilliantly. It really reduced the lumps and when used coupled with the sauce flour I always have lump-free sauces! I am a definite convert of these products. Do try them if they are available in your area they are quite inexpensive. In the UK, they are available in almost all shops selling kitchen items and the sauce flour is in all supermarkets already. Actually I got the green handled whisk above free from a cooking magazine. Happy saucing ...
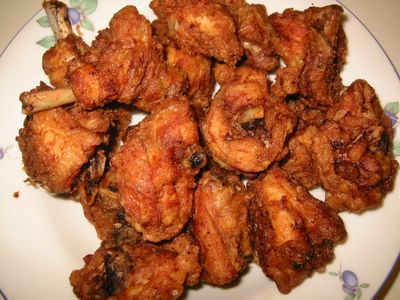
I asked a family friend for the yummy recipe of her fried chicken. I like it a lot because even when cold it still was very tasty. Like most seasoned cooks all her measurements are approximate plus from what she told me I have to put a large amount of chicken stock powder/cube in it. Now, I do use chicken stock cubes but I try to reduce as much as possible any pre-prepared ingredients in cooking to reduce the 'E' numbered things in it and make the dishes as natural as possible. Somehow learning that I have to put a lot of it made it less appetising. Until I remembered this fried chicken recipe from my favourite Huang Su-Huei's Chinese Cooking for Beginners. I haven't cooked this for quite sometime due to general aversion to things deep fried. But it's nice to have this once in awhile. It's as tasty as my friend's with the added bonus that it doesn't have any need for chicken powder. The word 'Chinese' is added in the name to make it more descriptive and to distinguish it from any others I would have here later. Apologies to Chinese chefs out there 'coz I'm not sure if this is authentic though I did find this in a Chinese cookbook. Do try this simple and easy recipe.
Chinese Fried Chicken
1 kg chicken - cut up into serving sizes
1 Tbsp cooking wine
1 tsp sea salt
1 tsp sugar
4 tsp soy sauce
4 green onions - cut into 1-inch pieces
4 slices ginger root
2 small egg yolks
1/4 cup cornstarch
oil for frying
- Mix the cooking wine, salt, sugar, soy sauce, green onions, and ginger in a bowl. Add in the chicken, mix well and marinate for at least 1 hour.
- Before frying, you may remove the ginger and green onions if preferred. Add the egg yolks and mix. Add the cornstarch, mix well.
- Deep fry in oil (medium heat) for about 6-7 minutes (depending on the size of the chicken pieces) or until cooked and the outside is crispy. Serve.

I was so delighted when I discovered that my local library are stocking a lot of my coveted cookbooks. My youngest had their nursery class that day at the children's section. So to while away my next 2 hours, I wandered off in the cookery section. You could just imagine how wide-eyed I was seeing rows and rows of bookshelves filled with my beloved cookbooks. The sight of the latest of these really excited me. Woo hoo! Even the Twelve: A Tuscan Cookbook by Tessa Kiros and the latest of the celeb chefs were there! I don't have to buy them - fantastic! Sorry if I sound pathetic but I'm the type of person who has cookbooks for bedside reading.
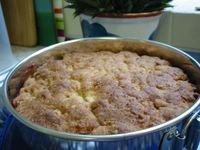
Among my finds is this recipe from Sue Lawrence's Book of Baking. My son was nagging me on making something out of our batch of apples sitting on the kitchen counter. I already made an apple pie and apple cake. Baking something new would be most welcome what with my tiredness of baking the same thing over and over. Anyway, this is quite easy to do. I'm not sure why it's called 'German' but it's basically cake layers sandwiching chopped apples and raisins tossed in sugar and cinnamon. Easy peasy. No alteration was required since the dough and the apple filling was spiced and sugared just right. Of course it met the approval of my son, the baked apple product critic, so it must be good. Nice to have warm slices of this with your afternoon tea of Earl Grey.
German Apple Cake
100 g unsalted butter - melted
100 g (1/2 cup) golden granulated sugar
200 g (1 3/4 cup) self raising flour - sifted
1 large egg
500 g (3-4) cooking apples - peeled, cored, and sliced/chopped
55 g (1/3 cup) raisins
1 tsp ground cinnamon
55 g (1/4 cup) demerara sugar
- Preheat oven at 375°F/190°C/fan 170°C. Butter 18cm/7-inch springform pan.
- Add sugar, flour, egg, and pinch of salt to the melted butter. Mix well.
- Place 2/3 of the dough in the base of the greased pan. Press lightly.
- Mix apple, raisins, cinnamon, and demerara sugar in a bowl. Put in the pan, pressing lightly making sure that it's level.
- Shape the remaining dough into a ball and press flat roughly in a circular shape on a greaseproof paper or cling film. Place the flattened dough on top of the apple mixture in the pan. Very lightly press down making sure that the dough more or less covers the whole of the pan.
- Bake in oven for 1 hour; cover lightly with foil in the last 10 minutes.
- Cool in pan for 20 minutes. Serve warm or cold.

A need this one for my records since my children sometimes want to cook this on their own. It's almost the same as my Salmon Head Sinigang though here the fish is substituted with pork. You can also read in that post the different nuances of cooking sinigang and the different souring agents used. The chilis used here are the long thing variety, they're about 3 - 4 inches long. Sinigang is a regular in our dining table because it never fails to satisfy our craving for something soupy hot especially on a chilly day.
Sinigang na Baboy
(Sour Soup Pork)
500 g boney pork
3-4 medium tomatoes - sliced
1 big onion - sliced
1 Tbsp sea salt
1-2 green fresh chillis - pointed ends cut off [optional]
6-8 cups water
souring agent (tamarind puree, lemon and/or lime, sinigang mix)
1 aubergine (eggplant) - sliced 1 inch thick and quartered
1 bunch long string beans (sitaw) [optional] - cut into 2 inch pieces
2 taro roots (gabi) - peeled and quartered
spinach leaves or kangkong - washed and plucked from stems
- Combine tomatoes, onion, and sea salt in a big pot. Add chillis (optional) and pork.
- Add water and bring to boil. Lower heat and cook for about 5 minutes. Mash the tomatoes with a sandok (cooking spoon).
- Simmer until pork is tender (about 1 hour 15 minutes).
- Add taro, aubergine and sitaw. Bring to boil and simmer until taro is almost cooked (about 5 minutes).
- Add the souring agent and spinach (for tamarind puree I use about 1/2 cup of it plus a squeeze of lemon/lime). Cook for 1-2 minutes. Taste soup and adjust seasonings accordingly. Serve hot.
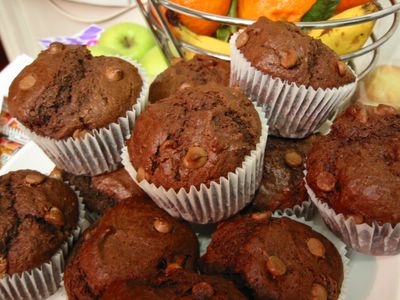
This is a favourite of my eldest daughter - the chocolate enthusiast in the family. Very chocolatey and smells heavenly once you take out of the oven. Guaranteed to be a hit among kids and the not so small kids in among us.
I adapted this from the The Genuine American Cookie & Muffin Book by Peter Shaffer. The only thing I adjusted is the sugar. I increased it because it needed a bit more sweetness to match the chocolate chips in it. This is very easy enough for you and your children to make. Just be careful not to over bake or the inside will become quite dry.
Double Chocolate Chip Muffins
350 g [2 3/4 cup] plain flour
85 g [3/4 cup + 2 Tbsp] unsweetened cocoa powder
200 g chocolate chips (plain or milk)
1 Tbsp baking powder
1/2 tsp bicarbonate of soda (baking soda)
1/2 tsp fine salt
2 large eggs - beaten
1/2 cup plain natural yoghurt or sour cream
1/2 cup + 1 Tbsp milk
175 g butter - melted
270 g [1 1/3 cup] soft Demerara sugar (packed)
1 tsp vanilla extract
- Preheat oven to 190°C/fan 170°C/375°F. Grease (or line) a 12 cup muffin pan.
- Combine the flour, cocoa, chocolate chips, baking powder, bicarbonate of soda, and salt in a bowl.
- In a separate bowl combine all the wet ingredients - eggs, yoghurt, milk, butter, sugar, and vanilla.
- Gradually fold wet ingredients into the dry ingredients. Mix until combined. Do not over-mix.
- Spoon batter into the greased muffin pans. Fill to the top of each cup.
- Bake for 18 - 24 minutes or until tops spring back when gently touched. Do not over bake. Cool in wire rack. Serve warm or cold.


