'Chocolate by Brand' is the current theme of one of the longest running event in the blogging world. David Lebovitz hosts this 27th edition of Sugar High Friday. He encourages us to make a dessert out of our chocolate bars and write about them.
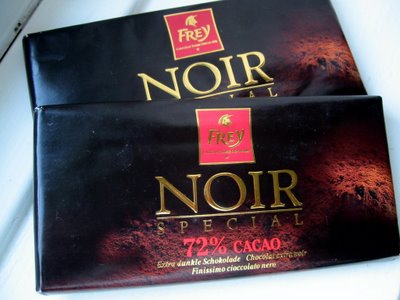
The chocolate bars I nabbed is by Frey - dark variety with 72% cocoa content. Wow, that's the highest I've used for cooking. Why I got it? It was on sale at the local Migros grocery near my sister's place when I visited her in Geneva a few months ago. You know me, I love value for money that means anything on sale!
Unlike some 70% chocolate I had before, this one is very deeply dark brown almost black actually. I savoured a small bite of it that showed it had smoothness, just the right amount of sugar and creaminess, a hint of coffee, with a little bitterness in the finish. Although I couldn't really tell how it would compare to one of those single-estate-organic-super-high-end types that your get from uber cool chocolate boutiques. All I can say is I like its smell, colour, and taste. Now let's see how it would fare when cooked.
I wanted to make something uncomplicated that would show the real qualities of chocolate. First thing that came to mind was chocolate truffles which I thought was perfect but then I've already posted one and for SHF, too! So out came this recipe from my burgeoning clippings from the BBC GoodFood magazine. It looks simple enough until I read closely about 'finely chopped' and 'crushed'. Turned out it requires more elbow grease. Oh well, things I have to do to have my sugar fix. :) The recipe originally asked for dried apricots but I bet any dried or candied fruit would be lovely in it. Things like cherries, pineapples, cranberries, even crystallised ginger! I did not include any chopped nuts because I thought there's too many things in it already. Maybe next time I'll lose the ground almond and put in the nuts. The chocolate itself had to be sufficiently chilled after melting to make it easy enough to mold into a log. Once you've done that the rolling on the crushed biscuits is easy peasy.
How did it taste? Well, the honey had a definite influence on it so other honey flavours would give it a different slant (even golden syrup would be interesting). Despite the number of distractions on this log (did I say I'm making something uncomplicated?), the chocolate still shone through. Dark, very slightly bitter, at the same time meltingly smooth in the mouth. Such a nice change from the gritty chocolates my husband brought home last Christmas.
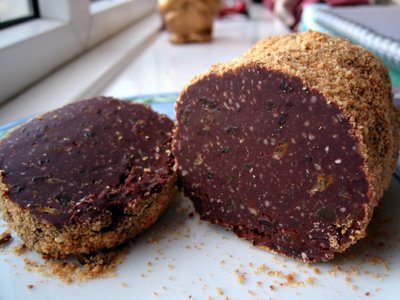 Chocolate Salami
250 g dark chocolate or combination of milk and dark chocolates
100 g butter
3 Tbsp clear honey
100 g ground almonds
100 g dried or candied fruits (apricots, cherries, etc.) - finely chopped
50 g toasted nuts (optional) - finely chopped
100 g amaretti biscuits - crushed
- Melt chocolate, butter and honey in a heatproof bowl over simmering water in a saucepan.
- Remove from heat and add almonds, toasted nuts (if using), and dried fruits.
- Cool completely and chill in fridge for about 1-2 hours until it is of dough-like consistency.
- Shape into a log (about 2 inches thick) and roll on crushed amaretti biscuits.
- Wrap in greaseproof paper and again tightly in foil.
Chill overnight in fridge.
- Before serving slice into rounds with sharp knife.
 Andrew's call for stews as a new blogging event got me excited. Ever since the IMBB event stopped I was hoping someone would come up with a similar widely encompassing blog meme. It's nice to have one that would gather bloggers all over the world from all manners of persuation and basically have a big blogworld foodfest.
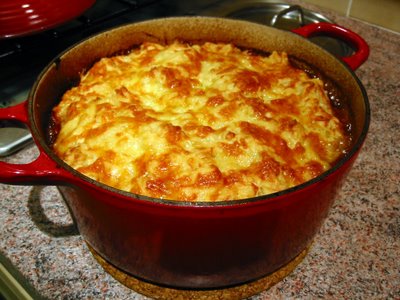
As per usual habit, I wanted to submit something Filipino but my husband emphatically said he doesn't want any stew that has tomatoes in it. I think the recent spate of pastas on our dinner table has done him in. That ruled out the Pinoy angle since all the stews without that offending ingredient I have already blogged before. So I've decided to do a simple beef stew but with its dumplings twisted into a muffin-like topping.
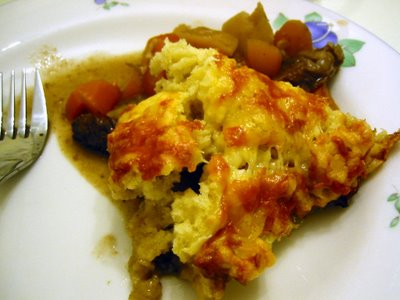
I had to do some adjustment to the recipe by Lesley Waters in the GoodFood magazine. For one, I thought it had too much sauce but the topping dough sucked up a lot of it so that was alright. Still the sauce was on the thin side so I noted in the recipe to add a little of the flour coating. Plus I had to add some Worcestershire sauce to correct its blandness and add mushrooms and reduce the carrots. There were too many changes that I think the beef stew was from my own recipe and I just kept the topping which was fab, by the way, and extremely yummy. It was looking particularly attractive with the cheese on top baked to a crisp golden colour.
Muffin-topped Beef Stew
500 g stewing steak - cut into chunks
2 Tbsp flour - seasoned with salt and pepper
2 Tbsp olive oil
1 large onion - chopped
2 medium carrots - peeled and chopped
2 large parsnips - peeled and chopped
200 g mushrooms - sliced
1 bay leaf
2 Tbsp tomato paste (optional)
1 Tbsp Worcestershire sauce
1 cup red wine
2 cups stock
*Topping:
225 g flour (about 1 1/2 cups)
1 Tbsp baking powder
140 g cheddar cheese - grated (about 1 1/2 cups)
2 Tbsp olive oil
2/3 cups milk
- Preheat oven to 150°C/fan 130°C/300°F.
- Toss beef in seasoned flour. Reserve 1/2 Tbsp of excess flour mixture.
- Heat the olive oil in a pot. Brown the flour-coated beef in high heat. If need be, do it in batches. Remove from pot once colour changes. Set aside.
- Lower heat and fry onions until soft and translucent - about 5 minutes.
- Add the carrots, parsnips, mushrooms. Cook 2 minutes.
- Stir in the reserved flour mixture and cook for a few seconds.
- Bring back beef in the pot. Stir and cook for 1 minute.
- Add bay leaf, tomato paste (if using), Worcestershire sauce, red wine, and stock.
- Bring to boil then put in oven. Bake for 1 3/4 - 2 hours of until the beef is tender.
- While the stew is in the oven, make the topping: Mix flour, baking powder, and half of the cheese.
- Combine milk and olive oil.
- Stir in milk mixture to the flour mixture to form a soft dough. If need be, add milk a little more at a time.
- Once the stew is done, remove the pot from the oven and raise the temperature to 190°C/fan 170°C/375°F.
- Spread (you may have to use your hand) on top of the stew and sprinkle the rest of the cheese on top.
- Bake for 15 minutes or until golden brown.
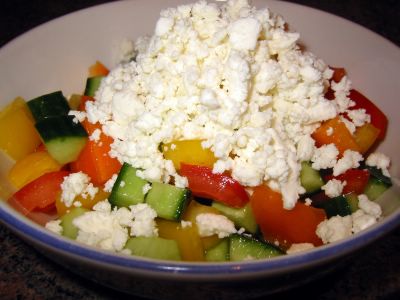 Last time I stayed with my sister in Geneva she served me this salad. We really don't know its name. She got the idea when she was served this at a friend's party who also don't have a name for it. So I just named it after the dominant veg.
I'm not a big fan of raw bell peppers but this veg combination and the cheese complementing it had me sold on the idea. It had definite echoes from a traditional Greek salad but is much simpler and, in my opinion, healthier without the olive oil.
This is perfect paired with meat dishes giving a refreshing respite from the richness and oil of the meat with its crunch and tang. Slight saltiness comes from the feta cheese to save it from being on the edge of being bland. You can easily replace the feta with any crumbly cheese like the Filipino kesong puti (white cheese) or cottage cheese. Of course you have to adjust the seasonings according to the cheese of your choice.
Bell Pepper Salad
1 yellow bell pepper* - deseeded and diced
1 orange bell pepper* - deseeded and diced
1 cucumber
3 medium tomatoes
100 g feta cheese (or any crumbly cheese)
salt and pepper to taste
- Cut the ends of the cucumber. Cut in half lengthwise. Scrape the center of the cucumber and discard. Slice the cucumber into small cubes.
- Slice the tomatoes crosswise and remove the seeds. Cut into small cubes.
- Mix all the vegetables in a serving bowl. Season to taste with salt and/or pepper*.
- Crumble the feta cheese on top. Chill.
- Before serving toss the vegetables with the cheese.
*Note: If you can't find these colours in bell peppers, just choose two of different colours - red and green for example.
Put less salt for salty cheese like feta and more salt for blander cheeses like kesong puti or cottage cheese.
 My ginger-fiend friend described it as one of the best ginger cake he ever had. Well you can't get a better encouragement than that! It was moist, soft, dark - I'm talking about the cake here okay? ;) with that slightly smoky bittery edge from the treacle and spiked by the spices that adorned it. Since I'm not too fond of icings so I did not bother putting any like I usually do. It was even better after a few days stored in an airtight container when it became moister and the rich dark taste developed and sort of 'matured' giving it a fuller-bodied deeper taste. Am I describing a cake or a wine??
So it was this 'naked' ginger cake that captured my colleagues' tastebuds which I adapted from my favourite BBC GoodFood magazine of October 2006 edition. They're getting better by the way (the magazine I mean). There was a year that I stopped buying because I was getting bored with the same recipes rehashed over and over again. But in the past 2 years they've become more innovative and bolder in introducing new sections such as the produce in season and their ultimate recipe series. They even launched the spin-off magazine Olive which concentrates on the dining out or travelling foodies. Giving info and tips and where and when to get the latest in restaurant food or delis for example.
Ginger & Spice Cake
250 g [1 cup] butter
250 g [3/4 cup] black treacle (molasses)
250 g [heaping 1 cup] dark muscovado sugar
2 eggs - slightly beaten
300 ml [scant 1 1/4 cups] milk
100 g finely chopped stem ginger (glace ginger from a jar)
375 g plain flour
2 tsp bicarbonate of soda (baking soda)
2 tsp ground ginger
1 tsp allspice
*Icing (optional):
3 Tbsp ginger syrup from the stem ginger jar
5 Tbsp icing sugar (confectioner's)
- Butter and line a 9-inch/23-cm square deep baking pan. Preheat oven to 160°C/fan 140°C/325°F.
- Combine the butter, treacle, and muscovado sugar in a saucepan. Heat gently for about 5 minutes or until the butter melted. Stir to mix.
- Stir in the milk. Remove from heat and stir in the eggs until well combined. Set aside.
- Mix all the dry ingredients including the chopped ginger in a bowl.
- Stir in the butter/milk mixture with a wooden spoon until smooth and well combined.
- Pour the batter into the prepared baking pan and bake for 1 hour or until a skewer poked in the centre comes out clean.
- Take out of the oven and leave to cool completely in the pan. At this point you can wrap it well in cling film or in an airtight container and store for up to a week.
- (Optional) On the day you're going to serve it, mix all the icing ingredients. Drizzle the icing prettily on the cake. Cut into squares.

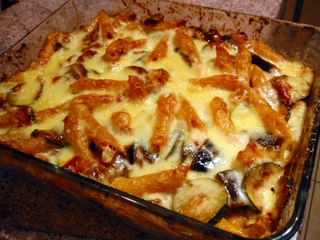
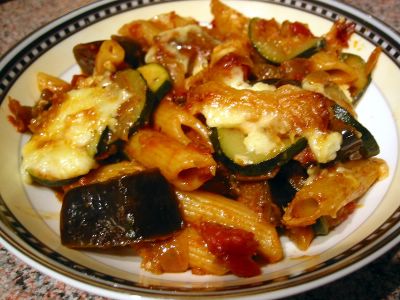
Now that the new year is here, I think a spot of non-meat all-veggie dish is all we need after 2 weeks of non-stop rich meaty food. *sigh* I wish I could wave a magic a wand to sweep away all the extra pounds I put on. So this simple pasta dish - I personally call it ratatouille with pasta - is very much welcome and a good deviation from meat dishes we've been having in the past holiday season. The veggies and the pasta can be prepared in advanced and then mixed and put together just before putting in the oven. This was adapted from the Good Housekeeping magazine of August 1995.
 Pasta & Vegetable Gratin
350 g aubergine - roughly chopped
2 small courgettes - sliced thinly
1 onion - chopped
1 garlic clove - minced
2 Tbsp olive oil
2 tsp paprika
2 tsp tomato paste
400 g can chopped tomatoes
1/4 cup water
1 tsp sugar
salt and pepper to taste
250 g rigatoni or penne pasta
1 Tbsp pesto
150 g [1 1/2 cups] mature cheddar or Gruyere cheese
2-3 Tbsp freshly grated parmesan cheese
- Heat the olive oil in a saucepan. Fry the onion and garlic until soft.
- Add paprika and tomato paste, stir and cook for 1 minute.
- Add the aubergine and cook for 2 minutes.
- Add the tomatoes, sugar and water. Bring to boil then lower heat and simmer under cover for about 15 mins.
- Add the sliced courgette and cook for about 5 mins or until vegetables are done. Season with salt and pepper.
- Cook pasta according to packet instructions, drain and toss with the pesto sauce.
- Toss pasta in the vegetable sauce and transfer to a baking dish.
- Sprinkle cheeses on top.
- Bake at 200°C/fan 180°C/400°F for 20 minutes or until cheese on top in melted and golden brown.
